How to use handleChange() function in react component? handleChange() 获取输入框的数值
An onChange event is triggered when values are entered in the input. This fires a function handleChange(), that is used to set a new state for the input.
1. Handling Single Input
First, we have to set up the input field as a controlled component so that we have a controlled component that senses changes and updates the state accordingly.
We will learn handleChange() function with the help of a project in which we’re going to use handleChange() function to display the entered input.
Creating React Application:
Step 1: Create a React application using the following command:
npx create-react-app handlechangedemo
Step 2: After creating your project folder i.e. handlechangedemo, move to it using the following command:
cd handlechangedemo
Project Structure: It will look like the following.
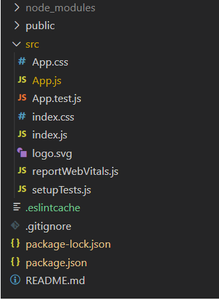
Project Structure
App.js: Now write down the following code in the App.js file. Here, App is our default component where we have written our code.
- Javascript
import React, { useState } from "react";const App = () => { /* Initial State */ let [Name, setname] = useState(''); /* The handleChange() function to set a new state for input */ const handleChange = (event) => { setname(event.target.value); } return ( /* Short-form of React.Fragement*/ <> <form> { /* The handleChange() is triggered when text is entered */} <div> <h1>My Name is <span style={{ color: 'red' }} > {Name}</span></h1> <input type="text" value={Name} onChange={handleChange} placeholder="Enter a text" /> </div> </form> </> )}export default App; |
Step to Run Application: Run the application using the following command from the root directory of the project:
npm start
Output:
The following will be the output if the user enters an input which is set with the help of handleChange() function as shown below:

2. Handling Multiple Input
In the above project write down the following code in the App.js file for handling multiple inputs.
- Javascript
import React, { useState } from 'react';const App = () => { let [Fullname, setFullname] = useState({ fname: '', lname: '' }) const handleChange = (event) => { let value = event.target.value; let name = event.target.name; setFullname((prevalue) => { return { ...prevalue, // Spread Operator [name]: value } }) } return ( <> <form> <div> <h1>Hello <span style={{ color: 'red' }}>{Fullname.fname}</span> <span style={{ color: 'green' }}>{Fullname.lname}</span></h1> <input type='text' placeholder='Enter Your FirstName' onChange={handleChange} name='fname' /> <input type='text' placeholder='Enter Your LastName' onChange={handleChange} name='lname' /> </div> </form> </> )}export default App; |
Step to Run Application: Run the application using the following command from the root directory of the project:
npm start
Output:
The following will be the output if the user enters an input which is set with the help of handleChange() function as shown below:

Explanation: We have added name property in case of multiple inputs so that we can identify which input field fired the handleChange() function. We have used the spread operator because when the handleChange() function has been fired, we need the current value of fname and lname (because only then we can add(or assign) the entered input to the state variables(fname and lname)) which are stored in the state object, so we used spread operator to take an existing state object.
How this [name]: value statement works?
This statement assigns the value to that input field whose name (Property) matches the value.
Alternatives to the handleChange function
There are several alternatives to the handleChange function you provided here are a few of them :
Using an anonymous function:
- HTML
<input type="text" onChange={(event) => setname(event.target.value)} /> |
Using a named function:
- Javascript
function handleInputChange(event) { setname(event.target.value);}<input type="text" onChange={handleInputChange} /> |
Using the bind method:
- HTML
<input type="text" onChange={setname.bind(null, event.target.value)} /> |

 浙公网安备 33010602011771号