

Spring ioc
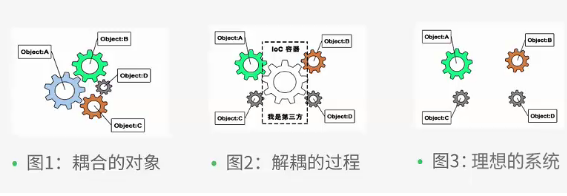
IoC:控制反转(Inversion of Control)
没有IoC的程序中我们使用面向对象编程对象的创建与对象间的依赖关系完全硬编码在程序中,对象的创建由程序自己控制,控制反转后将对象的创建转移给第三方
所谓控制反转就是:获得依赖对象的方式反转了。
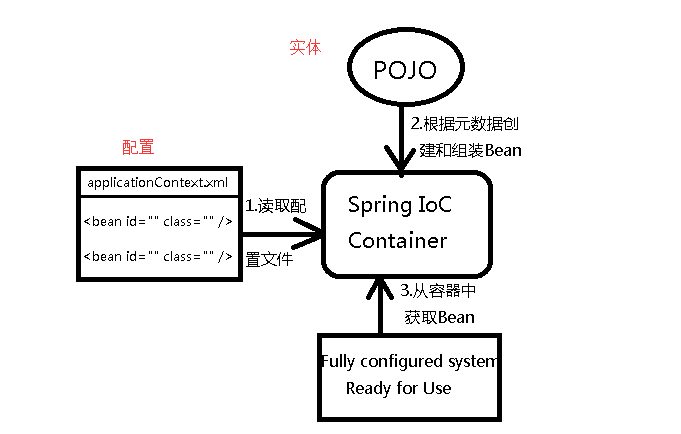
IoC是Spring框架的核心内容,使用多种方式完美的实现了IoC,可以使用XML配置,也可以使用注解,新版本的Spring也可以零配置实现IoC。Spring容器在初始化时先读取配置文件,根据配置文件或元数据创建与组织对象存入容器中,程序使用时再从Ioc容器中取出需要的对象。
使用XML方式配置Bean的时候,Bean的定义信息是和实现分离的,而采用注解的方式可以把两者合为一体,Bean的定义信息直接以注解的形式定义在实现类中,从而达到了零配置的目的。
控制反转是一种通过描述(XML或注解)并通过第三方去生产或获取特定对象的方式。在Spring中实现控制反转的是IoC容器,其实现方法是依赖注入(Dependency Injection,DI)。
使用XML配置的方式实现IOC
maven项目
1、配置pom


<?xml version="1.0" encoding="UTF-8"?>
<project xmlns="http://maven.apache.org/POM/4.0.0"
         xmlns:xsi="http://www.w3.org/2001/XMLSchema-instance"
         xsi:schemaLocation="http://maven.apache.org/POM/4.0.0 http://maven.apache.org/xsd/maven-4.0.0.xsd">
    <modelVersion>4.0.0</modelVersion>

    <groupId>com.wbg</groupId>
    <artifactId>springdemo</artifactId>
    <version>1.0-SNAPSHOT</version>


<!--打包-->
    <packaging>war</packaging>
    <properties>
        <project.build.sourceEncoding>UTF-8</project.build.sourceEncoding>
        <spring.version>4.3.0.RELEASE</spring.version>
    </properties>
    <dependencies>
        <dependency>
            <groupId>junit</groupId>
            <artifactId>junit</artifactId>
            <scope>test</scope>
            <version>4.10</version>
        </dependency>
        <dependency>
            <groupId>org.springframework</groupId>
            <artifactId>spring-context</artifactId>
            <version>${spring.version}</version>
        </dependency>
        <dependency>
            <groupId>org.aspectj</groupId>
            <artifactId>aspectjweaver</artifactId>
            <version>1.8.9</version>
        </dependency>
        <dependency>
            <groupId>cglib</groupId>
            <artifactId>cglib</artifactId>
            <version>3.2.4</version>
        </dependency>
    </dependencies>
</project>
2、创建一个学生类

package com.wbg.springdemo.entity;

public class Student {
    String name;
    int age;
    String sex;

    @Override
    public String toString() {
        return "Student{" +
                "name='" + name + '\'' +
                ", age=" + age +
                ", sex='" + sex + '\'' +
                '}';
    }

    public Student() {
    }

    public String getName() {
        return name;
    }

    public void setName(String name) {
        this.name = name;
    }

    public int getAge() {
        return age;
    }

    public void setAge(int age) {
        this.age = age;
    }

    public String getSex() {
        return sex;
    }

    public void setSex(String sex) {
        this.sex = sex;
    }

    public Student(String name, int age, String sex) {
        this.name = name;
        this.age = age;
        this.sex = sex;
    }
}
3、创建学生的接口
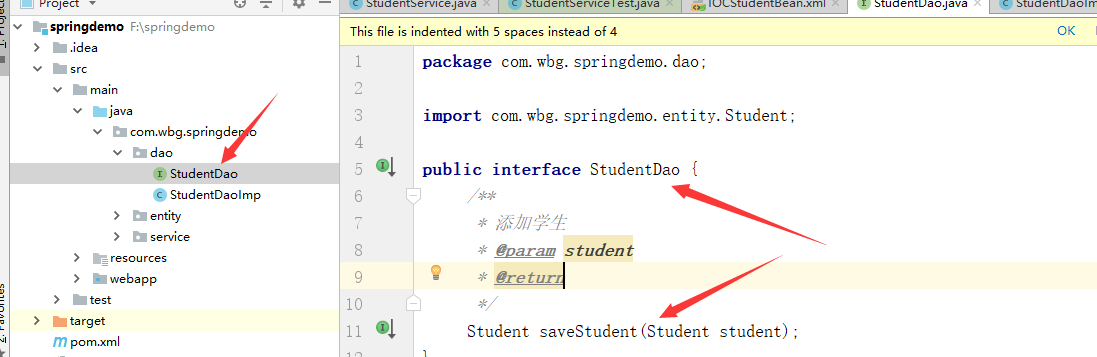
package com.wbg.springdemo.dao;

import com.wbg.springdemo.entity.Student;

public interface StudentDao {
     /**
      * 添加学生
      * @param student
      * @return
      */
     Student saveStudent(Student student);
}
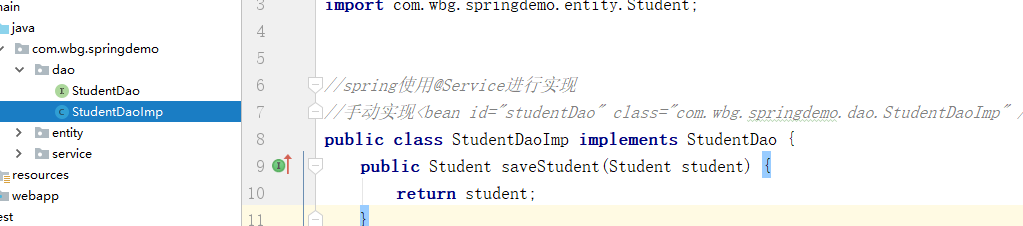
4、实现接口
package com.wbg.springdemo.dao;

import com.wbg.springdemo.entity.Student;


//spring使用@Service进行实现
//手动实现<bean id="studentDao" class="com.wbg.springdemo.dao.StudentDaoImp" />
public class StudentDaoImp implements StudentDao {
    public Student saveStudent(Student student) {
        return student;
    }
}
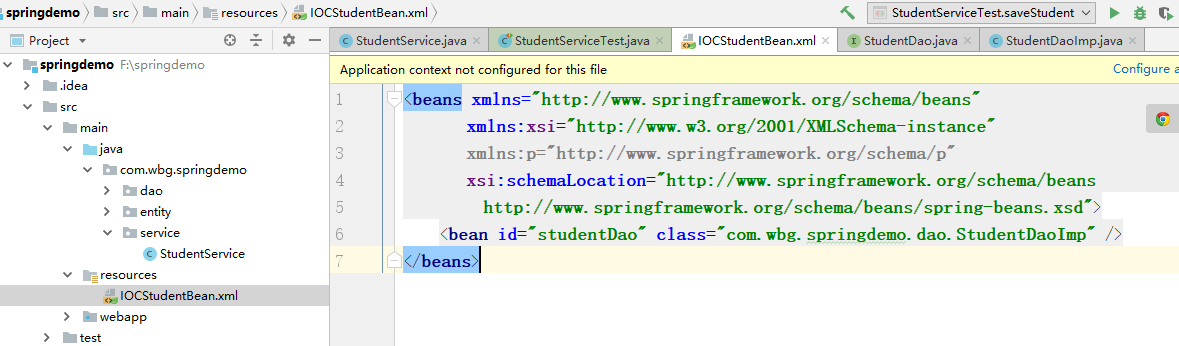
5、 容器的配置文件
<beans xmlns="http://www.springframework.org/schema/beans"
       xmlns:xsi="http://www.w3.org/2001/XMLSchema-instance"
       xmlns:p="http://www.springframework.org/schema/p"
       xsi:schemaLocation="http://www.springframework.org/schema/beans
        http://www.springframework.org/schema/beans/spring-beans.xsd">
    <bean id="studentDao" class="com.wbg.springdemo.dao.StudentDaoImp" />
</beans>
6、业户类
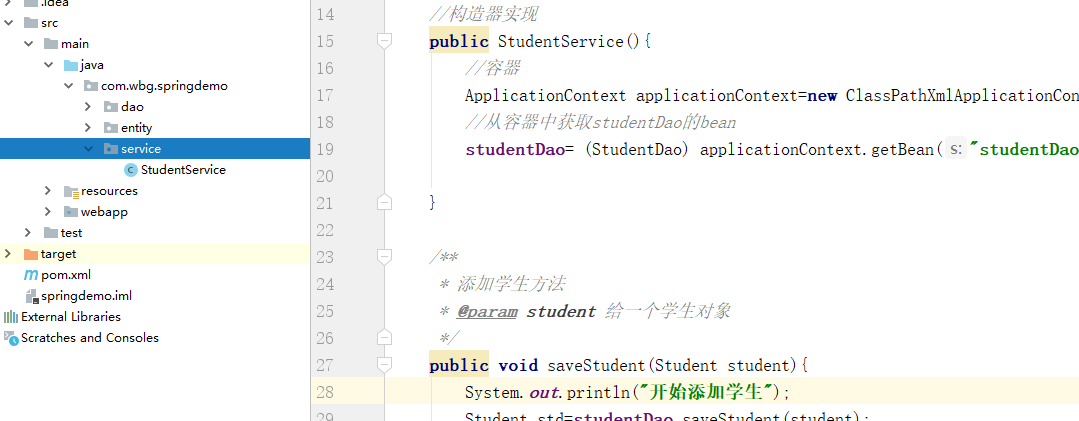
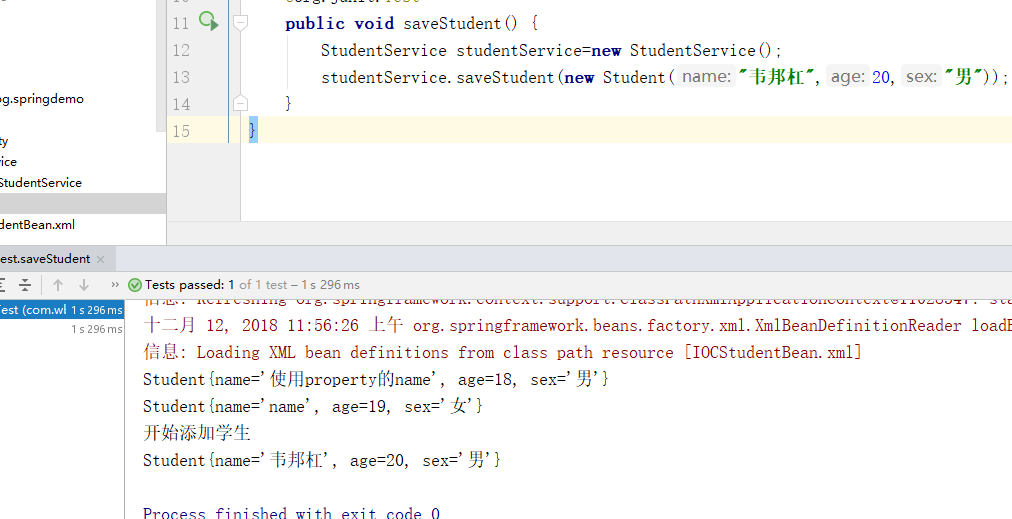
package com.wbg.springdemo.service;

import com.wbg.springdemo.dao.StudentDao;
import com.wbg.springdemo.entity.Student;
import org.springframework.context.ApplicationContext;
import org.springframework.context.support.ClassPathXmlApplicationContext;

/**
 * 实现业务
 */
public class StudentService {

    StudentDao studentDao;
    //构造器实现
    public StudentService(){
        //容器
        ApplicationContext applicationContext=new ClassPathXmlApplicationContext("IOCStudentBean.xml");
        //从容器中获取studentDao的bean
        studentDao= (StudentDao) applicationContext.getBean("studentDao");

    }

    /**
     * 添加学生方法
     * @param student 给一个学生对象
     */
    public void saveStudent(Student student){
        System.out.println("开始添加学生");
        Student std=studentDao.saveStudent(student);
        System.out.println(std);
    }
}
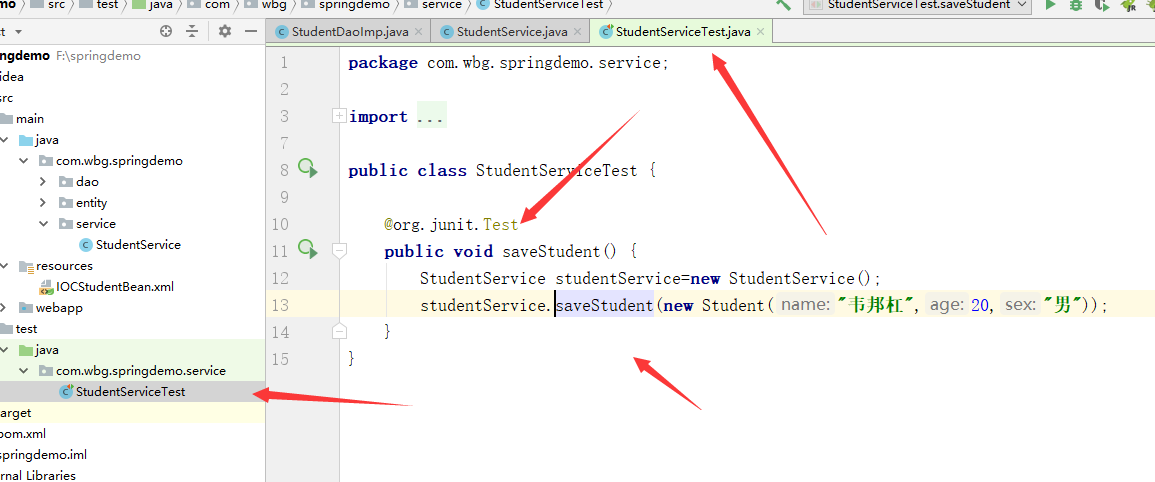
7、测试
package com.wbg.springdemo.service;

import com.wbg.springdemo.entity.Student;
import org.junit.Test;

import static org.junit.Assert.*;

public class StudentServiceTest {

    @org.junit.Test
    public void saveStudent() {
        StudentService studentService=new StudentService();
        studentService.saveStudent(new Student("韦邦杠",20,"男"));
    }
}
结果

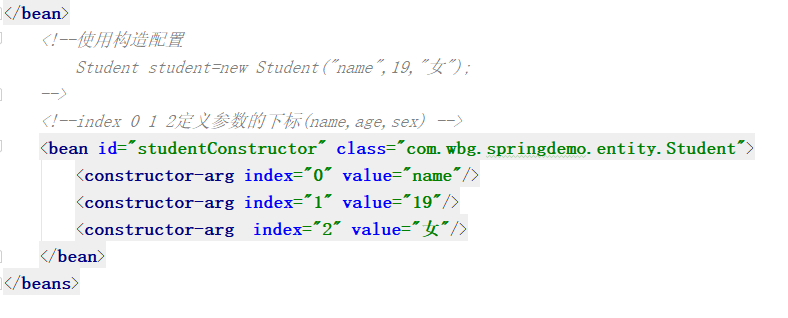
装配Spring Bean 有三种方式注入
1、构造注入
2、setter注入
3、接口注入(不推荐)
测试
实现业务代码
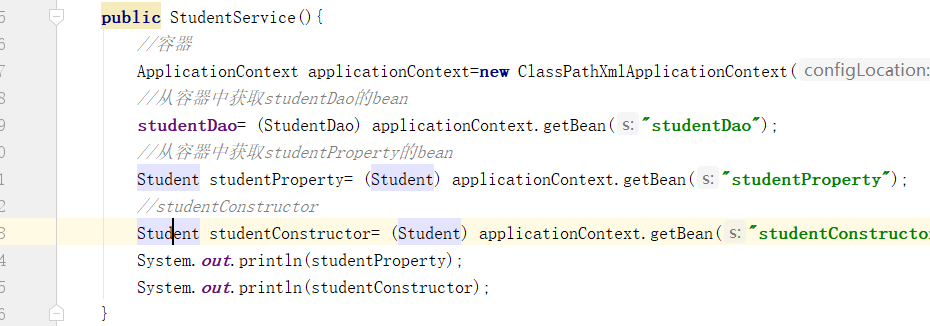
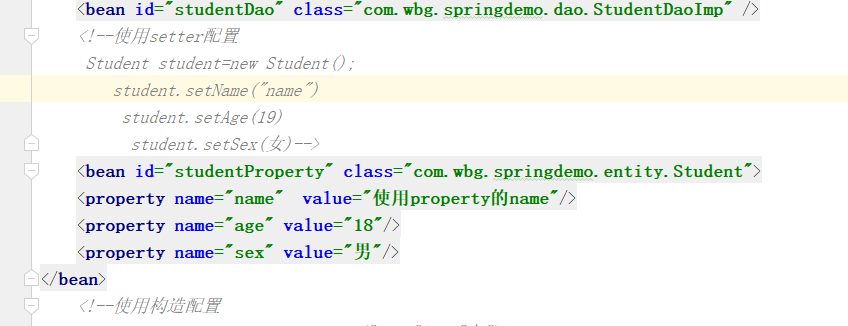
package com.wbg.springdemo.service;

import com.wbg.springdemo.dao.StudentDao;
import com.wbg.springdemo.entity.Student;
import org.springframework.context.ApplicationContext;
import org.springframework.context.support.ClassPathXmlApplicationContext;

/**
 * 实现业务
 */
public class StudentService {

    StudentDao studentDao;
    //构造器实现
    public StudentService(){
        //容器
        ApplicationContext applicationContext=new ClassPathXmlApplicationContext("IOCStudentBean.xml");
        //从容器中获取studentDao的bean
        studentDao= (StudentDao) applicationContext.getBean("studentDao");
        //从容器中获取studentProperty的bean
        Student studentProperty= (Student) applicationContext.getBean("studentProperty");
        //studentConstructor
        Student studentConstructor= (Student) applicationContext.getBean("studentConstructor");
        System.out.println(studentProperty);
        System.out.println(studentConstructor);
    }

    /**
     * 添加学生方法
     * @param student 给一个学生对象
     */
    public void saveStudent(Student student){
        System.out.println("开始添加学生");
        Student std=studentDao.saveStudent(student);
        System.out.println(std);
    }
}
或者


【推荐】国内首个AI IDE,深度理解中文开发场景,立即下载体验Trae
【推荐】编程新体验,更懂你的AI,立即体验豆包MarsCode编程助手
【推荐】抖音旗下AI助手豆包,你的智能百科全书,全免费不限次数
【推荐】轻量又高性能的 SSH 工具 IShell:AI 加持,快人一步
· Linux系列:如何用heaptrack跟踪.NET程序的非托管内存泄露
· 开发者必知的日志记录最佳实践
· SQL Server 2025 AI相关能力初探
· Linux系列:如何用 C#调用 C方法造成内存泄露
· AI与.NET技术实操系列(二):开始使用ML.NET
· 无需6万激活码!GitHub神秘组织3小时极速复刻Manus,手把手教你使用OpenManus搭建本
· C#/.NET/.NET Core优秀项目和框架2025年2月简报
· 一文读懂知识蒸馏
· Manus爆火,是硬核还是营销?
· 终于写完轮子一部分:tcp代理 了,记录一下