探究Google力推的JetPack库<三>---------LiveData&ViewModel再次探究、Room
LiveData&ViewModel再次探究:
DEMO编写:
关于LiveData和ViewModel的使用在之前https://www.cnblogs.com/webor2006/p/12483158.html已经学习过了,但是木有剖析它的实现原理,所以这里再次对它进行深入了解一下,先来编写两个DEMO:
具体效果如下:
①、利用ViewModel延迟5秒之后来更新UI:
②、利用LiveData和ViewModel来实现Fragment之间数据的实时更新:

而且我们在旋转屏幕时,数据也会被保留:
具体实现:
基本上都是之前学过的,所以这里直接将代码贴出既可:
<?xml version="1.0" encoding="utf-8"?>
<LinearLayout xmlns:android="http://schemas.android.com/apk/res/android"
    xmlns:app="http://schemas.android.com/apk/res-auto"
    xmlns:tools="http://schemas.android.com/tools"
    android:layout_width="match_parent"
    android:layout_height="match_parent"
    android:orientation="vertical"
    tools:context=".MainActivity">

    <Button
        android:layout_width="wrap_content"
        android:layout_height="wrap_content"
        android:onClick="click"
        android:text="demo1" />

    <Button
        android:layout_width="wrap_content"
        android:layout_height="wrap_content"
        android:onClick="click2"
        android:text="demo2" />

</LinearLayout>
package com.android.livedataandviewmodel;

import android.os.Bundle;
import android.view.View;

import androidx.appcompat.app.AppCompatActivity;

public class MainActivity extends AppCompatActivity {

    @Override
    protected void onCreate(Bundle savedInstanceState) {
        super.onCreate(savedInstanceState);
        setContentView(R.layout.activity_main);
    }

    public void click(View view) {
        //todo
    }

    public void click2(View view) {
        //todo
    }
}
先来处理第一个点击事件:
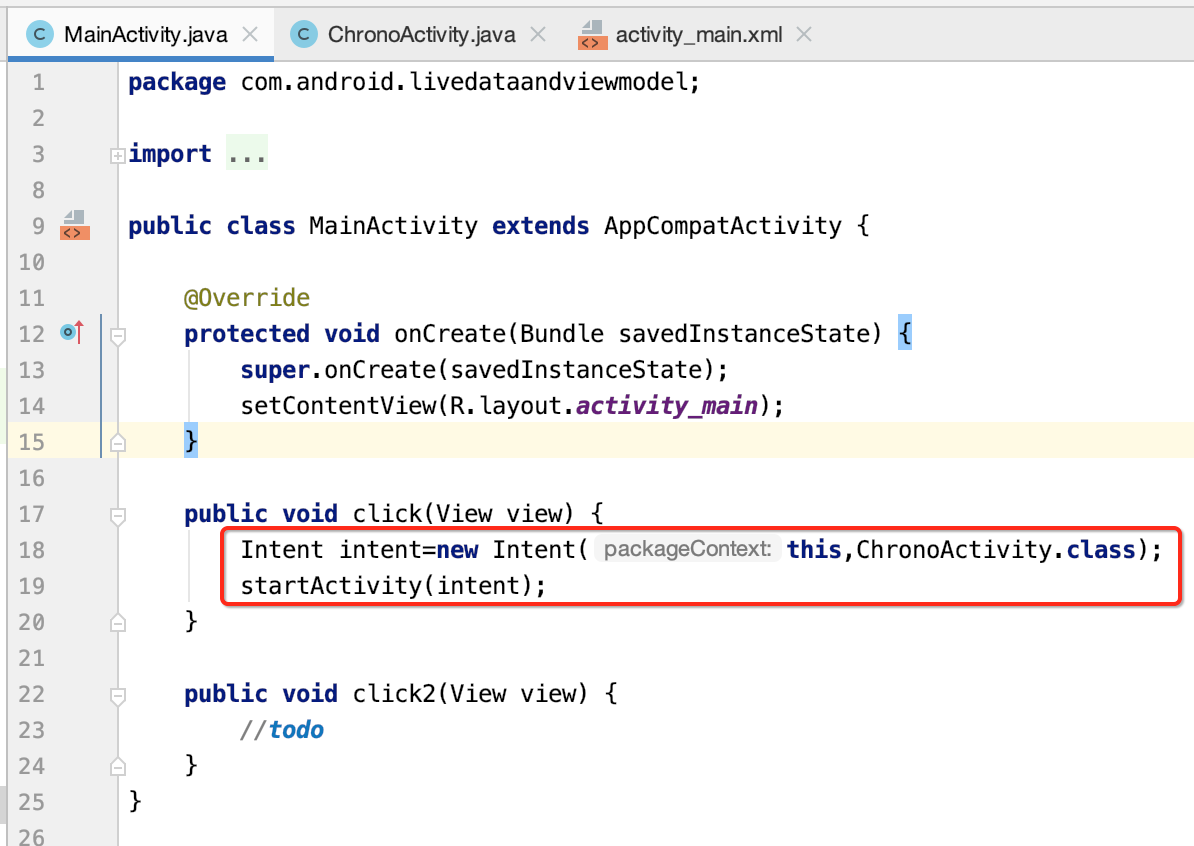
然后先建立一个Model对像:
package com.android.livedataandviewmodel;

import android.os.SystemClock;

import androidx.lifecycle.LiveData;
import androidx.lifecycle.MutableLiveData;
import androidx.lifecycle.ViewModel;

import java.util.Timer;
import java.util.TimerTask;

public class LiveDataTimerViewModel extends ViewModel {
    private static final int ONE_SECOND = 5000;

    private MutableLiveData<Long> mElapsedTime = new MutableLiveData<>();

    private long mInitialTime;

    public LiveDataTimerViewModel() {
        mInitialTime = SystemClock.elapsedRealtime();
        Timer timer = new Timer();

        // Update the elapsed time every second.
        timer.scheduleAtFixedRate(new TimerTask() {
            @Override
            public void run() {
                final long newValue = (SystemClock.elapsedRealtime() - mInitialTime) / 1000;
                // setValue() cannot be called from a background thread so post to main thread.
                mElapsedTime.postValue(newValue);
            }
        }, ONE_SECOND, ONE_SECOND);

    }

    public LiveData<Long> getElapsedTime() {
        return mElapsedTime;
    }
}
上面代码就是做了个5秒的延时然后再去更新LiveData中的数据,比较简单,此时则回到Activity做一下监听:
package com.android.livedataandviewmodel;

import android.os.Bundle;
import android.widget.TextView;

import androidx.annotation.Nullable;
import androidx.appcompat.app.AppCompatActivity;
import androidx.lifecycle.Observer;
import androidx.lifecycle.ViewModelProviders;

public class ChronoActivity extends AppCompatActivity {

    private LiveDataTimerViewModel mLiveDataTimerViewModel;

    @Override
    protected void onCreate(Bundle savedInstanceState) {
        super.onCreate(savedInstanceState);

        setContentView(R.layout.chrono_activity);

        mLiveDataTimerViewModel = ViewModelProviders.of(this).get(LiveDataTimerViewModel.class);

        subscribe();
    }

    private void subscribe() {
        final Observer<Long> elapsedTimeObserver = new Observer<Long>() {
            @Override
            public void onChanged(@Nullable final Long aLong) {
                String newText = "123";
                ((TextView) findViewById(R.id.timer_textview)).setText(newText);

            }
        };
        //observeForever可以在activity不在前台也接收数据
        mLiveDataTimerViewModel.getElapsedTime().observe(this, elapsedTimeObserver);
    }
}
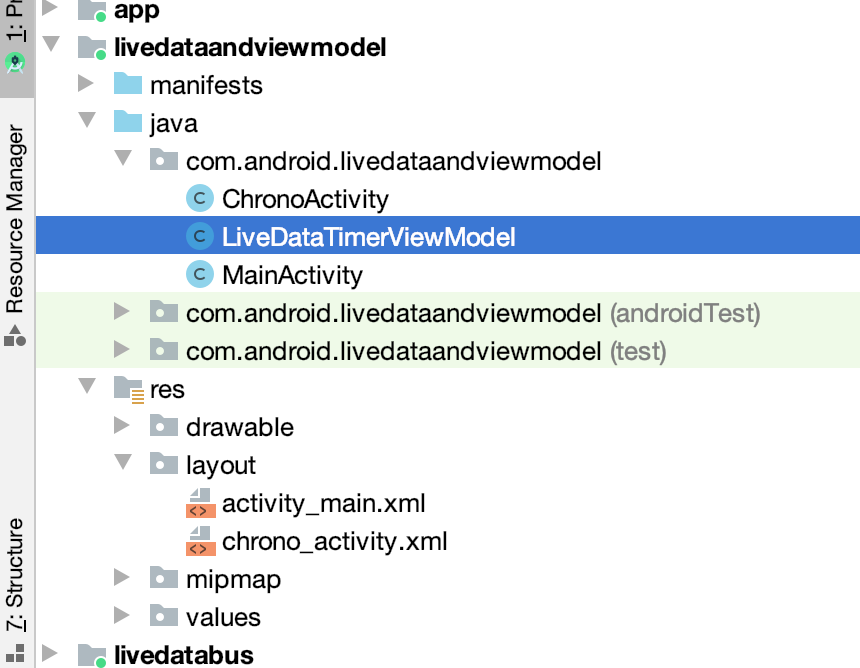
接下来再来处理demo2的点击事件:
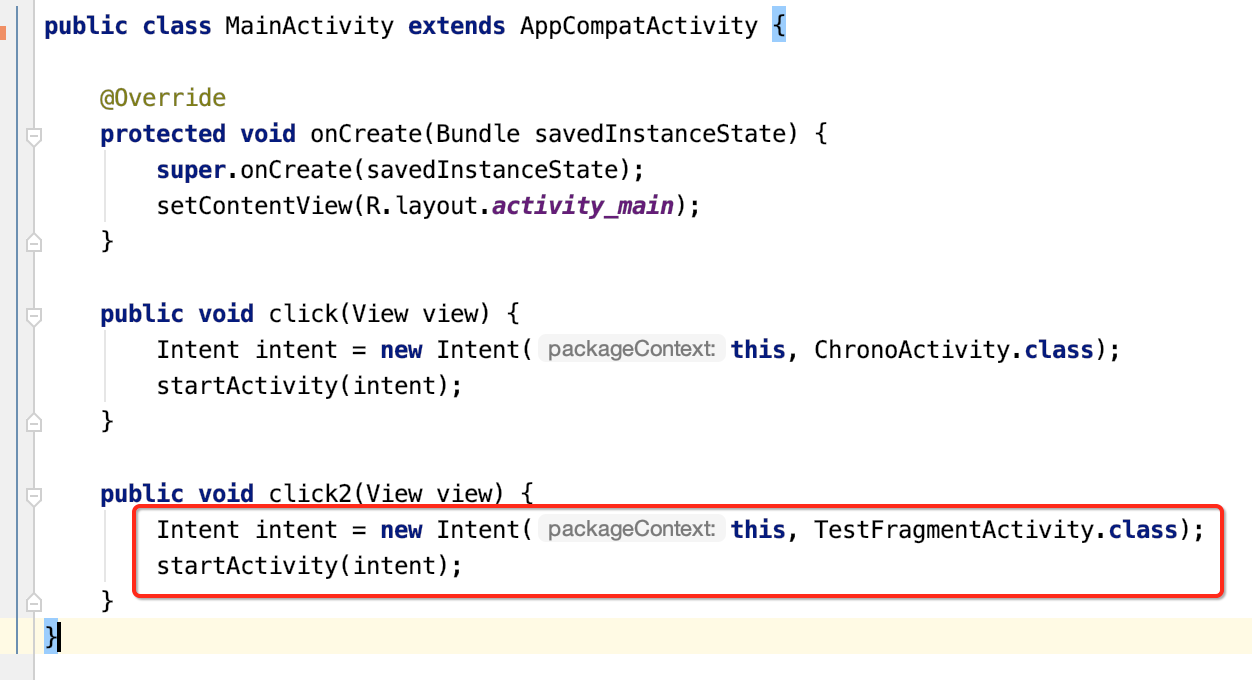
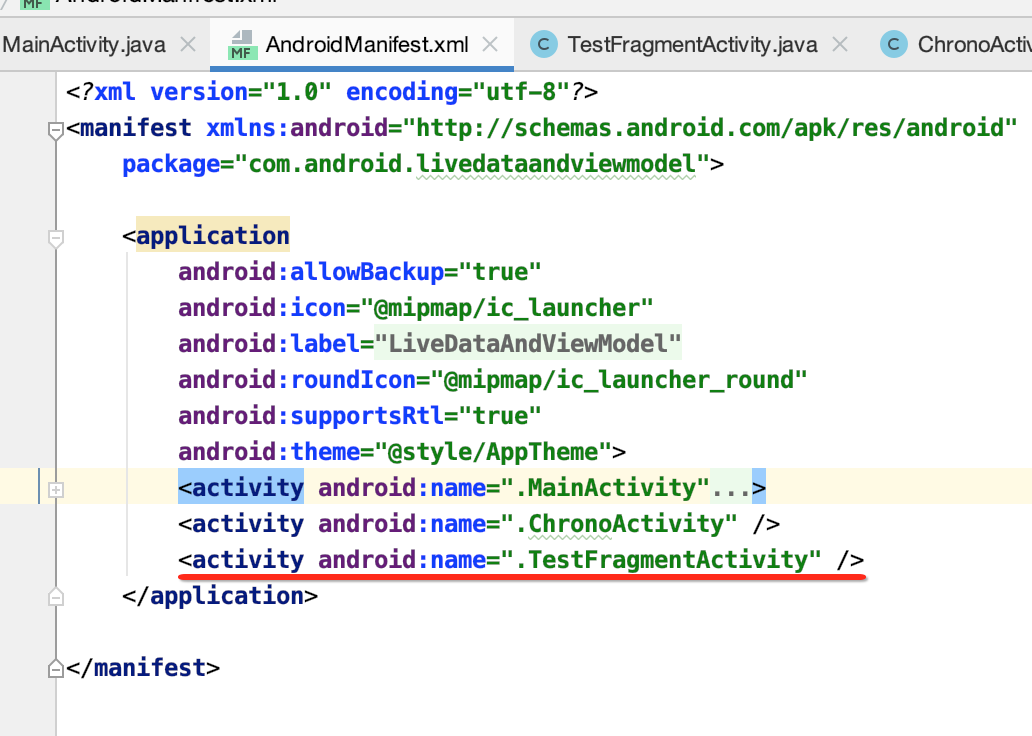
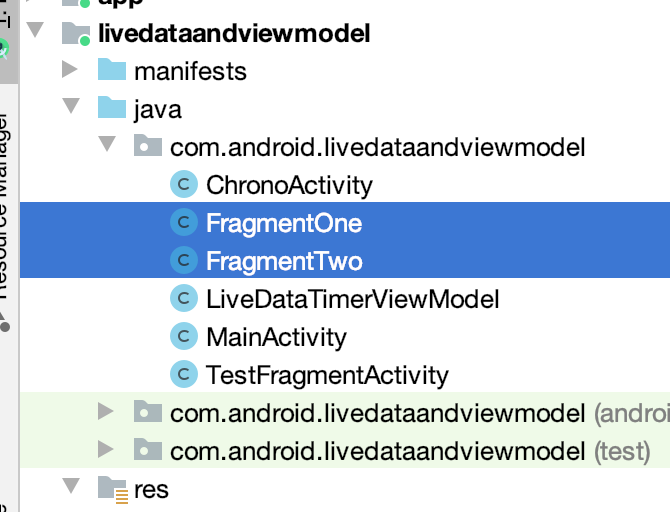
它里面就是嵌套了2个Fragment:
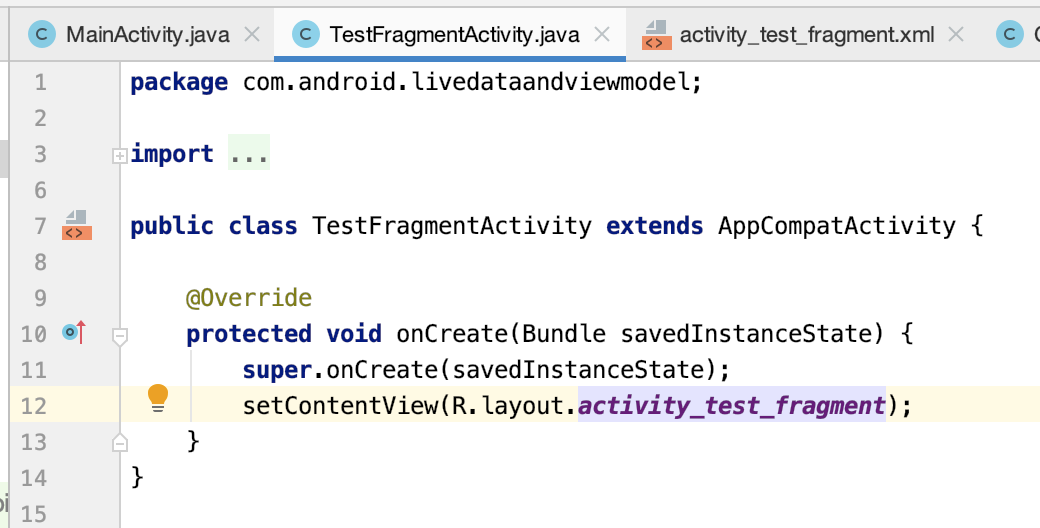
<?xml version="1.0" encoding="utf-8"?>
<LinearLayout xmlns:android="http://schemas.android.com/apk/res/android"
    xmlns:tools="http://schemas.android.com/tools"
    android:layout_width="match_parent"
    android:layout_height="match_parent"
    android:orientation="vertical"
    tools:context=".TestFragmentActivity">

    <fragment
        android:id="@+id/fragment_one"
        android:name="com.android.livedataandviewmodel.FragmentOne"
        android:layout_width="match_parent"
        android:layout_height="200dp" />

    <fragment
        android:id="@+id/fragment_two"
        android:name="com.android.livedataandviewmodel.FragmentTwo"
        android:layout_width="match_parent"
        android:layout_height="200dp" />

</LinearLayout>
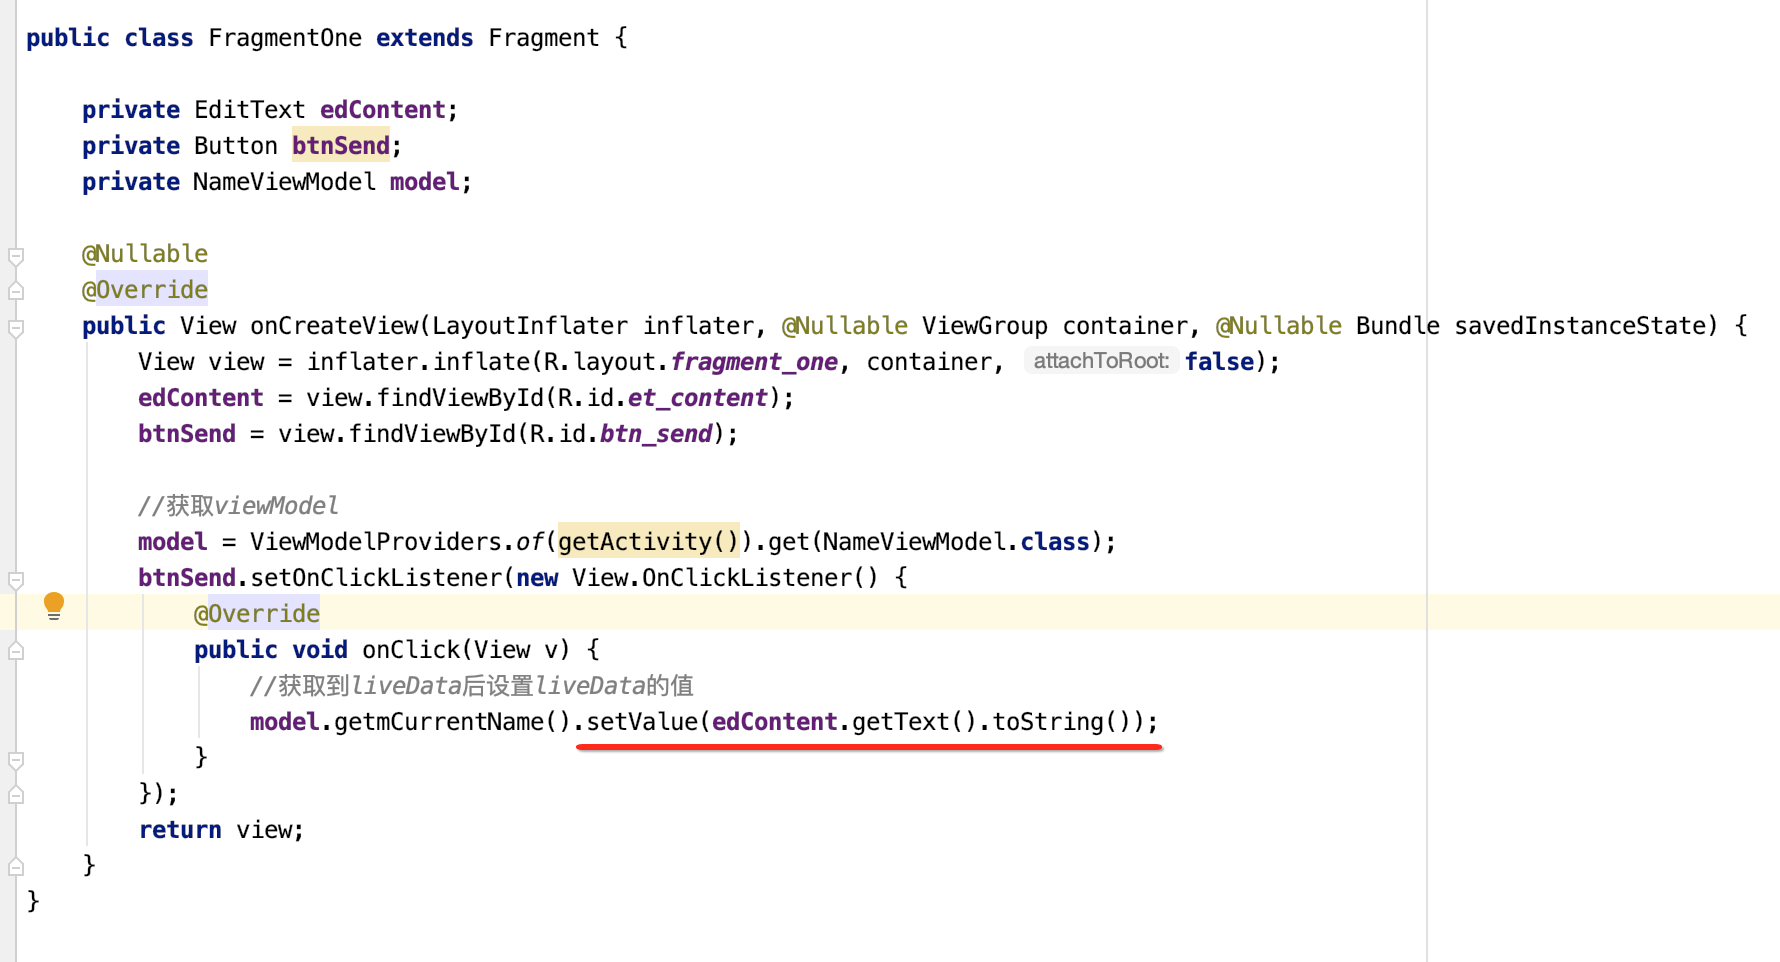
package com.android.livedataandviewmodel;

import android.os.Bundle;
import android.view.LayoutInflater;
import android.view.View;
import android.view.ViewGroup;
import android.widget.Button;
import android.widget.EditText;

import androidx.annotation.Nullable;
import androidx.fragment.app.Fragment;
import androidx.lifecycle.ViewModelProviders;

public class FragmentOne extends Fragment {

    private EditText edContent;
    private Button btnSend;
    private NameViewModel model;

    @Nullable
    @Override
    public View onCreateView(LayoutInflater inflater, @Nullable ViewGroup container, @Nullable Bundle savedInstanceState) {
        View view = inflater.inflate(R.layout.fragment_one, container, false);
        edContent = view.findViewById(R.id.et_content);
        btnSend = view.findViewById(R.id.btn_send);

        //获取viewModel
        model = ViewModelProviders.of(getActivity()).get(NameViewModel.class);
        btnSend.setOnClickListener(new View.OnClickListener() {
            @Override
            public void onClick(View v) {
                //获取到liveData后设置liveData的值
                model.getmCurrentName().setValue(edContent.getText().toString());
            }
        });
        return view;
    }
}
<?xml version="1.0" encoding="utf-8"?>
<LinearLayout xmlns:android="http://schemas.android.com/apk/res/android"
    xmlns:tools="http://schemas.android.com/tools"
    android:layout_width="match_parent"
    android:layout_height="match_parent"
    android:orientation="vertical"
    tools:context=".MainActivity">

    <EditText
        android:id="@+id/et_content"
        android:layout_width="match_parent"
        android:layout_height="wrap_content" />

    <Button
        android:id="@+id/btn_send"
        android:layout_width="match_parent"
        android:layout_height="wrap_content"
        android:text="发送数据" />

</LinearLayout>
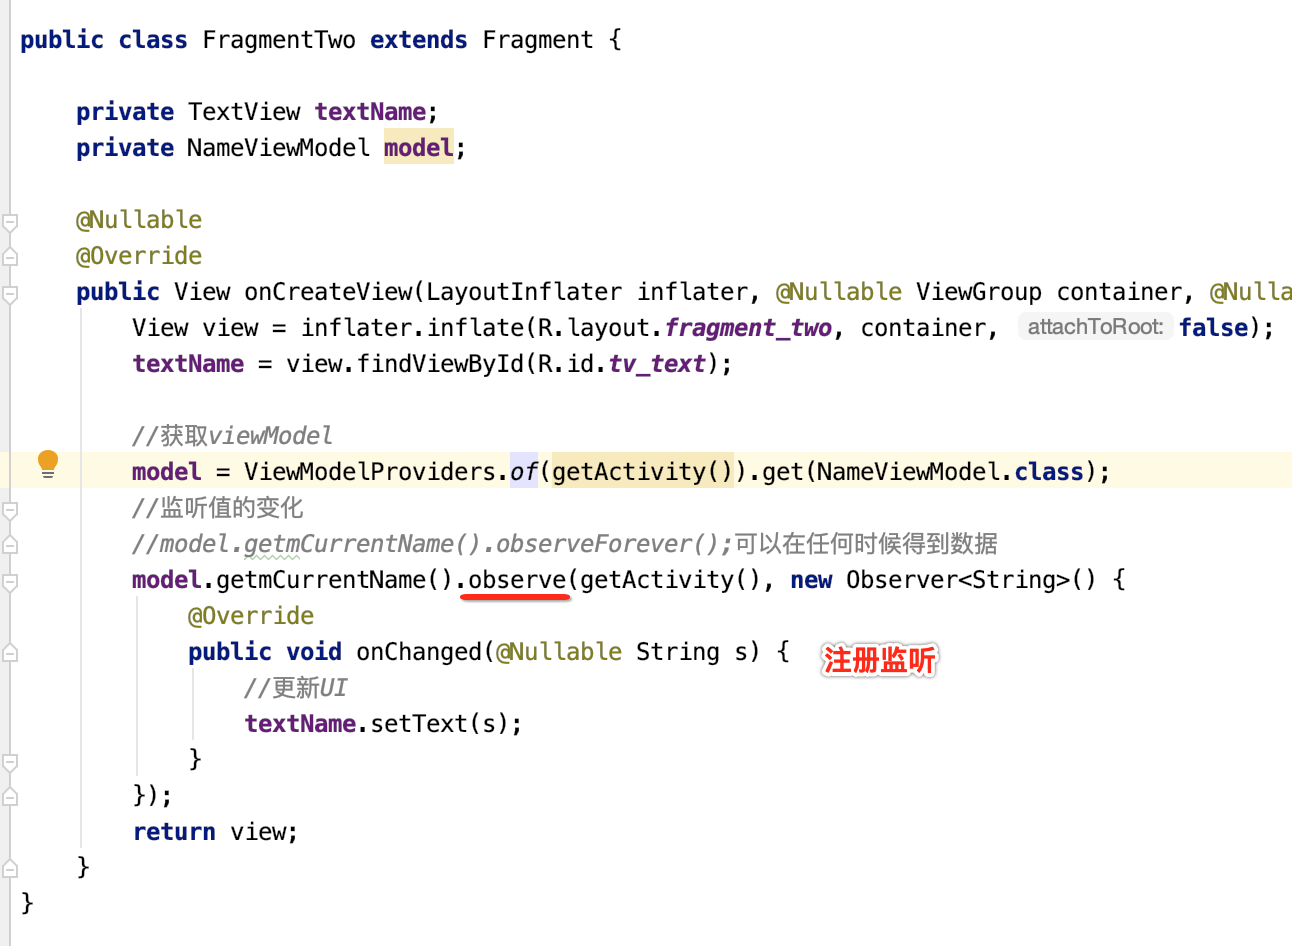
package com.android.livedataandviewmodel;

import android.os.Bundle;
import android.view.LayoutInflater;
import android.view.View;
import android.view.ViewGroup;
import android.widget.TextView;

import androidx.annotation.Nullable;
import androidx.fragment.app.Fragment;
import androidx.lifecycle.Observer;
import androidx.lifecycle.ViewModelProviders;

public class FragmentTwo extends Fragment {

    private TextView textName;
    private NameViewModel model;

    @Nullable
    @Override
    public View onCreateView(LayoutInflater inflater, @Nullable ViewGroup container, @Nullable Bundle savedInstanceState) {
        View view = inflater.inflate(R.layout.fragment_two, container, false);
        textName = view.findViewById(R.id.tv_text);

        //获取viewModel
        model = ViewModelProviders.of(getActivity()).get(NameViewModel.class);
        //监听值的变化
        //model.getmCurrentName().observeForever();可以在任何时候得到数据
        model.getmCurrentName().observe(getActivity(), new Observer<String>() {
            @Override
            public void onChanged(@Nullable String s) {
                //更新UI
                textName.setText(s);
            }
        });
        return view;
    }
}
<?xml version="1.0" encoding="utf-8"?>
<LinearLayout xmlns:android="http://schemas.android.com/apk/res/android"
    xmlns:app="http://schemas.android.com/apk/res-auto"
    xmlns:tools="http://schemas.android.com/tools"
    android:layout_width="match_parent"
    android:layout_height="match_parent"
    android:orientation="vertical"
    tools:context=".MainActivity">

    <TextView
        android:id="@+id/tv_text"
        android:layout_width="match_parent"
        android:layout_height="wrap_content"
        android:text="显示数据" />

</LinearLayout>
这些代码都是比较简单的,就不过多的说明了,接下来重点是来剖析其原理。
原理剖析:
这里以分析两个Fragment之间的数据共享为例进行分析既可,那个延时的其本质使用是一样的,从这里分析起:
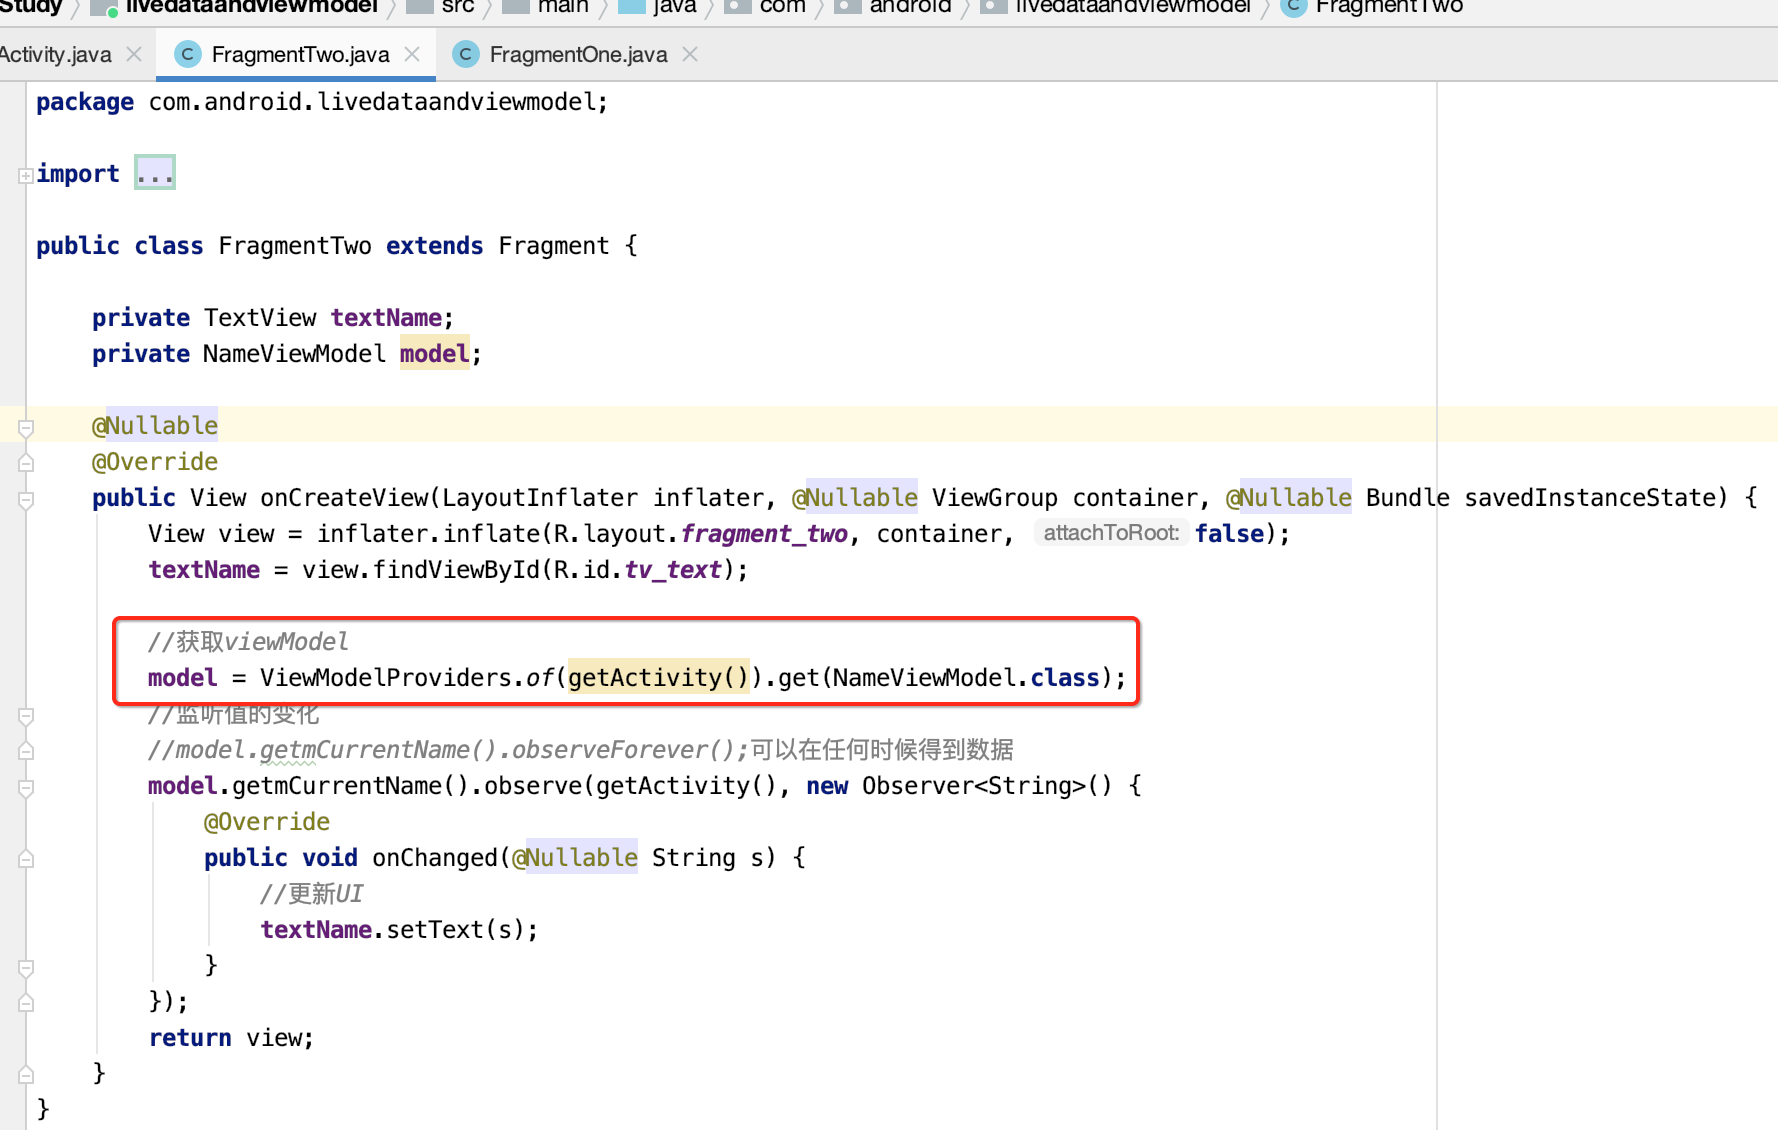
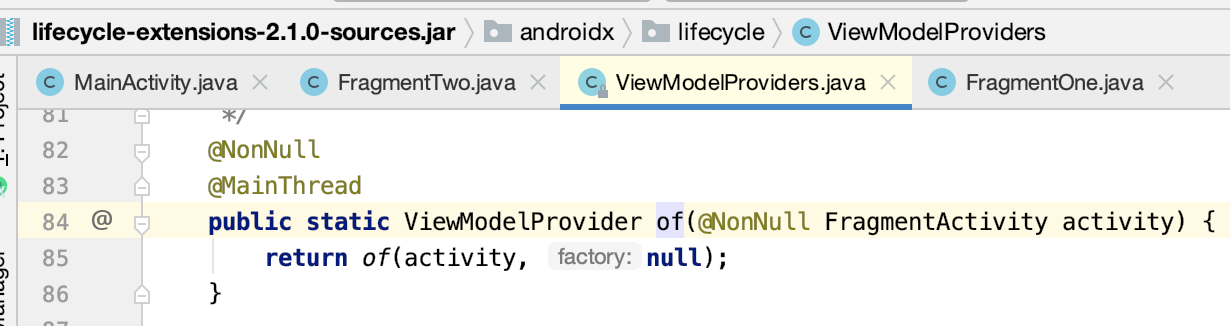
先来看一下这个of()方法:

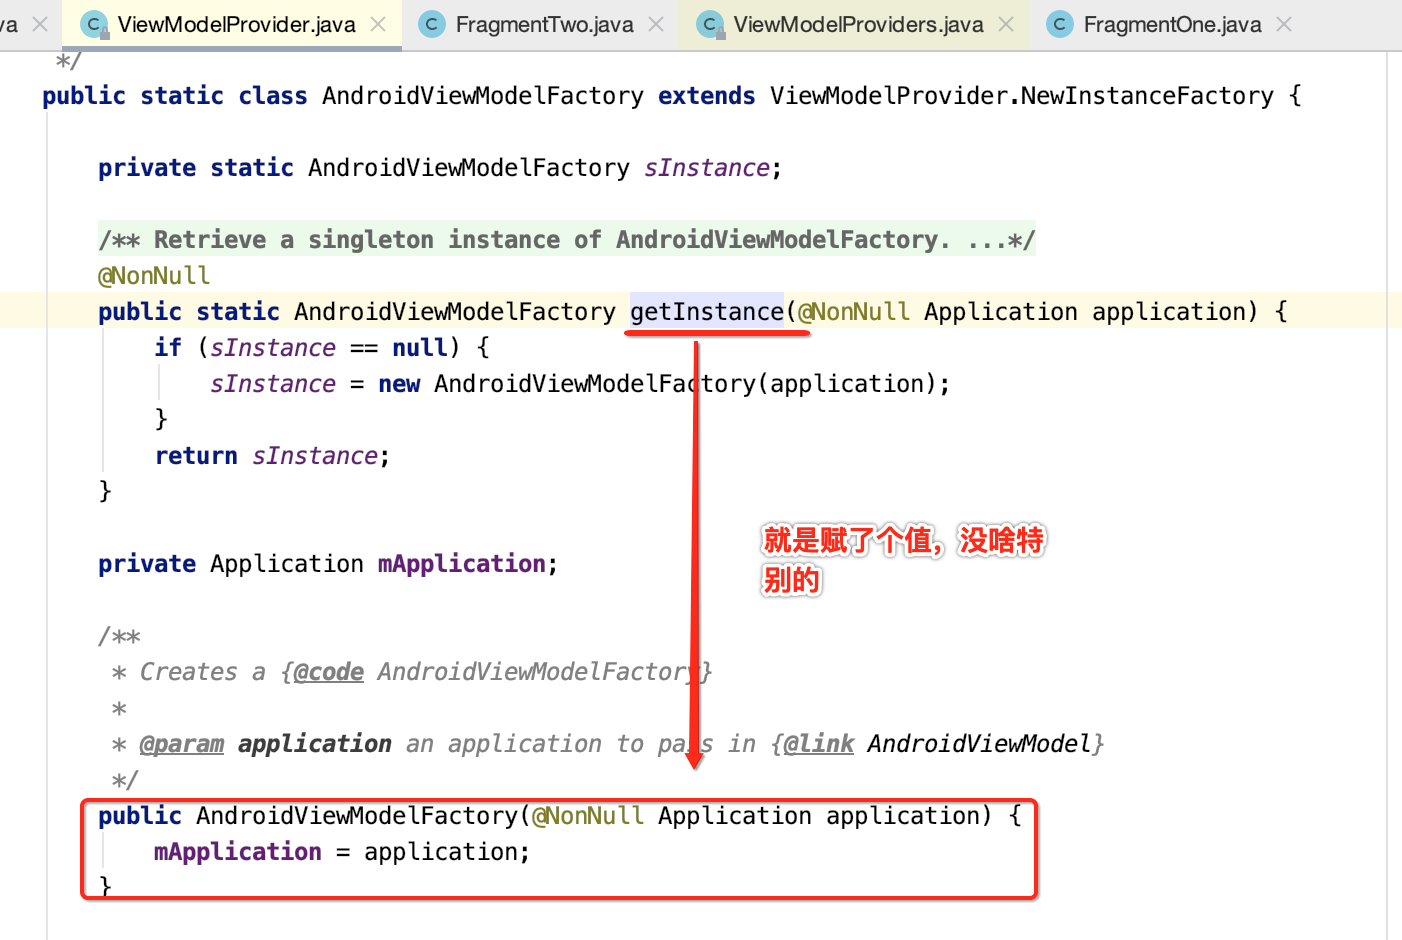
这工厂是ViewModelProvider的内部类,很明显是用来创建ViewModel的,看一下它的getInstance()方法:
继续往下:
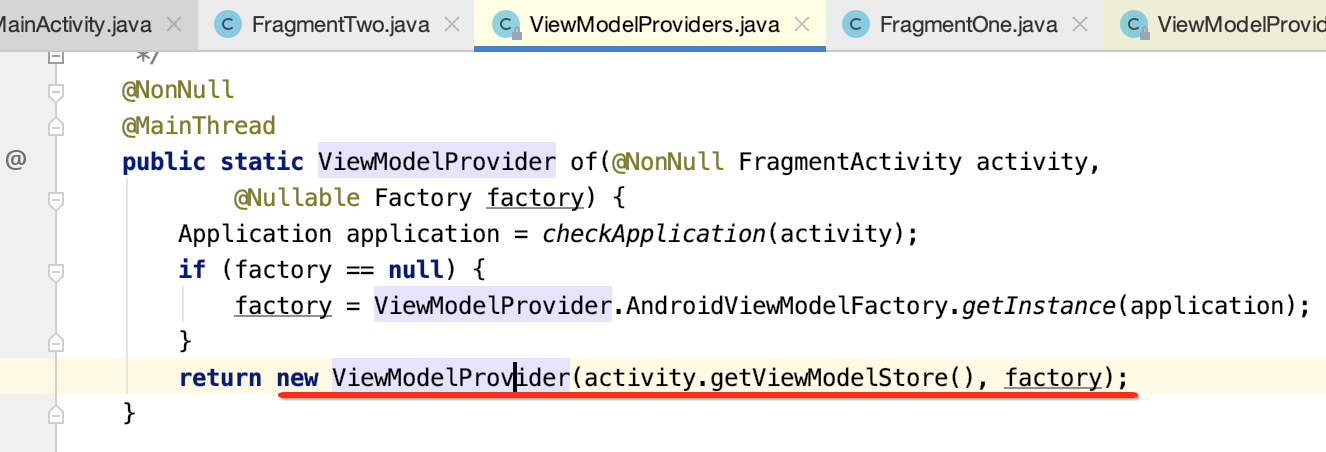
新建了一个ViewModelProvider,看一下它的构造方法:
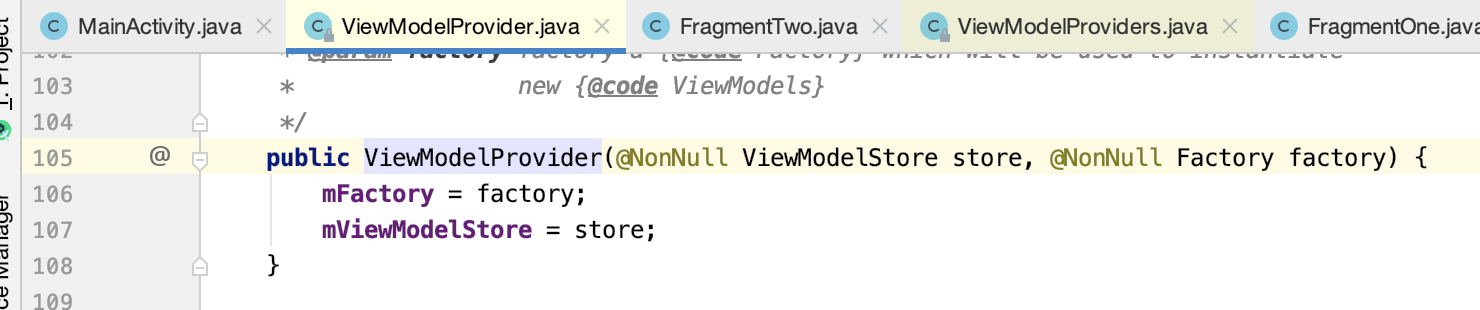
此时看一下ViewModelStore是啥结构?
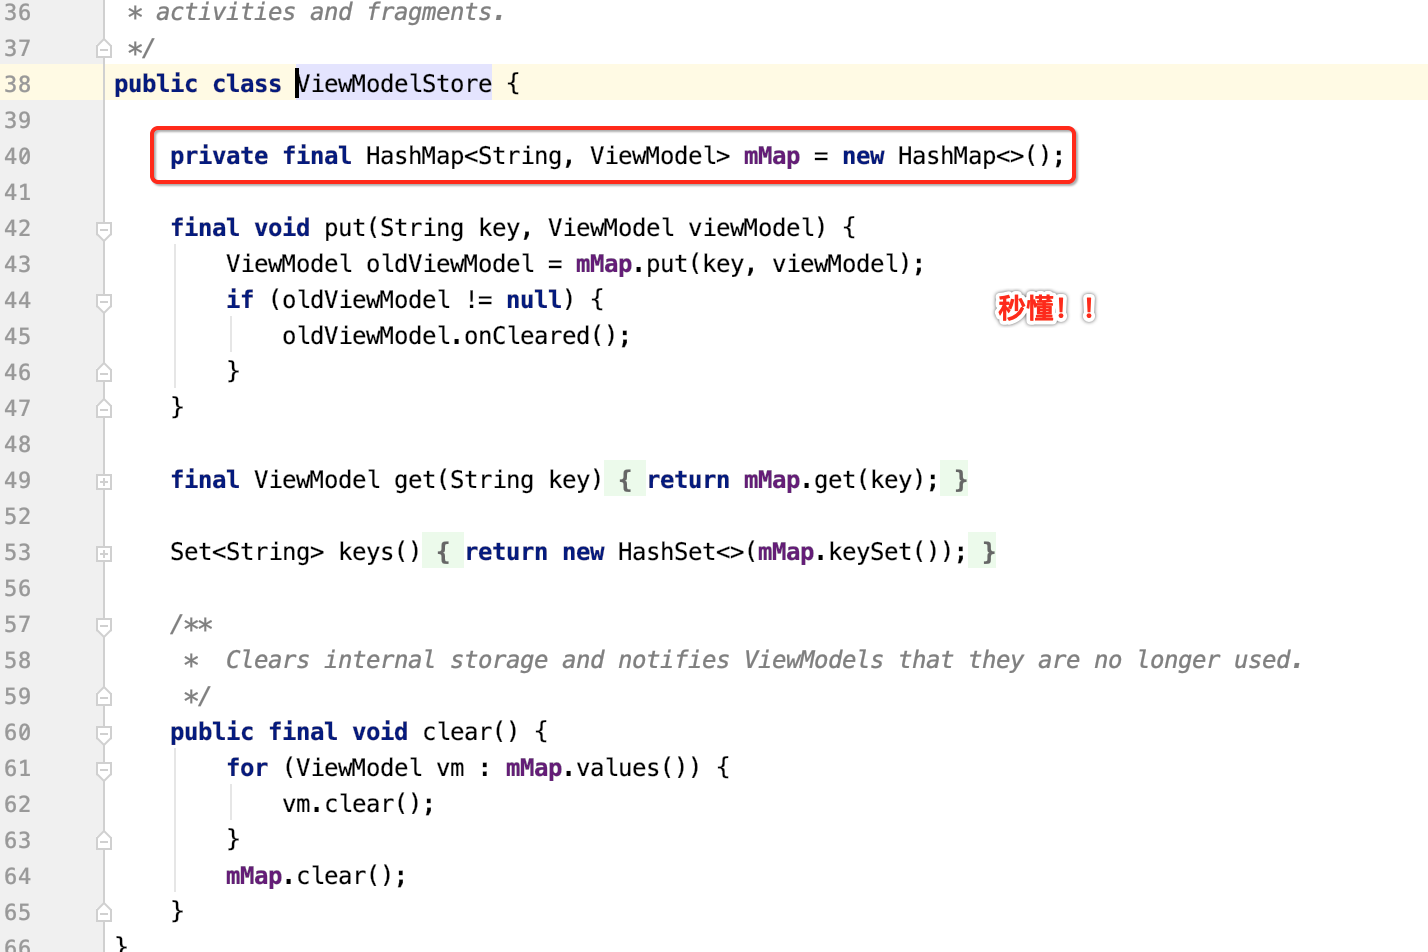
所以此时再回到主流程来:

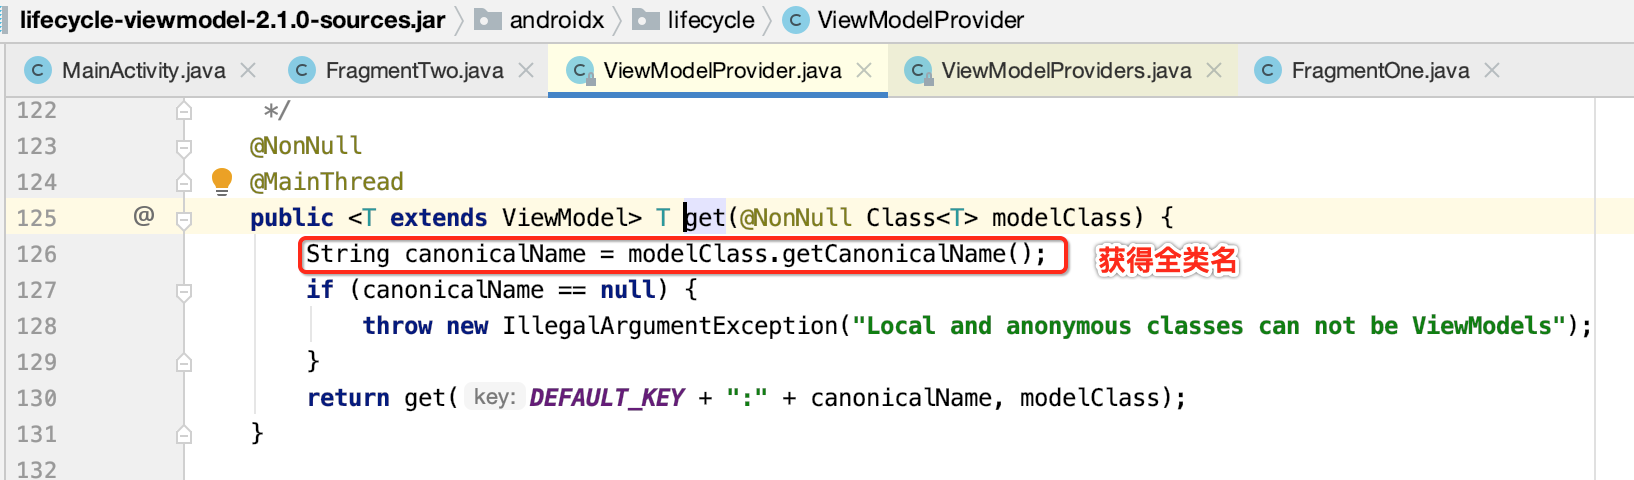
继续往下:

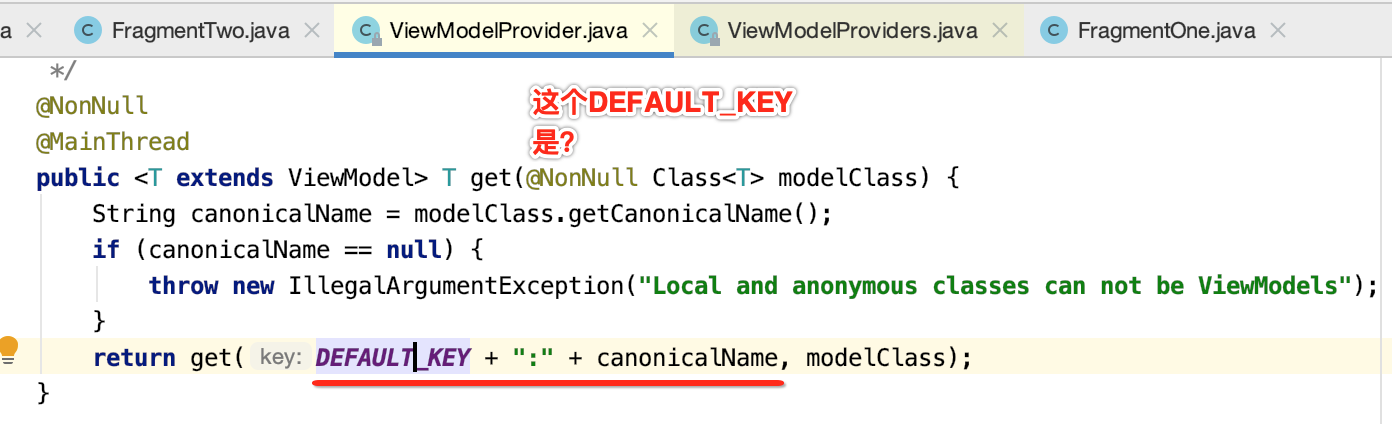
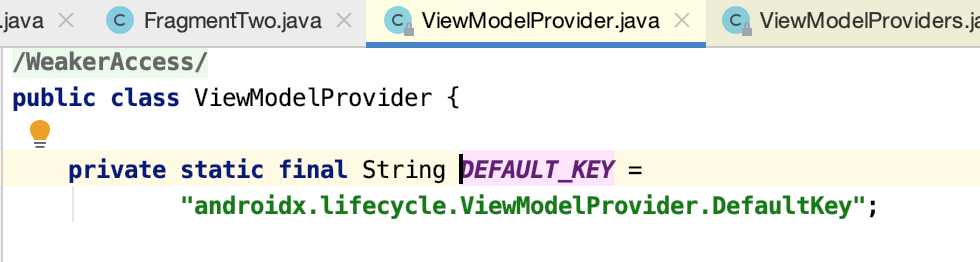
此时咱们就来看一下工厂创建的细节:
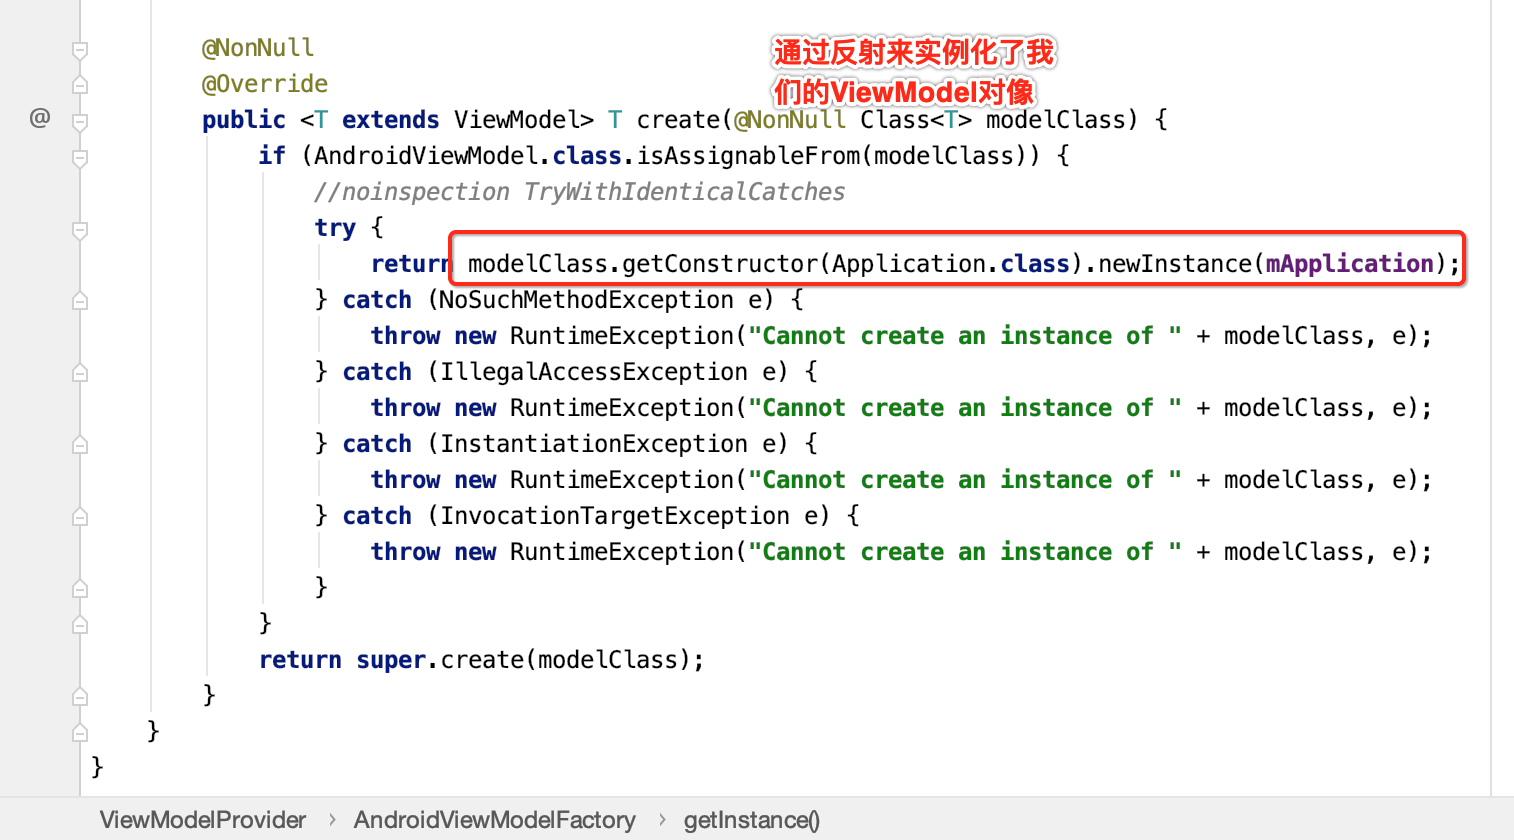
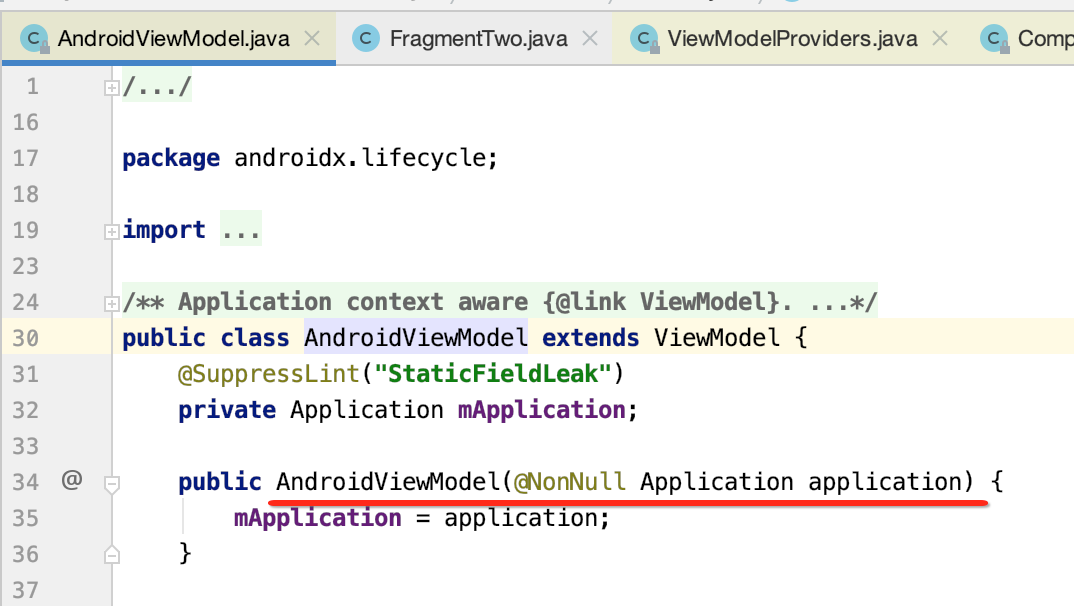
从这反射可看出对于ViewModel会有一个Application参数的构造函数,如下:
此时我们的ViewModel就生成实例并存到ViewModelStore当中了,那有一个问题,为啥我们在旋转屏幕时的数据能够被保存下来呢?照理旋转时没有做特殊处理数据是会丢失的,所以接下来咱们来寻找答案:
对于屏幕旋转平常要处理数据保存都会到Activity的相应的回调中来处理,这里其实也是同样的,也是在Activity中来处理的,具体看一下:
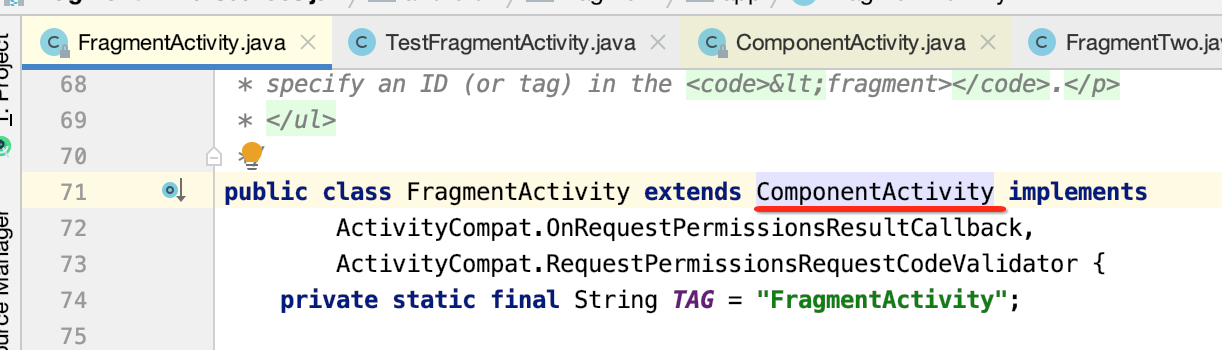
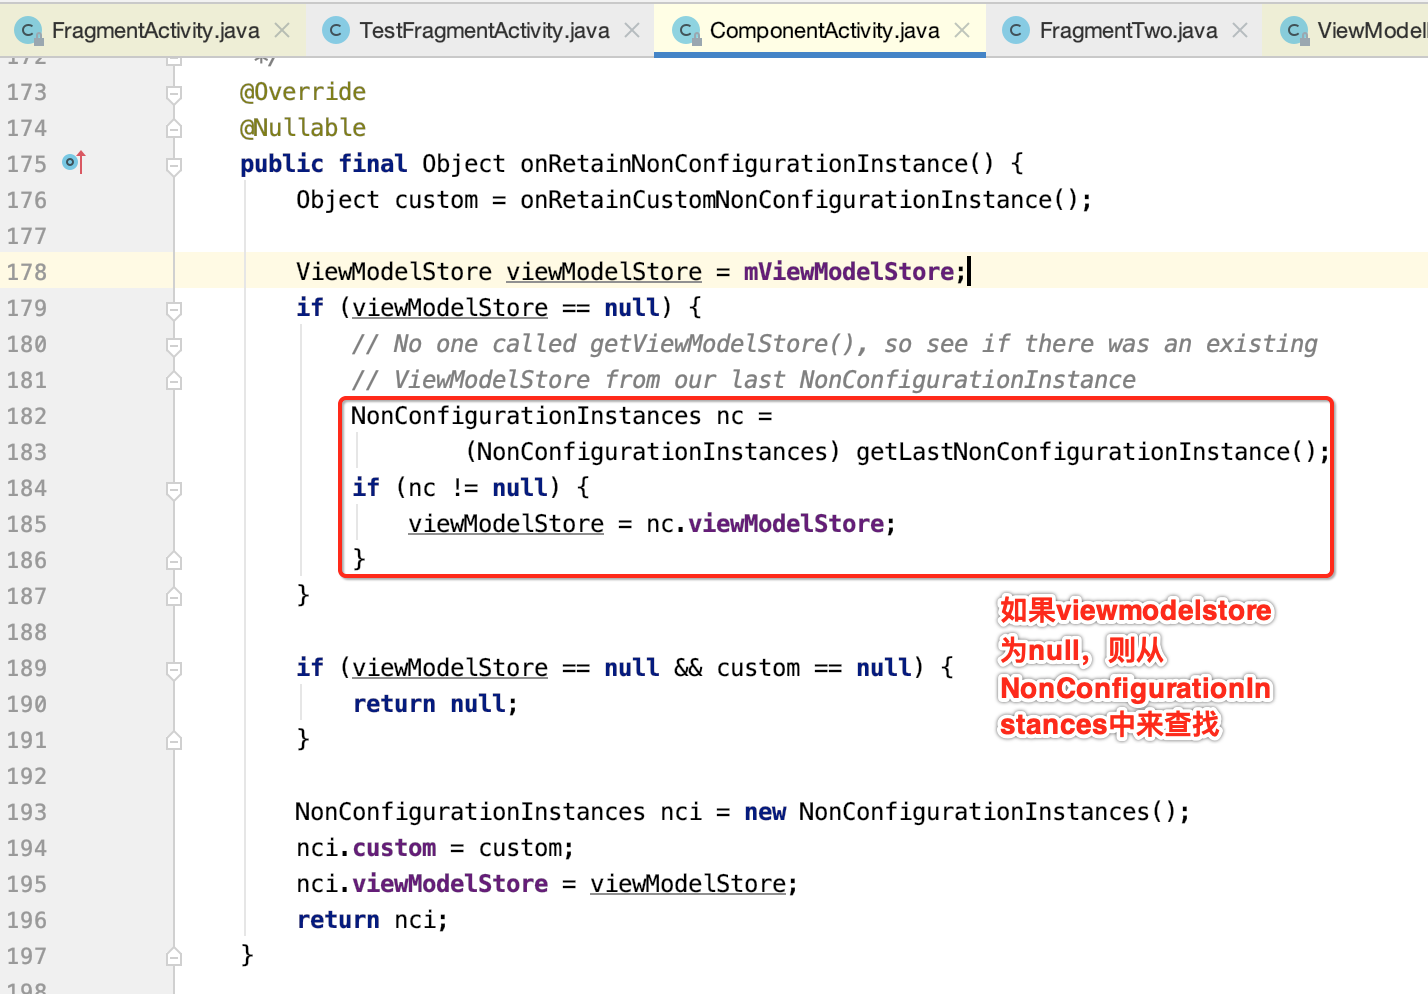
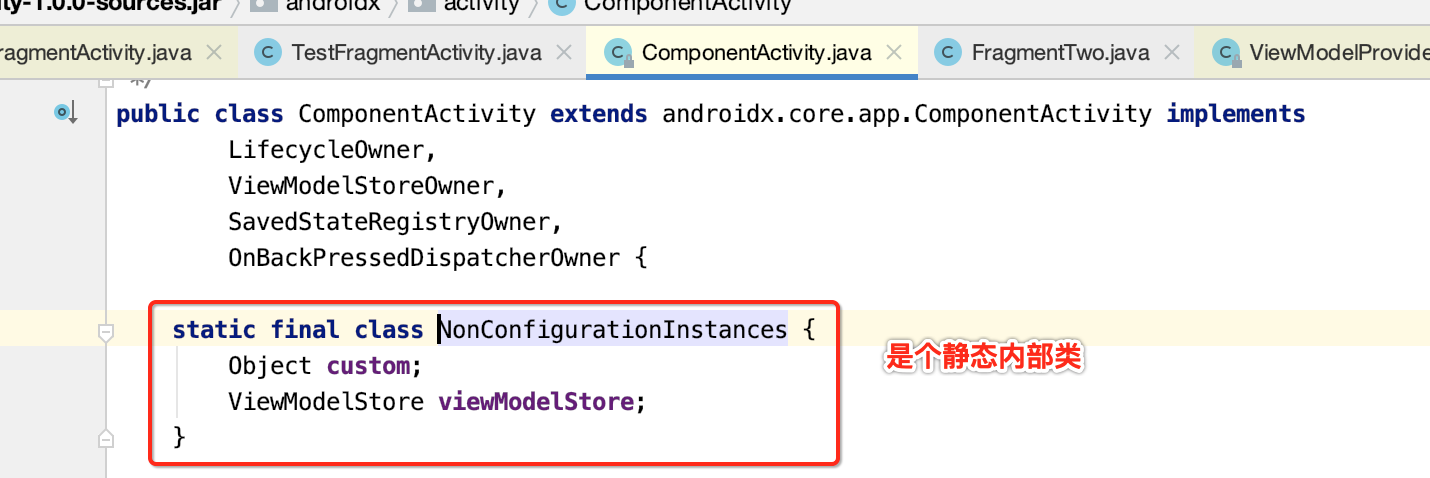
此时看一下这个类的定义:
具体细节就不看了,接下来则来分析一下整个数据发送接收更新的逻辑,这块在之前https://www.cnblogs.com/webor2006/p/12483158.html已经分析过了,这里再过一遍:
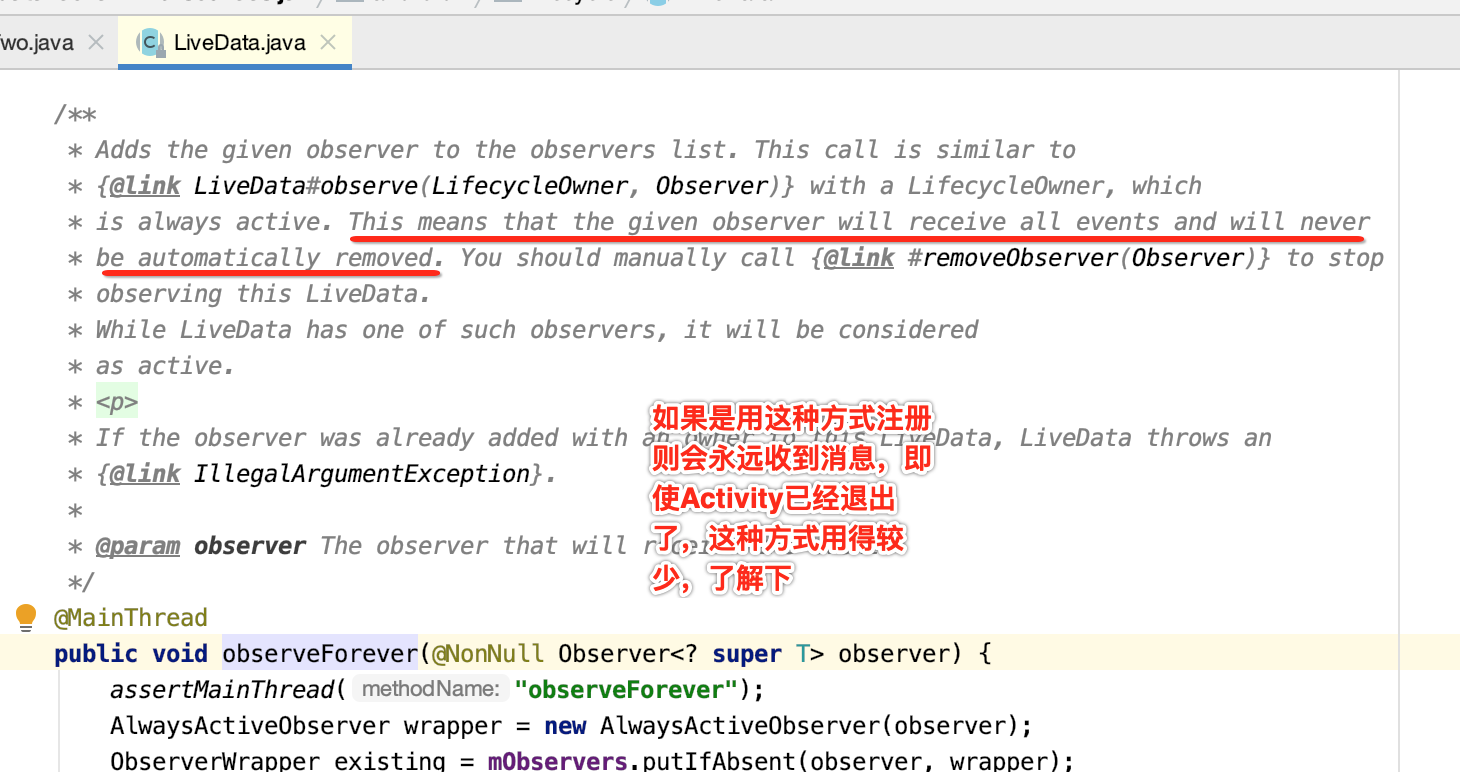
如注释上所说,还有另外一个订阅方式:
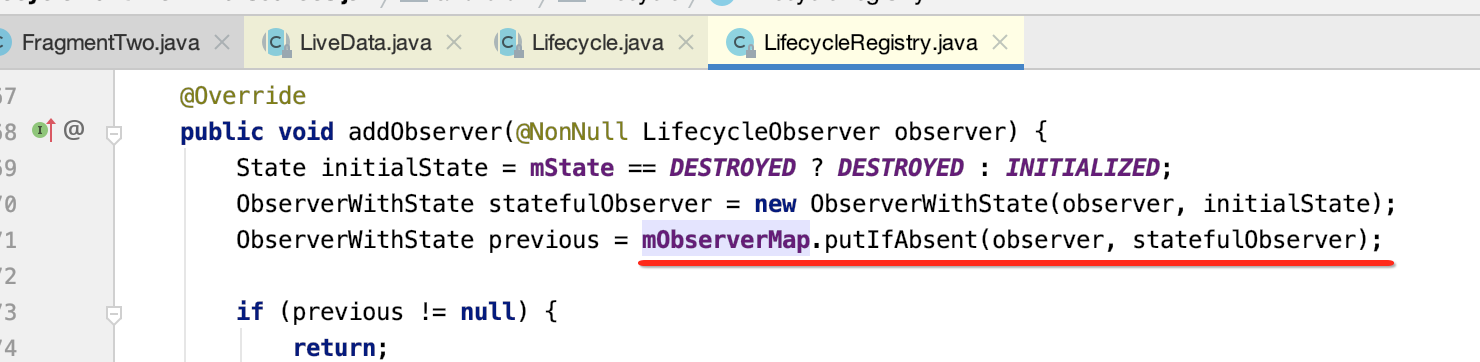
咱们来看一下observe()的订阅细节:

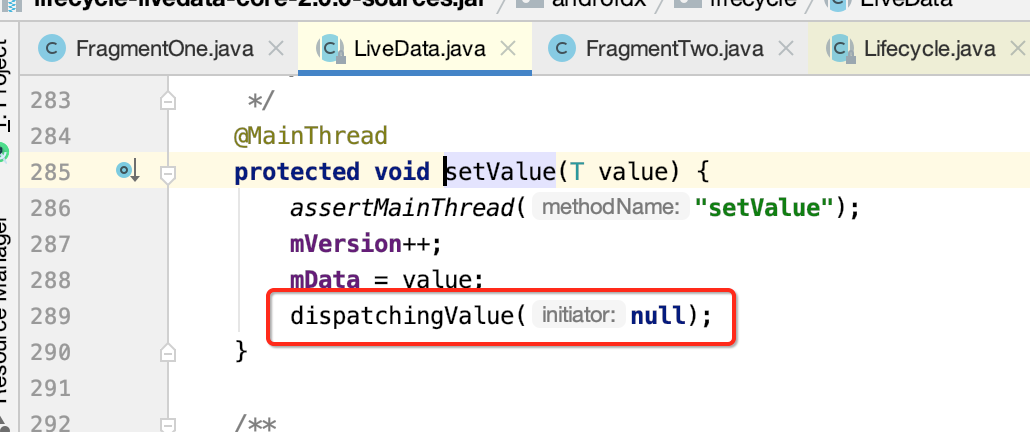
好,接下来看一下修改LiveData数据的逻辑:
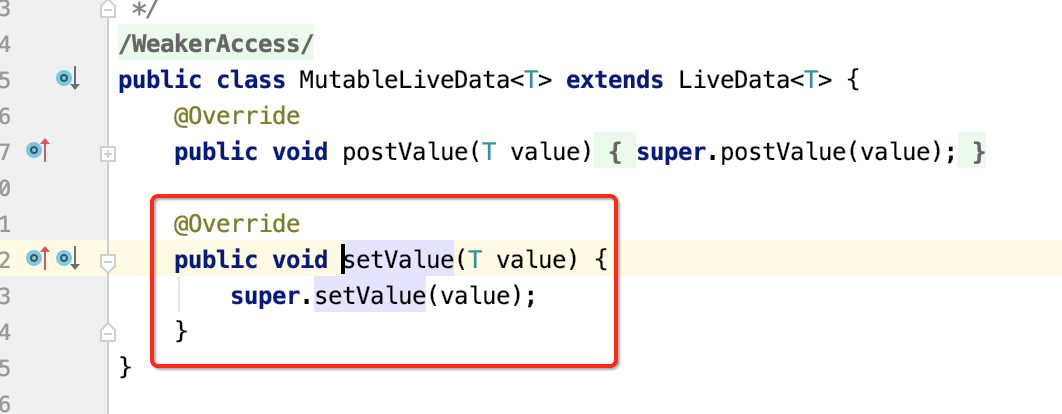
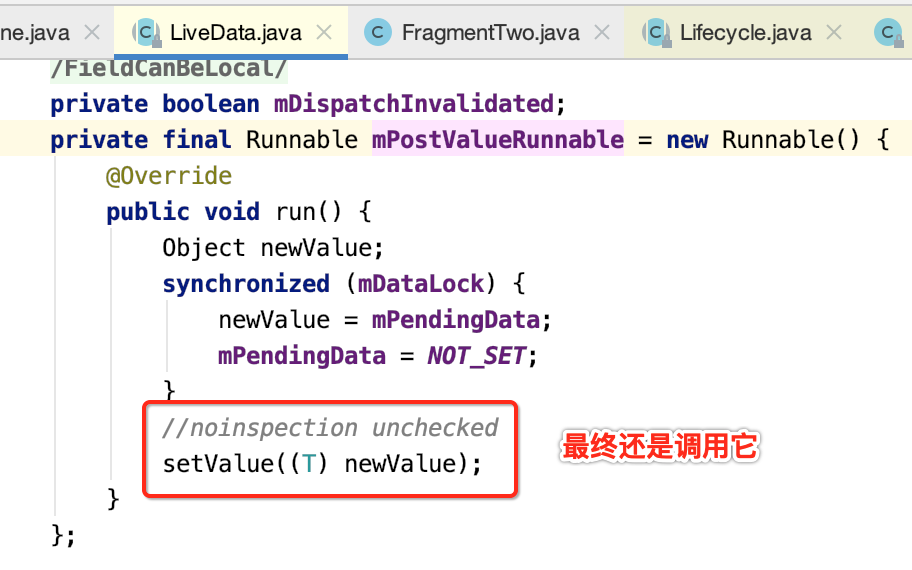
另外对于发送数据还有一种方式:

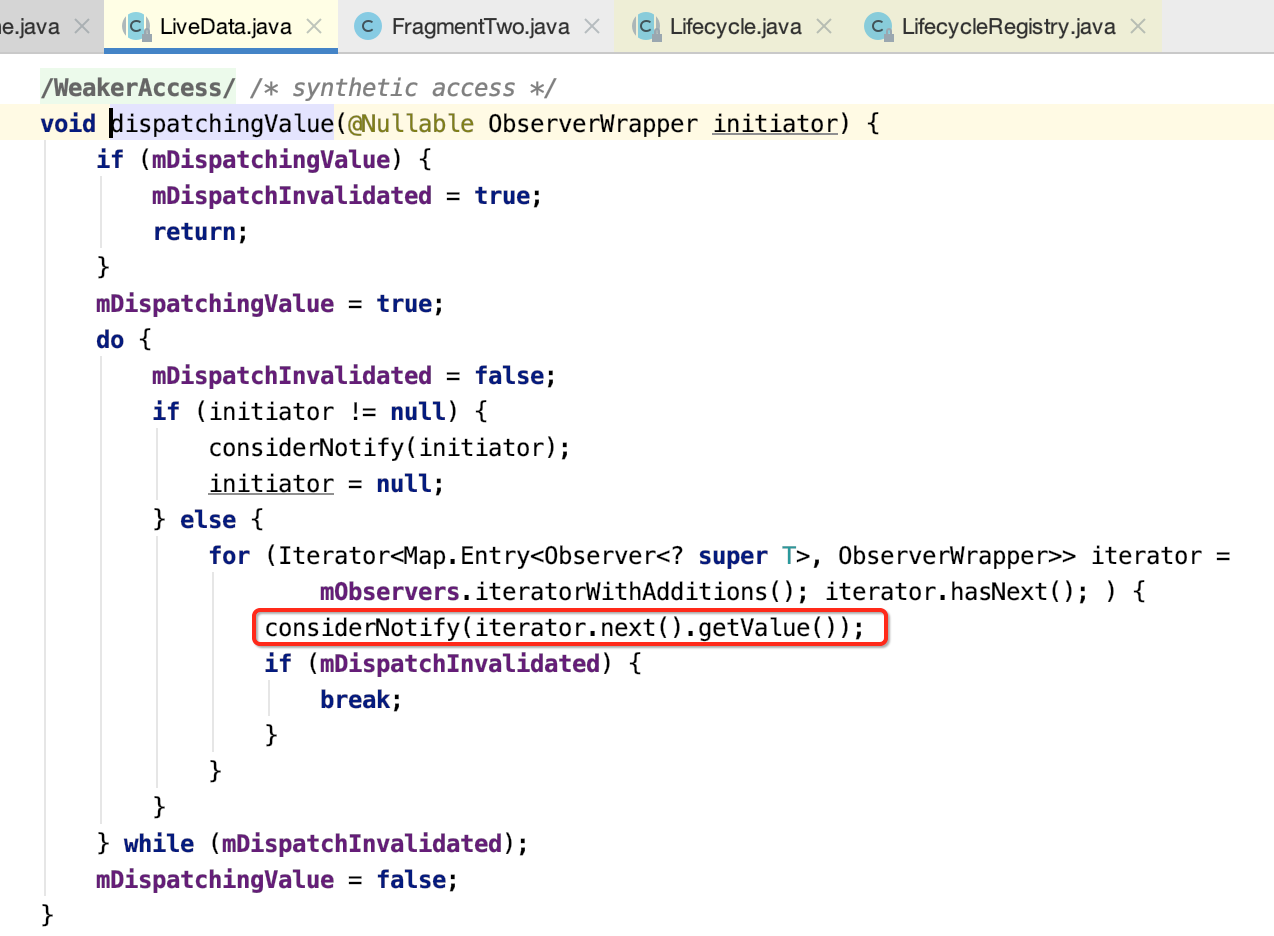
好,接下来集中看一下它里面的实现细节,怎么就通知到了观察者了:
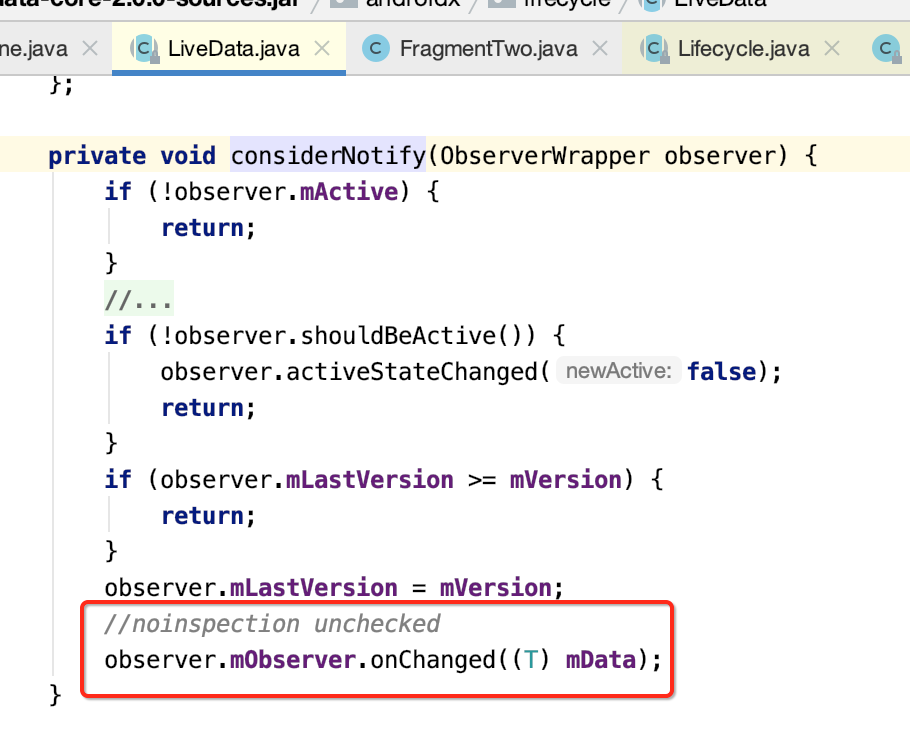
这里关于这块消息的监听就分析到这了,比较好理解。
Room:
官方了解:
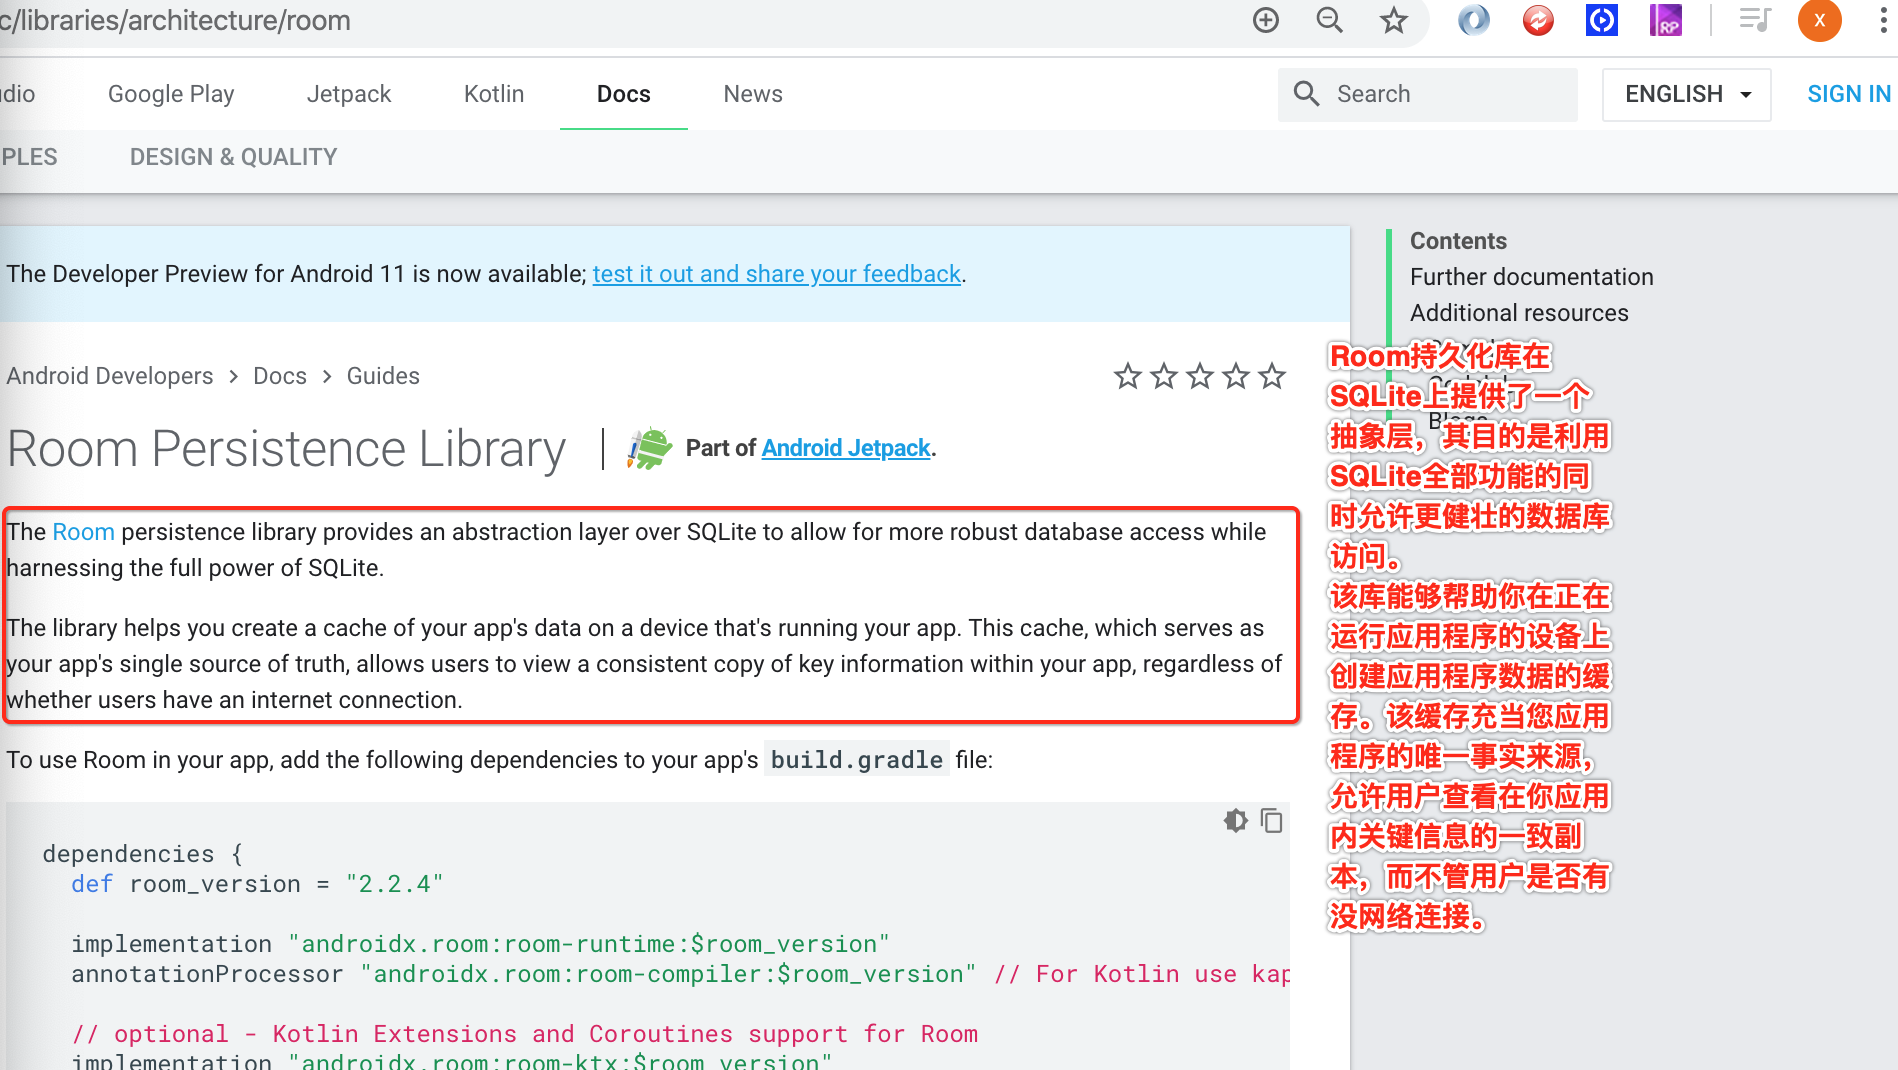
哦,是基于SQLite的,还是很有必要学一学的。
具体使用:
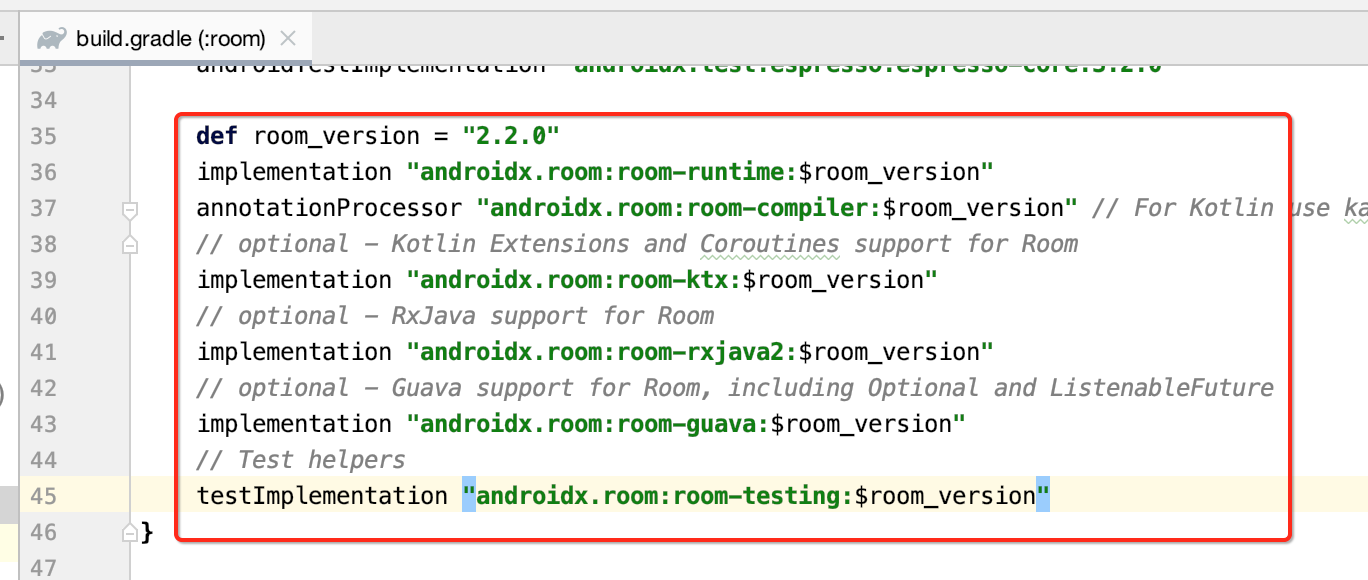
先添加依赖包:
基本使用:
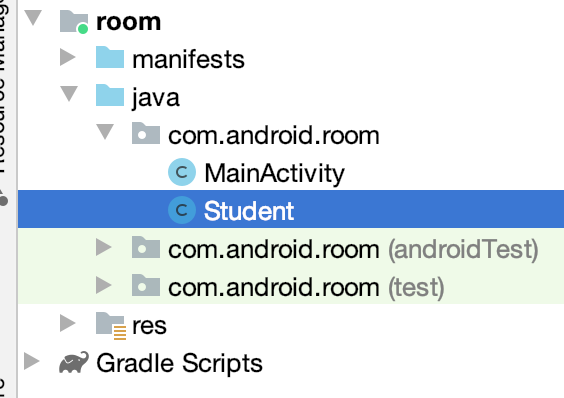
然后先建立个实体类:
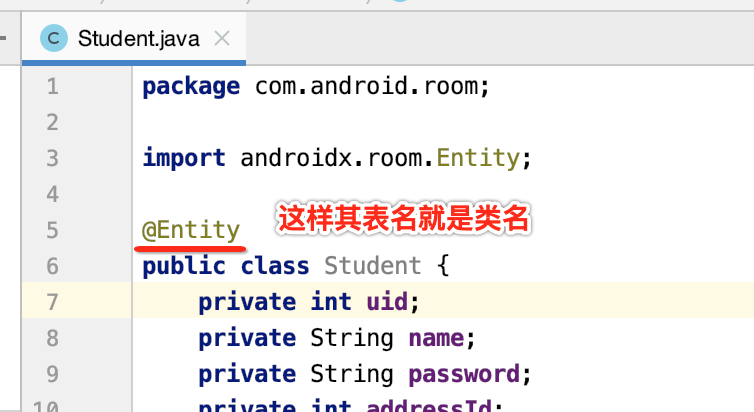
package com.android.room;

public class Student {
    private int uid;
    private String name;
    private String password;
    private int addressId;

    public Student(String name, String password, int addressId) {
        this.name = name;
        this.password = password;
        this.addressId = addressId;
    }

    public int getUid() {
        return uid;
    }

    public void setUid(int uid) {
        this.uid = uid;
    }

    public String getName() {
        return name;
    }

    public void setName(String name) {
        this.name = name;
    }

    public String getPassword() {
        return password;
    }

    public void setPassword(String password) {
        this.password = password;
    }

    public int getAddressId() {
        return addressId;
    }

    public void setAddressId(int addressId) {
        this.addressId = addressId;
    }

    @Override
    public String toString() {
        return "Student{" +
                "uid=" + uid +
                ", name='" + name + '\'' +
                ", password='" + password + '\'' +
                ", addressId=" + addressId +
                '}';
    }
}
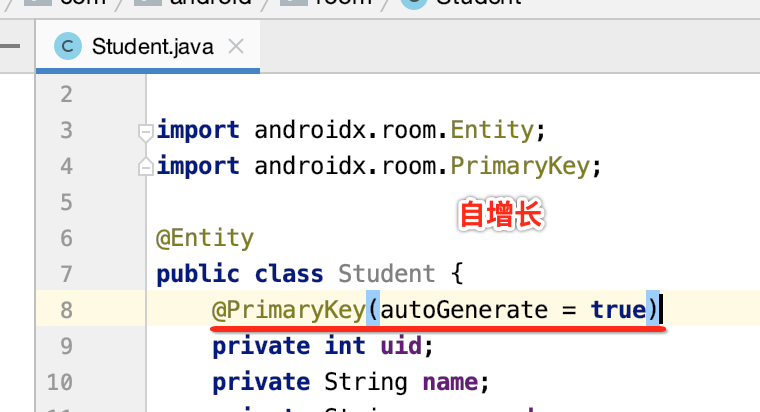
光一个实全类怎么能跟表关联呢?此时注解就上来了,标注一个表则需要在类名上加上这个注解:
然后对于表肯定要有主键:
然后普通字段则:
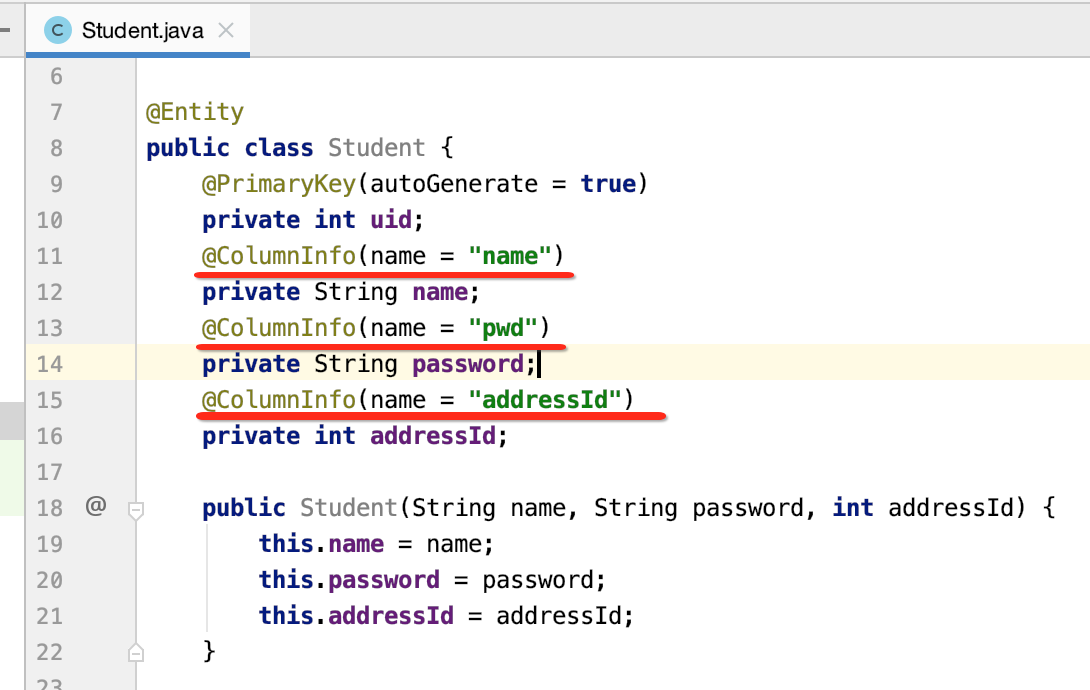
其中要注意的是一定要给字段增加setter和getter方法才行,实体已经定义好了,接下来则定义DAO:
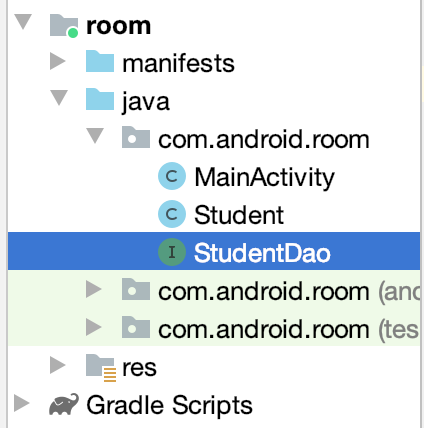
package com.android.room;

import androidx.room.Dao;
import androidx.room.Delete;
import androidx.room.Insert;
import androidx.room.Query;
import androidx.room.Update;

import java.util.List;

/**
 * 这就是数据访问对象
 * 用于操作数据的API
 */
@Dao
public interface StudentDao {

    @Insert
    void insert(Student... students);

    @Delete
    void delete(Student student);

    @Update
    void update(Student student);

    @Query("select * from Student")
    List<Student> getAll();

}
是不是这Dao的实现非常之精简,要平常我们还要写一大堆SQL语句才行,可以此框架的便捷之处。
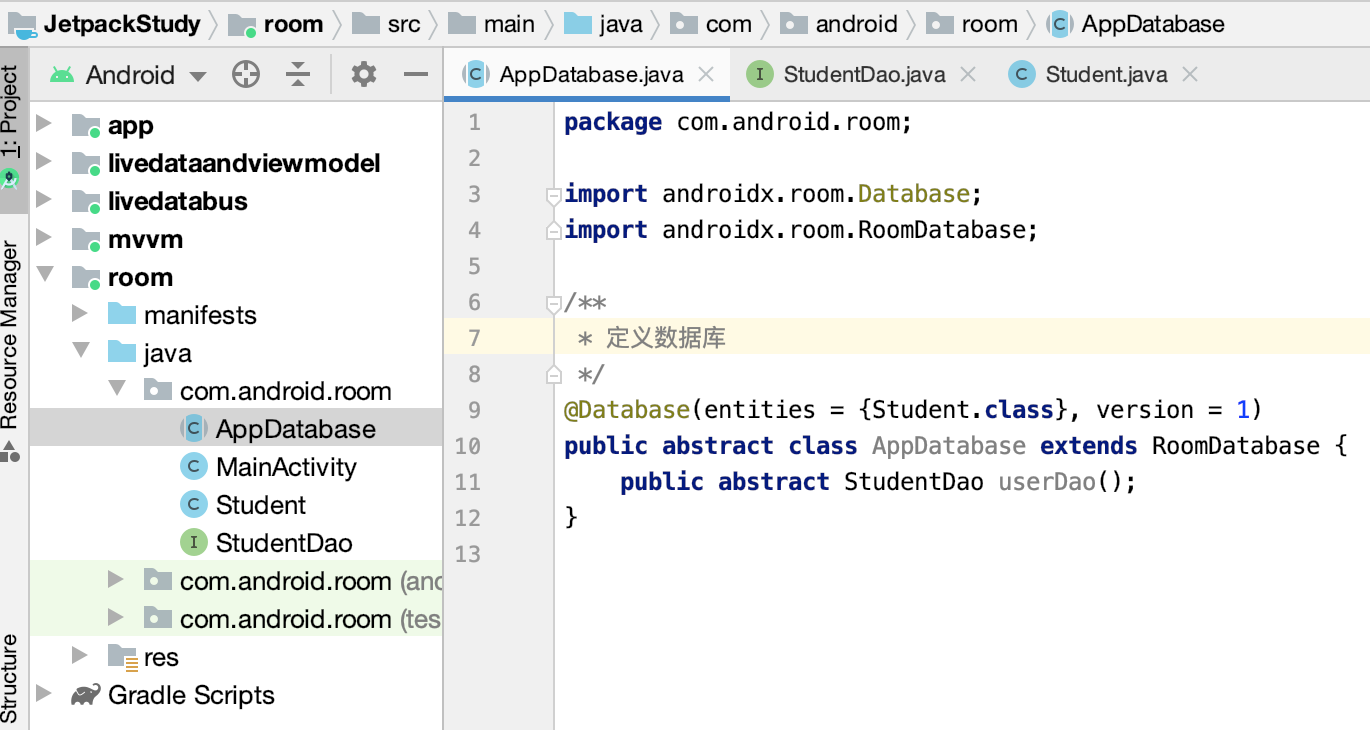
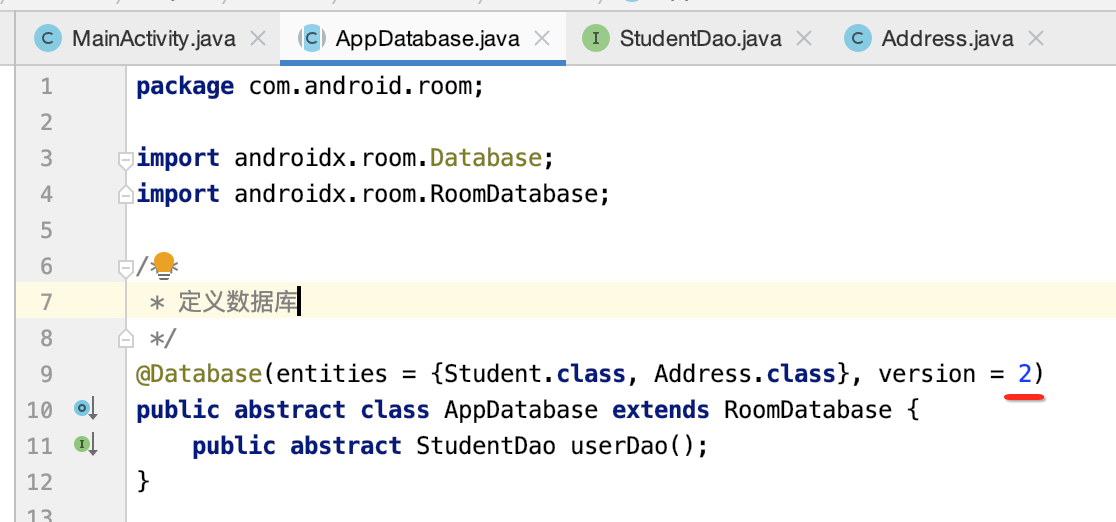
接下来则需要定义数据库了:
好,接下来则可以来调用了,如下:
package com.android.room;

import android.os.Bundle;
import android.util.Log;

import androidx.appcompat.app.AppCompatActivity;
import androidx.room.Room;

import java.util.List;

public class MainActivity extends AppCompatActivity {

    @Override
    protected void onCreate(Bundle savedInstanceState) {
        super.onCreate(savedInstanceState);
        setContentView(R.layout.activity_main);
        DbTest t = new DbTest();
        t.start();
    }

    public class DbTest extends Thread {
        @Override
        public void run() {
            super.run();
            //在这里进行数据库的操作
            AppDatabase appDatabase = Room.databaseBuilder(getApplicationContext()
                    , AppDatabase.class
                    , "MyDB")
                    .build();
            StudentDao dao = appDatabase.userDao();
            dao.insert(new Student("test", "111", 1));
            dao.insert(new Student("test2", "222", 2));
            dao.insert(new Student("test3", "333", 1));
            dao.insert(new Student("test4", "444", 2));

            List<Student> list = dao.getAll();
            Log.e("cexo", list.toString());

        }
    }
}
输出:
2020-03-16 21:19:03.108 22029-22066/com.android.room E/cexo: [Student{uid=1, name='test', password='111', addressId=1}, Student{uid=2, name='test2', password='222', addressId=2}, Student{uid=3, name='test3', password='333', addressId=1}, Student{uid=4, name='test4', password='444', addressId=2}, Student{uid=5, name='test', password='111', addressId=1}, Student{uid=6, name='test2', password='222', addressId=2}, Student{uid=7, name='test3', password='333', addressId=1}, Student{uid=8, name='test4', password='444', addressId=2}]
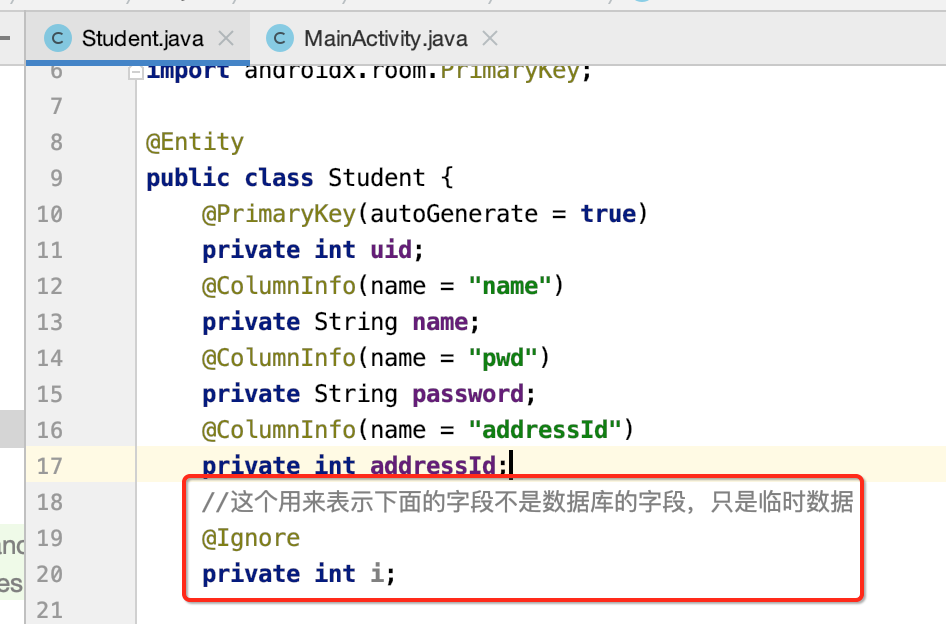
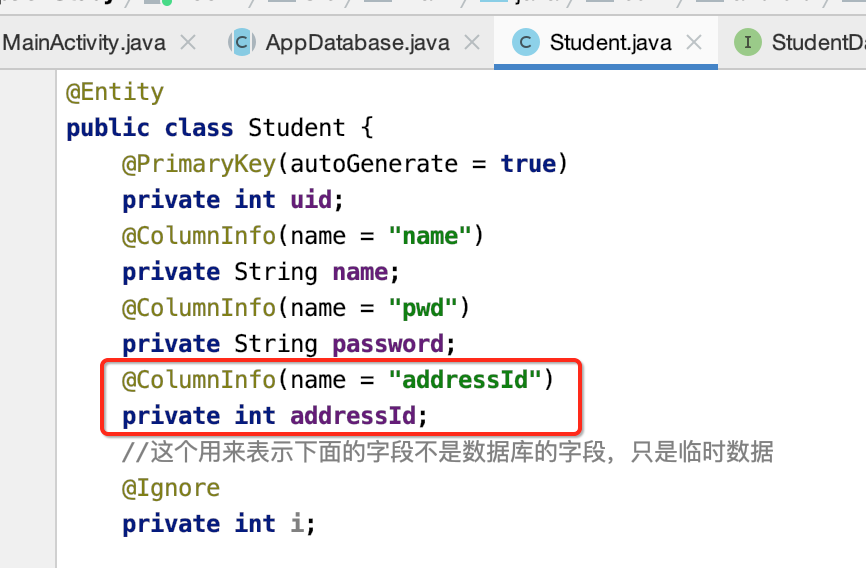
那如果实体中有些是业务字段,不想参与到数据库表的字段中,则可以用一个注解来标识,类似于Realm数据库框架一样:
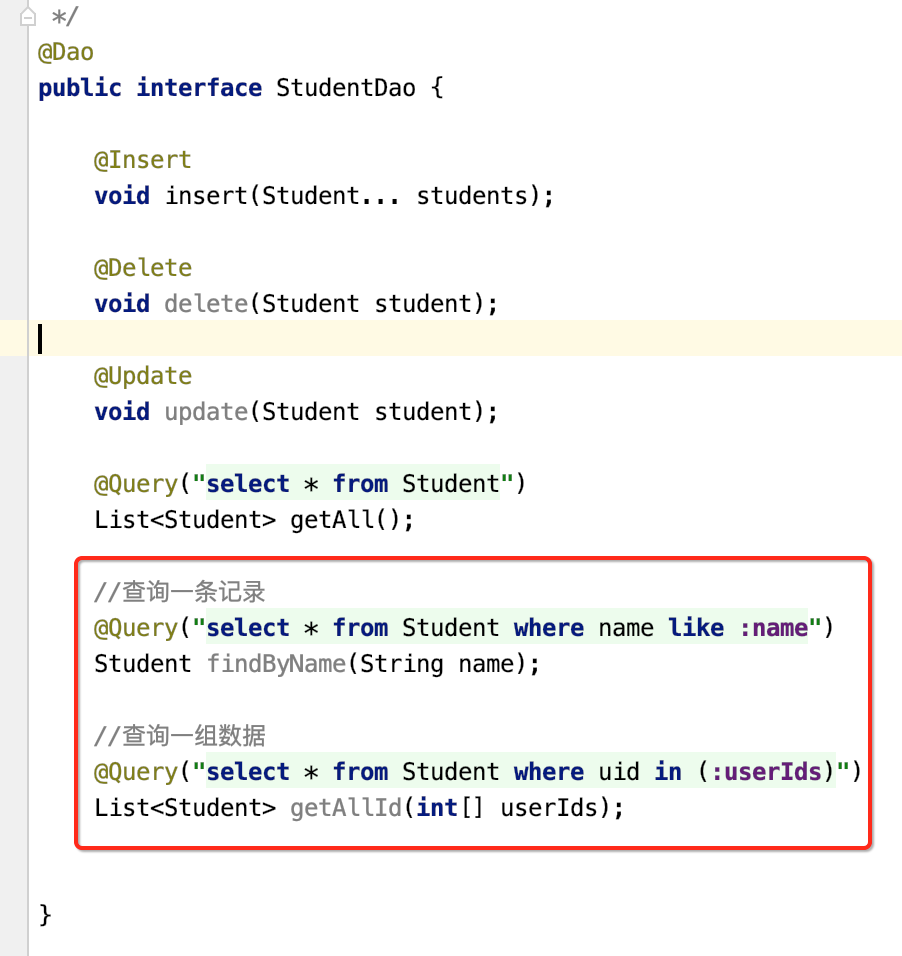
查询数据:
调用一下:

运行:
2020-03-16 21:36:10.085 23289-23550/com.android.room E/cexo: [Student{uid=1, name='test', password='111', addressId=1}, Student{uid=2, name='test2', password='222', addressId=2}, Student{uid=3, name='test3', password='333', addressId=1}, Student{uid=4, name='test4', password='444', addressId=2}, Student{uid=5, name='test', password='111', addressId=1}, Student{uid=6, name='test2', password='222', addressId=2}, Student{uid=7, name='test3', password='333', addressId=1}, Student{uid=8, name='test4', password='444', addressId=2}, Student{uid=9, name='test', password='111', addressId=1}, Student{uid=10, name='test2', password='222', addressId=2}, Student{uid=11, name='test3', password='333', addressId=1}, Student{uid=12, name='test4', password='444', addressId=2}]
2020-03-16 21:36:10.092 23289-23550/com.android.room E/cexo: Student{uid=1, name='test', password='111', addressId=1}
2020-03-16 21:36:10.096 23289-23550/com.android.room E/cexo: [Student{uid=2, name='test2', password='222', addressId=2}, Student{uid=3, name='test3', password='333', addressId=1}, Student{uid=4, name='test4', password='444', addressId=2}]
部分字段查询:
实际中有可能只会查询表中的某几个字段来形成一个新的对象,啥意思下面来演示一下,先建一个最终要生成的类,它的字段是只有Student表中的一部分,如下:
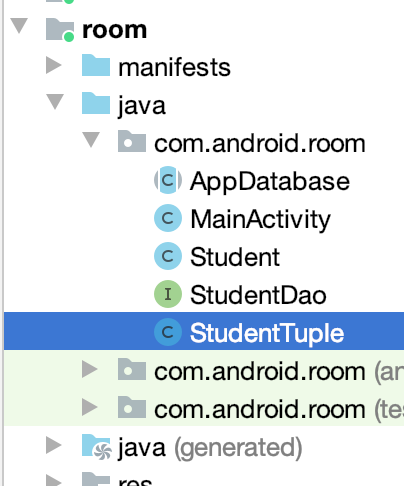
package com.android.room;

import androidx.room.ColumnInfo;

public class StudentTuple {
    @ColumnInfo(name = "name")
    public String name;
    @ColumnInfo(name = "pwd")
    public String password;

    public StudentTuple(String name, String password) {
        this.name = name;
        this.password = password;
    }

    public String getName() {
        return name;
    }

    public void setName(String name) {
        this.name = name;
    }

    public String getPassword() {
        return password;
    }

    public void setPassword(String password) {
        this.password = password;
    }

    @Override
    public String toString() {
        return "StudentTuple{" +
                "name='" + name + '\'' +
                ", password='" + password + '\'' +
                '}';
    }
}
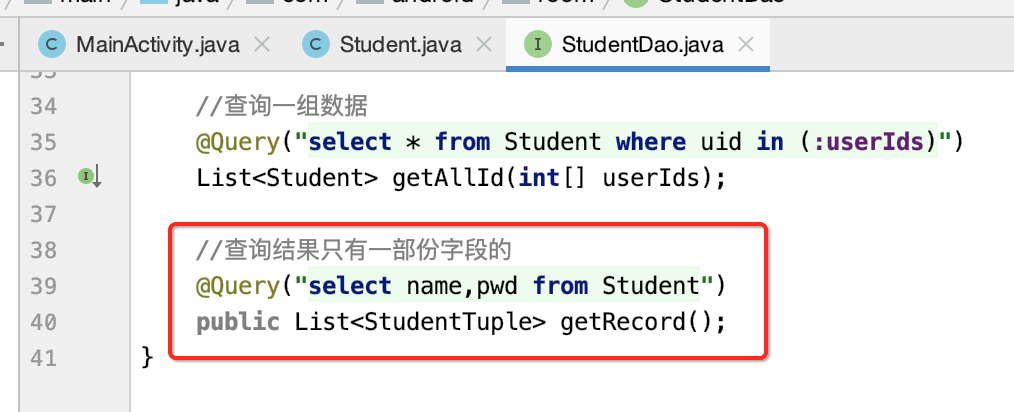
可以看到它只有两个字段了,接下来咱们来查询一下:
调用一下:

运行:
2020-03-16 21:43:05.350 24229-24260/? E/cexo: [Student{uid=1, name='test', password='111', addressId=1}, Student{uid=2, name='test2', password='222', addressId=2}, Student{uid=3, name='test3', password='333', addressId=1}, Student{uid=4, name='test4', password='444', addressId=2}, Student{uid=5, name='test', password='111', addressId=1}, Student{uid=6, name='test2', password='222', addressId=2}, Student{uid=7, name='test3', password='333', addressId=1}, Student{uid=8, name='test4', password='444', addressId=2}, Student{uid=9, name='test', password='111', addressId=1}, Student{uid=10, name='test2', password='222', addressId=2}, Student{uid=11, name='test3', password='333', addressId=1}, Student{uid=12, name='test4', password='444', addressId=2}, Student{uid=13, name='test', password='111', addressId=1}, Student{uid=14, name='test2', password='222', addressId=2}, Student{uid=15, name='test3', password='333', addressId=1}, Student{uid=16, name='test4', password='444', addressId=2}, Student{uid=17, name='test', password='111', addressId=1}, Student{uid=18, name='test2', password='222', addressId=2}, Student{uid=19, name='test3', password='333', addressId=1}, Student{uid=20, name='test4', password='444', addressId=2}]
2020-03-16 21:43:05.356 24229-24260/? E/cexo: Student{uid=1, name='test', password='111', addressId=1}
2020-03-16 21:43:05.359 24229-24260/? E/cexo: [Student{uid=2, name='test2', password='222', addressId=2}, Student{uid=3, name='test3', password='333', addressId=1}, Student{uid=4, name='test4', password='444', addressId=2}]
2020-03-16 21:43:05.363 24229-24260/? E/cexo: [StudentTuple{name='test', password='111'}, StudentTuple{name='test2', password='222'}, StudentTuple{name='test3', password='333'}, StudentTuple{name='test4', password='444'}, StudentTuple{name='test', password='111'}, StudentTuple{name='test2', password='222'}, StudentTuple{name='test3', password='333'}, StudentTuple{name='test4', password='444'}, StudentTuple{name='test', password='111'}, StudentTuple{name='test2', password='222'}, StudentTuple{name='test3', password='333'}, StudentTuple{name='test4', password='444'}, StudentTuple{name='test', password='111'}, StudentTuple{name='test2', password='222'}, StudentTuple{name='test3', password='333'}, StudentTuple{name='test4', password='444'}, StudentTuple{name='test', password='111'}, StudentTuple{name='test2', password='222'}, StudentTuple{name='test3', password='333'}, StudentTuple{name='test4', password='444'}]
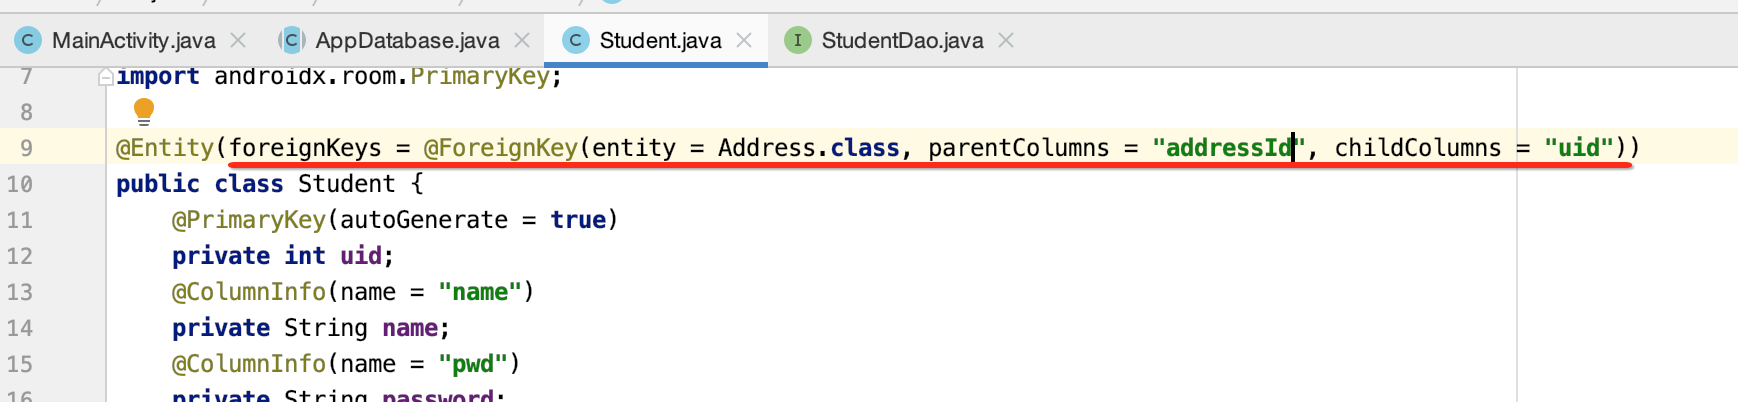
定义外键结束:
这里假设给这个字段建立外键约束:
然后新建对应的实体:
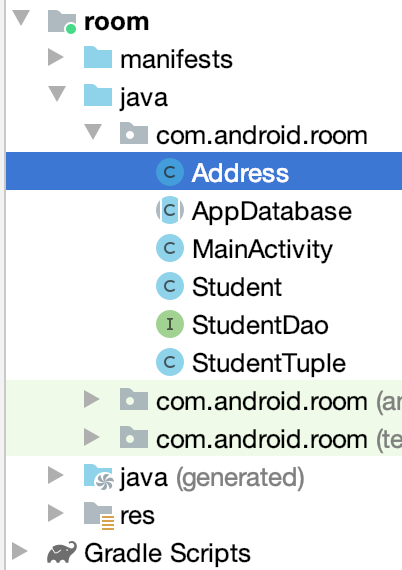
package com.android.room;

import androidx.room.ColumnInfo;
import androidx.room.Entity;
import androidx.room.PrimaryKey;

@Entity
public class Address {
    @PrimaryKey(autoGenerate = true)
    public int addressId;
    @ColumnInfo(name = "addressName")
    public String name;

    public Address(int addressId, String name) {
        this.addressId = addressId;
        this.name = name;
    }

    public int getAddressId() {
        return addressId;
    }

    @Override
    public String toString() {
        return "Address{" +
                "addressId=" + addressId +
                ", name='" + name + '\'' +
                '}';
    }

    public void setAddressId(int addressId) {
        this.addressId = addressId;
    }

    public String getName() {
        return name;
    }

    public void setName(String name) {
        this.name = name;
    }
}
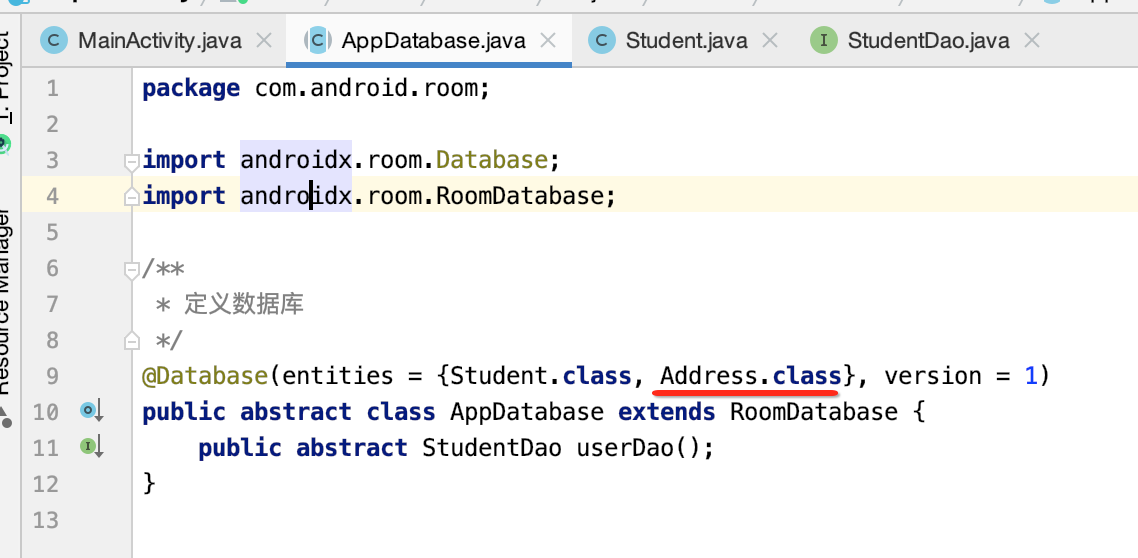
此时在数据库中就需要增加一张表的定义了,如下:
此时运行报错了。。
2020-03-16 21:51:14.298 24936-24970/? E/AndroidRuntime: FATAL EXCEPTION: Thread-2
    Process: com.android.room, PID: 24936
    java.lang.IllegalStateException: Room cannot verify the data integrity. Looks like you've changed schema but forgot to update the version number. You can simply fix this by increasing the version number.
        at androidx.room.RoomOpenHelper.checkIdentity(RoomOpenHelper.java:154)
        at androidx.room.RoomOpenHelper.onOpen(RoomOpenHelper.java:135)
        at androidx.sqlite.db.framework.FrameworkSQLiteOpenHelper$OpenHelper.onOpen(FrameworkSQLiteOpenHelper.java:142)
        at android.database.sqlite.SQLiteOpenHelper.getDatabaseLocked(SQLiteOpenHelper.java:409)
        at android.database.sqlite.SQLiteOpenHelper.getWritableDatabase(SQLiteOpenHelper.java:298)
        at androidx.sqlite.db.framework.FrameworkSQLiteOpenHelper$OpenHelper.getWritableSupportDatabase(FrameworkSQLiteOpenHelper.java:92)
        at androidx.sqlite.db.framework.FrameworkSQLiteOpenHelper.getWritableDatabase(FrameworkSQLiteOpenHelper.java:53)
        at androidx.room.RoomDatabase.inTransaction(RoomDatabase.java:476)
        at androidx.room.RoomDatabase.assertNotSuspendingTransaction(RoomDatabase.java:281)
        at com.android.room.StudentDao_Impl.insert(StudentDao_Impl.java:91)
        at com.android.room.MainActivity$DbTest.run(MainActivity.java:31)
意思是说增加表了的话则需要提升数据库的版本号,所以:
具体这块就不运行了。
引用类型:
有时候可能实体中会引用其它实体,那该怎么定义呢?

LiveData、RxJava、Cursor的查询类型:
对于查询其实还可以支持其它几种类型,比如:
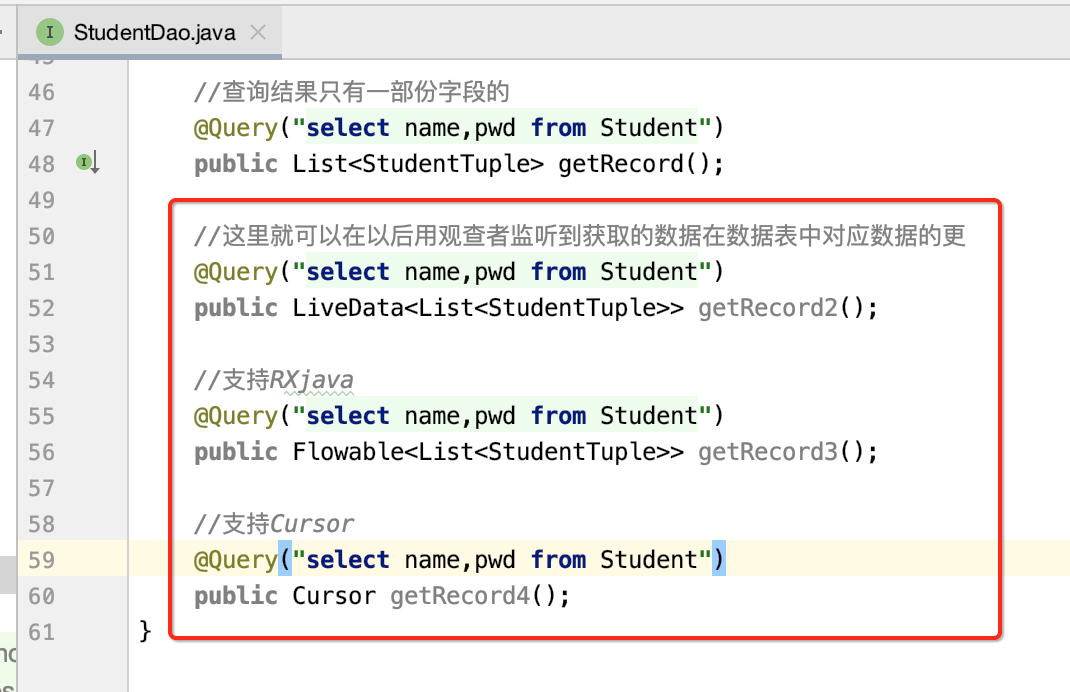
可见是非常之灵活的。
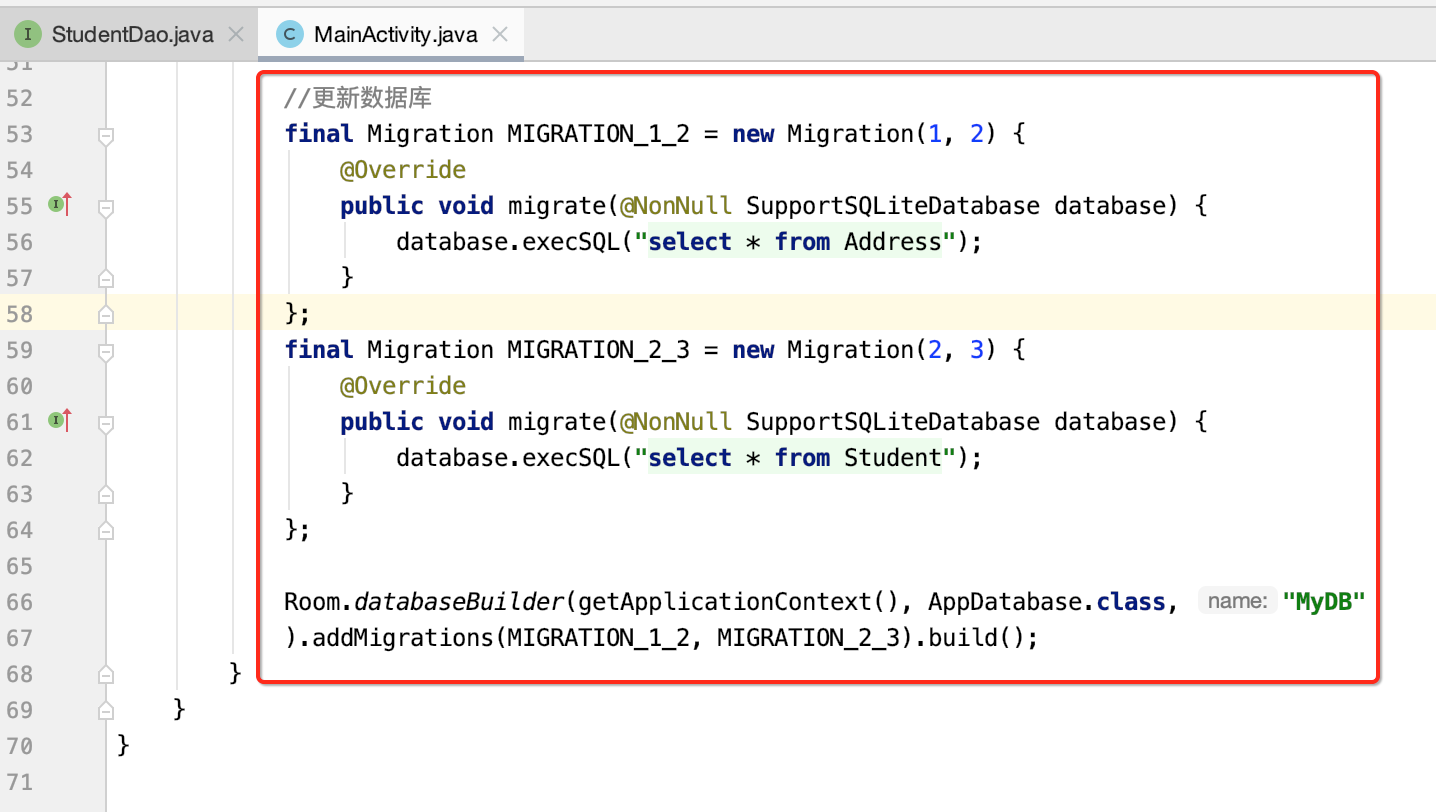
数据升级迁移处理:
这块就如我们之前Sqlite中的onUpgrade()方法,这里是这样处理的:
原理剖析:
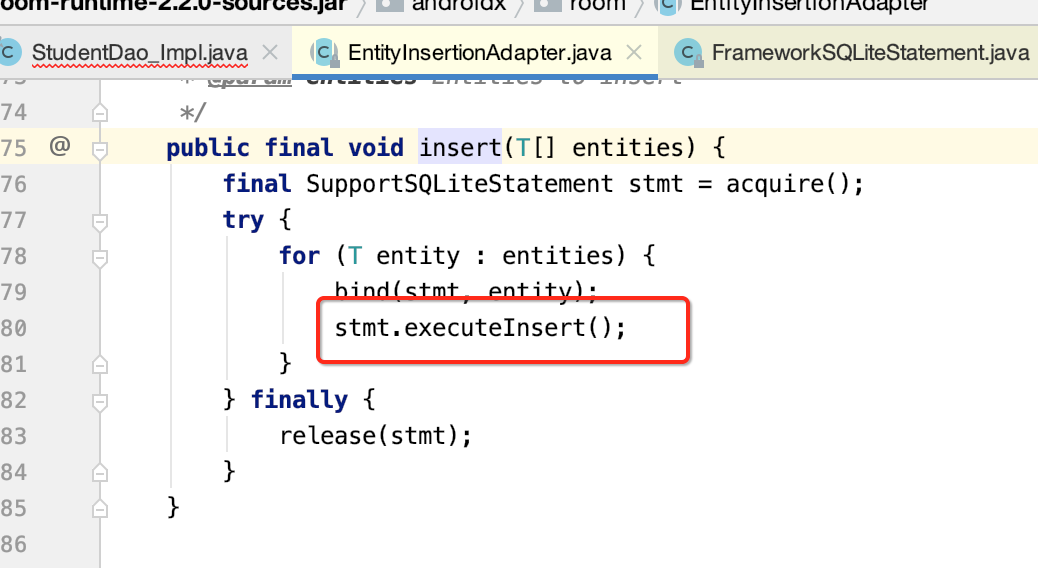
其实它的实现原理就是通过注解处理器来实现的,瞅一下:
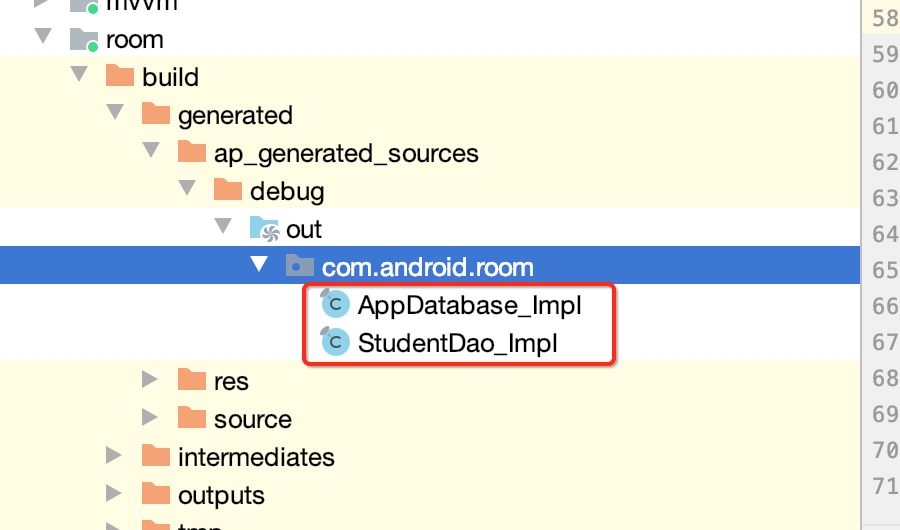
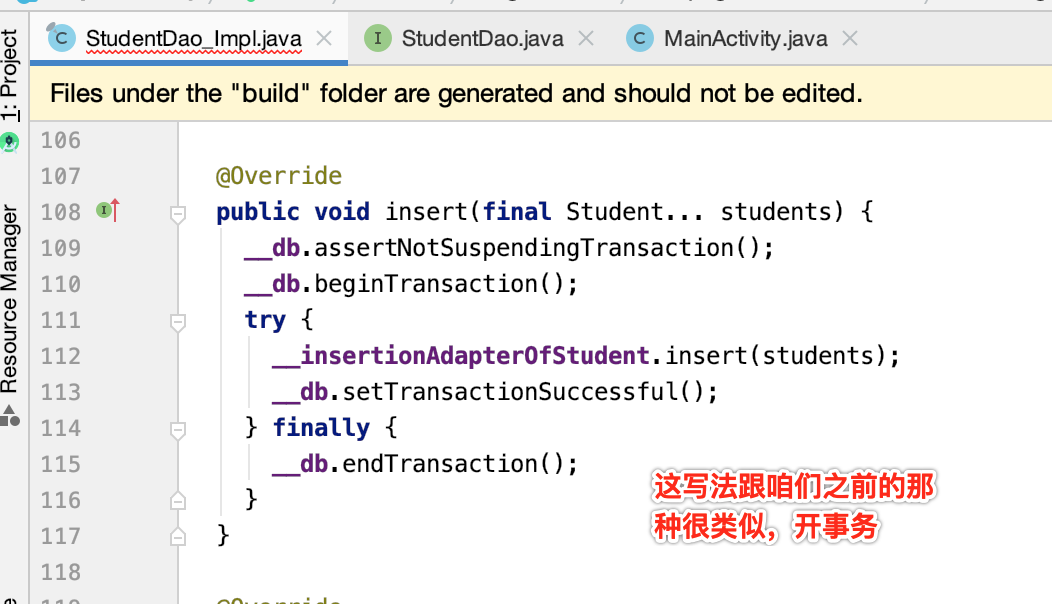
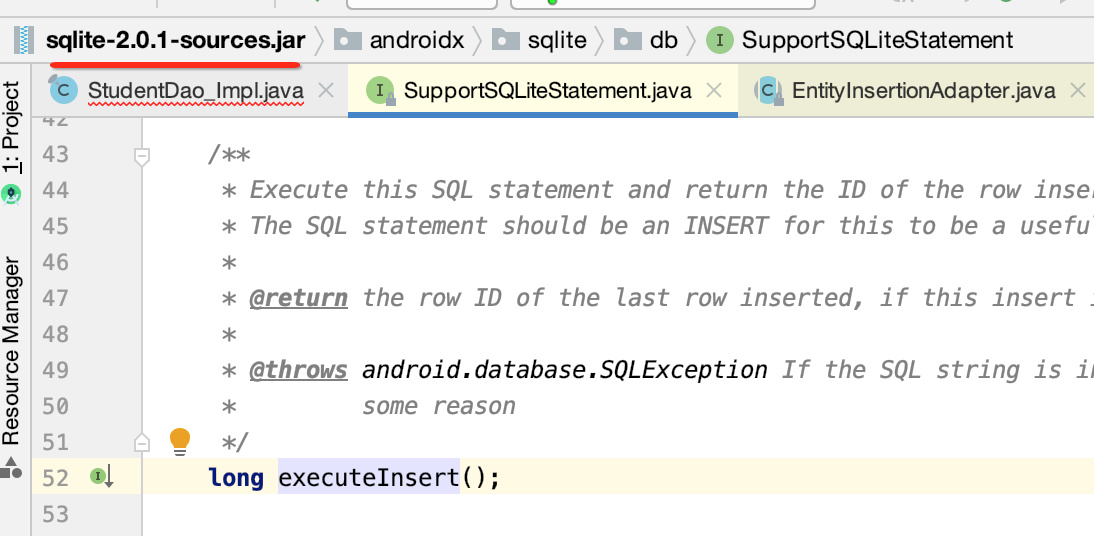
其中跟进去最终就是调用的Sqlite的API了:
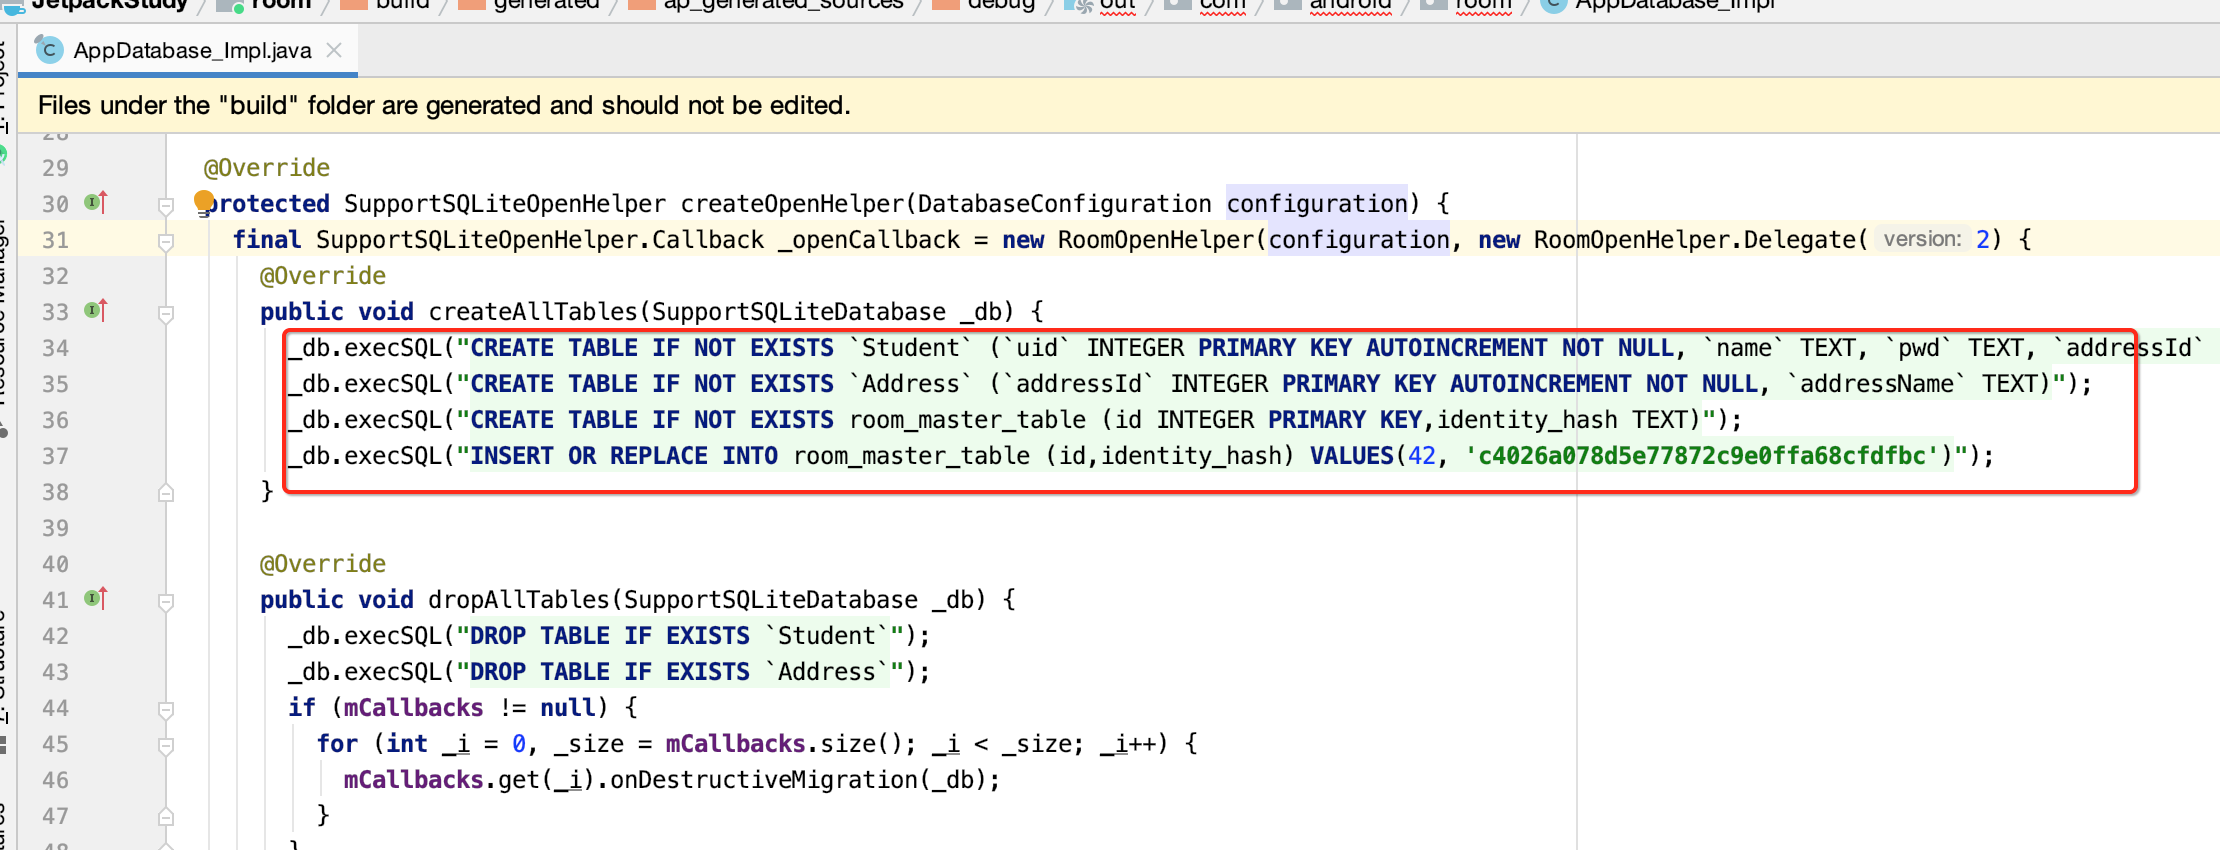
而另一个DB相关的生成类中则是跟创建数据表相关了,大致瞅一下:
当然具体的细节还是很多的,这里只掌握核心原理既可,关于它的使用还得在实际项目中进行熟练,这里算是对它进行一个入门。

