使用vscode搭建本地的websocket
首先在服务器方面,网上都有不同的对websocket支持的服务器:
- php - http://code.google.com/p/phpwebsocket/
- jetty - http://jetty.codehaus.org/jetty/(版本7开始支持websocket)
- netty - http://www.jboss.org/netty
- ruby - http://github.com/gimite/web-socket-ruby
- Kaazing - https://web.archive.org/web/20100923224709/http://www.kaazing.org/confluence/display/KAAZING/Home
- Tomcat - http://tomcat.apache.org/(7.0.27支持websocket,建议用tomcat8,7.0.27中的接口已经过时)
- WebLogic - http://www.oracle.com/us/products/middleware/cloud-app-foundation/weblogic/overview/index.html(12.1.2開始支持)
- node.js - https://github.com/Worlize/WebSocket-Node
- node.js - http://socket.io
- nginx - http://nginx.com/
- mojolicious - http://mojolicio.us/
- python - https://github.com/abourget/gevent-socketio
- Django - https://github.com/stephenmcd/django-socketio
- erlang - https://github.com/ninenines/cowboy.git
以上内容摘自:菜鸟教程,大家可以根据自己的喜好决定安装配置哪个服务器环境。
这里我安装的是nodejs环境,安装教程:菜鸟教程
下面开始进入正题。打开vscode,新建一个文件夹,再在此文件夹下新建一个server.js文件来监听端口:
1 var WebSocketServer = require('ws').Server,
2 wss = new WebSocketServer({ port: 8181 });
3 wss.on('connection', function (ws) {
4     console.log('client connected');
5     ws.on('message', function (message) {
6         console.log(message);
7     });
8 });
其中的require('ws')要求配置好websocket环境,我们将github上的websocket源码下载下来解压并安装:
地址:https://github.com/websockets/ws
npm install websocket
port处的端口号需要先扫描端口才能填写,否则可能监听失败。在命令提示符下输入
netstat -ano
即可获取所有已占用端口的信息。
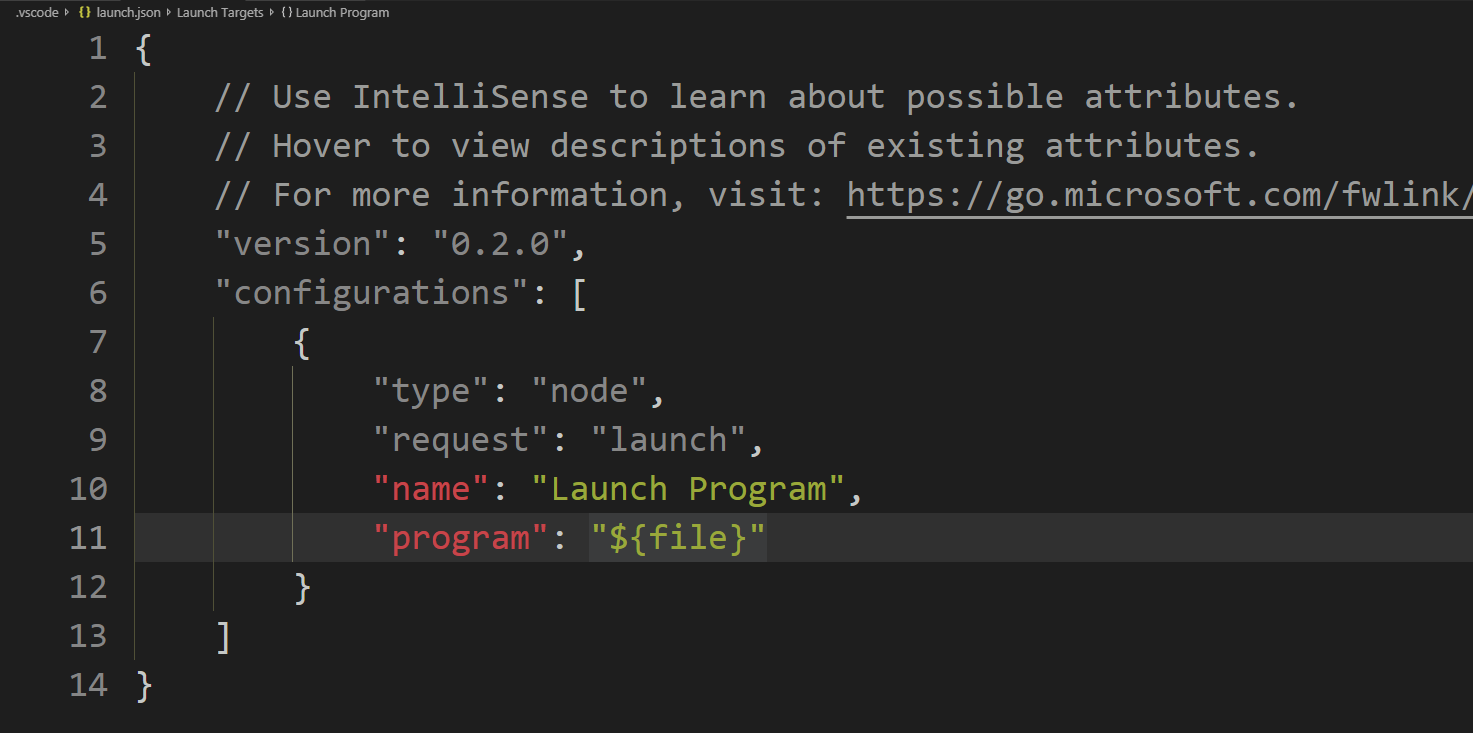
然后点一下调试,在弹出的调试环境下拉菜单里选nodejs,这时vscode会自动生成一个json文件:

此处需要在program后的引号中写下js文件的地址。
按下F5调试,若无问题可继续下一步:

新建一个client.html文件:
1 <html xmlns="http://www.w3.org/1999/xhtml"> 2 <head> 3 <meta http-equiv="Content-Type" content="text/html; charset=utf-8" /> 4 <title>WebSocket Echo Demo</title> 5 <meta name="viewport" content="width=device-width, initial-scale=1"/> 6 <link href="../bootstrap-3.3.5/css/bootstrap.min.css" rel="stylesheet" /> 7 <script src="../js/jquery-1.12.3.min.js"></script> 8 <script src="../bootstrap-3.3.5/js/bootstrap.min.js"></script> 9 <script> 10 var ws = new WebSocket("ws://localhost:8181"); 11 ws.onopen = function (e) { 12 console.log('Connection to server opened'); 13 } 14 function sendMessage() { 15 ws.send($('#message').val()); 16 } 17 var WebSocketServer = require('ws').Server, 18 wss = new WebSocketServer({ port: 8181 }); 19 wss.on('connection', function (ws) { 20 console.log('client connected'); 21 ws.on('message', function (message) { 22 console.log(message); 23 }); 24 }); 25 </script> 26 </head> 27 28 <body > 29 <div class="vertical-center"> 30 <div class="container"> 31 <p> </p> 32 <form role="form" id="chat_form" onsubmit="sendMessage(); return false;"> 33 <div class="form-group"> 34 <input class="form-control" type="text" name="message" id="message" 35 placeholder="Type text to echo in here" value="" /> 36 </div> 37 <button type="button" id="send" class="btn btn-primary" 38 onclick="sendMessage();"> 39 Send! 40 </button> 41 </form> 42 </div> 43 </div> 44 <div id="info"></div> 45 </body> 46 </html>
打开命令行,切换到你的项目的目录,输入以下命令启动服务器:
node server.js
打开client.html,在文本框中输入任意字符串发送,服务器将收到的字符串输出在命令行窗口中:

感兴趣的朋友可以下载源码调试:项目源码。
写这篇文章前我看过很多类似的文章,但针对新手的较少;代码借鉴了一些比较优秀的项目。


