CentOS7安装MinIO教程,C#使用MinIO看这一篇就够了(WPF)
MinIO的详细介绍可以参考官网(https://min.io/product/overview)。
简单来说它是一个实现了AWS S3标准的100%开源的,可商用的( Apache V2 license),高性能的分布式对象存储管理系统。
AWS S3是什么(https://zhuanlan.zhihu.com/p/112057573):
- 提供了统一的接口 REST/SOAP 来统一访问任何数据
- 对 S3 来说,存在里面的数据就是对象名(键),和数据(值)
- 不限量,单个文件最高可达 5TB
- 高速。每个 bucket 下每秒可达 3500 PUT/COPY/POST/DELETE 或 5500 GET/HEAD 请求
- 具备版本,权限控制能力
- 具备数据生命周期管理能力
这次主要介绍CentOS7如何安装MinIO,以及C#如何使用MinIO的.NET SDK来上传文件(显示上传进度)。
首先安装好CentOS7 64位操作系统,然后在/usr/local下新建一个minio目录,在minio目录下新建三个子文件夹,分别是:
bin 用来保存minio的主程序
data 用来保存用户上传的文件
etc 用来保存minio的配置文件
然后新建MinIO运行所需的系统组和用户,并给/usr/local/minio/分配组信息
groupadd -g 2020 minio
useradd -r -M -u 2020 -g 2020 -c "Minio User" -s /sbin/nologin  minio
chown -R minio:minio /usr/local/minio
建立了一个组ID是2020,名称是minio的系统组,然后添加了一个不能登录的名称是minio,所属组ID是2020并且个人ID也是2020的系统用户。
MinIO默认提供的http访问端口是9000,我们提前在防火墙里把9000端口打开
firewall-cmd --zone=public --add-port=9000/tcp --permanent
firewall-cmd --reload
同时我们需要给MinIO挂载要给存储空间比较大的磁盘用来存储文件
执行lvdisplay找到比较大的分区,挂载给/usr/local/minio目录
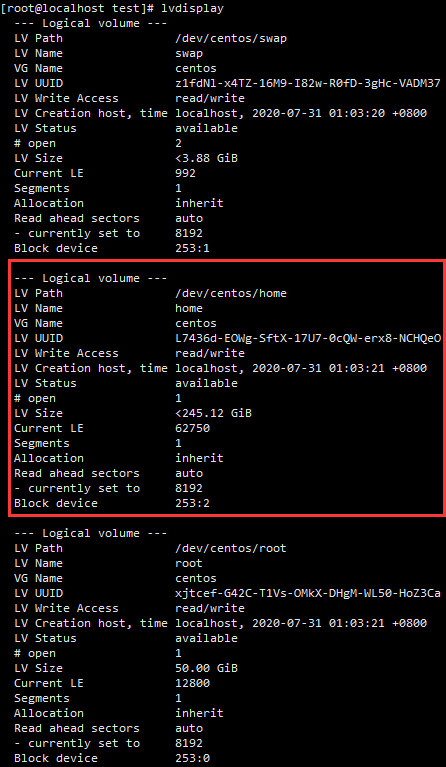
运行
mount /dev/centos/home /usr/local/minio
把这个200多G的逻辑卷挂载给minio的目录。
同时为了重启后自动挂载,我们需要执行以下代码
vim /etc/fstab
把centos-home这句换成以下内容,保存退出,就可以让系统重启后自动挂载空间到/usr/local/minio目录了
/dev/mapper/centos-home /usr/local/minio xfs defaults 0 0

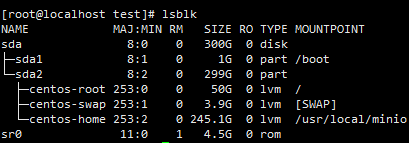
然后我们运行lsblk就可以看到磁盘空间正确挂载在minio目录下了
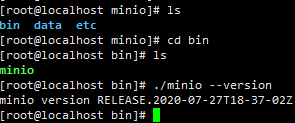
从官网(或者通过下载工具下载到本地后上传)下载(https://min.io/download#/linux)到CentOS的/usr/local/minio/bin目录下

其中第二句(chmod +x minio)等把minio文件移动到/usr/local/minio/bin后在执行
第三句先不要执行
下面我们建立MinIO的配置文件
vim /usr/local/minio/etc/minio.conf
写入以下内容(--address后面的IP 是CentOS的IP地址)
MINIO_VOLUMES="/usr/local/minio/data"
MINIO_OPTS="-C /usr/local/minio/etc --address 192.168.127.131:9000
建立MinIO的service文件,让它随系统启动而启动
vim /etc/systemd/system/minio.service
写入以下内容
[Unit]
Description=MinIO
Documentation=https://docs.min.io
Wants=network-online.target
After=network-online.target
AssertFileIsExecutable=/usr/local/minio/bin/minio

[Service]
# User and group
User=minio
Group=minio

EnvironmentFile=/usr/local/minio/etc/minio.conf
ExecStart=/usr/local/minio/bin/minio server $MINIO_OPTS $MINIO_VOLUMES

# Let systemd restart this service always
Restart=always

# Specifies the maximum file descriptor number that can be opened by this process
LimitNOFILE=65536

# Disable timeout logic and wait until process is stopped
TimeoutStopSec=infinity
SendSIGKILL=no

[Install]
WantedBy=multi-user.target
然后我们启动MinIO
systemctl enable minio.service
systemctl start minio.service
systemctl status minio.service

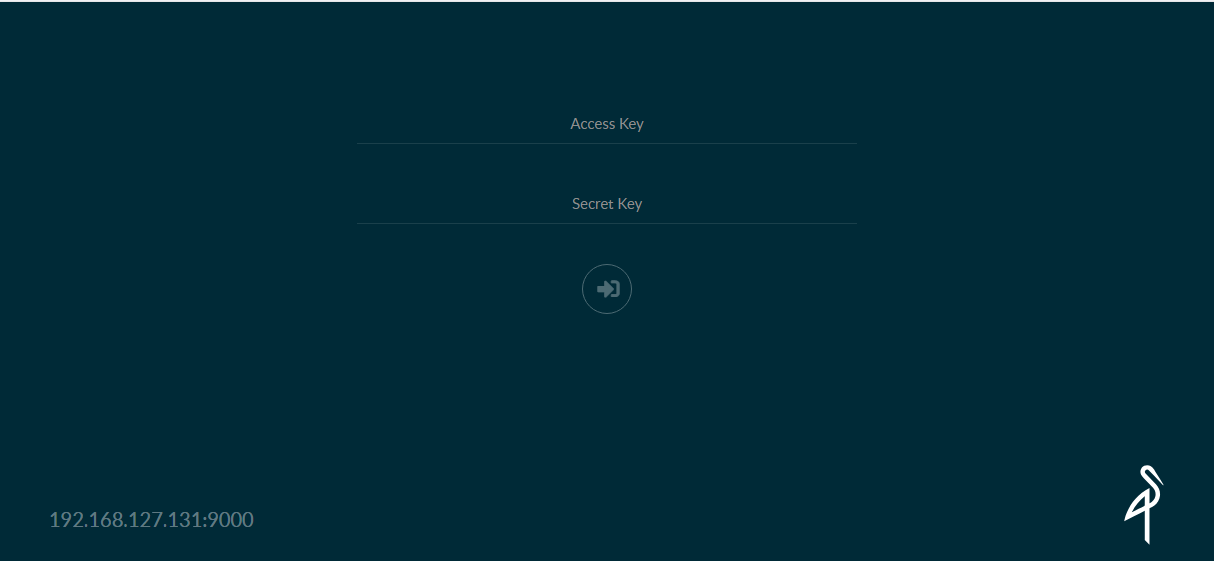
启动正常后,我们访问http://192.168.127.131:9000就应该可以看到web管理端的登录界面
我们可以通过下面的命令来获取到默认的登录名和密码(minioadmin)
cat /usr/local/minio/data/.minio.sys/config/config.json

如果要自定义登录名和密码,可以在/usr/local/minio/etc/minio.conf中增加两个配置内容
MINIO_ACCESS_KEY="登录名"
MINIO_SECRET_KEY="登录密码"
至此,MinIO的安装就介绍完毕,下面是本文重点,C#中使用WPF客户端如何获取文件上传时的进度。
首先新建一个项目MinIO,项目类型是WPF,项目的.NET版本是4.6
引用官方的Minio .NET SDK以及其它一些需要的类库

在项目的根目录添加一个nlog.config并设置为较新时复制,内容如下(主要用来做一些日志记录):
<?xml version="1.0" encoding="utf-8" ?>
<nlog xmlns="http://www.nlog-project.org/schemas/NLog.xsd"
      xmlns:xsi="http://www.w3.org/2001/XMLSchema-instance"
      xsi:schemaLocation="http://www.nlog-project.org/schemas/NLog.xsd NLog.xsd"
      autoReload="true"
      throwExceptions="false"
      internalLogLevel="Info">
    <targets>
        <default-target-parameters xsi:type="File" createDirs="true" keepFileOpen="true" autoFlush="false" openFileFlushTimeout="10" openFileCacheTimeout="30" archiveAboveSize="10240" archiveNumbering="Sequence" concurrentWrites="true" encoding="UTF-8"/>
        <target xsi:type="File" name="InfoFile" fileName="${basedir}/InfoLogs/log.txt" archiveFileName="${basedir}/InfoLogs/log.{#}.txt">
            <layout xsi:type="JsonLayout">
                <attribute name="counter" layout="${counter}" />
                <attribute name="time" layout="${longdate}" />
                <attribute name="level" layout="${level:upperCase=true}"/>
                <attribute name="message" layout="${message:format=message}" encode="false" />
            </layout>
        </target>
        <target xsi:type="File" name="ErrorFile" fileName="${basedir}/ErrorLogs/log.txt" archiveFileName="${basedir}/ErrorLogs/log.{#}.txt">
            <layout xsi:type="JsonLayout">
                <attribute name="time" layout="${longdate}" />
                <attribute name="level" layout="${level:upperCase=true}"/>
                <attribute name="message" layout="${message}" encode="false" />
                <attribute name="exception">
                    <layout xsi:type="JsonLayout">
                        <attribute name="callsite" layout="${callsite}" />
                        <attribute name="callsite-linenumber" layout="${callsite-linenumber} " />
                    </layout>
                </attribute>
            </layout>
        </target>
    </targets>
    <rules>
        <logger name="*" minlevel="Info" writeTo="InfoFile" />
        <logger name="*" minlevel="Error" writeTo="ErrorFile" />
    </rules>
</nlog>
在使用过程中发现MinIO的.NET SDK中并没有回显上传进度的地方(如果有请告知),经过一些摸索,在它暴露的日志记录的地方获取到当前上传文件块的编号,通过MVVM的Messenger传递给主程序,主程序接收后计算出当前进度并显示出来。
我们在App.xaml中添加一个启动事件App_OnStartup,在启动的时候初始化一下Nlog,并定义一下MinIO上传时遇到大文件分块的默认值(5MB)
namespace MinIO
{
    /// <summary>
    /// App.xaml 的交互逻辑
    /// </summary>
    public partial class App : Application
    {
        public static NLog.Logger NewNLog;
        public static long MinimumPartSize = 5 * 1024L * 1024L;//单次上传文件请求最大5MB

        private void App_OnStartup(object sender, StartupEventArgs e)
        {
            NewNLog = NLog.LogManager.GetLogger("MinIOLoger");
        }
    }
}
在MainWindow.xaml中我们添加一个按钮用来上传文件,一个TextBlock用来显示上传文件信息和进度
<Window x:Class="MinIO.MainWindow" xmlns="http://schemas.microsoft.com/winfx/2006/xaml/presentation" xmlns:x="http://schemas.microsoft.com/winfx/2006/xaml" xmlns:d="http://schemas.microsoft.com/expression/blend/2008" xmlns:mc="http://schemas.openxmlformats.org/markup-compatibility/2006" xmlns:local="clr-namespace:MinIO" mc:Ignorable="d" DataContext="{Binding FileUploadViewModel,Source={StaticResource Locator}}" Title="MainWindow" Height="450" Width="800" Loaded="MainWindow_OnLoaded"> <Grid> <Button Content="上传文件" HorizontalAlignment="Left" Margin="47,51,0,0" VerticalAlignment="Top" Width="75" Click="ButtonUpload_Click"/> <TextBlock HorizontalAlignment="Left" Margin="47,158,0,0" TextWrapping="Wrap" VerticalAlignment="Top"> <Run Text=" 文件名:"></Run> <Run Text="{Binding Path=FileName}"></Run> <Run Text=" "></Run> <Run Text="文件大小:"></Run> <Run Text="{Binding Path=FileSize}"></Run> <Run Text=" "></Run> <Run Text="上传进度:"></Run> <Run Text="{Binding Path=UploadProcess}"></Run> </TextBlock> </Grid> </Window>
同时我们定义一个ViewModel来实现文件上传信息变化时的通知(ViewModel目录中新建一个FileUploadViewModel.cs)
using System.ComponentModel;

namespace MinIO.ViewModel
{
    public class FileUploadViewModel : INotifyPropertyChanged
    {
        public event PropertyChangedEventHandler PropertyChanged;

        private string _filename { get; set; }
        /// <summary>
        /// 文件名
        /// </summary>
        public string FileName
        {
            get => _filename;
            set
            {
                _filename = value;
                PropertyChanged?.Invoke(this, new PropertyChangedEventArgs("FileName"));
            }
        }

        private long _fileSize { get; set; }
        /// <summary>
        /// 文件大小
        /// </summary>
        public long FileSize
        {
            get => _fileSize;
            set
            {
                _fileSize = value;
                PropertyChanged?.Invoke(this, new PropertyChangedEventArgs("FileSize"));
            }
        }

        private long _partNumber { get; set; }
        /// <summary>
        /// 当前上传块
        /// </summary>
        public long PartNumber
        {
            get => _partNumber;
            set
            {
                _partNumber = value;
                PropertyChanged?.Invoke(this, new PropertyChangedEventArgs("PartNumber"));
            }
        }

        private long _totalParts { get; set; }
        /// <summary>
        /// 文件全部块数
        /// </summary>
        public long TotalParts
        {
            get => _totalParts;
            set
            {
                _totalParts = value;
                PropertyChanged?.Invoke(this, new PropertyChangedEventArgs("TotalParts"));
            }
        }

        private string _uploadProcess { get; set; }
        /// <summary>
        /// 上传进度展示
        /// </summary>
        public string UploadProcess
        {
            get => _uploadProcess;
            set
            {
                _uploadProcess = value;
                PropertyChanged?.Invoke(this,new PropertyChangedEventArgs("UploadProcess"));
            }
        }
    }
}
同时为了能让MinIO根据不同的文件类型展示不同的图标,我们还需要建立一个ContentType对应关系类(ContentTypeHelper.cs)
using System.Collections.Generic;

namespace MinIO.Helper
{
    public static class ContentTypeHelper
    {
        private static readonly Dictionary<string,string> DictionaryContentType=new Dictionary<string, string>
        {
            {"default","application/octet-stream"},
            {"bmp","application/x-bmp"},
            {"doc","application/msword"},
            {"docx","application/msword"},
            {"exe","application/x-msdownload"},
            {"gif","image/gif"},
            {"html","text/html"},
            {"jpg","image/jpeg"},
            {"mp4","video/mpeg4"},
            {"mpeg","video/mpg"},
            {"mpg","video/mpg"},
            {"ppt","application/x-ppt"},
            {"pptx","application/x-ppt"},
            {"png","image/png"},
            {"rar","application/zip"},
            {"txt","text/plain"},
            {"xls","application/x-xls"},
            {"xlsx","application/x-xls"},
            {"zip","application/zip"},
        };
        /// <summary>
        /// 根据文件扩展名(不含.)返回ContentType
        /// </summary>
        /// <param name="fileExtension">文件扩展名(不包含.)</param>
        /// <returns></returns>
        public static string GetContentType(string fileExtension)
        {
            return DictionaryContentType.ContainsKey(fileExtension) ? DictionaryContentType[fileExtension] : DictionaryContentType["default"];
        }
    }
}
我们需要新建一个实现MinIO中IRequestLogger接口的类(LogHelper.cs),用来接收日志信息通过处理日志信息,来计算出当前上传进度信息
using GalaSoft.MvvmLight.Messaging;
using Minio;
using Minio.DataModel.Tracing;
using System.Net;

namespace MinIO.Helper
{
    public class LogHelper : IRequestLogger
    {
        public void LogRequest(RequestToLog requestToLog, ResponseToLog responseToLog, double durationMs)
        {
            if (responseToLog.statusCode == HttpStatusCode.OK)
            {
                foreach (var header in requestToLog.parameters)
                {
                    if (!string.Equals(header.name, "partNumber")) continue;
                    if(header.value==null) continue;
                    int.TryParse(header.value.ToString(), out var partNumber);//minio遇到上传文件大于5MB时,会进行分块传输,这里就是当前块的编号(递增)
                    Messenger.Default.Send(partNumber, "process");//发送给主界面计算上传进度
                    break;
                }
            }
        }
    }
}
在MainWindow初始化的时候初始化MinIO的配置信息,同时用MVVM的Messenger来接收当前上传的块编号,用来计算上传进度。
using GalaSoft.MvvmLight.Messaging;
using Microsoft.Win32;
using Minio;
using Minio.Exceptions;
using MinIO.Helper;
using MinIO.ViewModel;
using System;
using System.Diagnostics;
using System.IO;
using System.Threading.Tasks;
using System.Windows;

namespace MinIO
{
    /// <summary>
    /// MainWindow.xaml 的交互逻辑
    /// </summary>
    public partial class MainWindow : Window
    {
        private static string _endpoint = "192.168.127.131:9000";//minio服务器地址
        private static string _accessKey = "minioadmin";//授权登录账号
        private static string _secretKey = "minioadmin";//授权登录密码
        private static MinioClient _minioClient;

        public MainWindow()
        {
            InitializeComponent();
        }
        private void MainWindow_OnLoaded(object sender, RoutedEventArgs e)
        {
            _minioClient = new MinioClient(_endpoint, _accessKey, _secretKey);
            Messenger.Default.Register<int>(this, "process", obj =>
             {
                 try
                 {
                     Debug.WriteLine($"当前块编号:{obj}");
                     if (obj == 0)
                     {
                         ViewModelLocator.Instance.FileUploadViewModel.UploadProcess = "0.00%";
                         return;
                     }
                     ViewModelLocator.Instance.FileUploadViewModel.PartNumber = obj;
                     ViewModelLocator.Instance.FileUploadViewModel.UploadProcess =
                         $"{(float)ViewModelLocator.Instance.FileUploadViewModel.PartNumber / ViewModelLocator.Instance.FileUploadViewModel.TotalParts:P2}";//计算文件上传进度
                 }
                 catch (Exception exception)
                 {
                     App.NewNLog.Error($"计算上传进度时出错:{exception}");
                 }
             });
        }
        private void ButtonUpload_Click(object sender, RoutedEventArgs e)
        {
            var open = new OpenFileDialog
            {
                CheckFileExists = true,
                CheckPathExists = true,
            };
            if (open.ShowDialog(this) == false)
            {
                return;
            }

            ViewModelLocator.Instance.FileUploadViewModel.FileName = open.SafeFileName;
            try
            {
                Dispatcher?.InvokeAsync(async () =>
                {
                    await Run(_minioClient, "test", open.FileName, ViewModelLocator.Instance.FileUploadViewModel.FileName);
                });
            }
            catch (Exception ex)
            {
                Console.WriteLine(ex.Message);
            }
        }

        private static async Task Run(MinioClient minio, string userBucketName, string uploadFilePath, string saveFileName)
        {
            var bucketName = userBucketName;
            var location = "us-east-1";
            var objectName = saveFileName;
            var filePath = uploadFilePath;
            var contentType = ContentTypeHelper.GetContentType(saveFileName.Substring(saveFileName.LastIndexOf('.') + 1));
            var file = new FileInfo(uploadFilePath);

            try
            {
                var found = await minio.BucketExistsAsync(bucketName);
                if (!found)
                {
                    await minio.MakeBucketAsync(bucketName, location);
                }

                _minioClient.SetTraceOn(new LogHelper());//我们在上传开始的时候,打开日志,通过日志抛出的块编号来计算出当前进度

                ViewModelLocator.Instance.FileUploadViewModel.FileSize = file.Length;
                ViewModelLocator.Instance.FileUploadViewModel.TotalParts = file.Length / App.MinimumPartSize + 1;//计算出文件总块数

                await minio.PutObjectAsync(bucketName, objectName, filePath, contentType);//上传文件
                Debug.WriteLine("Successfully uploaded " + objectName);

            }
            catch (MinioException e)
            {
                App.NewNLog.Error($"File Upload Error: {e}");
                Debug.WriteLine($"File Upload Error: {e.Message}");
            }
            finally
            {
                _minioClient.SetTraceOff();
            }
        }
    }
}
具体效果如下:
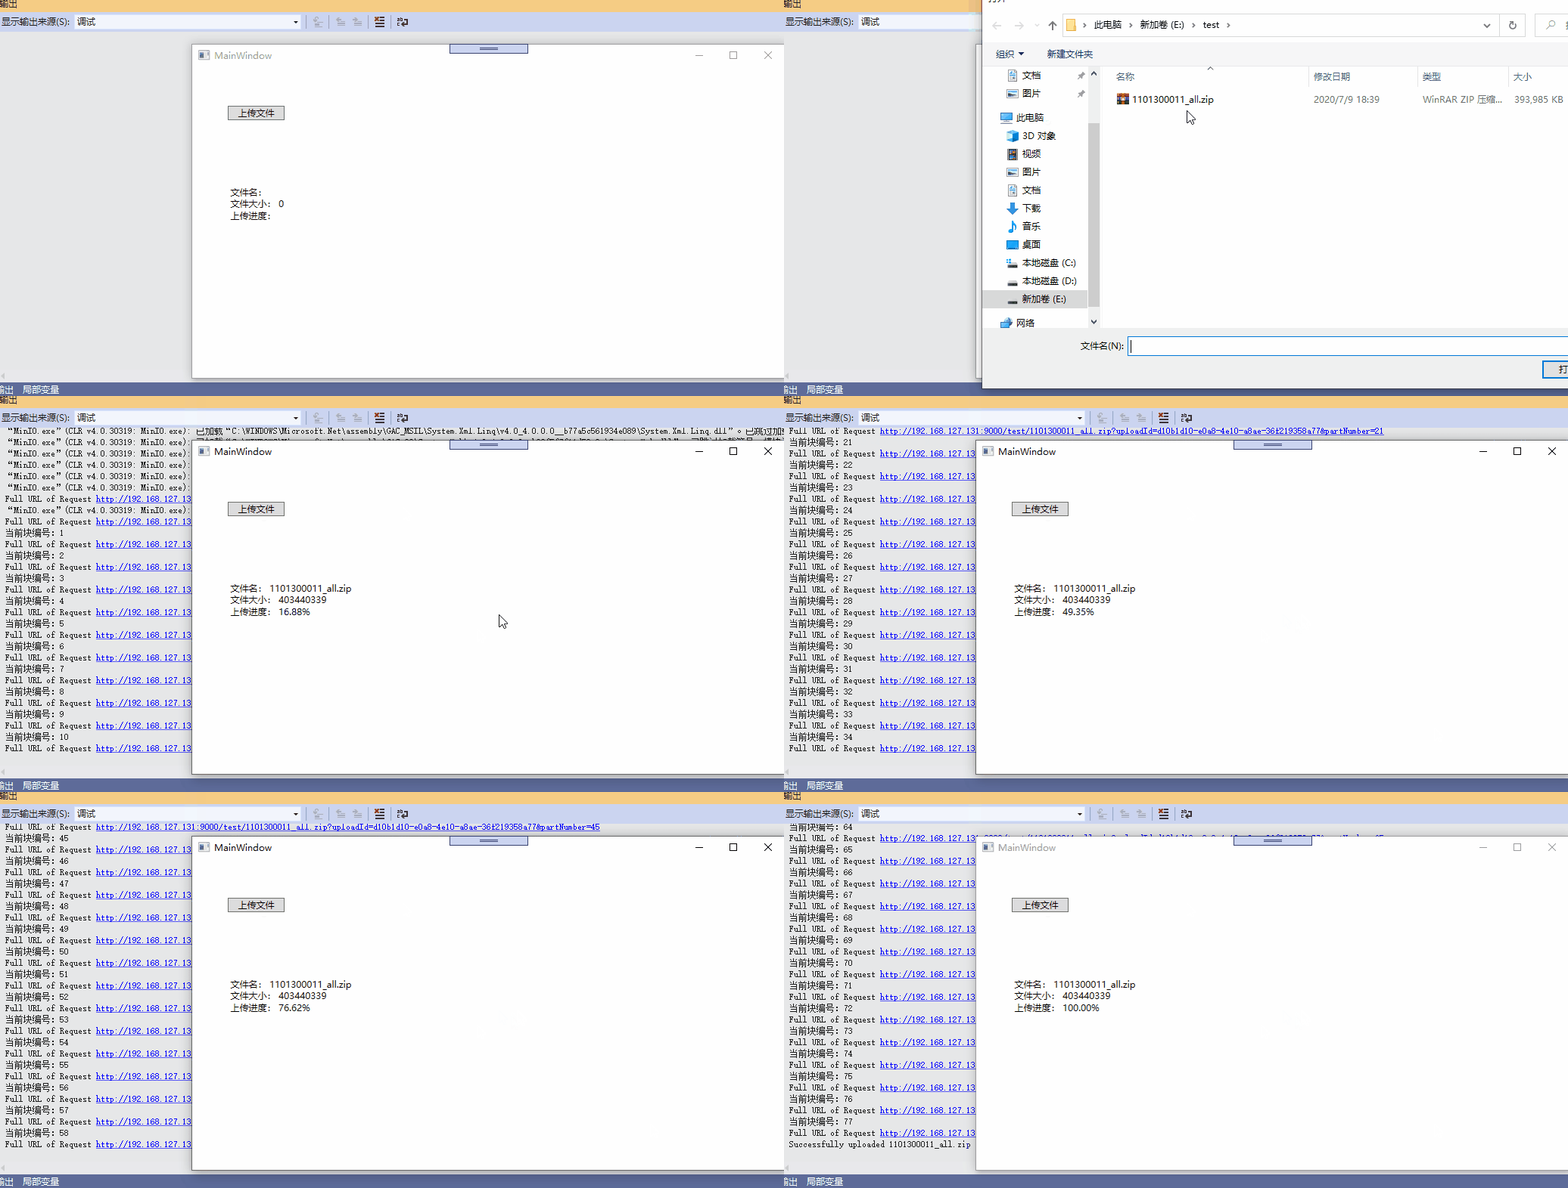
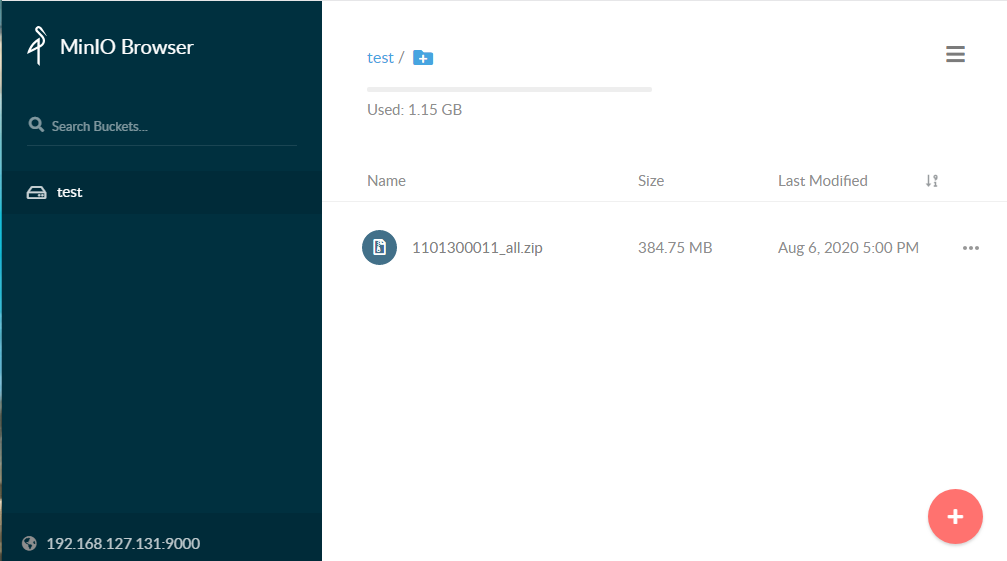
至此,我们实现了CentOS7下安装MinIO,并且在C#客户端下展示文件上传进度的功能。
PS:代码还不完善,少了一个小于5M的时候,直接展示上传成功的代码。


