csrf相关装饰器、基于中间件思想编写项目、auth认证模块
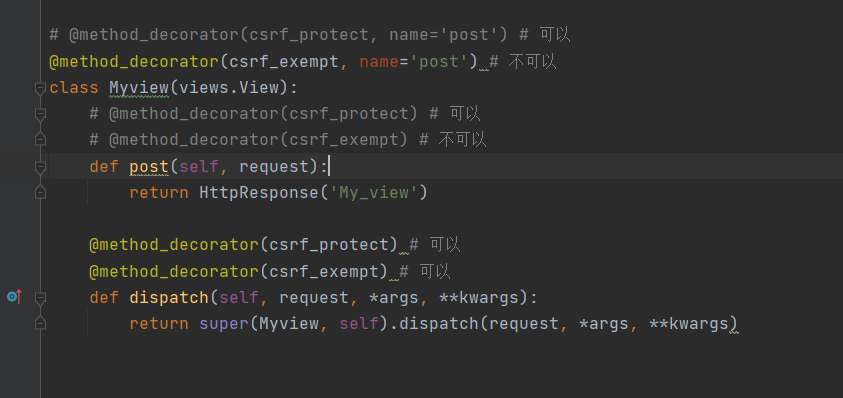
from django.views.decorators.csrf import csrf_exempt,csrf_protect
"""
csrf_exempt
    忽略csrf校验
csrf_protect
    开启csrf校验
"""
1.针对FBV
@csrf_protect\@csrf_exempt
def login(request):
    return render(request,'login.html')
2.针对CBV
csrf_protect 三种CBV添加装饰器的方式都可以
csrf_exempt  只有一种方式可以生效(给重写的dispatch方法装)
# importlib模块
    可以通过字符串的形式导入模块
# 常规导入方式
# from ccc import b
# print(b)  # <module 'ccc.b' from '/Users/jiboyuan/PycharmProjects/day61_1/ccc/b.py'>
# print(b.name)
# 字符串导入方式
# import importlib
# module_path = 'ccc.b'
# res = importlib.import_module(module_path)
# print(res.name)

from ccc.b import name  # 可以直接导变量数据
import importlib
module_path = 'ccc.b.name'
importlib.import_module(module_path)  # 不可以 最小导入单位是模块文件级别


'''以发送提示信息为需求 编写功能'''
方式1:封装成函数
方式2:封装成配置


import settings
import importlib
def send_all(msg):
    # 1.循环获取配置文件中字符串信息
    for str_path in settings.NOTIFY_FUNC_LIST:  # 'notify.email.Email'
        # 2.切割路径信息
        module_path, class_str_name = str_path.rsplit('.', maxsplit=1)  # ['notify.email','Email']
        # 3.根据module_path导入模块文件
        module = importlib.import_module(module_path)
        # 4.利用反射获取模块文件中对应的类名
        class_name = getattr(module, class_str_name)  # Email  Msg  QQ
        # 5.实例化
        obj = class_name()
        # 6.调用发送消息的功能
        obj.send(msg)
NOTIFY_FUNC_LIST = [
    'notify.email.Email',
    'notify.msg.Msg',
    'notify.qq.QQ',
    'notify.weixin.WeiXin',
]
# django提供给你快速完成用户相关功能的模块
    用户相关功能:创建、认证、编辑...
# django也配套提供了一张'用户表'
    执行数据库迁移命令之后默认产生的auth_user
# django自带的admin后台管理用户登录参考的就是auth_user表
    创建admin后台管理员用户:run manage.py task>>:createsuperuser
  自动对用户密码进行加密处理并保存
from django.contrib import auth
# 1.验证用户名和密码是否正确
    auth.authenticate()
# 2.保存用户登录状态
    auth.login()
# 3.获取当前用户对象
    request.user
# 4.判断当前用户是否登录
    request.user.is_authenticated()
# 5.校验登录装饰器
    from django.contrib.auth.decorators import login_required
    @login_required(login_url='/lg/')  # 局部配置
    @login_required  # 全局配置
    LOGIN_URL = '/lg/'  # 需要在配置文件中添加配置
# 6.修改密码
    request.user.check_password()

  request.user.set_password()
  request.user.save()
# 7.注销登录
    auth.logout(request)
# 8.注册用户
    from django.contrib.auth.models import User
  User.objects.create_superuser()
  User.objects.create_suser()
from django.shortcuts import render, HttpResponse, redirect

# Create your views here.

from django.views.decorators.csrf import csrf_exempt,csrf_protect

@csrf_exempt
def login(request):
    return render(request, 'login.html')


from django import views
from django.utils.decorators import method_decorator


# @method_decorator(csrf_protect, name='post') # 可以
# @method_decorator(csrf_exempt, name='post') # 不可以
class Myview(views.View):
    # @method_decorator(csrf_protect) # 可以
    # @method_decorator(csrf_exempt) # 不可以
    def post(self, request):
        return HttpResponse('My_view')

    # @method_decorator(csrf_protect) # 可以
    @method_decorator(csrf_exempt) # 可以
    def dispatch(self, request, *args, **kwargs):
        return super(Myview, self).dispatch(request, *args, **kwargs)


from django.contrib import auth
def lg(request):
    if request.method == 'POST':
        username = request.POST.get('username')
        password = request.POST.get('password')
        res = auth.authenticate(request, username=username, password=password)
        if res:
            auth.login(request, res)
            return HttpResponse('登陆成功')
    return render(request, 'lg.html')


def get_user(request):
    print(request.user)
    if request.user.is_authenticated():
        print(request.user.username)
        print(request.user.password)
        print(request.user.last_login)
    return HttpResponse('查看当前用户是否登录')

from django.contrib.auth.decorators import login_required

@login_required
def func(request):
    return HttpResponse('func')

@login_required
def home(request):
    return HttpResponse('home')

@login_required
def index(request):
    return HttpResponse('index')

@login_required
def set_pwd(request):
    if request.method == 'POST':
        old_password = request.POST.get('old_password')
        new_password = request.POST.get('new_password')
        is_right = request.user.check_password(old_password)
        if is_right:
            request.user.set_password(new_password)
            request.user.save()
            return HttpResponse('修改成功')

    return render(request, 'set_pwd.html', locals())


@login_required
def logout(request):
    auth.logout(request)
    return HttpResponse('注销')

from django.contrib.auth.models import User
def register(request):
    if request.method == 'POST':
        username = request.POST.get('user')
        password = request.POST.get('pwd')
        res = auth.authenticate(request, username=username)
        if res:
            User.objects.create_user(username=username, password=password)
            return HttpResponse('注册成功')
        else:
            return HttpResponse('已存在')
    return render(request, 'register.html')
# 方式1:编写一对一表关系(了解)
# 方式2:类继承(推荐)
from django.contrib.auth.models import AbstractUser
class Users(AbstractUser):
    # 编写AbstractUser类中没有的字段 不能冲突!!!
    phone = models.BigIntegerField()
    addr = models.CharField(max_length=32)

AUTH_USER_MODEL = 'app01.Users'
"""
1.类继承之后 需要重新执行数据库迁移命令 并且库里面是第一次操作才可以
2.auth模块所有的方法都可以直接在自定义模型类上面使用
    自动切换参照表
"""

 浙公网安备 33010602011771号