8 - Introduce k8s network - using flannel
2021-07-22 19:58 WayneWei 阅读(68) 评论(0) 收藏 举报Prerequisites:
Prerequisites:
| Node | OS | IP |
| k8s-master | CentOS7 | 192.168.137.161 |
| k8s-node1 | CentOS7 | 192.168.137.162 |
Install Flannel:
- Download flannel descrition file to local
Since we don't have access to github from domestic, we need to copy and save the flannel yml file to master node locally.
Navigate to link address: https://github.com/flannel-io/flannel/blob/master/Documentation/kube-flannel.yml
Copy the whole content and create a file named kube-flannel.yml on master local directory, then paste the content.![]()
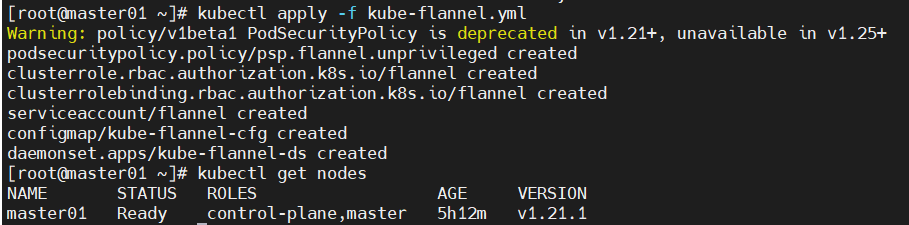
- Apply the flannel file to create k8s network
Running command: kubectl apply -f kube-flannel.yml
Once the network created, wait for a while when the network plugin do some loading up, then you can run kubectl get nodes again, now you will see the master node is READY !![]()
Note: Alternatively you can run command ( kubectl apply -f https://raw.githubusercontent.com/flannel-io/flannel/master/Documentation/kube-flannel.yml ) to apply flannel, but you won't success as we don't have access to github, if you not setting up any proxy.
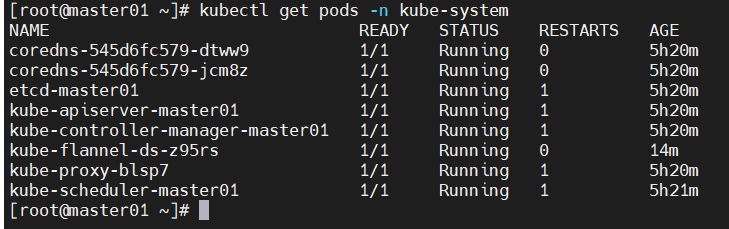
- Checking k8s cluster components
Running below command to verify status of critical components of k8s
kubectl get pods -n kube-system
![]()
Now you can see the key components are all up and running: apiserver, controller manager, kube proxy, scheduler etc.
- Adding node to k8s cluster
From previous chapter 8 - Install Kubernetes - via kubeadm, at the end of step 3, there was a command to allow you add node into cluster.
Running below command from k8s-node1 virtual machine, to add it into k8s cluster as a node:
kubeadm join 192.168.137.161:6443 --token 73vhmy.v6ifuh6uc3iwzx30 --discovery-token-ca-cert-hash sha256:fe21f84cdddd12e90941d67d9f00a2e2ffc999971dee9615cb3330c8a6bb6e38
If you didn't copy the command, that's fine, you can get the token and CA public key with below command:
# Get token
kubeadm token list | awk -F" " '{print $1}' |tail -n 1

# Get CA public key
openssl x509 -pubkey -in /etc/kubernetes/pki/ca.crt | openssl rsa -pubin -outform der 2>/dev/null | openssl dgst -sha256 -hex | sed 's/^ .* //'
![]()
Once running the command to adding node into cluster, just waiting it to finish, then you will get below outcome, this is means you got k8s-node01 added into cluster successfully:
![]()
We can run kubectl get nodes to check the status of our cluster now, you will find at the beginning of a few minutes our node is not ready, however after a few minutes it's done the configuration then showing as READY state:
![]()
![]()
- Congratulations !!! So far we've setup of Kubenetes cluster successfully !
You can try to deploy applications into the k8s platform.
We'll see if i have more time to demostrate will application deployment with Kubenetes, see you then !


 浙公网安备 33010602011771号