spring源码分析——BeanPostProcessor接口
BeanPostProcessor是处理bean的后置接口,beanDefinitionMaps中的BeanDefinition实例化完成后,完成populateBean,属性设置,完成
初始化后,这个接口支持对bean做自定义的操作。
一:BeanPostProcessor的使用
定义一个测试用的model对象,name属性默认为hello
public class BeanDemo {

	private String name = "hello";

	public String getName() {
		return name;
	}

	public void setName(String name) {
		this.name = name;
	}

	@Override
	public String toString() {
		final StringBuffer sb = new StringBuffer("BeanDemo{");
		sb.append("name='").append(name).append('\'');
		sb.append('}');
		return sb.toString();
	}
}
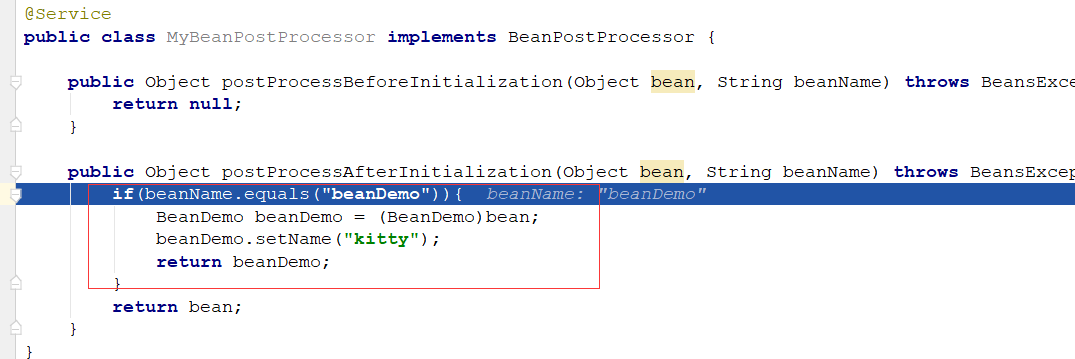
自定义一个MyBeanPostProcessor类,实现BeanPostProcessor接口
@Service
public class MyBeanPostProcessor implements BeanPostProcessor {

	public Object postProcessBeforeInitialization(Object bean, String beanName) throws BeansException {
		return null;
	}

	public Object postProcessAfterInitialization(Object bean, String beanName) throws BeansException {
		if(beanName.equals("beanDemo")){
			BeanDemo beanDemo = (BeanDemo)bean;
			beanDemo.setName("kitty");
			return beanDemo;
		}
		return bean;
	}
}

从运行结果看,spring中维护的beanName为beanDemo的对象,name属性为ketty

二:看看源码怎么实现的
1:实例化并且注册到beanPostProcessors集合中


主要的实例化逻辑在这个接口,这个接口的作用就是把所有实现BeanPostProcessor接口的类实例化,然后注册到 beanPostProcessors这个缓存中

public static void registerBeanPostProcessors(
ConfigurableListableBeanFactory beanFactory, AbstractApplicationContext applicationContext) {
// 获取所有实现接口BeanPostProcessor的beanName
String[] postProcessorNames = beanFactory.getBeanNamesForType(BeanPostProcessor.class, true, false);
// Register BeanPostProcessorChecker that logs an info message when
// a bean is created during BeanPostProcessor instantiation, i.e. when
// a bean is not eligible for getting processed by all BeanPostProcessors.
int beanProcessorTargetCount = beanFactory.getBeanPostProcessorCount() + 1 + postProcessorNames.length;
beanFactory.addBeanPostProcessor(new BeanPostProcessorChecker(beanFactory, beanProcessorTargetCount));
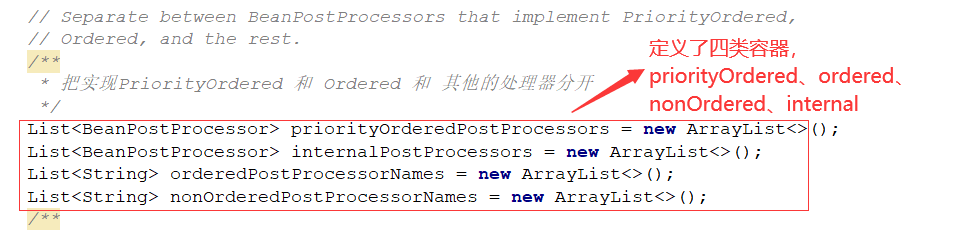
// Separate between BeanPostProcessors that implement PriorityOrdered,
// Ordered, and the rest.
/**
* 把实现PriorityOrdered 和 Ordered 和 其他的处理器分开
*/
List<BeanPostProcessor> priorityOrderedPostProcessors = new ArrayList<>();
List<BeanPostProcessor> internalPostProcessors = new ArrayList<>();
List<String> orderedPostProcessorNames = new ArrayList<>();
List<String> nonOrderedPostProcessorNames = new ArrayList<>();
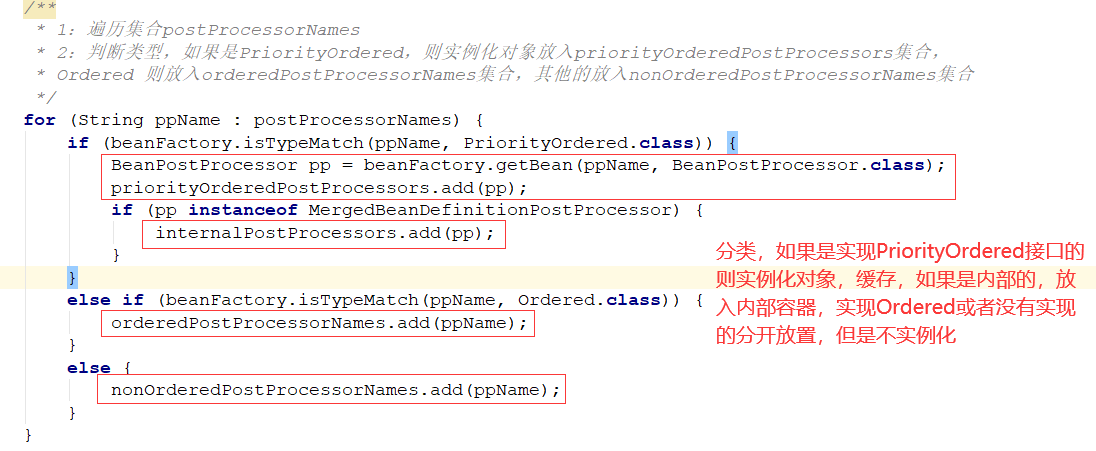
/**
* 1:遍历集合postProcessorNames
* 2:判断类型,如果是PriorityOrdered,则实例化对象放入priorityOrderedPostProcessors集合,
* Ordered 则放入orderedPostProcessorNames集合,其他的放入nonOrderedPostProcessorNames集合
*/
for (String ppName : postProcessorNames) {
if (beanFactory.isTypeMatch(ppName, PriorityOrdered.class)) {
BeanPostProcessor pp = beanFactory.getBean(ppName, BeanPostProcessor.class);
priorityOrderedPostProcessors.add(pp);
if (pp instanceof MergedBeanDefinitionPostProcessor) {
internalPostProcessors.add(pp);
}
}
else if (beanFactory.isTypeMatch(ppName, Ordered.class)) {
orderedPostProcessorNames.add(ppName);
}
else {
nonOrderedPostProcessorNames.add(ppName);
}
}
// First, register the BeanPostProcessors that implement PriorityOrdered.
// 首先对priorityOrderedPostProcessors集合中实例对象排序,然后注册,放入beanFactory中缓存下来
sortPostProcessors(priorityOrderedPostProcessors, beanFactory);
registerBeanPostProcessors(beanFactory, priorityOrderedPostProcessors);
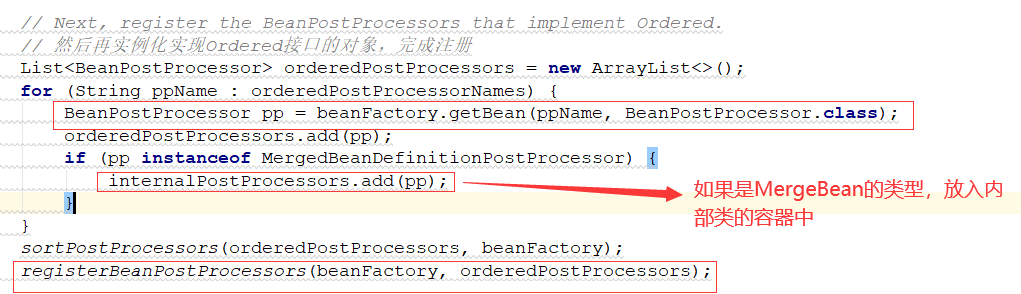
// Next, register the BeanPostProcessors that implement Ordered.
// 然后再实例化实现Ordered接口的对象,完成注册
List<BeanPostProcessor> orderedPostProcessors = new ArrayList<>();
for (String ppName : orderedPostProcessorNames) {
BeanPostProcessor pp = beanFactory.getBean(ppName, BeanPostProcessor.class);
orderedPostProcessors.add(pp);
if (pp instanceof MergedBeanDefinitionPostProcessor) {
internalPostProcessors.add(pp);
}
}
sortPostProcessors(orderedPostProcessors, beanFactory);
registerBeanPostProcessors(beanFactory, orderedPostProcessors);
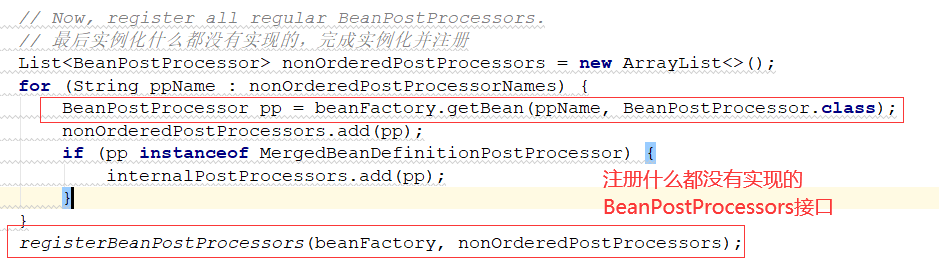
// Now, register all regular BeanPostProcessors.
// 最后实例化什么都没有实现的,完成实例化并注册
List<BeanPostProcessor> nonOrderedPostProcessors = new ArrayList<>();
for (String ppName : nonOrderedPostProcessorNames) {
BeanPostProcessor pp = beanFactory.getBean(ppName, BeanPostProcessor.class);
nonOrderedPostProcessors.add(pp);
if (pp instanceof MergedBeanDefinitionPostProcessor) {
internalPostProcessors.add(pp);
}
}
registerBeanPostProcessors(beanFactory, nonOrderedPostProcessors);
// Finally, re-register all internal BeanPostProcessors.
// 最后再次注册内部postProcessor
sortPostProcessors(internalPostProcessors, beanFactory);
registerBeanPostProcessors(beanFactory, internalPostProcessors);
// Re-register post-processor for detecting inner beans as ApplicationListeners,
// moving it to the end of the processor chain (for picking up proxies etc).
beanFactory.addBeanPostProcessor(new ApplicationListenerDetector(applicationContext));
}

定义四类容器,高优先级有序、有序、无序、内部
分类放入四种容器:
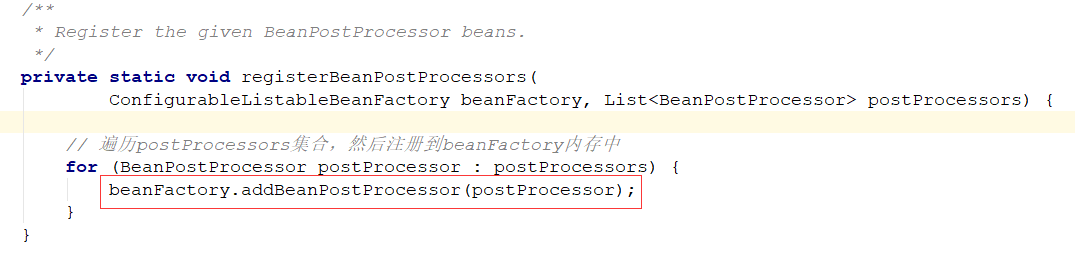
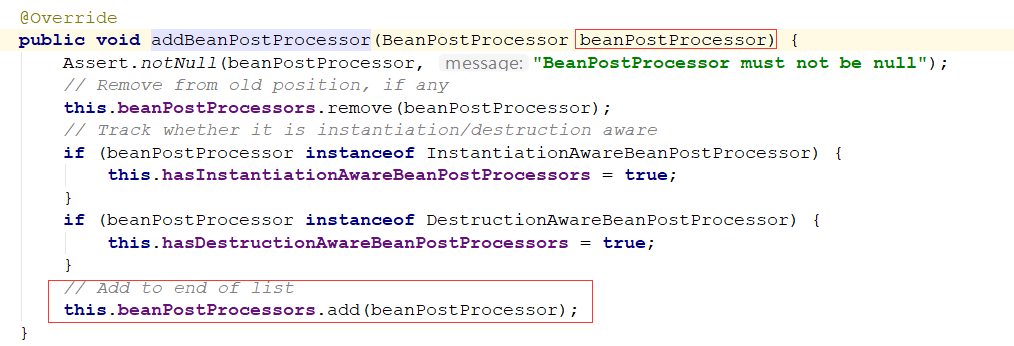
注册BeanPostProcessor,将实现BeanPostProcessor接口的对象放入beanPostProcessors缓存中

注册完PriorityOrdered的实现类后,再处理Ordered的实现类
注册什么都没有实现的BeanPostProcessor接口实现类,
最后注册内部的BeanPostProcessor对象

到这里BeanPostProcessor的实例化以及注册工作完成,在beanFactory的beanPostProcessors集合中已经缓存了所有的beanPostProcessor的对象
2:BeanPostProcessor的使用
因为这个接口是bean的后置接口,所以需要bean创建并初始化完成,才可以发挥作用,上一步的缓存只是埋好点,以备使用,因为bean的实例化流程我们
还没有分析,这里直接看一下怎么使用的
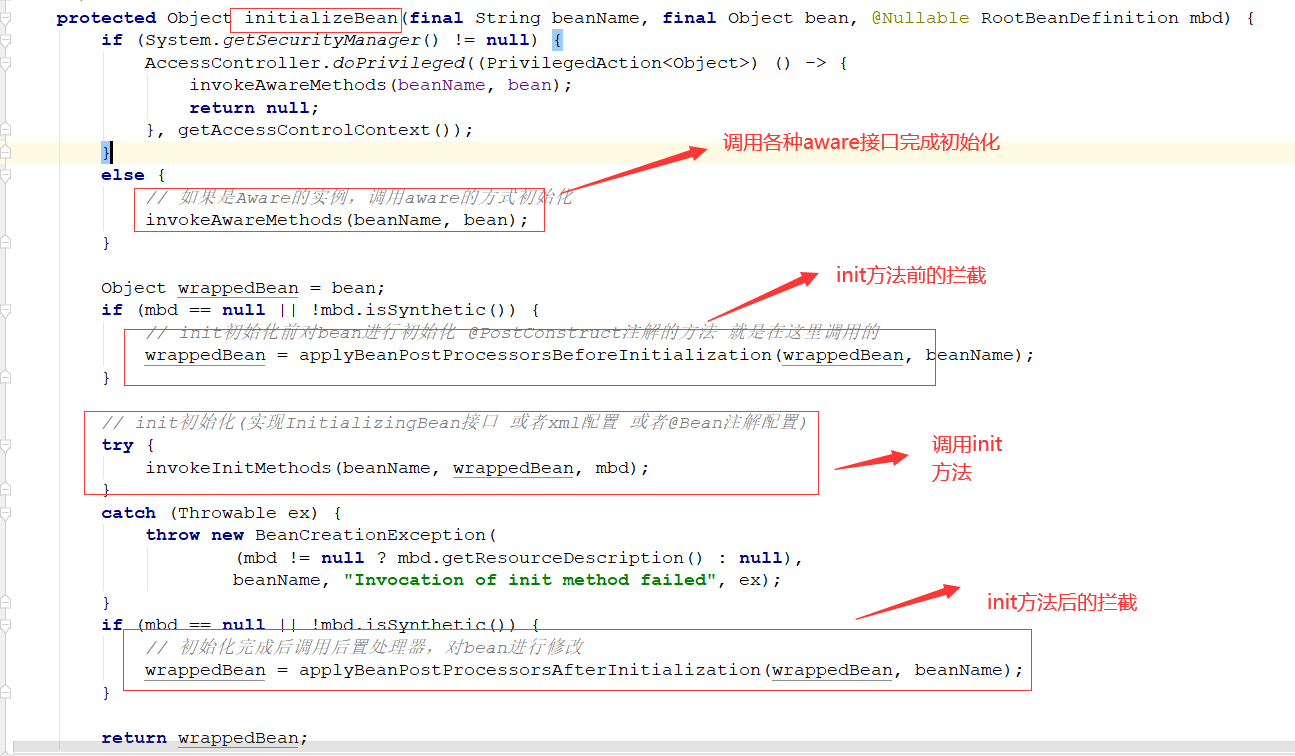
我们看一下init方法后的拦截,因为这个时候已经init完成,可以在后置接口中对bean做一下修改的操作
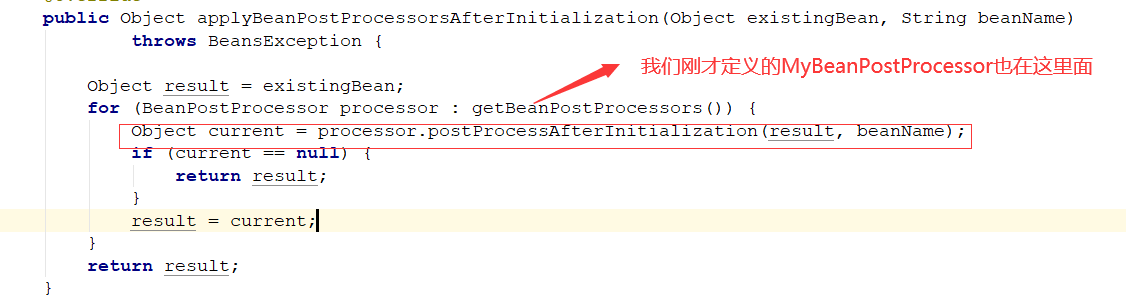
调用到我们自定义的MyBeanPostProcessor实现类:

把这个beanDemo对象属性修改一下,修改完,再返回,将这个对象缓存到spring的一级缓存中。
总结:
BeanPostProcessor接口主要是对bean对象做一些自定义的操作,修改bean对象的信息,aop代理也是通过这种方式实现的,
在refresh的registryBeanPostProcessor方法中实例化BeanPostProcessor对象,并且注册到beanFactory容器的beanPostProcessors的缓存中,
然后在后续的操作中拦截使用。

 浙公网安备 33010602011771号