QCustomPlot使用心得三:线样式,点样式
转自:https://blog.csdn.net/yxy244/article/details/100033549
一、线宽、样式、颜色
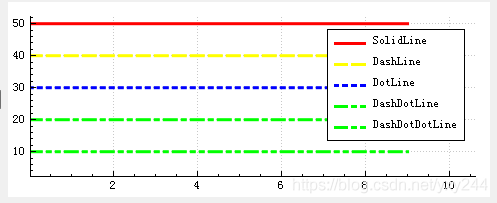
通过画笔QPen设置线的线宽、样式和颜色,线样式Qt::PenStyle有几个枚举值,实线虚线等。
代码例子:
1     QPen pen;
2     pen.setWidth(3);//线宽
3     // 添加Graph,1条曲线使用一个Graph
4     customPlot->addGraph();
5     pen.setStyle(Qt::PenStyle::DashLine);//虚线
6     pen.setColor(Qt::yellow);//黄色
7     customPlot->graph(0)->setPen(pen); //
二、填充色
画刷QBrush设置曲线和0轴填充色围成区域的颜色,可以看到重叠部分颜色是叠加的
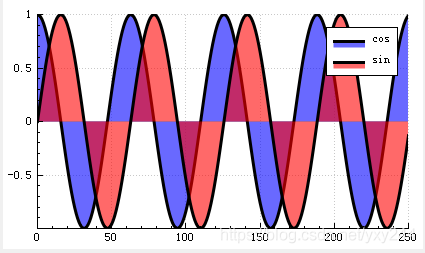
代码例子:
1     customPlot->addGraph();
2     customPlot->graph(0)->setBrush(QBrush(QColor(0,0,255,150))); //蓝色,透明度150
3     customPlot->addGraph();
4     customPlot->graph(1)->setBrush(QBrush(QColor(255,0,0,150))); //红色,透明度150
三、数据点连接方式
先看一下官网的图例https://www.qcustomplot.com/index.php/demos/linestyledemo
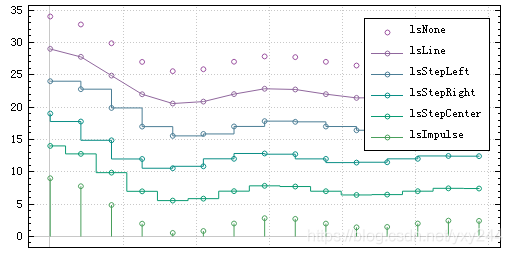
调用setLineStyle设置数据点连接方式,QCPGraph::LineStyle有几个枚举值
|
QCPGraph::LineStyle |
说明 |
|
lsNone |
无连接线 |
|
lsLine |
直线连接(默认) |
|
lsStepLeft |
阶梯线,高度和左边数据点对齐 |
|
lsStepRight |
阶梯线,高度和右边数据点对齐 |
|
lsStepCenter |
阶梯线,阶梯在两个数据中间 |
|
lsImpulse |
脉冲线 |
代码例子:
customPlot->graph(0)->setLineStyle((QCPGraph::LineStyle::lsStepLeft));//阶梯线,左对齐四、散点图,点样式
散点就是在图上用某个图形标出数据点,默认情况下是不显示数据点图形的,需要通过调用setScatterStyle(const QCPScatterStyle & style)来设置散点样式,才会显示点图案,传递的参数是一个QCPScatterStyle对象,如果想只显示数据点而不显示线,可以设置线样式为lsNone
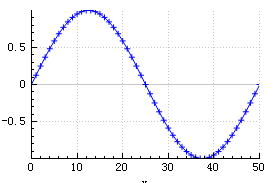
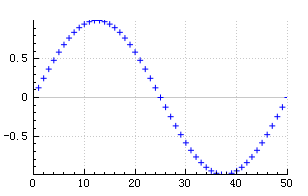
只显示散点的方法:
1     //不显示连线
2     customPlot->graph(0)->setLineStyle(QCPGraph::LineStyle::lsNone);
3     //数据点+号
4     customPlot->graph(0)->setScatterStyle(QCPScatterStyle(QCPScatterStyle::ScatterShape::ssPlus,5));
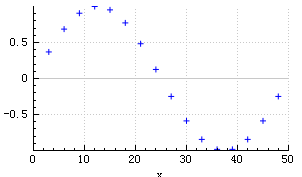
调用setScatterSkip(int)设置绘制一个点后跳过的点数,可以让曲线变得稀疏
1 //绘制一个点后跳过2个点
2
3 customPlot->graph(0)->setScatterSkip(2);
(1)QCPScatterStyle::ScatterShape枚举样式
先看一下官网的图例https://www.qcustomplot.com/index.php/demos/scatterstyledemo
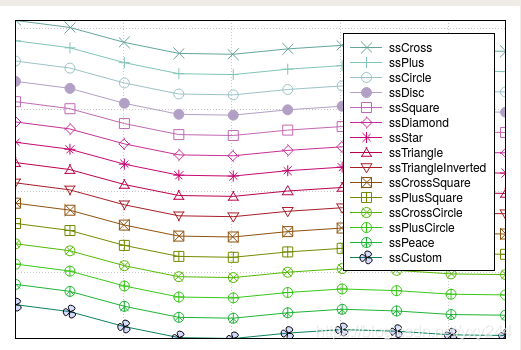
QCPScatterStyle::ScatterShape的样式包含的很多基本形状,一般足够使用了
| QCPScatterStyle::ScatterShape | 说明 |
| 没有散点(默认) | |
| 单像素点(要用能改变大小的圆请使用ssCircle或ssDisc) | |
|
|
| 通过setPixmap设置的图像 | |
| 通过setCustomPath设置的路径 |
(2)ssCustom自定义散点
注意到官网图例的最后一条曲线的散点图案是自定义的三叶草的形状,其实原理就是通过QPainterPath来实现的

通过添加三条贝塞尔曲线组图案,放大看:

1  QPainterPath customScatterPath;
2 //添加3条贝塞尔曲线,形成叶子形状
3     for (int i=0; i<3; ++i)
4       customScatterPath.cubicTo(qCos(2*M_PI*i/3.0)*9, qSin(2*M_PI*i/3.0)*9, qCos(2*M_PI*(i+0.9)/3.0)*9, qSin(2*M_PI*(i+0.9)/3.0)*9, 0, 0);
5 //设定散点图案为自定义的路径
6     customPlot->graph()->setScatterStyle(QCPScatterStyle(customScatterPath, QPen(Qt::black, 0), QColor(40, 70, 255, 50), 10));
贝塞尔曲线挺复杂的,可以试着画个简单的五角星
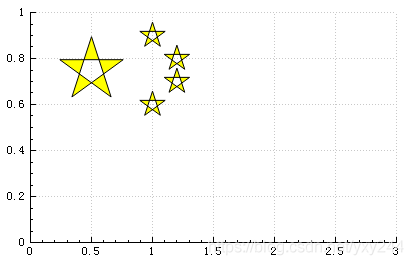
 1   QVector<double> x1(1),x2(4),y1(1),y2(4);
 2  //数据点(五角星位置)
 3     x1[0]=0.5;y1[0]=0.75;
 4     x2[0]=1;x2[1]=1;
 5     x2[2]=1.2;x2[3]=1.2;
 6     y2[0]=0.9;y2[1]=0.6;y2[2]=0.8;y2[3]=0.7;
 7     // 添加两个graph,一个显示大五星,另一个显示小五星
 8     customPlot->addGraph();
 9     customPlot->graph(0)->setData(x1, y1);
10     customPlot->addGraph();
11     customPlot->graph(1)->setData(x2, y2);
12     //不显示连线
13     customPlot->graph(0)->setLineStyle(QCPGraph::LineStyle::lsNone);
14     customPlot->graph(1)->setLineStyle(QCPGraph::LineStyle::lsNone);
15     //五角星路径
16     QPainterPath customScatterPath;
17     customScatterPath.moveTo(qCos(18/180.0*M_PI)*2, -qSin(18/180.0*M_PI)*2);
18     customScatterPath.lineTo(qCos(162/180.0*M_PI)*2,-qSin(162/180.0*M_PI)*2);
19     customScatterPath.lineTo(qCos(306/180.0*M_PI)*2,-qSin(306/180.0*M_PI)*2);
20     customScatterPath.lineTo(qCos(90/180.0*M_PI)*2, -qSin(90/180.0*M_PI)*2);
21     customScatterPath.lineTo(qCos(234/180.0*M_PI)*2,-qSin(234/180.0*M_PI)*2);
22     customScatterPath.closeSubpath();//闭合路径
23     //设置散点样式为自定义的路径
24     customPlot->graph(0)->setScatterStyle(QCPScatterStyle(customScatterPath, QPen(Qt::black, 0), Qt::yellow, 100));
25     customPlot->graph(1)->setScatterStyle(QCPScatterStyle(customScatterPath, QPen(Qt::black, 0), Qt::yellow, 40));
26     //x轴范围
27     customPlot->xAxis->setRange(0,3);
28     //y轴范围
29     customPlot->yAxis->setRange(0,1);
30     customPlot->replot();
(3)ssPixmap图像
要显示好看的图案,用自定义路径的方式很复杂,实际上直接使用图像更方便
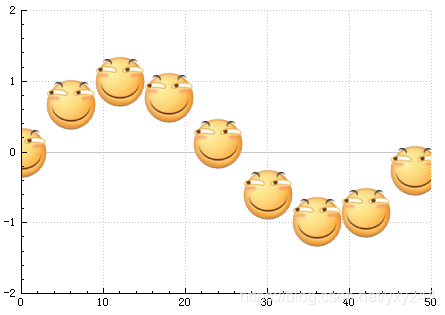
图像添加到资源文件里

QCPScatterStyle设置为图像就行了
1    //数据点显示图像
2        customPlot->graph(0)->setScatterStyle(QCPScatterStyle(QPixmap(":image/huaji.png")));


 浙公网安备 33010602011771号