

jquery应用实例
应用实例
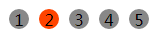
1、点击每个li,li背景色变成红色
方法一:
<!DOCTYPE html>
<html lang="en">
<head>
    <meta charset="UTF-8">
    <title>Document</title>
    <style>
        ul {
            list-style: none;
            cursor: pointer;
        }
        ul li {
            width: 20px;
            height: 20px;
            background: #888;
            border-radius: 50%;
            margin-left: 10px;
            float: left;
            text-align: center;
        }
    </style>
</head>
<body>
    <ul>
        <li>1</li>
        <li>2</li>
        <li>3</li>
        <li>4</li>
        <li>5</li>
    </ul>
    <script src='..//jquery-3.3.1.min.js'></script>
    <script>
        $('li').click(function () {
            $('li').css('background','#888');
            $(this).css('background','#f40')
        })
    </script>
</body>

</html>
方法二:
<!DOCTYPE html>
<html lang="en">
<head>
    <meta charset="UTF-8">
    <title>Document</title>
    <style>
        ul {
            list-style: none;
            cursor: pointer;
        }
        ul li {
            width: 20px;
            height: 20px;
            background: #888;
            border-radius: 50%;
            margin-left: 10px;
            float: left;
            text-align: center;
        }
        .active{
            background: #f40;
        }
    </style>
</head>
<body>
    <ul>
        <li class="active">1</li>
        <li>2</li>
        <li>3</li>
        <li>4</li>
        <li>5</li>
    </ul>
    <script src='..//jquery-3.3.1.min.js'></script>
    <script>
        $('li').click(function () {
           $('.active').removeClass('active');
           $(this).addClass('active');
        })
    </script>
</body>
</html>
2、切换选项卡
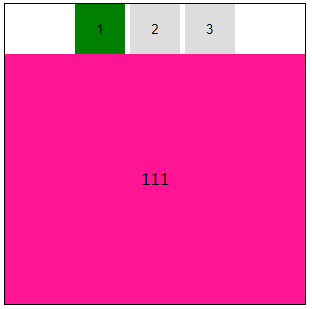
<!DOCTYPE html>
<html lang="en">
<head>
    <meta charset="UTF-8">
    <title>Document</title>
    <style>
        .wrapper{
            width: 300px;
            height: 300px;
            border: 1px solid black;
        }
        .wrapper .btn{
            /* border: 1px solid red; */
            text-align: center;
        }
        .wrapper .btn button{
            width: 50px;
            height: 50px;
            border: none;
        }
        .wrapper .content div{
            width: 300px;
            height: 250px;
            line-height: 250px;
            text-align: center;
            background: deeppink;
            display: none;
        }
        .wrapper .content div.c-Active{
            display: block;
        }
        .b-Active{
            background: green;
        }
    </style>
</head>
<body>
    <div class="wrapper">
        <div class="btn">
            <button class="b-Active">1</button>
            <button>2</button>
            <button>3</button>
        </div>
        <div class="content">
            <div class = 'c-Active'>111</div>
            <div>222</div>
            <div>333</div>
        </div>
    </div>
    <script src='..//jquery-3.3.1.min.js'></script>
    <script>
        $('button').click(function(){
            $('.b-Active').removeClass('b-Active');
            $(this).addClass('b-Active');
            $('.c-Active').removeClass('c-Active');
            var index = $(this).index();
            $('.content div').eq(index).addClass('c-Active');
        })
    </script>
</body>

</html>
3、实现百度登录弹出
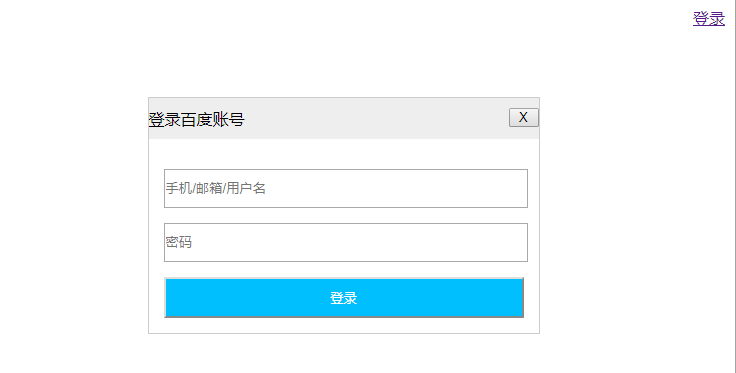
<!DOCTYPE html>
<html lang="en">

<head>
    <meta charset="UTF-8">
    <title>Document</title>
    <style>
        * {
            padding: 0;
            margin: 0;
        }

        a {
            position: absolute;
            top: 10px;
            right: 10px;
        }

        .wrapper {
            display: none;
            position: absolute;
            top: 100px;
            left: 50%;
            width: 390px;
            background: #fff;
            border: 1px solid #ccc;
            overflow: hidden;
            margin-left: -195px;
        }

        .wrapper .titleCont {
            padding: 10px 0;
            position: relative;
            background: #eee;
        }

        .wrapper .titleCont div {
            display: inline-block;
        }

        .wrapper .titleCont #close {
            float: right;
            width: 30px;
        }

        .wrapper .main .content {
            margin: 15px;
        }

        .wrapper .main .content input {
            width: 100%;
            padding: 10px 0;
            margin-top: 15px;
        }

        .wrapper .main .content button {
            width: 100%;
            padding: 10px 0;
            background: deepskyblue;
            color: #fff;
            margin-top: 15px;
        }
    </style>
</head>

<body>
    <a href="#">登录</a>
    <!-- 先写好结构,调整好样式 ,再注视掉 -->
    <!-- <div class="wrapper">
        <div class="titleCont">
            <div>登录百度账号</div>
            <button id="close">X</button>
        </div>
        <div class="main">
            <div class="content">
                <input type="text" name="user" placeholder="手机/邮箱/用户名">
                <input type="password" placeholder="密码">
                <button>登录</button>
            </div>
        </div>
    </div> -->
    <script src='..//jquery-3.3.1.min.js'></script>
    <script>
        var flag = true;//锁,只生成一次登录界面
        $('a').on('click', function () {
            if (flag) {
                flag = false;
                var str = '<div class="wrapper">\
                            <div class="titleCont">\
                                <div>登录百度账号</div>\
                                <button id="close">X</button>\
                            </div>\
                            <div class="main">\
                                <div class="content">\
                                    <input type="text" name="user" placeholder="手机/邮箱/用户名">\
                                    <input type="password" placeholder="密码">\
                                    <button>登录</button>\
                                </div>\
                            </div>\
                        </div>';
                $('body').append($(str));
            }
            $('.wrapper').css('display', 'block');
            $('#close').one('click', function () {
                $('.wrapper').css('display', 'none');
            })
        })

    </script>
</body>

</html>
4、jquery实现轮播图

 浙公网安备 33010602011771号