Redhat7 环境基本优化
Redha7基础优化
1. 查看系统基础环境。
cat /etc/redhat-release
Red Hat Enterprise Linux Server release 7.4 (Maipo)
uname -r
3.10.0-957.el7.x86_64 (查看系统内核kernel的版本号)
uname -m
x86_64 (查看系统的位数)
2. Linux配置YUM源
创建iso存放目录和挂载目录
cd /mnt/
mkdir iso cdrom
将iso镜像文件上传到/mnt/iso文件夹下
将/mnt/iso下的iso文件挂载到/mnt/cdrom目录
mount -o loop rhel-server-7.4-x86_64-dvd.iso /mnt/cdrom/
mount: /dev/loop0 写保护,将以只读方式挂载.
(mount命令 -o指定选项,loop用来把一个文件当成硬盘分区mount到目录)
echo "mount -o loop /mnt/iso/ rhel-server-7.4-x86_64-dvd.iso /mnt/cdrom/" >> /etc/rc.local
编辑/etc/yum.repos.d/myself.repo,如果/etc/yum.repos.d/路径下有其他*.repo文件的话,先备份删除,然后再编辑myself.repo文件
[root@desktop ~]# cd /etc/yum.repos.d/
[root@desktop yum.repos.d]# vim local.repo
[base]
name=local
baseurl=file:///mnt/cdrom
gpgcheck=0
enabled=1
测试
清除yum缓存
yum clean all
已加载插件:langpacks, product-id, search-disabled-repos, subscription-manager
This system is not registered with an entitlement server. You can use subscription-manager to register.
正在清理软件源: base
Cleaning up everything
Maybe you want: rm -rf /var/cache/yum, to also free up space taken by orphaned data from disabled or removed repos
尝试安装httpd
yum install httpd -y
yum install lrzsz -y
已加载插件:langpacks, product-id, search-disabled-repos
软件包 lrzsz-0.12.20-36.el7.x86_64 已安装并且是最新版本
无须任何处理
yum报错信息:
订阅插件提示:This system is not registered with an entitlement server. You can use subscription-manager to register.
这个Red Hat Subscription Manager订阅管理器,它会让你一直register,解决办法:禁用就好
脚本文件: /usr/lib/yum-plugins/subscription-manager.py
配置文件: /etc/yum/pluginconf.d/subscription-manager.conf
调用了脚本 /usr/share/rhsm/repolib.py
去重写或者更新/etc/yum.repos.d/redhat.repo文件。
每次yum调用(不禁掉plugins的情况下),都会更新此文件。
因此,为了不冲突,可以如下操作:停止掉该插件的使用,在配置文件中把enable=0即可。
[root@micocube ~] vim /etc/yum/pluginconf.d/subscription-manager.conf
[main]
enabled=0#将它禁用掉
如刚开始安装选择的最小化安装,后续可以执行这条命令安装组件
[root@local cdrom]# yum grouplist
已加载插件:langpacks, product-id, search-disabled-repos, subscription-manager
This system is not registered with an entitlement server. You can use subscription-manager to register.
没有安装组信息文件
Maybe run: yum groups mark convert (see man yum)
可用的环境分组:
最小安装
基础设施服务器
文件及打印服务器
基本网页服务器
虚拟化主机
带 GUI 的服务器
可用组:
传统 UNIX 兼容性
兼容性程序库
图形管理工具
安全性工具
开发工具
控制台互联网工具
智能卡支持
科学记数法支持
系统管理
系统管理工具
完成
[root@local cdrom]# yum groupinstall -y "开发工具" ##安装命令
3. 关闭SElinux功能。SELinux(Security-Enhanced Linux)是美国国家安全局(NSA)对于强制访问控制的实现,这个功能让系统管理员又爱又恨,这里我们还是把它关闭,至于安全问题,后面通过其他手段来解决,这也是大多数生产环境的做法,如果非要开启也是可以的。关闭SELINUX,可以通过vi修改配置文件来修改SELinux的状态或者用sed命令进行修改。
sed -i 's/SELINUX=enforcing/SELINUX=disabled/' /etc/selinux/config
setenforce 0
#修改完配置文件需重启系统才能生效,可临时设置为关闭状态
getenforce
Permissive(#查看SElinux当前的级别状态,Permissive相当disabled)
4. 关闭iptables防火墙。关闭防火墙的目的是为了让初学者学习更方便,将来在学了iptables技术后可再统一开启。在企业环境中,一般只有配置外网IP的linux服务器才需要开启防火墙,但即使是有外网IP,对于高并发高流量的业务服务器仍是不能开的,因为会有较大性能损失,导致网站访问很慢,这种情况下只能在前端加更好的硬件防火墙了。
systemctl stop firewalld #关闭防火墙
systemctl status firewalld #查看防火墙状态
systemctl disable firewalld #设置开机禁止启动防火墙
systemctl is-enabled firewalld #查看防火墙是否开机启动
disabled
5. 设定linux运行级别。
在Linux操作系统中操作系统 的级别分为七级:
0 — 表示关机级别(不要将默认的运行级别设置成这个值)
1 — 单用户模式
2 — 多用户模式,不带NFS(Network File Syetem)
3 — 多用户模式,完全的多用户模式(不带桌面的,纯命令行模式)
4 — 没有被使用的模式(被保留模式)
5 — X11,完整的图形化界面模式
6 — 表示重启级别(不要将默认的运行级别设置成这个值)
对于传统的设置方法,只要修改/etc/inittab文件即可,将默认的启动级别改为需要改动的级别。打开CentOS7的/etc/inittab,发现该文件与其他Linux不同。
# cat /etc/inittab
# inittab is no longer used when using systemd.
#
# ADDING CONFIGURATION HERE WILL HAVE NO EFFECT ON YOUR SYSTEM.
#
# Ctrl-Alt-Delete is handled by /usr/lib/systemd/system/ctrl-alt-del.target
#
# systemd uses 'targets' instead of runlevels. By default, there are two main targets:
#
# multi-user.target: analogous to runlevel 3
# graphical.target: analogous to runlevel 5
#
# To view current default target, run:
# systemctl get-default
#
# To set a default target, run:
# systemctl set-default TARGET.target
#
按照该文件所说的,runlevels被targets所取代,即CentOS7采用加载target的方式来替代之前的启动级别。其中有两个重要的target:multi-user.target与graphical.target。它们分别表示运行级别中的3与5级别。
linux Redhat7运行级别对应表?
-bash-4.2$ ls -al /lib/systemd/system/runlevel*
lrwxrwxrwx. 1 root root 15 12月 20 16:46 /lib/systemd/system/runlevel0.target -> poweroff.target 关机
lrwxrwxrwx. 1 root root 13 12月 20 16:46 /lib/systemd/system/runlevel1.target -> rescue.target 单用户模式,root权限,用于系统维护
lrwxrwxrwx. 1 root root 17 12月 20 16:46 /lib/systemd/system/runlevel2.target -> multi-user.target 多用户状态(无NFS)。没有网络服务。
lrwxrwxrwx. 1 root root 17 12月 20 16:46 /lib/systemd/system/runlevel3.target -> multi-user.target 完整的多用户状态(有NFS)。有网络服务,登录后进入控制台命令行模式。
lrwxrwxrwx. 1 root root 17 12月 20 16:46 /lib/systemd/system/runlevel4.target -> multi-user.target 保留,未使用
lrwxrwxrwx. 1 root root 16 12月 20 16:46 /lib/systemd/system/runlevel5.target -> graphical.target X11控制台,登录后进入图形GUI模式。
lrwxrwxrwx. 1 root root 13 12月 20 16:46 /lib/systemd/system/runlevel6.target -> reboot.target 重启模式
linux Redhat7修改运行级别?
将默认级别设置为3(命令行模式)
systemctl set-default multi-user.target
将默认级别设置为5(图形界面模式)
systemctl set-default graphical.target
systemctl管理服务的启动,重启,停止等命令?
systemctl start foo.service 启动
systemctl restart foo.service 重启
systemctl stop foo.service 停止
systemctl status foo.service 查看服务状态
systemctl设置服务开机启动,不启动等命令?
systemctl enable foo.service 开机自动启动
systemctl disable foo.service 开机不自动启动
systemctl is-enable foo.service 查看特定服务是否开机自启动
6. 管理服务设置精简开机。CentOS7开始使用systemd服务来代替daemon,原来管理系统启动和管理系统服务的相关命令全部由systemctl命令来代替。
service 命令与 systemctl 命令对比
众所周知,服务越少,系统占用的资源就会越少,所以建议把不需要的服务关闭掉,这样做的好处是减少内存和CPU资源占用。首先可以看下系统中 存在着哪些已经启动了的服务。
systemctl list-unit-files -t service
yum install -y bash-completion #安装后可补全服务名称
下面列出的是CentOS7开机需要保留的服务:
crond.service — 定时任务
getty@.service — tty控制台相关
rsyslog.service — 日志服务
sshd.service — ssh登陆
sysstat.service — 性能分析
一条命令关闭其他所有不必要的服务:
# systemctl list-unit-files|grep enable|egrep -v
"crond|getty|rsyslog|sshd|sysstat"|awk '{print "systemctl","disable",$1}'|bash
# systemctl list-unit-files|grep enable
crond.service enabled
getty@.service enabled
rsyslog.service enabled
sshd.service enabled
sysstat.service enabled
7. 中文显示设置。
cp /etc/sysconfig/i18n /etc/sysconfig/back_i18n
echo 'LANG="en_US.UTF-8"' > /etc/sysconfig/i18n
source /etc/sysconfig/i18n
echo $LANG
8. 定时校正服务器时间。当Linux服务器的时间不对的时候,可以使用ntpdate工具来校正时间。
yum install ntp -y #若无ntpdate命令,安装ntp
ntpdate ntp.api.bz #校正服务器时间同网络时间一致
3 Feb 17:03:37 ntpdate[1458]: step time server 114.118.7.163 offset -57.802521 sec
# dig ntp.api.bz #ntp.api.bz是一组NTP服务器集群,可用dig命令查看
# crontab -e #加入到定时任务,如每天凌晨1点1分执行一次时间同步
01 01 * * * /usr/sbin/ntpdate ntp.api.bz >> /dev/null 2>&1
9. 调整文件描述符的数量,进程和文件打开都要消耗文件描述符。
echo 'ulimit -n 32000' >>/etc/profile
source /etc/profile
echo '* soft nofile 327680'>> /etc/security/limits.conf
echo '* hard nofile 327680'>> /etc/security/limits.conf
10. 隐藏linux版本信息。
>/etc/issue
>/etc/issue.net
11. 禁止linux系统被ping
# 开启禁止ping
echo "net.ipv4.icmp_echo_ignore_all=1" 1>> /etc/sysctl.conf
sysctl –p
# 关闭禁止ping
首先要删除 /etc/sysctl.conf 里面net.ipv4.icmp_echo_ignore_all = 1
之后执行如下命令
echo 0 1> /proc/sys/net/ipv4/icmp_echo_ignore_all
# 后续就可以通过更改 cat /proc/sys/net/ipv4/icmp_echo_ignore_all文件
0 关闭 1 开启
12. 历史记录
# 以下都是临时生效,默认1000不需要更改
# 设置的是闲置账号的超时时间
export TMOUT=10 10秒后提示超时时间
# 设置终端history显示条数
export HISTSIZE=5 只显示最近5条信息
# 上面的终端显示对应的是 cat ~/.bash_history
export HISTFILESIZE=5 该文件只保存5条信息
# 清空历史记录
history -c
# 指定条数删除
history -d 历史记录条属
13. 内核优化
net.ipv4.tcp_syn_retries = 1
net.ipv4.tcp_synack_retries = 1
net.ipv4.tcp_keepalive_time = 600
net.ipv4.tcp_keepalive_probes = 3
net.ipv4.tcp_keepalive_intvl =15
net.ipv4.tcp_retries2 = 5
net.ipv4.tcp_fin_timeout = 2
net.ipv4.tcp_max_tw_buckets = 36000
net.ipv4.tcp_tw_recycle = 1
net.ipv4.tcp_tw_reuse = 1
net.ipv4.tcp_max_orphans = 32768
net.ipv4.tcp_syncookies = 1
net.ipv4.tcp_max_syn_backlog = 16384
net.ipv4.tcp_wmem = 8192 131072 16777216
net.ipv4.tcp_rmem = 32768 131072 16777216
net.ipv4.tcp_mem = 786432 1048576 1572864
net.ipv4.ip_local_port_range = 1024 65000
net.ipv4.ip_conntrack_max = 65536
net.ipv4.netfilter.ip_conntrack_max=65536
net.ipv4.netfilter.ip_conntrack_tcp_timeout_established=180
net.core.somaxconn = 16384
net.core.netdev_max_backlog = 16384
14. 安装基础软件
yum install lrzsz nmap tree dos2unix nc -y
yum update -y
yum upgrade -y
15. 变更默认的ssh服务端口,禁止root用户远程连接
[root@c64 ~]# cp /etc/ssh/sshd_config /etc/ssh/sshd_config.bak
[root@c64 ~]# vim /etc/ssh/sshd_config
Port 52113 #ssh连接默认的端口禁止
PermitRootLogin no #root用户黑客都知道,禁止它远程登录,ssh虽然禁止远程登录,但是可以su -
PermitEmptyPasswords no #禁止空密码登录
UseDNS no #不使用DNS
GSSAPIAuthentication no ##ssh连接慢需要更改这里
[root@c64 ~]# /etc/init.d/sshd reload #从新加载配置
[root@c64 ~]# netstat -lnt #查看端口信息
[root@c64 ~]# lsof -i tcp:52113
16. 锁定关键文件系统
加锁,不可修改加锁文件
[root@jokerpro ~]# chattr +i /etc/passwd
[root@jokerpro ~]# lsattr /etc/passwd
----i--------e-- /etc/passwd
去锁,可以修改文件
[root@jokerpro ~]# chattr -i /etc/passwd
[root@jokerpro ~]# lsattr /etc/passwd
-------------e-- /etc/passwd
16. redhat7修改主机名常用方法
第一种方式:nmtui
第二种方式:使用hostnamectl命令
格式:hostnamectl set-hostname 主机名
如:
hostnamectl set-hostname node0001
修改后当前主机名并不会立马更改,需要重启后才生效,可使用hostname查看当前真实的主机名。
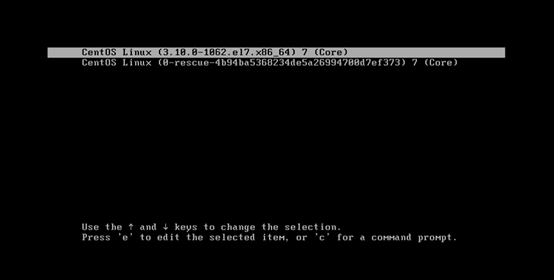
17. 为grub菜单设置密码
GRUB2提供两种类型的密码保护:
修改菜单条目时需要密码,但启动菜单条目时不需要密码;(只需要这一种)
修改菜单条目和启动一个、多个或所有菜单条目都需要密码。
设置修改菜单条目时的密码
使用grub2-setpassword设置密码可以防止修改GRUB菜单条目,但是不能防止未经许可的启动。如果需要启动条目的时候也需要密码,需要修改grub配置文件。
在RHEL 7.2和Centos 7(及更高版本)上,GRUB 2使用grub2-setpassword命令提供密码保护。
[root@localhost grub.d]# grub2-setpassword
Enter password:
Confirm password:
当在grub菜单里面按下e 或c,编辑的时候,提示需要用户名和密码才能修改。


