
Python IO操作与编码、解码
一、Python文件操作
1、文件IO操作(IO:input,output)
a:操作文件使用的函数是open()
b:操作文件模式:
r:读取文件
w:往文件里面写内容(先删除文件里面已有的内容)
a:是追加(在文件基础上写入新的内容)
b:二进制的模式写文件
c:open函数执行流程:
open操作文件的时候,它的判断逻辑是:
I:如果是读的模式,文件必须得存在
II:如果是写的模式,文件不存在,open内部会自动创建一个文件,然后把内容写进去
d:操作文件的步骤:
step1:打开文件
step2:逻辑文件
step3:关闭文件
2、不同文件模式的应用
A:w模式 【如果是写的模式,文件不存在,open内部会自动创建一个文件,然后把内容写进去】
1 def open_w():
2     f=open(file="log",mode="w",encoding="UTF-8")
3     f.write("我要学习!")
4     f.close()
5 open_w()
运行结果:
新创建出了一个log文件,并且文件里面出现”我要学习!”
B:w模式下的多行模式
1 def open_ws():
2     f=open(file="log",mode="w",encoding="UTF-8")
3     f.writelines("我喜欢苹果!\n"
4                  "我不想吃饭!\n"
5                  "我是毛毛虫!\n")
6     f.close()
7 open_ws()
运行结果:
打开新出现的文件log,出现:
我喜欢苹果!
我不想吃饭!
我是毛毛虫!
C:r模式下的读取所有的内容【如果是读的模式,文件必须得存在】
1 def readFile():
2     f=open(file="log",mode="r",encoding="UTF-8")
3     print(f.read())
4     f.close()
5 readFile()
运行结果:
我喜欢苹果!
我不想吃饭!
我是毛毛虫!


Process finished with exit code 0
D:r模式下的读取文件的第一行
1 def readFile():
2     f=open(file="log",mode="r",encoding="UTF-8")
3     print(f.readline())
4     f.close()
5 readFile()
运行结果:
我喜欢苹果!


Process finished with exit code 0
E: r模式下的循环读取文件里面的内容
虽然循环读取和全部读取所显示的内容是一样的,但是对于存在大量数据的情况下,通过循环读取可以使我们系统资源更好的运行。
1 def readFile():
2     f=open(file="log",mode="r",encoding="UTF-8")
3     for item in f.readlines():
4         print(item.strip())
5     f.close()
6 readFile()
运行结果:
我喜欢苹果!
我不想吃饭!
我是毛毛虫!


Process finished with exit code 0
F:批量读,批量写
1 def open_ws():
2     read=open(file="log",mode="r",encoding="UTF-8")
3     write=open(file="log.txt",mode="w",encoding="UTF-8")
4     for item in read.readlines():
5         write.writelines(item)
6     read.close()
7     write.close()
8 open_ws()
运行结果:
打开log文件和log.txt文件
可以看到:
我喜欢苹果!
我不想吃饭!
我是毛毛虫!
G:a的模式
1 def open_a():
2     f=open(file="log",mode="a",encoding="UTF-8")
3     f.write("Python")
4     f.close()
5 open_a()
运行结果:
打开log文件,可以看到:
我喜欢苹果!
我不想吃饭!
我是毛毛虫!
Python
F:with用法
with的作用:在文件中经常需要进行open()和close()操作,为了防止我们忘记这些操作,使用with很好解决了上述问题。
a:with上下文-读
1 def withFile():
2     with open(file="log",mode="r",encoding="UTF-8") as f:
3         print(f.read())
4 withFile()
运行结果:
我喜欢苹果!
我不想吃饭!
我是毛毛虫!
Python

Process finished with exit code 0
b:with上下文-写
1 def withFile():
2     with open(file="log",mode="w",encoding="UTF-8") as f:
3         print(f.write("我不喜欢吃饺子!"))
4 withFile()
运行结果:
打开log文件,可以看到:
我不喜欢吃饺子!
二、编码与解码
1、编码:就是把str的数据类型转为bytes的数据类型的过程,使⽤到的关键字是encode。
1 str1="我要学习!"
2 str1_bytes=str1.encode("UTF-8")
3 print(str1_bytes)
4 print(type(str1_bytes))
运行结果:
b'\xe6\x88\x91\xe8\xa6\x81\xe5\xad\xa6\xe4\xb9\xa0\xef\xbc\x81'
<class 'bytes'>

Process finished with exit code 0
2、解码:把bytes的数据类型转为str的数据类型的过程,使⽤到的关键字是decode。
1 bytes_str=str1_bytes.decode("Utf-8")
2 print(bytes_str)
3 print(type(bytes_str))
运行结果:
我要学习!
<class 'str'>

Process finished with exit code 0
3、解码与编码的用途
在实际的测试中,我们作为测试人员需要将一系列的乱码,转换成符合我们认识的代码语言,这是就需要解码和编码。
三、异常管理
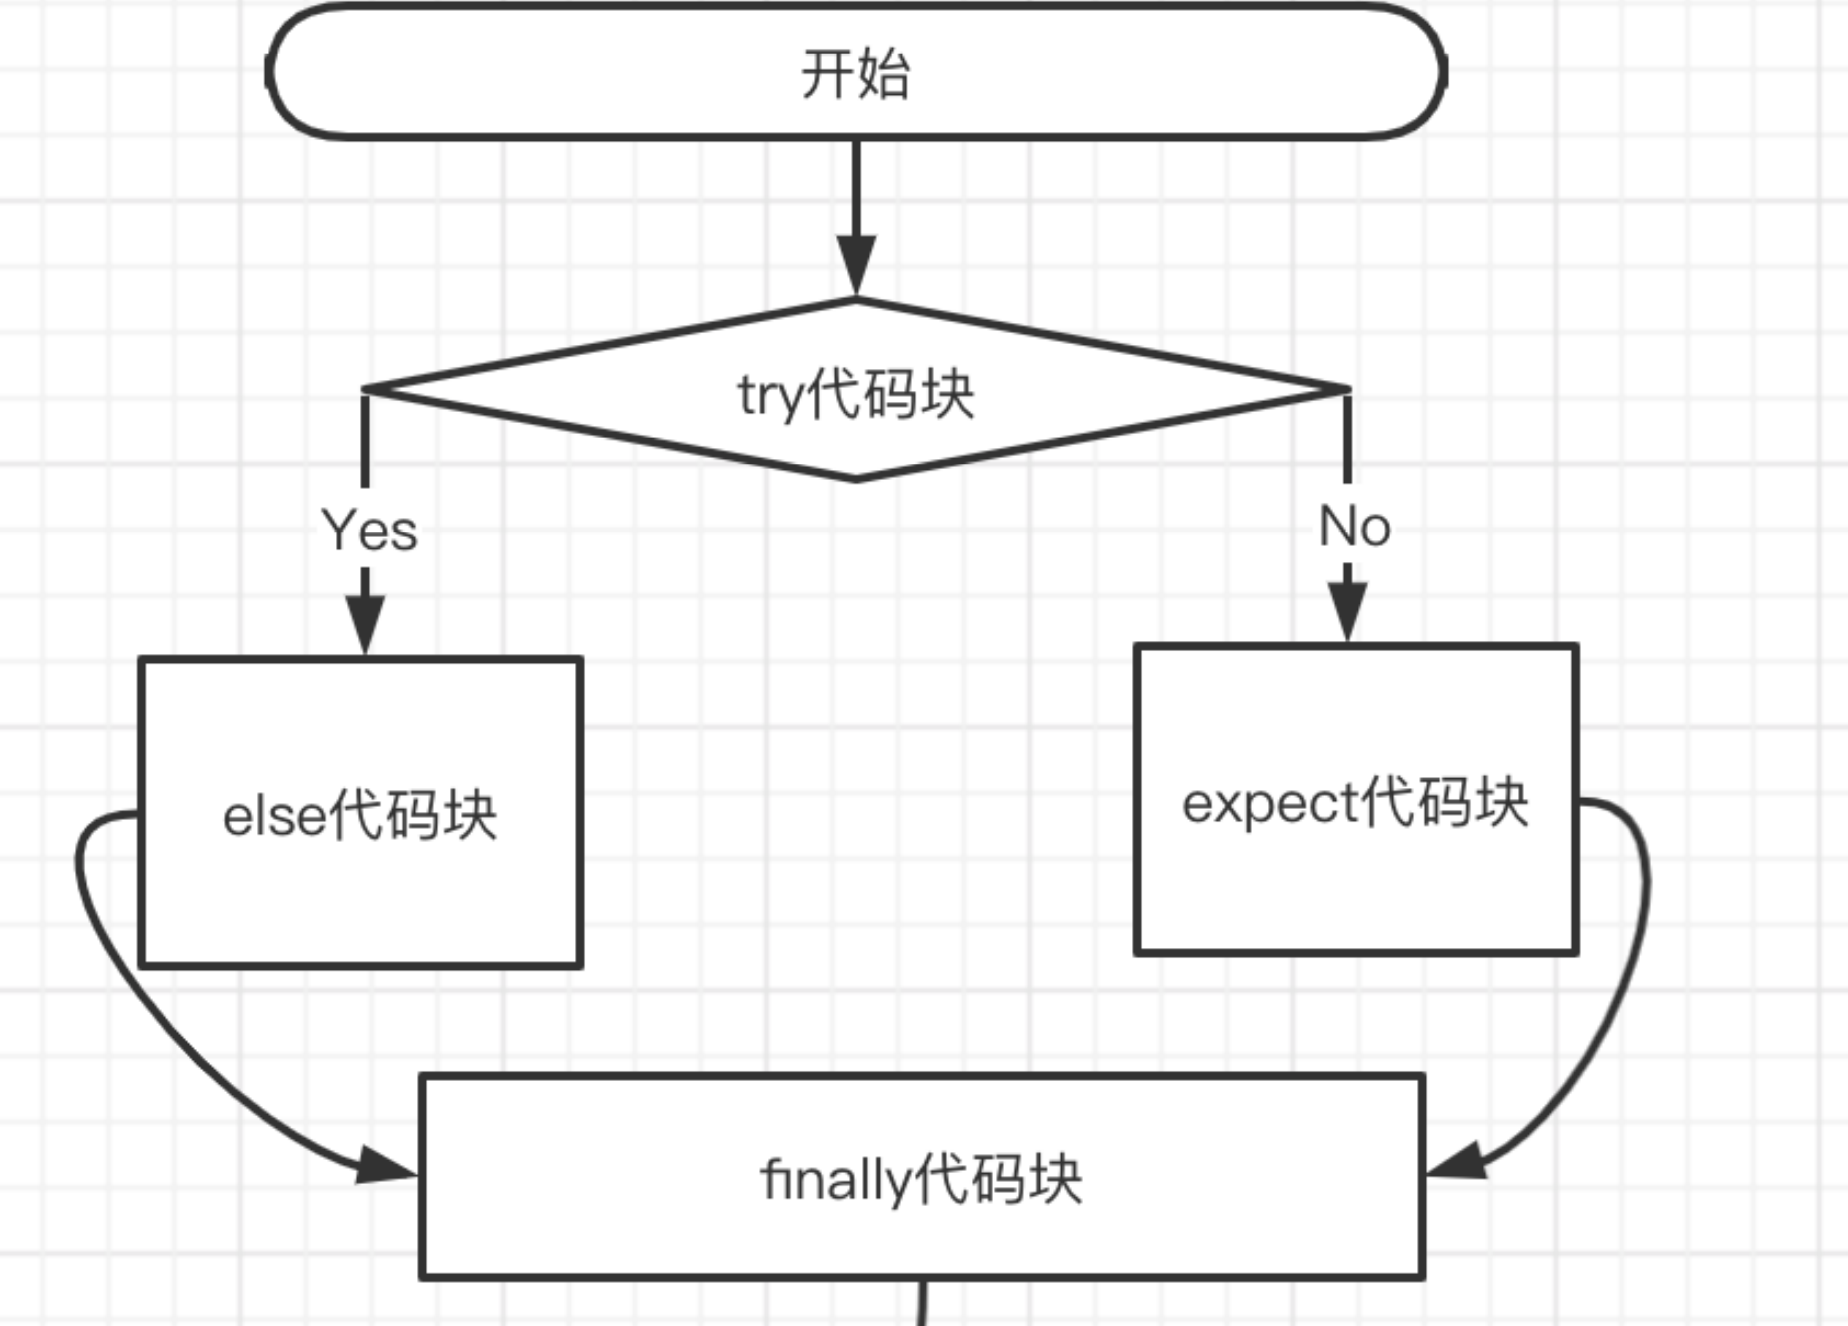
try:正常情况下,程序计划执行的语句。
except:程序异常是执行的语句。
else:程序无异常即try段代码正常执行后会执行该语句。
finally:不管有没有异常,都会执行的语句。
上述几个之间的逻辑关系如下:
情况1:
 1 try:
 2     1/0
 3 except Exception as e:
 4     print(e.args[0])
 5 except ZeroDivisionError as e:
 6     print(e.args[0])
 7 else:
 8     print("try执行正常")
 9 finally:
10     print("我无论如何都需要被执行")
上述代码根据断点Debug异常管理可知该程序执行的过程是:以执行行数来说1->2->3->4->9->10,可见,因为代码在执行的过程中是从上往下开始执行,而且Exception是捕获所有的异常情况,虽然我们知道是ZeroDivisionError异常,但是Exception在ZeroDivisionError的前面,所以会被优先执行,从而跳过,最终执行finally。
情况2:
 1 try:
 2     1/0
 3 except ZeroDivisionError as e:
 4     print(e.args[0])
 5 except Exception as e:
 6     print(e.args[0])
 7 else:
 8     print("try执行正常")
 9 finally:
10     print("我无论如何都需要被执行")
上述代码的执行过程以行数来说是:1->2->3->4->9->10,这时ZeroDivisionError在Exception的前面,而该代码刚好犯得就是这个错误,所以会被优先执行,从而跳过,最终执行finally。
情况3:
 1 try:
 2     score=int(input("输入学生成绩:\n"))
 3 except ZeroDivisionError as e:
 4     print(e.args[0])
 5 except Exception as e:
 6     print(e.args[0])
 7 else:
 8     print("try执行正常")
 9 finally:
10     print("我无论如何都需要被执行")
第一种结果如下:
输入学生成绩:
23.6
invalid literal for int() with base 10: '23.6'
我无论如何都需要被执行

Process finished with exit code 0
第二种结果如下:
输入学生成绩:
88
try执行正常
我无论如何都需要被执行

Process finished with exit code 0

