ELK 学习记录 - 环境搭建 - 手动安装
ELK 学习记录 - 环境搭建 - 手动安装
准备工作
1、下载安装包
2、解压到安装目录
tar -zxvf elasticsearch-7.8.1-linux-x86_64.tar.gz

tar -zxvf kibana-7.8.1-linux-x86_64.tar.gz

tar -zxvf logstash-7.8.1.tar.gz
一、elasticsearch 安装
1、配置
[root@ecs-aece elk]# cd elasticsearch-7.8.1/
[root@ecs-aece elasticsearch-7.8.1]# ls
bin  config  jdk  lib  LICENSE.txt  logs  modules  NOTICE.txt  plugins  README.asciidoc
[root@ecs-aece elasticsearch-7.8.1]# cd config
[root@ecs-aece config]# ls
elasticsearch.yml  jvm.options  jvm.options.d  log4j2.properties  role_mapping.yml  roles.yml  users  users_roles
[root@ecs-aece config]# vim elasticsearch.yml
配置示例
cluster.name: my-application
node.name: node-1
cluster.initial_master_nodes: ["node-1"]
network.host: 0.0.0.0
http.port: 9200
http.cors.enabled: true
http.cors.allow-origin: "*"
集群部署(三节点)配置实例(elasticsearch.yml )
# ======================== Elasticsearch Configuration =========================
#
# NOTE: Elasticsearch comes with reasonable defaults for most settings.
#       Before you set out to tweak and tune the configuration, make sure you
#       understand what are you trying to accomplish and the consequences.
#
# The primary way of configuring a node is via this file. This template lists
# the most important settings you may want to configure for a production cluster.
#
# Please consult the documentation for further information on configuration options:
# https://www.elastic.co/guide/en/elasticsearch/reference/index.html
#
# ---------------------------------- Cluster -----------------------------------
#
# Use a descriptive name for your cluster:
#
cluster.name: my-application
#
# ------------------------------------ Node ------------------------------------
#
# Use a descriptive name for the node:
#
node.name: node-1
#
# Add custom attributes to the node:
#
#node.attr.rack: r1
#
# ----------------------------------- Paths ------------------------------------
#
# Path to directory where to store the data (separate multiple locations by comma):
#
#path.data: /path/to/data
#
# Path to log files:
#
#path.logs: /path/to/logs
#
# ----------------------------------- Memory -----------------------------------
#
# Lock the memory on startup:
#
#bootstrap.memory_lock: true
#
# Make sure that the heap size is set to about half the memory available
# on the system and that the owner of the process is allowed to use this
# limit.
#
# Elasticsearch performs poorly when the system is swapping the memory.
#
# ---------------------------------- Network -----------------------------------
#
# By default Elasticsearch is only accessible on localhost. Set a different
# address here to expose this node on the network:
#
network.host: 0.0.0.0
#
# By default Elasticsearch listens for HTTP traffic on the first free port it
# finds starting at 9200. Set a specific HTTP port here:
#
#http.port: 9200
http.port: 9200
http.cors.enabled: true
http.cors.allow-origin: "*"
# For more information, consult the network module documentation.
#
# --------------------------------- Discovery ----------------------------------
#
# Pass an initial list of hosts to perform discovery when this node is started:
# The default list of hosts is ["127.0.0.1", "[::1]"]
#
#discovery.seed_hosts: ["node-1", "node-2", "node-3"]
#
discovery.seed_hosts: ["IP1:9300", "IP2:9300", "IP3:9300"]
# Bootstrap the cluster using an initial set of master-eligible nodes:
#
cluster.initial_master_nodes: ["node-1"]
#
# For more information, consult the discovery and cluster formation module documentation.
#
# --------------------------------- Readiness ----------------------------------
#
# Enable an unauthenticated TCP readiness endpoint on localhost
#
#readiness.port: 9399
#
# ---------------------------------- Various -----------------------------------
#
# Allow wildcard deletion of indices:
#
#action.destructive_requires_name: false
#
xpack.security.enabled: false
xpack.graph.enabled: false
xpack.watcher.enabled: false
xpack.ml.enabled: false
2、启动
#添加用户组
[root@ecs-aece config]# groupadd elsearch
#添加用户
[root@ecs-aece config]# useradd elsearch -g elsearch

#修改 es 文件夹及内部文件的所属用户及组为elsearch:elsearch
[root@ecs-aece elk]# pwd
/usr/local/elk
[root@ecs-aece elk]# ls
elasticsearch-7.8.1  elasticsearch-7.8.1-linux-x86_64.tar.gz  kibana-7.8.1-linux-x86_64  kibana-7.8.1-linux-x86_64.tar.gz  logstash-7.8.1  logstash-7.8.1.tar.gz
[root@ecs-aece elk]#
[root@ecs-aece elk]# chown -R elsearch:elsearch elasticsearch-7.8.1
[root@ecs-aece elk]#

#切换用户
[root@ecs-aece elk]# su elsearch
#进去bin目录
[elsearch@ecs-aece elk]$ cd elasticsearch-7.8.1/bin
#启动
sh elasticsearch &
3、验证
在浏览器中输入:http://xxxxxxxxxxxxxxxxxxxx:9200
{
  "name" : "node-1",
  "cluster_name" : "elasticsearch",
  "cluster_uuid" : "stnvKTWXSImMTMK_Fnropg",
  "version" : {
    "number" : "7.8.1",
    "build_flavor" : "default",
    "build_type" : "tar",
    "build_hash" : "b5ca9c58fb664ca8bf9e4057fc229b3396bf3a89",
    "build_date" : "2020-07-21T16:40:44.668009Z",
    "build_snapshot" : false,
    "lucene_version" : "8.5.1",
    "minimum_wire_compatibility_version" : "6.8.0",
    "minimum_index_compatibility_version" : "6.0.0-beta1"
  },
  "tagline" : "You Know, for Search"
}
其他配置说明
elasticsearch配置文件中 http.cors.x 字段有哪些用途和用法
http.cors.enabled   是否支持跨域,默认为false
http.cors.allow-origin  当设置允许跨域,默认为*,表示支持所有域名,如果我们只是允许某些网站能访问,那么可以使用正则表达式。比如只允许本地地址。 /https?:\/\/localhost(:[0-9]+)?/
http.cors.max-age   浏览器发送一个“预检”OPTIONS请求,以确定CORS设置。最大年龄定义多久的结果应该缓存。默认为1728000(20天)
http.cors.allow-methods 允许跨域的请求方式,默认OPTIONS,HEAD,GET,POST,PUT,DELETE
http.cors.allow-headers 跨域允许设置的头信息,默认为X-Requested-With,Content-Type,Content-Length
http.cors.allow-credentials 是否返回设置的跨域Access-Control-Allow-Credentials头,如果设置为true,那么会返回给客户端。
UI 插件 elasticsearch-head 安装
git clone git://github.com/mobz/elasticsearch-head.git
cd elasticsearch-head
npm install
npm run start
open http://localhost:9100/
注意:安装过程中可能出现部分软件下载不下来,那么手动下载 上传到 指定的位置即可。
如:phantomjs-2.1.1-linux-x86_64.tar.bz2
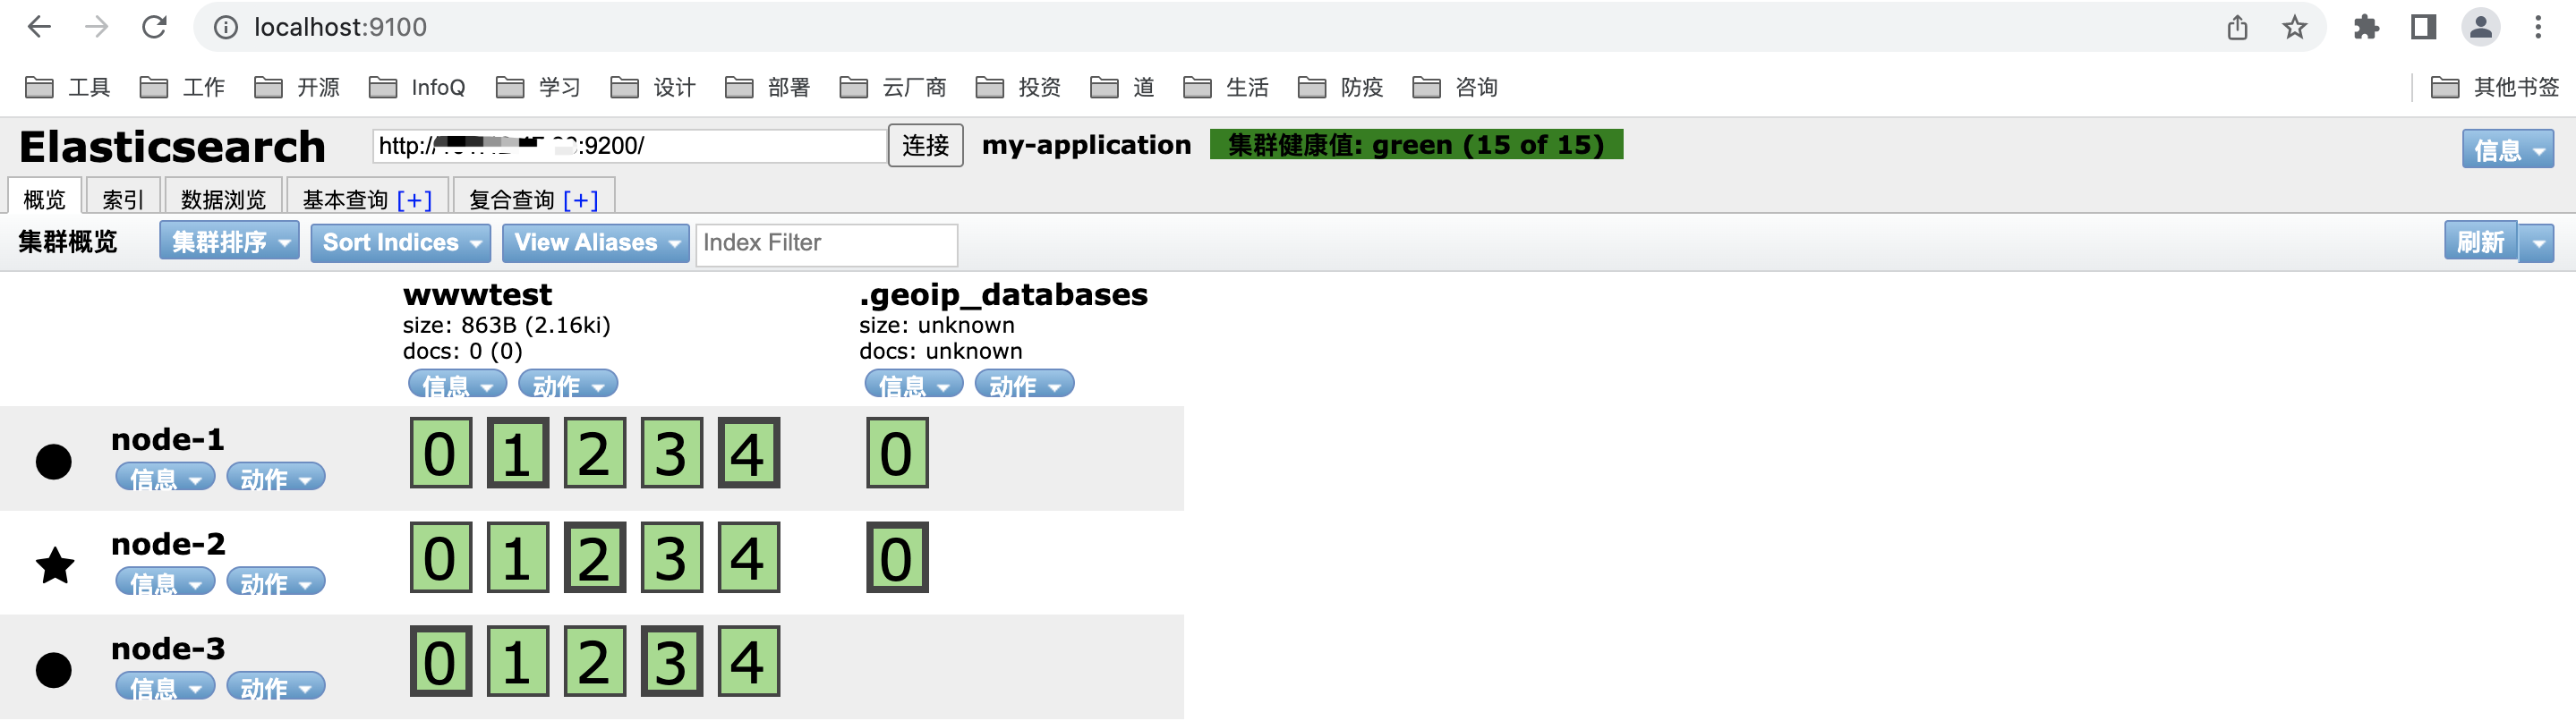
创建索引的日志(5分片2副本)
[2022-12-27T10:11:34,199][INFO ][o.e.c.m.MetadataCreateIndexService] [node-2] [wwwtest] creating index, cause [api], templates [], shards [5]/[2]
[2022-12-27T10:11:35,584][INFO ][o.e.c.r.a.AllocationService] [node-2] current.health="GREEN" message="Cluster health status changed from [YELLOW] to [GREEN] (reason: [shards started [[wwwtest][2]]])." previous.health="YELLOW" reason="shards started [[wwwtest][2]]"
遇到的问题
问题一(es):
WARNING: IPv4 forwarding is disabled. Networking will not work.
原因:因为linux内核转发的问题
解决方案:
1、修改sysctl.conf或者00-system.conf文件
vim /etc/sysctl.conf
或者
vim /usr/lib/sysctl.d/00-system.conf
2、在sysctl.conf或者00-system.conf文件添加以下代码
net.ipv4.ip_forward=1
3、重启network服务
systemctl restart network
4、查看是否修改成功
sysctl net.ipv4.ip_forward
问题二(es):
elasticsearch-env: line 122: syntax error near unexpected token `<
原因:版本问题
解决方案:修改elasticsearch-env文件的第122行:
done < <(env)
【<改成三连,括号改成单引号】
done <<<'env'
问题三(es):
ERROR: [1] bootstrap checks failed
[1]: max virtual memory areas vm.max_map_count [65530] is too low, increase to at least [262144]
原因:vm.max_map_count 数量太低
解决方案:vim /etc/sysctl.conf ,追加如下配置
vm.max_map_count=262144
然后执行如下命令:
sysctl -p #从指定的文件加载系统参数,如不指定即从/etc/sysctl.conf中加载
问题四(es):
java.lang.RuntimeException: can not run elasticsearch as root
原因:不可以用 root 用户启动es
解决方案:切换成 elsearch 用户 (或其他指定用户)
问题五(es):
ERROR: [1] bootstrap checks failed
[1]: the default discovery settings are unsuitable for production use; at least one of [discovery.seed_hosts, discovery.seed_providers, cluster.initial_master_nodes] must be configured
原因:没有修改 host1,host2 等
在elasticsearch的config目录下,修改elasticsearch.yml配置文件,将下面的配置加入到该配置文件中
ip替换host1等,多节点请添加多个ip地址,单节点可写按默认来
#配置以下三者,最少其一
#[discovery.seed_hosts, discovery.seed_providers, cluster.initial_master_nodes]
cluster.initial_master_nodes: ["node-1"] #这里的node-1为node-name配置的值
二、kibana 安装
1、使用 root 用户进去到 kibana 解压后的目录
2、配置
kibana.yml
server.port: 5601
server.host: "0.0.0.0"
elasticsearch.hosts: ["http://localhost:9200/"]
kibana.index: ".kibana"
3、启动
进去 bin 目录
sh kibana --allow-root & #默认不可以使用 root 启动
4、验证
http://xxxxxxxx:5601

问题:
问题一(k):
FATAL Error: [elasticsearch.url]: definition for this key is missing
解决方案:
需要用: elasticsearch.hosts, 而不是: elasticsearch.url
server.port: 5601
server.host: "0.0.0.0"
server.name: tanklog
elasticsearch.hosts: ["http://localhost:9200/"]
# elasticsearch.url: "http://localhost:9200"
三、logstash 安装
本次如下操作在 logstash 下进行
1、配置
logstash 启动之前需 手动编写配置文件,如: logstash_nacos.conf
内容如下:
input {
    file {
        path => "/usr/local/nacos/logs/*.log"
        start_position => beginning
    }
}
filter {

}
output {
    elasticsearch {
    hosts => "localhost:9200"
    }
}
2、启动
# -f 配置文件启动
sh logstash -f logstash_nacos.conf  &
总结:logstash三种启动方式,-e sting类型启动,-f 指定配置文件启动,服务启动。
# -e string 启动
logstash -e 'input{ stdin{} } output{ stdout{} }'
# 服务启动
service logstash start
参考资料:

 浙公网安备 33010602011771号