Springboot 基础完结->整合SSM03
spring boot常用注解
@SpringbootApplication 表名是springboot应用 组合注解 元注解 @Target({ElementType.TYPE}) 注解能写到哪里 @Retention(RetentionPolicy.RUNTIME) 注解何时生效 @Documented 注解加上文档javadoc @Inherited 注解能被集成
@SpringBootConfiguration 与@Configuration作用一致 标明当前类是配置类 @EnableAutoConfiguration 开启自动配置 @AutoConfigurationPackage 自动配置包(会自动扫描当前包及子包下所有spring注解) @Import({AutoConfigurationImportSelector.class}) 在运行时导入类(自动运行)
@ConditionalOnxxxxxx 条件注解 满足了才加载配置
@ConfigurationProperties(prefix=“”) 根据前缀读取配置文件中的配置到属性中
@MapperScan("mapper接口所在路径") 包扫描器,生成mapper接口的代理对象
@ComponentScan(basePackages = "") 扫包 扫描spring注解
@Value("${配置文件中的key}") 取配置文件的值赋值给属性 private String name; @Value(1231231231231) 直接写值赋值给属性 private String age; @ServletComponentScan 扫描web注解 @WebListener 监听器注解 @WebFilter 过滤器注解 @WebServlet servlet注解
@PropertySource() 加载自定义的.properties文件 @ImportResource()加载自定义的xml配置文件
Springboot也是一站式整合所有框架的框架
springboot自动配置
通过@EnableAutoConfiguration读取系统类,通过系统类去加载了自动配置包,jar包下面的
MATE-INFO下面的spring.factories文件
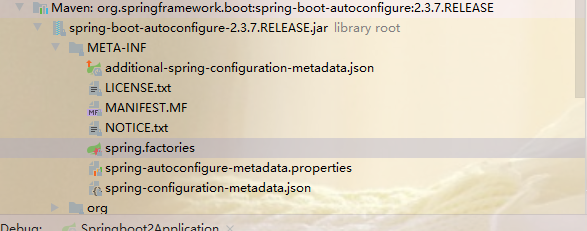
自动配置的类一共128个,根据版本不同数目会不一样
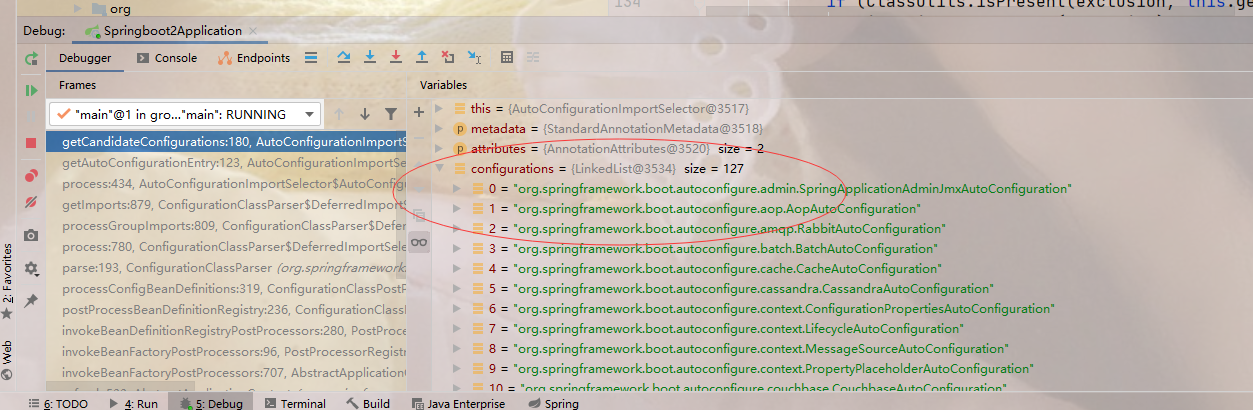
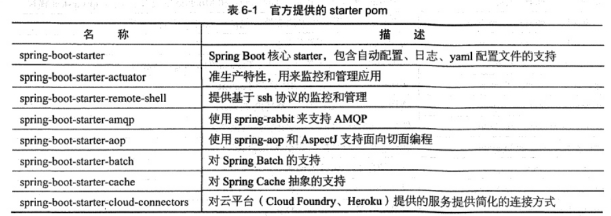
springboot根据你导入的场景启动器,你导的什么他给你自动加载什么
怎么样去筛选?
根据100多个自动配置类上面的条件注解来进行筛选,最后只加载了其中的你导了哪个场景启动器,哪个条件注解成立就加载哪个自动配置类--》在自动配置类里面,哪个配置类都是替换了xml的配置形式,都是通过java面向对象的形式 来完成相应的配置
@ConfigurationProperties(prefix = "person")
可以把你的配置读出来,并且覆盖默认的配置
SpringBoot-整合mybatis-配置版
1.快速创建springboot项目,勾选四个
分别是web,jdbc api,mybatis,mysql,后边配置德鲁伊数据源再说
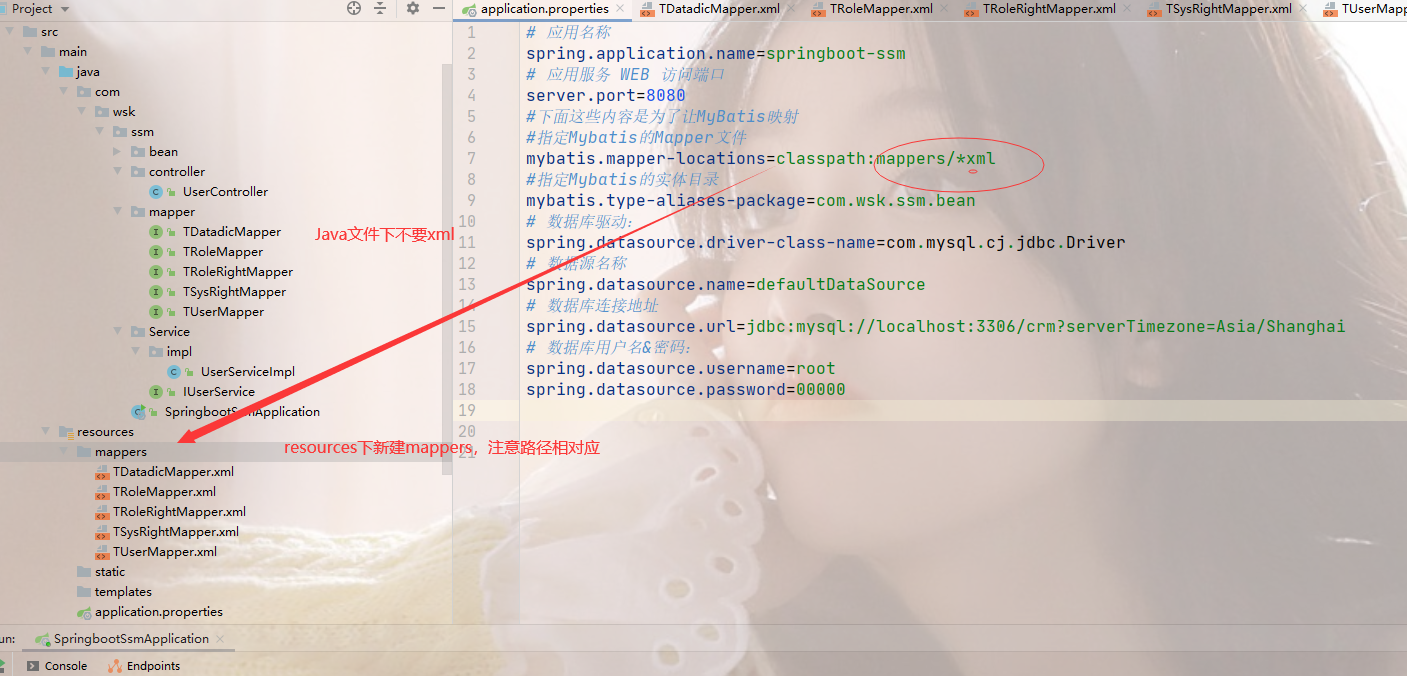
创建完后配置文件会有默认值,改下时区,改好自己需要的路径
如改成这样:
 # 应用名称
 spring.application.name=springboot-ssm
 # 应用服务 WEB 访问端口
 server.port=8080
 #下面这些内容是为了让MyBatis映射
 #指定Mybatis的Mapper文件
 mybatis.mapper-locations=classpath:mappers/*xml
 #指定Mybatis的实体目录
 mybatis.type-aliases-package=com.wsk.ssm.bean
 # 数据库驱动:
 spring.datasource.driver-class-name=com.mysql.cj.jdbc.Driver
 # 数据源名称
 spring.datasource.name=defaultDataSource
 # 数据库连接地址
 spring.datasource.url=jdbc:mysql://localhost:3306/crm?serverTimezone=Asia/Shanghai
 # 数据库用户名&密码:
 spring.datasource.username=root
 spring.datasource.password=00000
没有勾选数据源,先用的默认的
2.随便逆向工程几张表查查数据
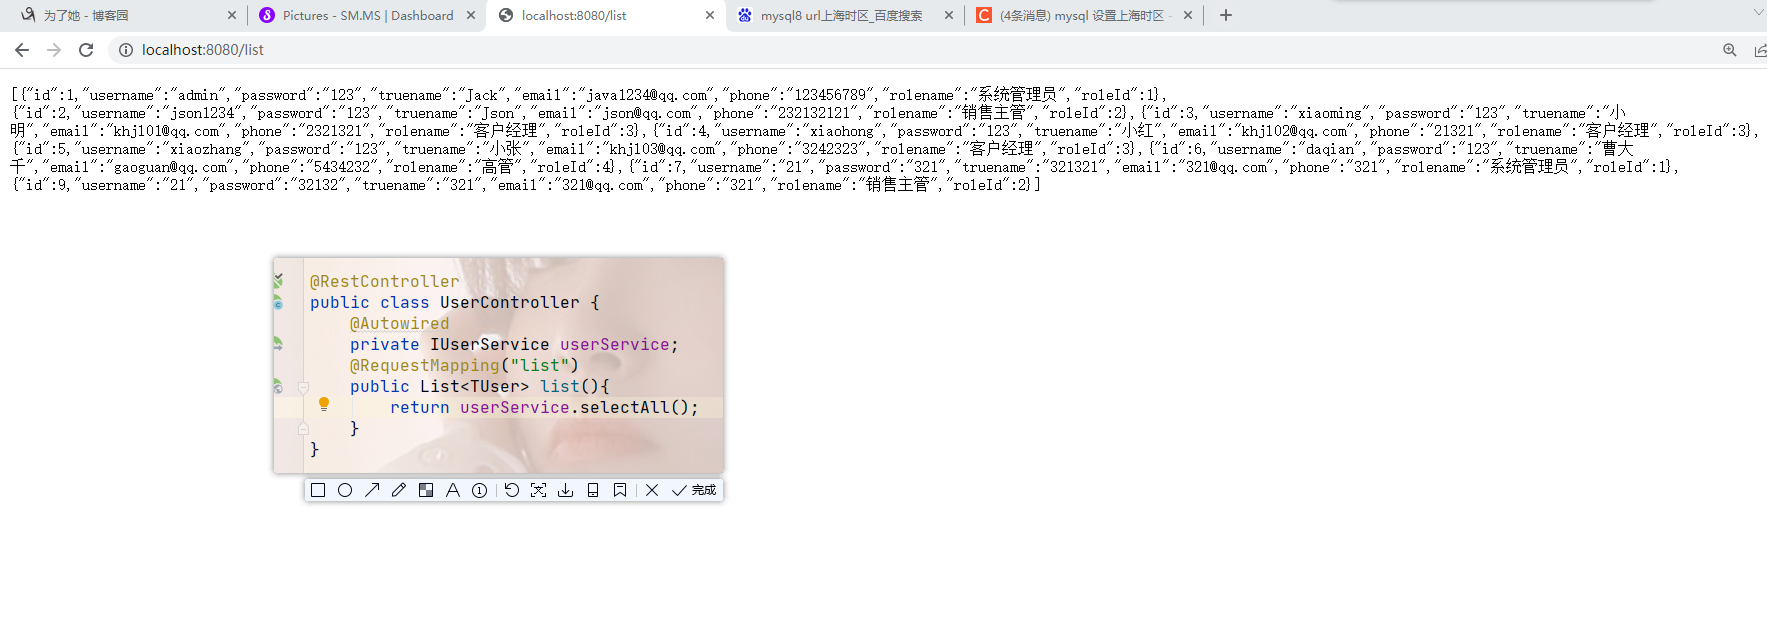
这边逆向的是user
正常写完请求后,(条件查询,条件为空就行)还是会报错,说找不到注入的mapper,项目也编译了这是为什么呢?
答案只需在程序入口扫一下mapper就行了
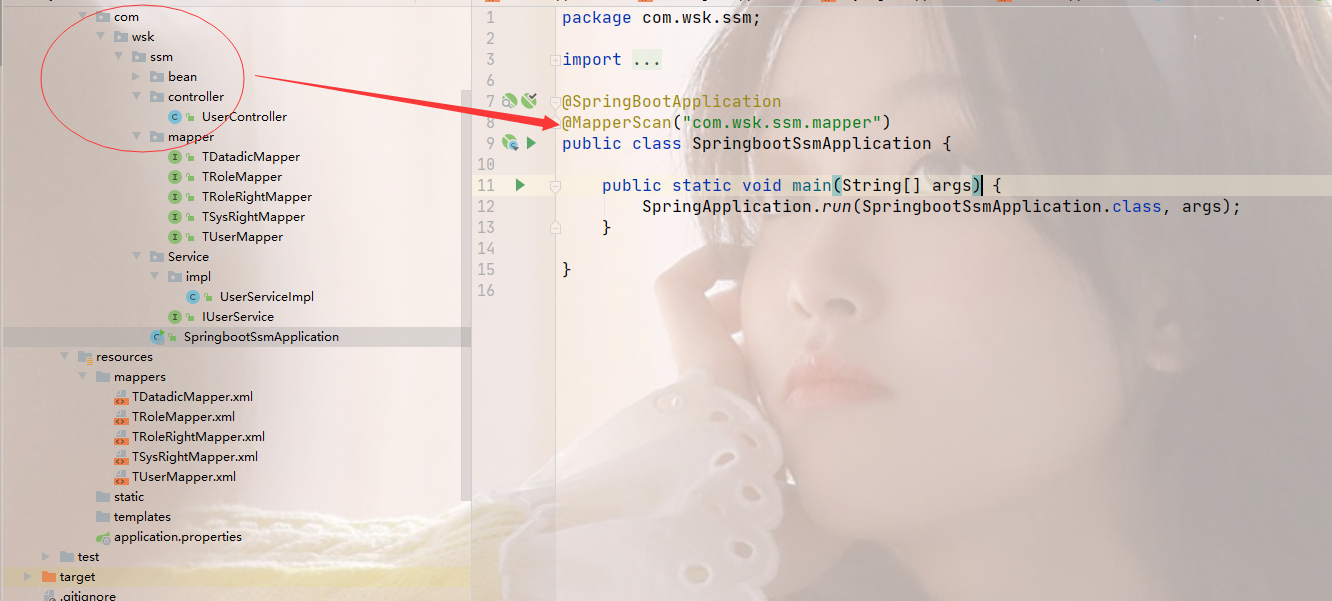
这样就正常显示了
接下来测试事务中不中
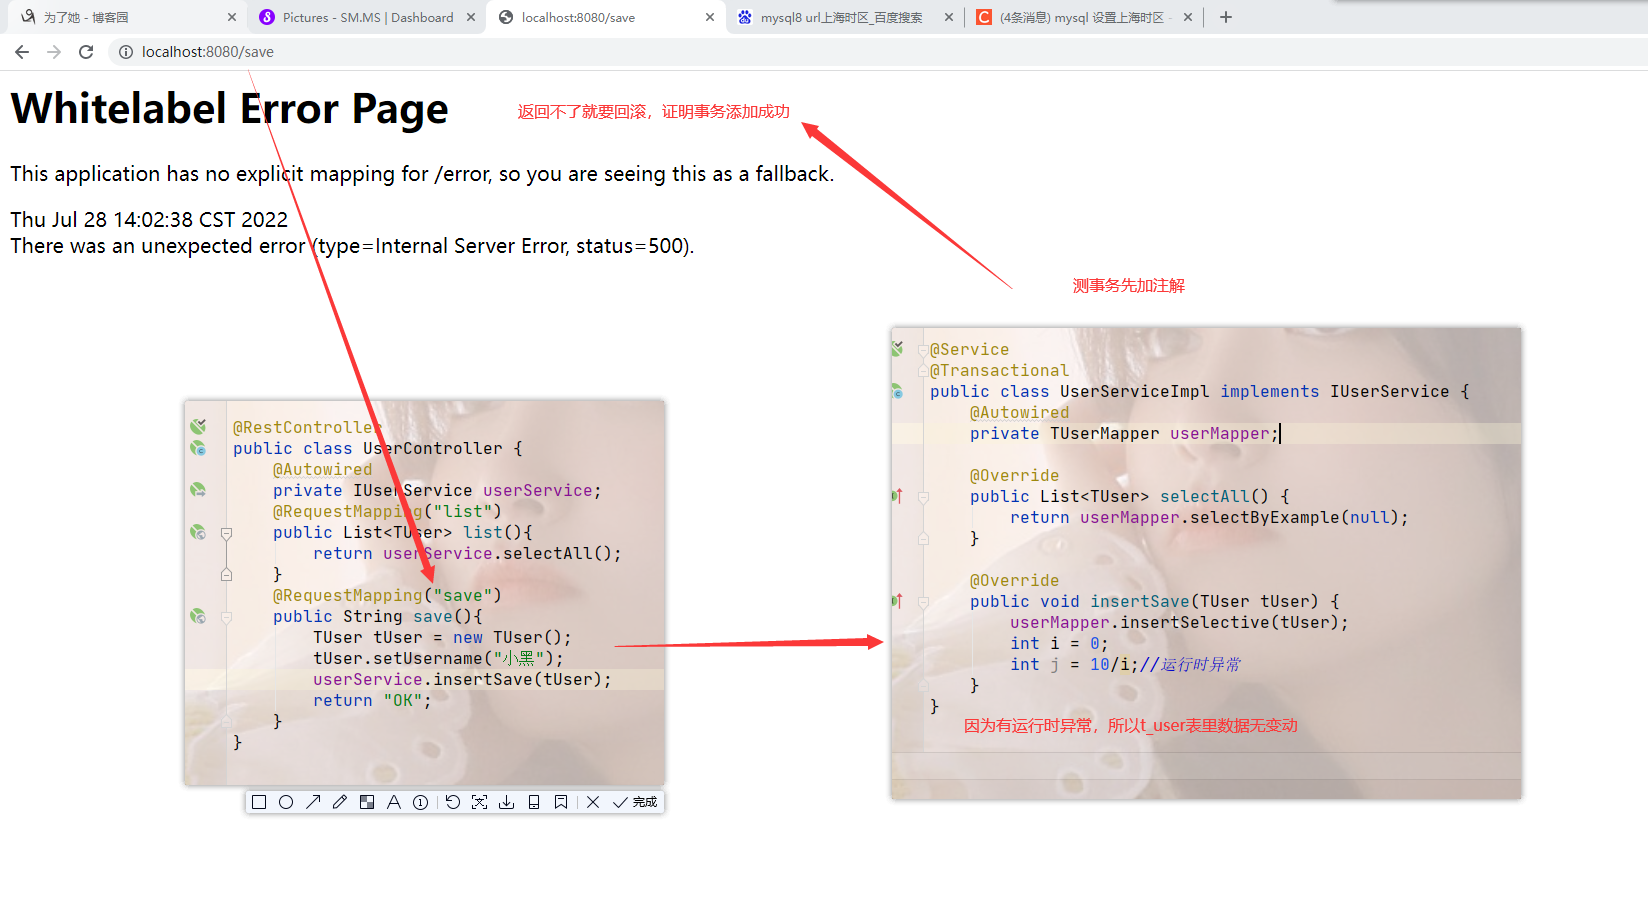
到这ssm就整合完了
SpringBoot-整合Druid数据源
使用方式一:
1.1 导入依赖
 <!-- https://mvnrepository.com/artifact/com.alibaba/druid -->
 <dependency>
     <groupId>com.alibaba</groupId>
     <artifactId>druid</artifactId>
     <version>1.1.12</version>
 </dependency>
1.2 配置数据源
yaml格式:
spring
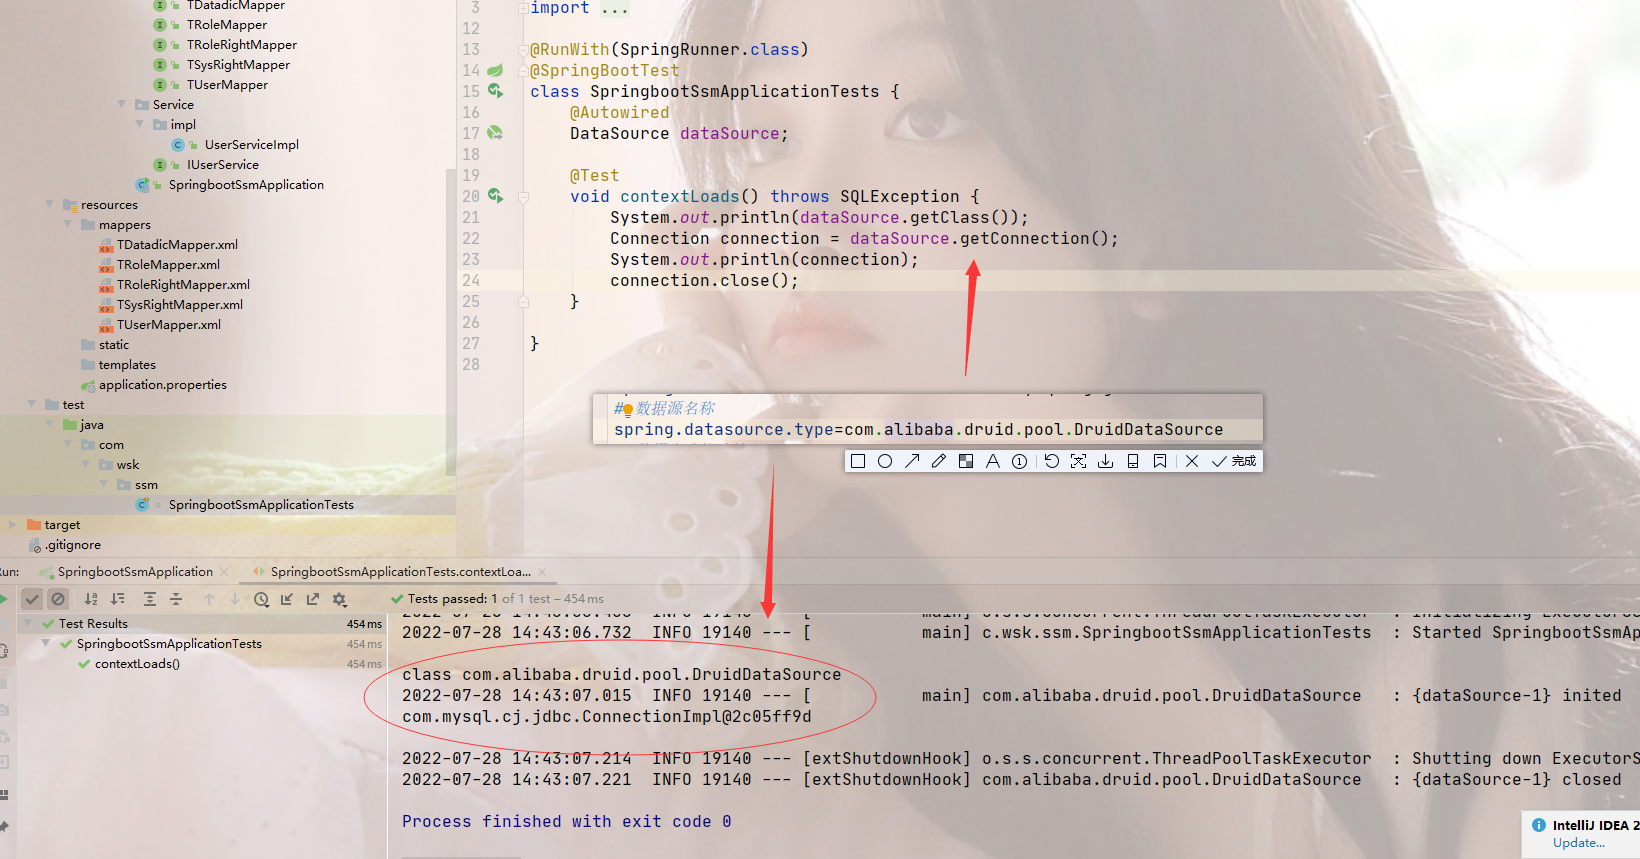
我们没有用@ConfigurationProperties注解所以写在系统的配置里就行
spring.datasource.type=com.alibaba.druid.pool.DruidDataSource
使用方式二:(以后用直接粘就好了)
2.1 配置数据源(依赖导过了,一里)
一样的步骤
2.2 创建数据源
2.3 Druid监控使用情况
增加配置
//配置Druid的监控
//1、配置一个管理后台的Servlet
入口访问:
http://localhost:8080/druid 账号密码代码里有
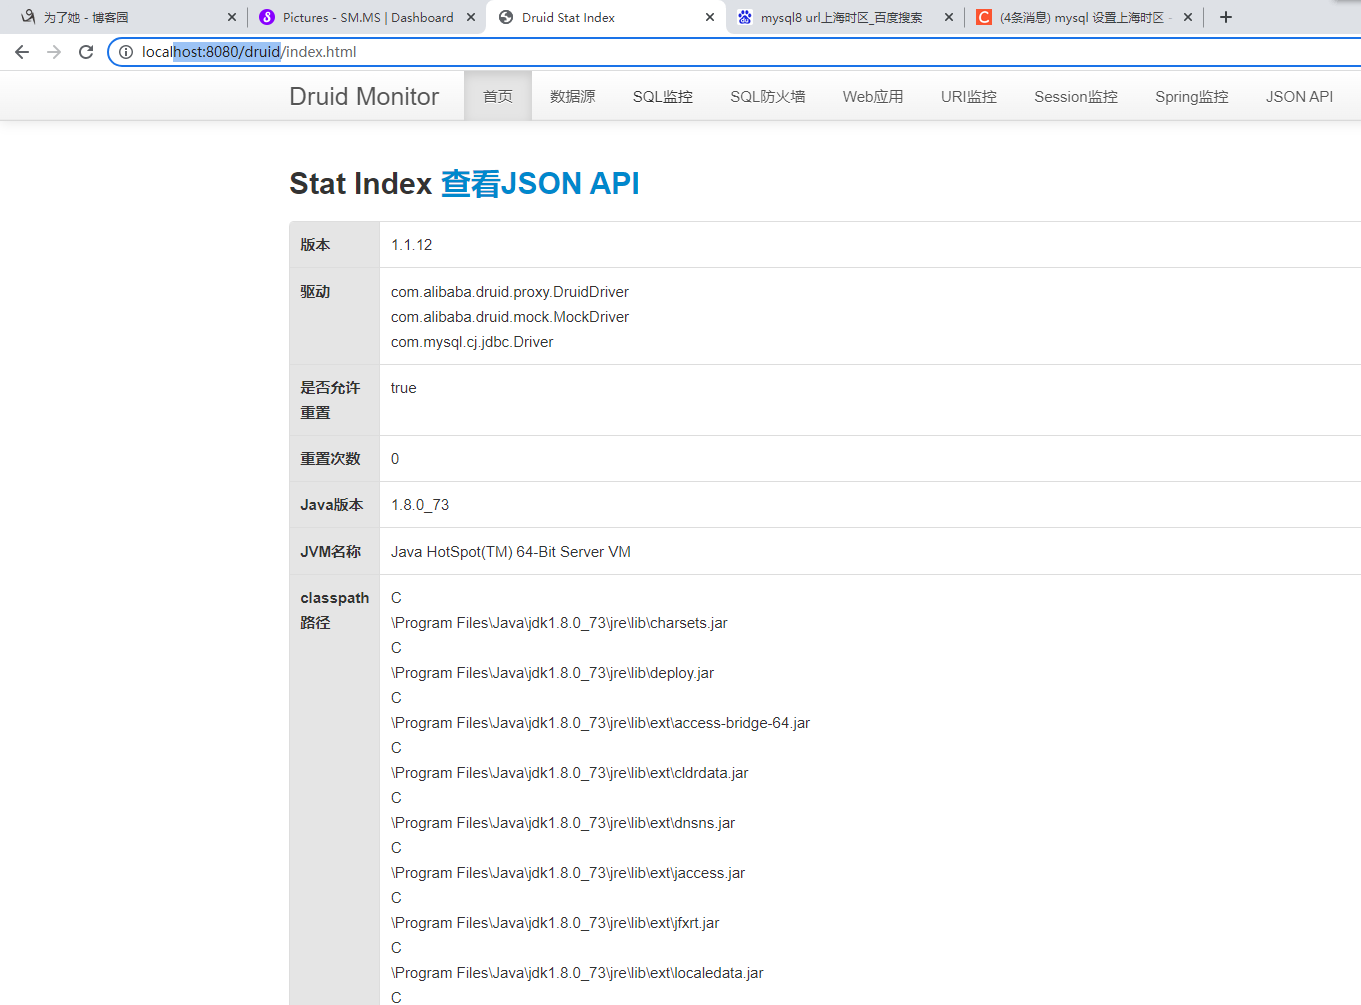
可以监控请求,sql等
SpringBoot-整合Web组件-注解版(了解就行了,不咋用)
之前的Web开发基于Servlet 2.5规范(在web.xml中配置Servlet,Filter,Listener)。
现在基于Servlet 3.0规范(基于配置类的方式声明对象:@WebServlet @WebFilter @WebListener)
显示sql
 # 给mapper层添加日志输出
 logging.level.com.wsk.ssm.mapper=debug
1 监听器@WebListener
//监听器
2 过滤器@WebFilter(urlPatterns="/*")
//过滤器
3 Servlet @WebServlet(urlPatterns="/my")
这三个用之前程序入口加一个注解
扫描组件@ServletComponentScan
扩展:get与post请求的区别
一个有请求体,一个没有请求体
get没有,post有,get只能在路径里传参,不安全
post有请求体-安全,文件上传啥的都用post请求,不用get因为路径接收的最大参数好像是几k-100k
所以我们都用请求体来接收参数
SpringBoot-集成业务层事务
-
扫描Dao接口,需要在启动类中增加扫描注解@MapperScan("com.galaxy.**.dao")及事务管理@EnableTransactionManagement
-
传统的SSM架构中采用的是声明式事务,需要在配置文件中增加AOP事务配置,Spring Boot框架中简化了这种配置,可以在Service接口中增加注解@Transactional

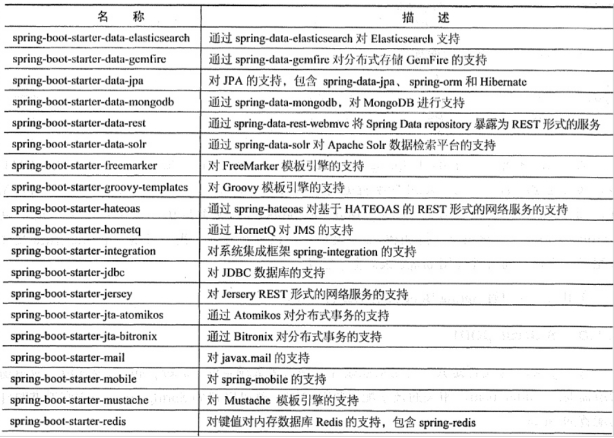
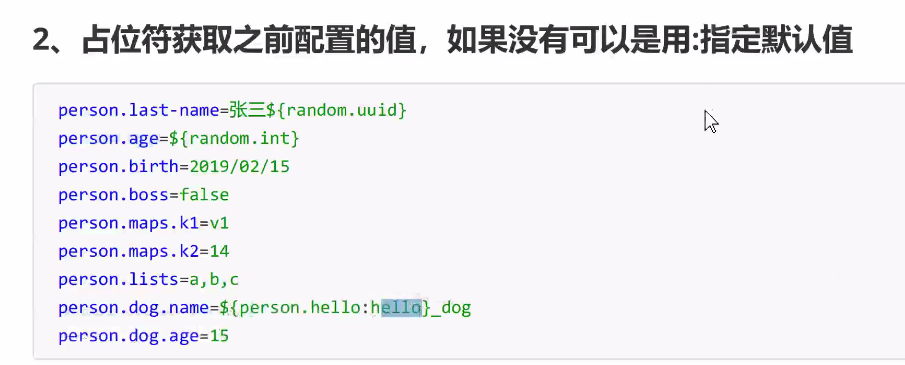
配置文件可以改着看看(指定默认值)

 浙公网安备 33010602011771号