小D课堂 - 零基础入门SpringBoot2.X到实战_第4节 Springboot2.0单元测试进阶实战和自定义异常处理_21、SpringBoot2.x配置全局异常返回自定义页面
笔记
5、SpringBoot2.x配置全局异常返回自定义页面
简介:使用SpringBoot自定义异常和错误页面跳转实战
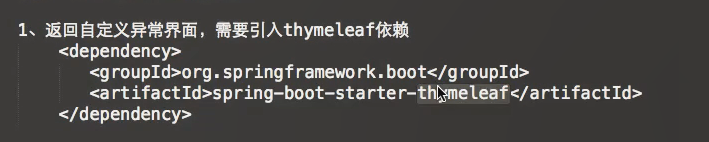
1、返回自定义异常界面,需要引入thymeleaf依赖
<dependency>
<groupId>org.springframework.boot</groupId>
<artifactId>spring-boot-starter-thymeleaf</artifactId>
</dependency>
2、resource目录下新建templates,并新建error.html
ModelAndView modelAndView = new ModelAndView();
modelAndView.setViewName("error.html");
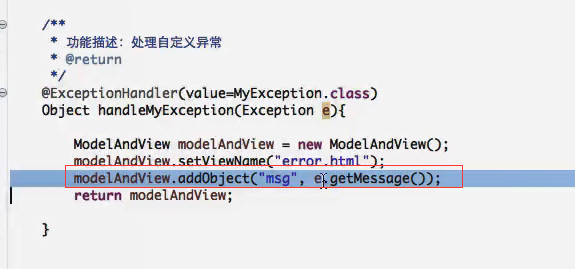
modelAndView.addObject("msg", e.getMessage());
return modelAndView;
https://docs.spring.io/spring-boot/docs/2.1.0.BUILD-SNAPSHOT/reference/htmlsingle/#boot-features-error-handling
开始
首先需要添加模板引擎的Thymeleaf

新建异常类,继承RuntimeException运行时异常最高类。这里一定要继承RuntimeException

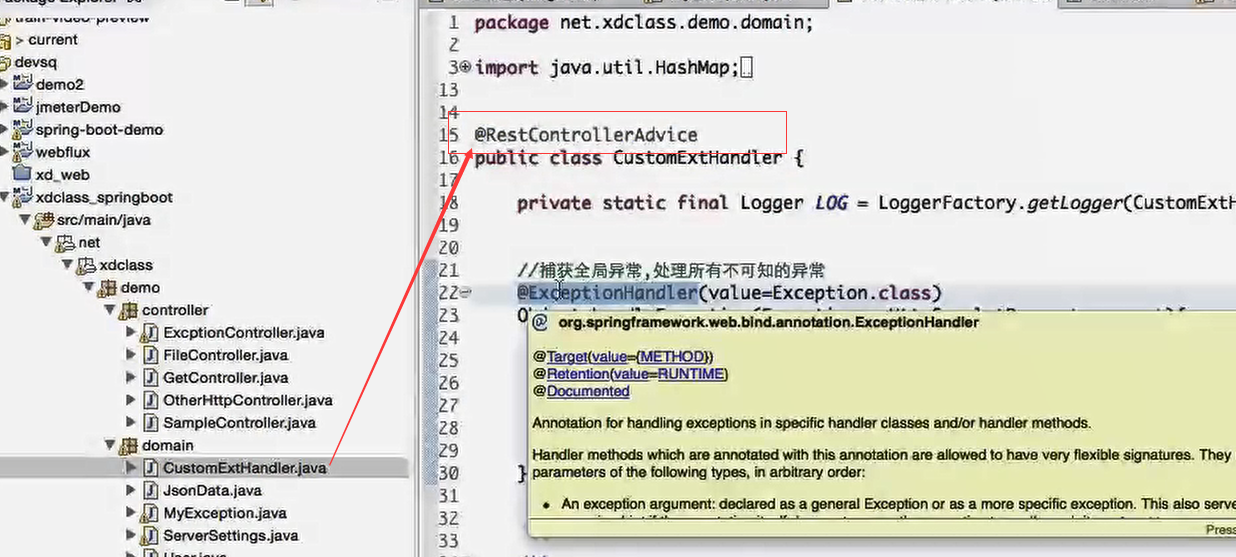
在CustomExtHandler异常类里面新增方法,执行新建的MyException类是异常处理类。

我们需要做页面的跳转。就需要做一个页面。在templates类下新建,error.html页面

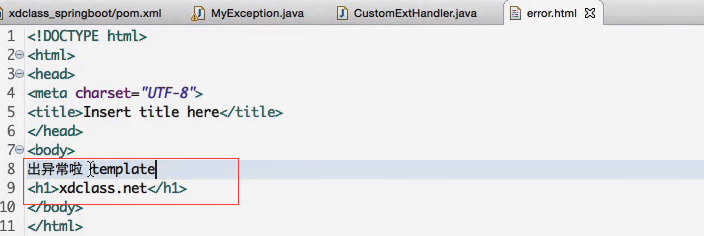
出异常就会通过modelAndView机械到error.html页面
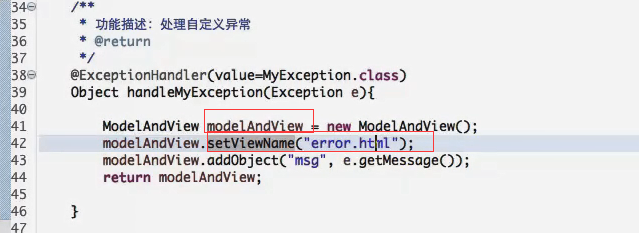
这里加入异常的消息,模板内我们并没有获取,这里意义不大
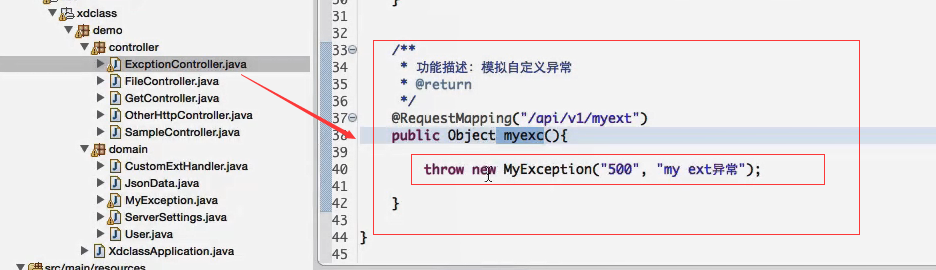
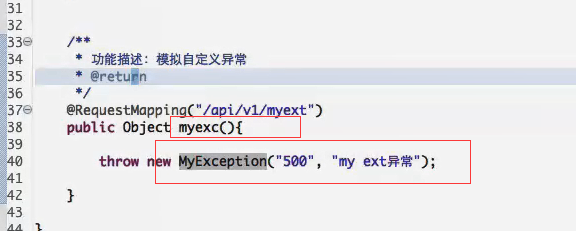
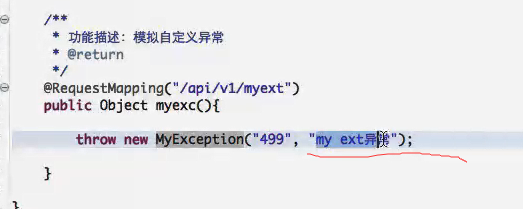
新建一个Controller的方法myexc里面抛出的异常是 我们自定义的异常类MyException
启动测试

自动跳转到异常页面

首先是访问这个Controller里面的方法,抛出异常。被spring监听到了。
跳转到CustomExtHandler因为最上面用了@RestControllerAdvice。然后会根据异常的种类去找对应的handler方法
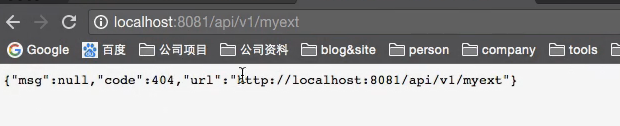
我们抛出的是MyException异常,所以就会交给这个handler去处理。进去方法后就会进行页面的跳转到error.html

我们可以自定义异常返回数据


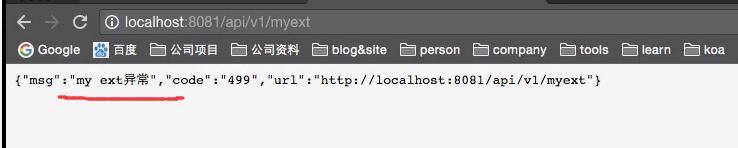
返回json数据
改成MyException。然后code设置为获取当前的getCode错误代码

在这个handler抛出一个499的异常

获取到了抛出的代码 499

自定义的异常内容
再去获取错误信息

获取异常的信息
在CustomExtHandler异常类里面新增方法,执行新建的MyException类是异常处理类。
我们需要做页面的跳转。就需要做一个页面。在templates类下新建,error.html页面
出异常就会通过modelAndView机械到error.html页面
这里加入异常的消息,模板内我们并没有获取,这里意义不大
新建一个Controller的方法myexc里面抛出的异常是 我们自定义的异常类MyException
启动测试
自动跳转到异常页面
首先是访问这个Controller里面的方法,抛出异常。被spring监听到了。
跳转到CustomExtHandler因为最上面用了@RestControllerAdvice。然后会根据异常的种类去找对应的handler方法
我们抛出的是MyException异常,所以就会交给这个handler去处理。进去方法后就会进行页面的跳转到error.html
我们可以自定义异常返回数据
返回json数据
改成MyException。然后code设置为获取当前的getCode错误代码
在这个handler抛出一个499的异常
获取到了抛出的代码 499
自定义的异常内容
再去获取错误信息
获取异常的信息

 浙公网安备 33010602011771号