09.客户端集成IdentityServer
09.客户端集成IdentityServer
新建API的项目
dotnet new webapi --name ClientCredentialApi

在我们上一节课的代码IdentityServerSample中加入授权的认证
引入命名空间:
using Microsoft.AspNetCore.Authorization;
然后给Controller加上authrize的属性。这样API就访问不了。

ClientCredentialApi
给我们刚创建的项目:ClientCredentialApi
加上Authrize属性,这样这个API我们就访问不了。

nuget包添加引用
IdentityServer4.AccessTokenValidation

在Startup.cs里面把认证授权加进来
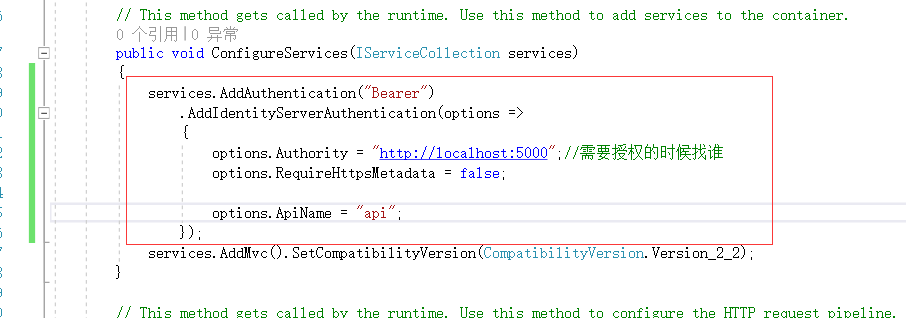
   services.AddAuthentication("Bearer")
                .AddIdentityServerAuthentication(options =>
                {
                    options.Authority = "http://localhost:5000";//需要授权的时候找谁
                    options.RequireHttpsMetadata = false;

                    options.ApiName = "api";
                });
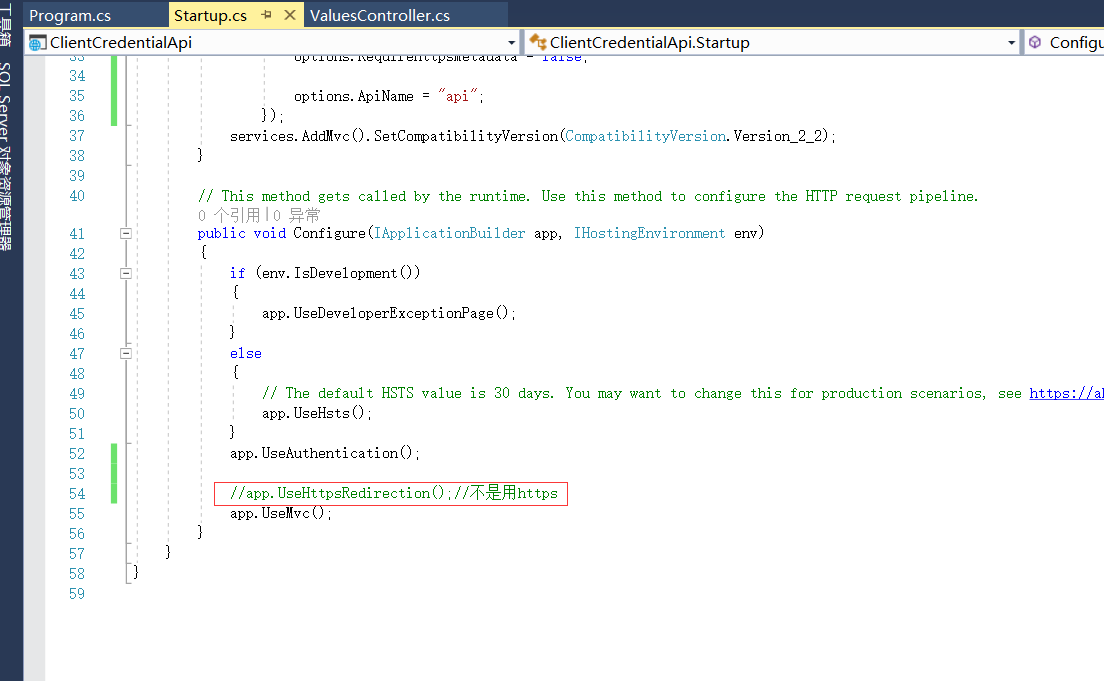
使用Authentication

这样就完成了。有了IdentityServer在APi端加授权就非常的简单
换成501的端口
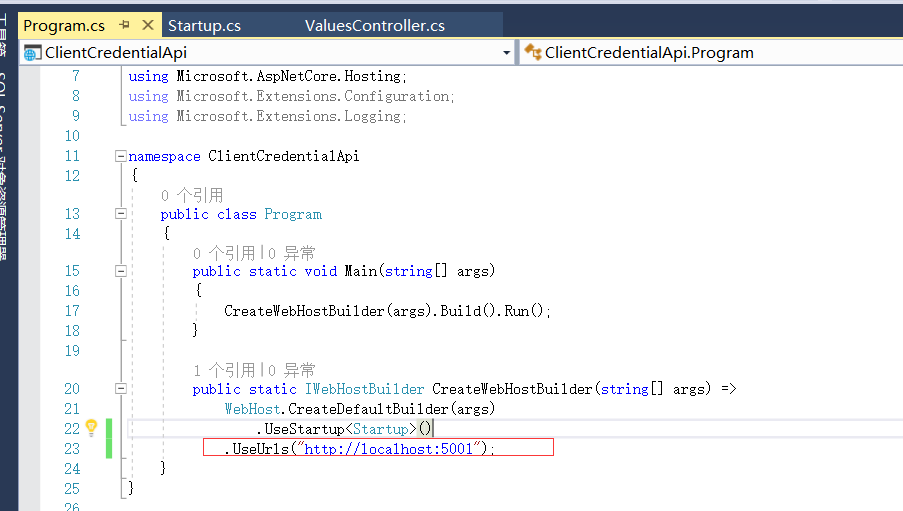
然后不用Https:
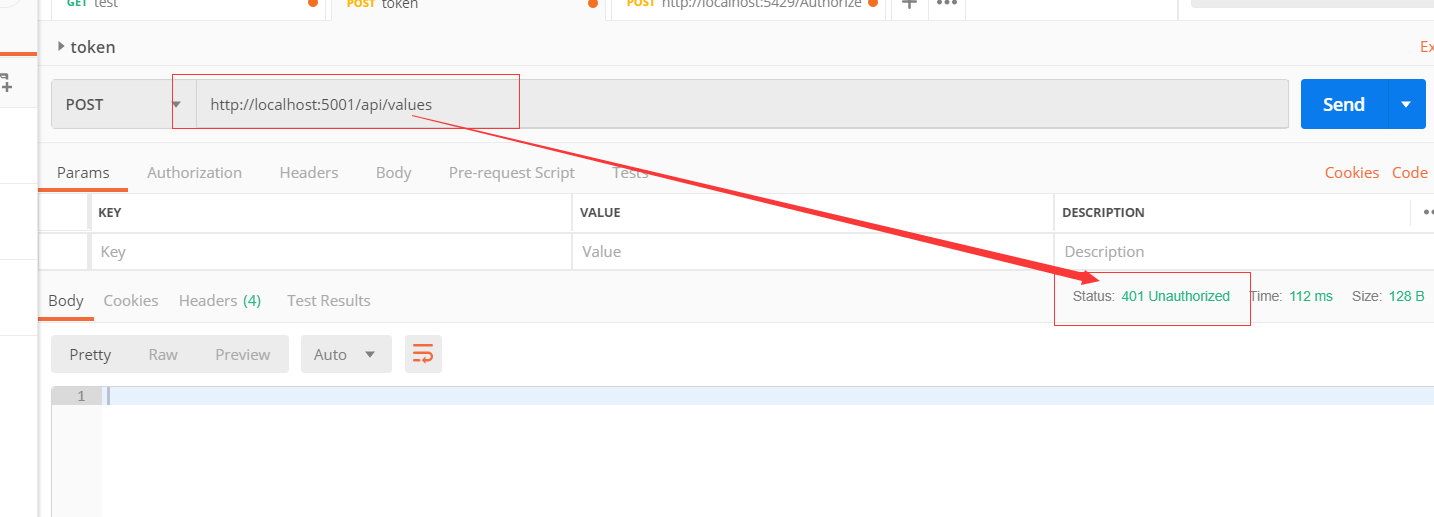
运行程序ClientCredentialApi
http://localhost:5001/api/values
返回的状体是401,未授权
运行程序IdentityServerCenter
那我们去哪里拿Token呢?
运行起来Server端 的地址。
打开地址:
http://localhost:5000/.well-known/openid-configuration
这里告诉我们取token的地址

"token_endpoint": "http://localhost:5000/connect/token",
postman内请求这个地址:
http://localhost:5000/connect/token
body内三个参数:
client_id:client
client_secret:secret
grant_type:client_credentials
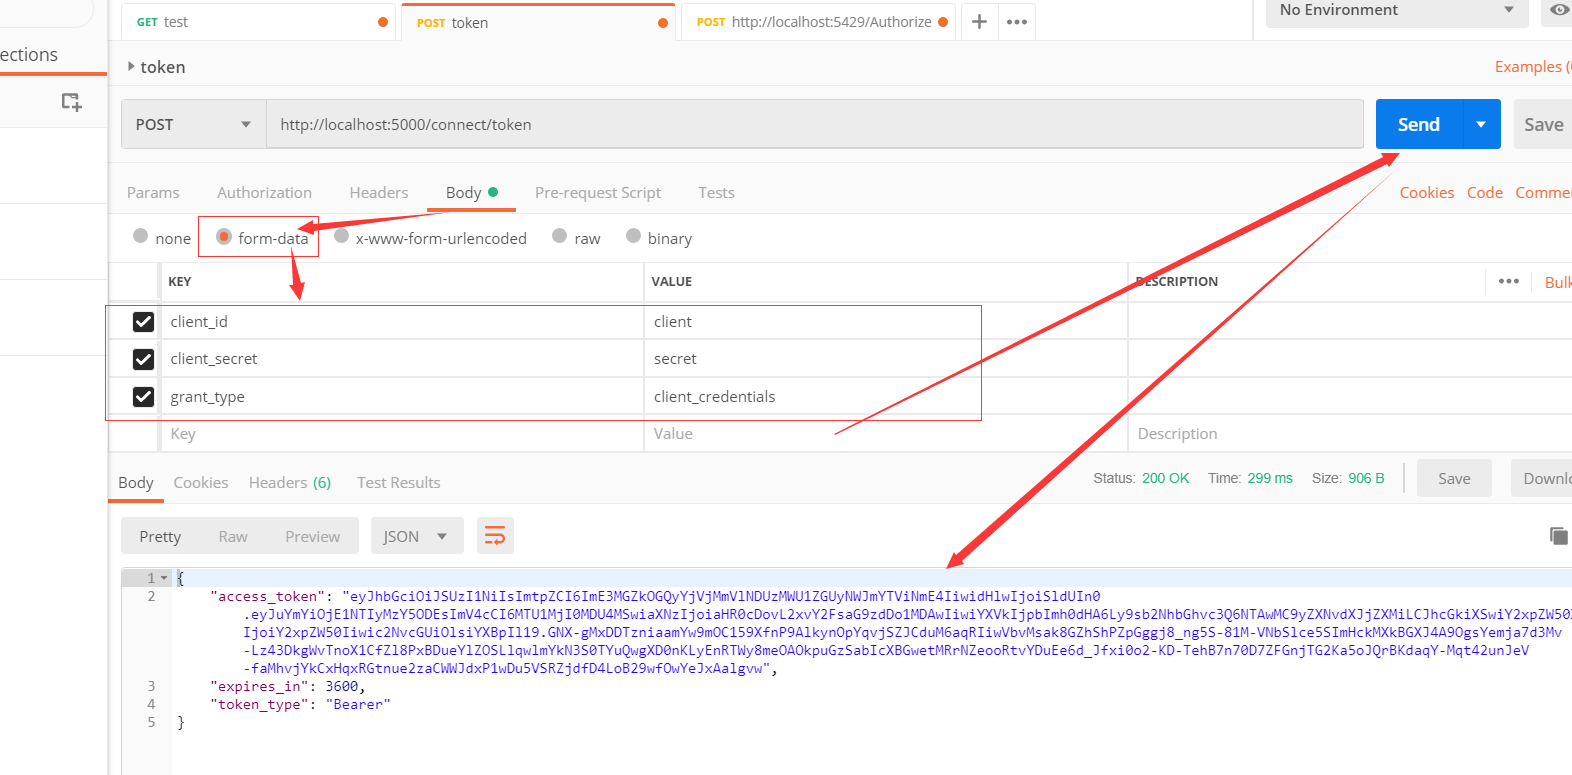
返回的数据。这样就拿到了我们的token
{
    "access_token": "eyJhbGciOiJSUzI1NiIsImtpZCI6ImE3MGZkOGQyYjVjMmVlNDUzMWU1ZGUyNWJmYTViNmE4IiwidHlwIjoiSldUIn0.eyJuYmYiOjE1NTIyMzY5ODEsImV4cCI6MTU1MjI0MDU4MSwiaXNzIjoiaHR0cDovL2xvY2FsaG9zdDo1MDAwIiwiYXVkIjpbImh0dHA6Ly9sb2NhbGhvc3Q6NTAwMC9yZXNvdXJjZXMiLCJhcGkiXSwiY2xpZW50X2lkIjoiY2xpZW50Iiwic2NvcGUiOlsiYXBpIl19.GNX-gMxDDTzniaamYw9mOC159XfnP9AlkynOpYqvjSZJCduM6aqRIiwVbvMsak8GZhShPZpGggj8_ng5S-81M-VNbSlce5SImHckMXkBGXJ4A9OgsYemja7d3Mv-Lz43DkgWvTnoX1CfZl8PxBDueYlZOSLlqwlmYkN3S0TYuQwgXD0nKLyEnRTWy8meOAOkpuGzSabIcXBGwetMRrNZeooRtvYDuEe6d_Jfxi0o2-KD-TehB7n70D7ZFGnjTG2Ka5oJQrBKdaqY-Mqt42unJeV-faMhvjYkCxHqxRGtnue2zaCWWJdxP1wDu5VSRZjdfD4LoB29wfOwYeJxAalgvw",
    "expires_in": 3600,
    "token_type": "Bearer"
}
复制从服务端拿到的token的值。
启动ClientCredentialApi的程序
访问地址:
http://localhost:5001/api/values
Authorization:Bearer+空格+复制过来的Token
这个token就是从是服务端 5000端口的地址拿过来的token
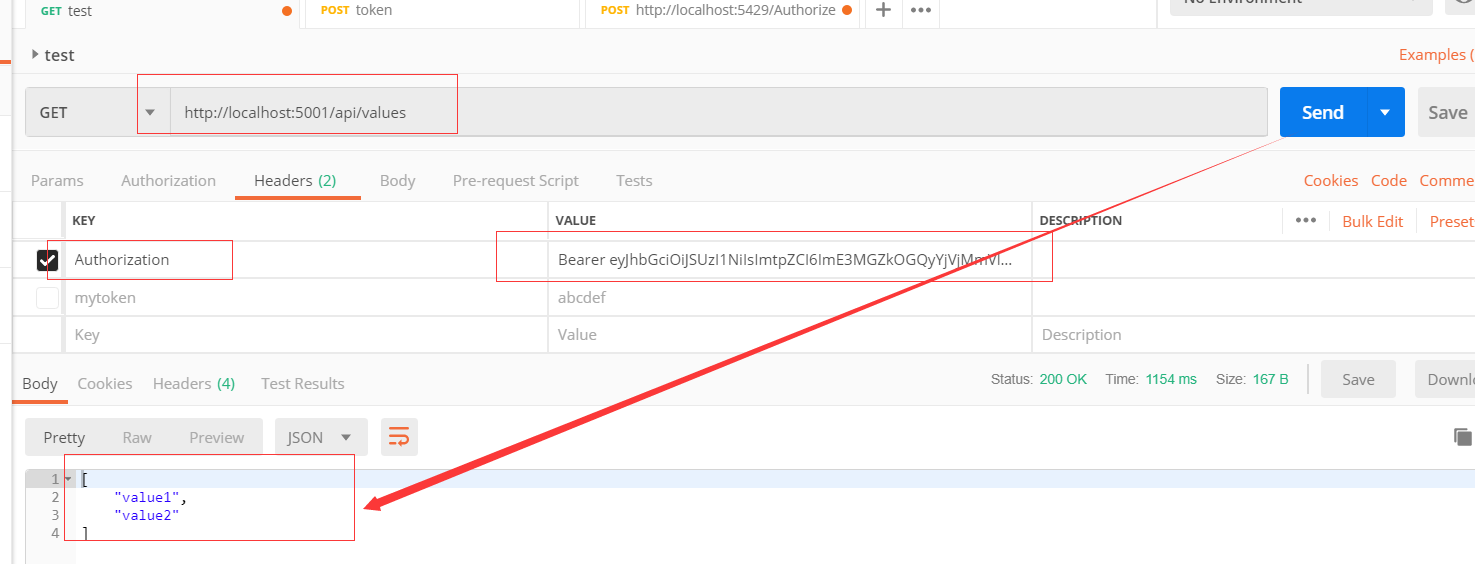
这是postman去实现的。接下来我们要写一个api的方式去实现

 浙公网安备 33010602011771号