二进制部署k8s集群v1.23.9版本-1-环境准备
致谢
本文档参考老男孩王导的早期b站教学视频(v1.15.2版本),在此表示感谢和致敬!
1.1、服务器规划
| 服务器IP | 操作系统 | 主机名 | 用途 |
|---|---|---|---|
| 192.168.1.197 | CentOS7.8 | hfqg1-197 | dns服务器 |
| 192.168.1.198 | CentOS7.8 | hfqg1-198 | nginx+keepalived |
| 192.168.1.199 | CentOS7.8 | hfqg1-199 | nginx+keepalived |
| 192.168.1.200 | CentOS7.8 | hfqg1-200 | 证书颁发+harbor |
| 192.168.1.201 | CentOS7.8 | hfqg1-201 | k8s-master |
| 192.168.1.202 | CentOS7.8 | hfqg1-202 | k8s-node1 |
| 192.168.1.203 | CentOS7.8 | hfqg1-203 | k8s-node2 |
| 192.168.1.196 | -------- | --------- | 高可用VIP |
1.2、修改主机名
主机名修改完成后需要退出重新登录
hostnamectl set-hostname hfqg1-197
hostnamectl set-hostname hfqg1-198
hostnamectl set-hostname hfqg1-199
hostnamectl set-hostname hfqg1-200
hostnamectl set-hostname hfqg1-201
hostnamectl set-hostname hfqg1-202
hostnamectl set-hostname hfqg1-203
1.3、修改IP地址
[root@hfqg1-201 ~]# cat /etc/sysconfig/network-scripts/ifcfg-em1
TYPE=Ethernet
PROXY_METHOD=none
BROWSER_ONLY=no
BOOTPROTO=static
DEFROUTE=yes
IPV4_FAILURE_FATAL=no
IPV6INIT=yes
IPV6_AUTOCONF=yes
IPV6_DEFROUTE=yes
IPV6_FAILURE_FATAL=no
IPV6_ADDR_GEN_MODE=stable-privacy
NAME=em1
UUID=f08b83bb-e47b-41d8-ad2d-05b0ba322f75
DEVICE=em1
ONBOOT=yes
IPADDR=192.168.1.201
NETMASK=255.255.254.0
GATEWAY=192.168.1.1
DNS1=192.168.1.197
重启网卡
/etc/init.d/network restart
1.4、关闭selinux
所有服务器都要操作
setenforce 0
sed -i 's#SELINUX=enforcing#SELINUX=disabled#g' /etc/selinux/config
[root@hfqg1-201 ~]# cat /etc/selinux/config | grep SELINUX=
# SELINUX= can take one of these three values:
SELINUX=disabled
如下图所示

1.5、关闭防火墙
所有服务器都要操作
systemctl stop firewalld
systemctl disable firewalld
1.6、关闭swap分区
所有服务器都要操作
swapoff -a
sed -ri 's/.swap./#&/' /etc/fstab
生效
sysctl --system
1.7、关闭邮件服务器
所有服务器都要操作
[root@hfqg1-201 ~]# systemctl stop postfix
[root@hfqg1-201 ~]# systemctl disable postfix
Removed symlink /etc/systemd/system/multi-user.target.wants/postfix.service.
1.8、配置base源和epel源
所有服务器都要操作
curl -o /etc/yum.repos.d/CentOS-Base.repo https://mirrors.aliyun.com/repo/Centos-7.repo
curl -o /etc/yum.repos.d/epel.repo http://mirrors.aliyun.com/repo/epel-7.repo
清除系统yum缓存,重新生成
yum clean all
yum makecache
1.9、安装常用工具软件
所有服务器都要操作
yum install wget net-tools telnet tree namp sysstat lrzsz dos2unix bind-utils -y
1.10、时间同步
所有服务器都要操作
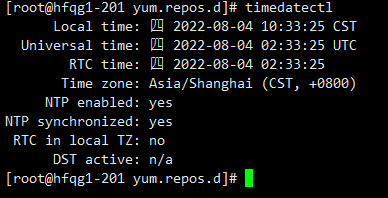
查看系统时间时区
timedatectl
安装chrony
yum -y install chrony
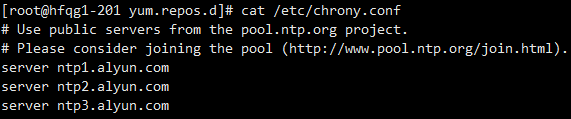
配置chrony
[root@hfqg1-201 yum.repos.d]# vim /etc/chrony.conf
[root@hfqg1-201 yum.repos.d]# cat /etc/chrony.conf
启动 chrony
systemctl start chronyd
设置开机自启动
systemctl enable chronyd
1.11、内核参数优化
所有服务器都要操作
[root@hfqg1-201 ~]# vim /etc/sysctl.d/k8s.conf
[root@hfqg1-201 ~]# cat /etc/sysctl.d/k8s.conf
net.bridge.bridge-nf-call-iptables=1
net.bridge.bridge-nf-call-ip6tables=1
net.ipv4.ip_forward=1
net.ipv4.tcp_tw_recycle=0
[root@hfqg1-201 ~]# sysctl --system
本文来自博客园,作者:霸都运维,转载请注明原文链接:https://www.cnblogs.com/wangjie20200529/p/16549835.html

 浙公网安备 33010602011771号