了解WEBGL就可以自己实现一些特效,添加到cesium中。
首先我们从简单的案列开始,比如利用纯WEBGL实现绘制三角形,那么实现的代码如下:
点着色器:
attribute vec4 position;
void main() {
    gl_Position = position;
}
片元着色器:
void main() {
    gl_FragColor = vec4(1.0, 1.0, 1.0, 1.0);
}
把上述点着色器和片元着色器放置cesium中,如定义一个扩展类,实现自己的着色器,如下:
 1 function getVS() {
 2     return 'attribute vec4 position;\
 3     void main() {\
 4         gl_Position = position;\
 5     }';
 6 }
 7
 8 function getFS() {
 9     return "void main()\
10         {\
11             gl_FragColor = vec4(1,1,1,1);\
12         }\
13         ";
14 }
15
16 function Trangle(viewer) {
17     this._viewer = viewer;
18 }
19
20 Trangle.prototype.getPointCommand = function (context) {
21     var shaderProgram = Cesium.ShaderProgram.fromCache({
22         context: context,
23         vertexShaderSource: getVS(),
24         fragmentShaderSource: getFS()
25     });
26     var renderState = Cesium.RenderState.fromCache({
27         depthTest: {
28             enabled: false
29         },
30         depthMask: false,
31         blending: Cesium.BlendingState.ALPHA_BLEND
32     });
33
34     var indexBuffer = Cesium.Buffer.createIndexBuffer({
35         context: context,
36         typedArray: new Uint32Array([0, 1, 2]),
37         usage: Cesium.BufferUsage.STATIC_DRAW,
38         indexDatatype: Cesium.IndexDatatype.UNSIGNED_INT
39     });
40     var vertexBuffer = Cesium.Buffer.createVertexBuffer({
41         context: context,
42         typedArray: Cesium.ComponentDatatype.createTypedArray(Cesium.ComponentDatatype.FLOAT, [0, 0, 0, 0, 100000, 100000, 100000, 100000, 0]),
43         usage: Cesium.BufferUsage.STATIC_DRAW
44     });
45     var attributes = [];
46     attributes.push({
47         index: 0,
48         vertexBuffer: vertexBuffer,
49         componentDatatype: Cesium.ComponentDatatype.FLOAT,
50         componentsPerAttribute: 3,
51         normalize: false
52     });
53     var vertexArray = new Cesium.VertexArray({
54         context: context,
55         attributes: attributes,
56         indexBuffer: indexBuffer
57     });
58
59     this.pointCommand = new Cesium.DrawCommand({
60         boundingVolume: new Cesium.BoundingSphere(Cesium.Cartesian3.fromDegrees(113, 30, 50000), 200000),
61         primitiveType: Cesium.PrimitiveType.TRIANGLES,
62         shaderProgram: shaderProgram,
63         renderState: renderState,
64         vertexArray: vertexArray,
65         pass: Cesium.Pass.OPAQUE,
66         modelMatrix: GWViewer.GWMath.getMatrix(Cesium.Cartesian3.fromDegrees(113, 30, 50000), 0, 0, 0)
67     });
68 };
69
70 Trangle.prototype.update = function (frameState) {
71     if (this.pointCommand) {
72         var commandList = frameState.commandList;
73         commandList.push(this.pointCommand);
74         this._viewer.scene.requestRender();
75     } else {
76         this.getPointCommand(this._viewer.scene._context);
77     }
78
79 };
上面定义了一个三角形类,内部给定了三角形的三个顶点,通过
viewer.scene.primitives.add(new Trangle(viewer));即可把自定义的着色器对象添加到球上,然后运行调试后发现没有报错也没有绘制出三角形。
调试分析查找原因,着色器代码确实运行绘制了,没有显示出来,原因是坐标位置不对,应该调用cesium自带的着色器方法,转换坐标。更改后的代码如下:
点着色器:
attribute vec3 position3DHigh;
attribute vec3 position3DLow;
void main()
{
    vec4 p = czm_translateRelativeToEye(position3DHigh, position3DLow);
    p = czm_modelViewProjectionRelativeToEye * p;
    gl_Position = p;
}
片元着色器:
void main()
{
    gl_FragColor = vec4(1,1,1,1);
}
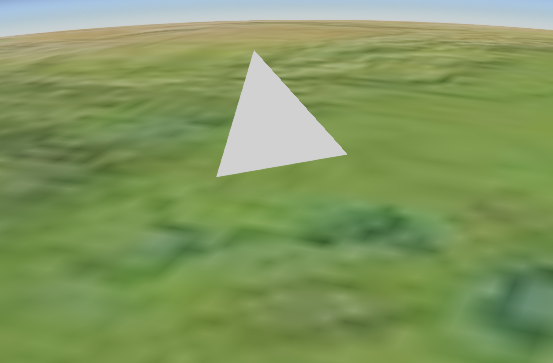
换掉着色器代码,我们就可以看到球上绘制的三角形了,展示结果如此下图所示:


 浙公网安备 33010602011771号