pytorch visdom可视化工具学习—2—详细使用-3-Generic Plots和Others
4)Generic Plots
注意,服务器API遵循数据和布局对象的规则,这样您就可以生成自己的任意Plotly可视化:
# Arbitrary visdom content
trace = dict(x=[1, 2, 3], y=[4, 5, 6], mode="markers+lines", type='custom',
             marker={'color': 'red', 'symbol': 104, 'size': "10"},
             text=["one", "two", "three"], name='1st Trace')
layout = dict(title="First Plot", xaxis={'title': 'x1'},
              yaxis={'title': 'x2'})

viz._send({'data': [trace], 'layout': layout, 'win': 'mywin'})
图示:

5)Others
vis.close: 通过id关闭窗口vis.delete_env: 通过env_id删除环境vis.win_exists: 通过id检查窗口是否已经存在vis.get_env_list: 获取服务器上所有环境的列表vis.win_hash: 获取窗口内容的md5散列vis.get_window_data: 获取窗口的当前数据vis.check_connection: 检查服务器是否连接vis.replay_log: 重播所提供的日志文件中的操作
1》 vis.replay_log
2》vis.delete_env
此函数完全删除指定的env。它接受env id :eid作为输入。
注意:delete_env删除一个环境的所有数据,并且是不可逆的。除非绝对想要删除环境,否则不要使用。
一开始有三个环境,打算将test环境删除

调用:
viz.delete_env('test')
返回:
''
然后就可以看见test环境不见了:

3》vis.win_exists
此函数返回一个bool,指示服务器上是否已经存在窗口win。如果出现错误,则返回None。
可选参数:
- env:在Environment中搜索窗口。默认是没有的。
    win = viz.scatter(
        X=np.random.rand(255, 2),
        opts=dict(
            markersize=10,
            markercolor=np.random.randint(0, 255, (255, 3,)),
        ),
    )

    #断言该窗口是否存在
    assert viz.win_exists(win), 'Created window marked as not existing'

    # 添加新的追踪到散点图中
    viz.scatter(
        X=np.random.rand(255),
        Y=np.random.rand(255),
        win=win,
        name='new_trace',
        update='new'
    )
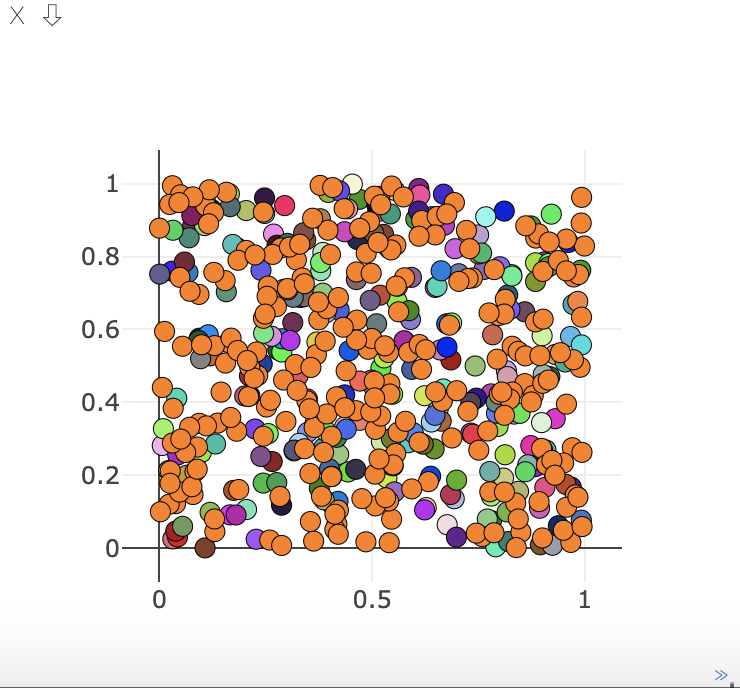
图示:

4》vis.get_env_list
此函数返回调用时服务器上所有环境的列表。它不需要任何参数。
调用:
viz.get_env_list()
返回:
['main', 'default', '']
5》vis.win_hash
如果存在于服务器上,此函数将返回win窗口内容的md5散列。否则返回None。
可选参数:
- env:在Environment中搜索窗口。默认是没有的。
viz.win_hash('default')
什么都没有返回
正确的使用方式是:
win = viz.scatter(
    X=np.random.rand(255, 2),
    opts=dict(
        markersize=10,
        markercolor=np.random.randint(0, 255, (255, 3,)),
    ),
)
viz.win_hash(win)
返回:
'b144c351f2f68f59d8b0dc5f28688b63'
6》vis.get_window_data
viz.get_window_data('default')
返回:
''
正确的使用方式是:
win = viz.scatter(
    X=np.random.rand(255, 2),
    opts=dict(
        markersize=10,
        markercolor=np.random.randint(0, 255, (255, 3,)),
    ),
)
viz.get_window_data(win)
返回:
'{"command": "window", "id": "window_3739ceea81b772", "title": "", "inflate": true, "width": null, "height": null, "contentID": "3739ceea81b79c", "content": {"data": [{"x": [0.04551835890074274, 0.9772260473924358, 0.9009148817295527, 0.539562493921608, 0.24118526960032582, 0.46977995598941924, 0.060850500332354174, 0.7347072292427027, 0.5412919280211997, 0.09581282770005128, 0.810341818084029, 0.41717700845083594, 0.1368515602012041 ... 6], "name": "1", "type": "scatter", "mode": "markers", "textposition": "right", "line": {}, "marker": {"size": 10, "symbol": "dot", "color": ["#ebbb47", "#1818ad", "#7bd242", "#333f7d", "#f2f7c4", "#f7c7c0", "#c2025f", "#ac2ca9", ... "#bbc91d", "#156b58", "#315d0d", "#96c8e2", "#1c1291", "#3def07", "#5adcbc", "#f1baec", "#a67050", "#373313", "#025bd9"], "line": {"color": "#000000", "width": 0.5}}}], "layout": {"showlegend": false, "margin": {"l": 60, "r": 60, "t": 60, "b": 60}}}, "type": "plot", "i": 15}'
7》vis.check_connection
举例:
viz = Visdom(port=DEFAULT_PORT, server=DEFAULT_HOSTNAME)

assert viz.check_connection(timeout_seconds=3), \
    'No connection could be formed quickly'

textwindow = viz.text('Hello World!') #生成一个窗口,里面带文本Hello World!

#生成另一个窗口,里面带文本Hello World! More text should be here
updatetextwindow = viz.text('Hello World! More text should be here')
#断言查看updatetextwindow窗口对象是否存在
assert updatetextwindow is not None, 'Window was none'
#窗口存在的话,就在该窗口中添加下面的文本,win指定添加到的窗口对象,append指定进行的操作是在元原有的基础上添加
viz.text('And here it is', win=updatetextwindow, append=True)
返回生成的窗口编号:
'window_373974331dca16'
图示:

8》vis.close
这个函数关闭一个特定的窗口。它接受输入窗口id:win和环境id:eid。使用win=None,即不设置win关闭环境中的所有窗口
关闭上面生成的text窗口
# close text window:
viz.close(win=textwindow)
返回:
''
图示:


