docker-machine create -d generic 运行的波折过程及遇见的问题
这是一个愚蠢的学习过程,但是因为觉得过程还是值得记录的,还是写了下来
2》driver = generic
1)在这个过程中使用的都是本地的mac系统,然后尝试在mac本地create -d generic
一直不成功,出现下面的错误:
Error creating machine: Error waiting for machine to be running: Maximum number of retries (60) exceeded
原因是:
1.--generic-ip-address标志后面跟着的是本机的IP地址,如果需要为其他远程docker主机安装可以改为其他docker主机ip(这里是本地创建docker-machine)
2.docker-machine为本机创建machine时也需要进行ssh认证:
首先:
userdeMacBook-Pro:~ user$ ssh-keygen
Generating public/private rsa key pair.
Enter file in which to save the key (/Users/user/.ssh/id_rsa):
Enter passphrase (empty for no passphrase):
Enter same passphrase again:  //输入密码后就生成了下面的两个文件
Your identification has been saved in /Users/user/.ssh/id_rsa.  //身份证明存储的地方
Your public key has been saved in /Users/user/.ssh/id_rsa.pub. //公钥存储的地方
The key fingerprint is:
SHA256:LuENCV9NZ3V9UimQA... user@userdeMacBook-Pro.local
The key's randomart image is:
+---[RSA 2048]----+
|     ..EB.=*=...=|
|    o.=o Bo*=..oo|
|   o.o+.o ++o o..|
|    .+ + ..o o   |
|    . * S o .    |
|     o *   o     |
|      o o .      |
|       .         |
|                 |
+----[SHA256]-----+
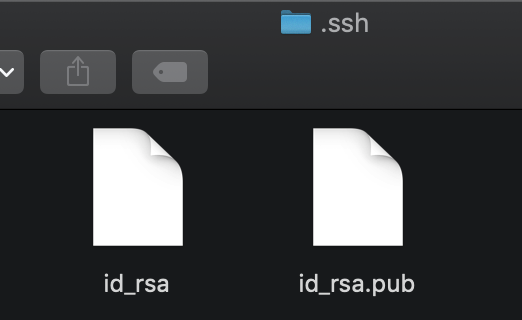
然后在/Users/user/.ssh路径下生成了两个文件:

然后:
userdeMacBook-Pro:~ user$ ssh-copy-id root@10.240.203.84
/usr/bin/ssh-copy-id: INFO: Source of key(s) to be installed: "/Users/user/.ssh/id_rsa.pub"
/usr/bin/ssh-copy-id: INFO: attempting to log in with the new key(s), to filter out any that are already installed

/usr/bin/ssh-copy-id: ERROR: ssh: connect to host 10.240.203.84 port 22: Connection refused
出错
问题解决办法:在系统偏好-共享中如下图所示打开远程登录的服务设置:

但是再次运行又有错:
userdeMacBook-Pro:~ user$ ssh-copy-id root@10.240.203.84
/usr/bin/ssh-copy-id: INFO: Source of key(s) to be installed: "/Users/user/.ssh/id_rsa.pub"
The authenticity of host '10.240.203.84 (10.240.203.84)' can't be established.
ECDSA key fingerprint is SHA256:lxCneM/Qbhue5WAitBgdHe5sMP1+HLYyItAR9OwSdcs.
解决办法——参考https://www.cnblogs.com/gauze/p/5554840.html
这是因为ssh会把你每个你访问过计算机的公钥(public key)都记录在~/.ssh/known_hosts。当下次访问相同计算机时,OpenSSH会核对公钥。如果公钥不同,OpenSSH会发出警告,避免你受到DNS Hijack之类的攻击
SSH对主机的public_key的检查等级是根据StrictHostKeyChecking变量来配置的。
默认情况下,StrictHostKeyChecking=ask。简单所下它的三种配置值:
1.StrictHostKeyChecking=no  #最不安全的级别,当然也没有那么多烦人的提示了,相对安全的内网测试时建议使用。如果连接server的key在本地不存在,那么就自动添加到文件中(默认是known_hosts),并且给出一个警告。
2.StrictHostKeyChecking=ask  #默认的级别,就是出现刚才的提示了。如果连接和key不匹配,给出提示,并拒绝登录。
3.StrictHostKeyChecking=yes  #最安全的级别,如果连接与key不匹配,就拒绝连接,不会提示详细信息。
在内网的进行的一些测试,为了方便,选择最低的安全级别。
在.ssh/config(或者/etc/ssh/ssh_config)中配置:
StrictHostKeyChecking no
UserKnownHostsFile /dev/null
修改好配置后,重新启动sshd服务即可,命令为:/etc/init.d/sshd restart (或 service sshd restart )
(注:这里为了简便,将knownhostfile设为/dev/null,就不保存在known_hosts中了)
再运行还是有问题:
userdeMacBook-Pro:~ user$ ssh-copy-id root@10.240.203.84
/usr/bin/ssh-copy-id: INFO: Source of key(s) to be installed: "/Users/user/.ssh/id_rsa.pub"
/usr/bin/ssh-copy-id: INFO: attempting to log in with the new key(s), to filter out any that are already installed
/usr/bin/ssh-copy-id: INFO: 1 key(s) remain to be installed -- if you are prompted now it is to install the new keys
Warning: Permanently added '10.240.203.84' (ECDSA) to the list of known hosts.
Password:
Password:
Password:
root@10.240.203.84's password:
Permission denied, please try again.
root@10.240.203.84's password:
Received disconnect from 10.240.203.84 port 22:2: Too many authentication failures
Disconnected from 10.240.203.84 port 22
这是因为我的用户名设置的不是root,而是user,所以输入的密码一直不正确,然后导致返回验证次数过多而失败的错误
该过来后再运行就成功了
下面的ssh-copy-id命令是复制SSH密钥到目标主机,开启无密码SSH登录
userdeMacBook-Pro:~ user$ ssh-copy-id user@10.240.203.84
/usr/bin/ssh-copy-id: INFO: Source of key(s) to be installed: "/Users/user/.ssh/id_rsa.pub"
/usr/bin/ssh-copy-id: INFO: attempting to log in with the new key(s), to filter out any that are already installed
/usr/bin/ssh-copy-id: INFO: 1 key(s) remain to be installed -- if you are prompted now it is to install the new keys
Password:

Number of key(s) added:        1

Now try logging into the machine, with:   "ssh 'user@10.240.203.84'"
and check to make sure that only the key(s) you wanted were added.
登录测试:
userdeMacBook-Pro:~ user$ ssh 'user@10.240.203.84'
Enter passphrase for key '/Users/user/.ssh/id_rsa':
Last login: Wed Jan  2 19:13:20 2019 from 10.240.203.84
然后发现可以从虚拟机远程登录本地主机:
vagrant@precise64:~$ ssh user@10.240.203.84
The authenticity of host '10.240.203.84 (10.240.203.84)' can't be established.
ECDSA key fingerprint is d9:ee:d9:d8:1e:9e:b1:a3:df:bd:c1:b9:1c:13:f2:c4.
Are you sure you want to continue connecting (yes/no)? yes
Warning: Permanently added '10.240.203.84' (ECDSA) to the list of known hosts.
Password:
Last login: Wed Jan  2 19:17:27 2019 from 10.240.203.84
但是还是出错了:
userdeMacBook-Pro:~ user$ docker-machine create --engine-registry-mirror=https://hes89po0.mirror.aliyuncs.com --driver generic --generic-ip-address=10.240.203.84 --generic-ssh-key /Users/user/.ssh/id_rsa --generic-ssh-user=user vm
Running pre-create checks...
Creating machine...
(vm) Importing SSH key...
Waiting for machine to be running, this may take a few minutes...
Detecting operating system of created instance...
Waiting for SSH to be available...
Enter passphrase for key '/Users/user/.docker/machine/machines/vm/id_rsa':
Detecting the provisioner...
Enter passphrase for key '/Users/user/.docker/machine/machines/vm/id_rsa':
Error creating machine: Error detecting OS: Error getting SSH command: ssh command error:
command : cat /etc/os-release
err     : exit status 1
output  : cat: /etc/os-release: No such file or directory
上面的这个错误是ubuntu的docker版本与本机的mac版本不兼容的原因,所以它找不到相应的文件
2)所以后面就打算换成一个ubuntu系统,但是中间理解错了,以为能够在本地的mac系统ssh连接虚拟机上的ubuntu12.04来create,所以在纠结ping通的问题
然后就打算换成使用本地虚拟机之前安装的一个ubuntu机器,有一个问题,就是虚拟机能够ping通主机

本地主机ping不通虚拟机:

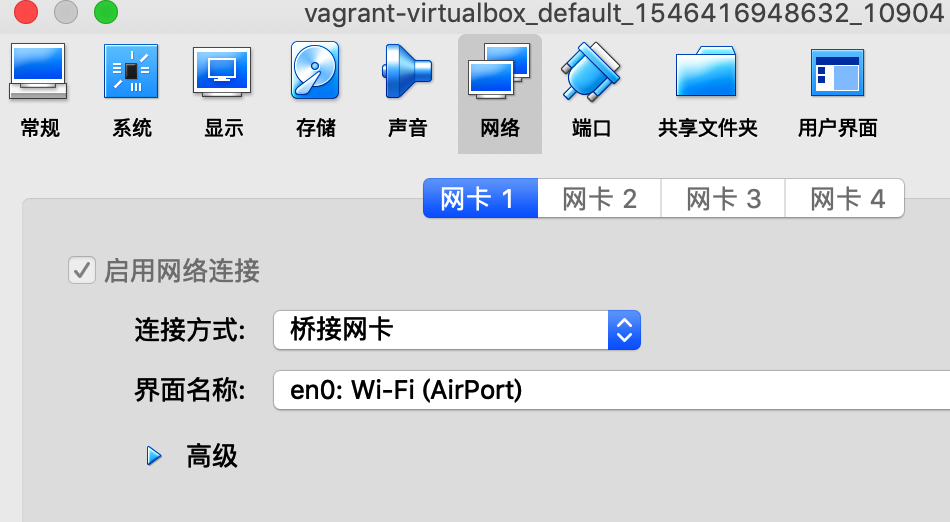
解决办法:
将网卡1改成桥接模式

⚠️要将虚拟机重启,否则是成功不了的(重要)
然后就成功ping通了

然后就跟上面的步骤一样重新来一遍,ssh-copy-id命令是复制SSH密钥到目标主机:
userdeMBP:~ user$ ssh-copy-id vagrant@10.240.203.48
/usr/bin/ssh-copy-id: INFO: Source of key(s) to be installed: "/Users/user/.ssh/id_rsa.pub"
/usr/bin/ssh-copy-id: INFO: attempting to log in with the new key(s), to filter out any that are already installed
/usr/bin/ssh-copy-id: INFO: 1 key(s) remain to be installed -- if you are prompted now it is to install the new keys
vagrant@10.240.203.48's password:  //输入的是你目标主机的密码

Number of key(s) added:        1

Now try logging into the machine, with:   "ssh 'vagrant@10.240.203.48'"
and check to make sure that only the key(s) you wanted were added.
测试:
userdeMBP:~ user$ ssh 'vagrant@10.240.203.48'
Enter passphrase for key '/Users/user/.ssh/id_rsa':  //输入你本机私钥的密码
Welcome to Ubuntu 12.04 LTS (GNU/Linux 3.2.0-23-generic x86_64)

 * Documentation:  https://help.ubuntu.com/
New release '14.04.5 LTS' available.
Run 'do-release-upgrade' to upgrade to it.

Welcome to your Vagrant-built virtual machine.
Last login: Thu Jan  3 03:56:04 2019
vagrant@precise64:~$  //可见成功远程连接了
然后先查看,确定目标主机本身是没有安装docker的,然后调用create为其安装:
userdeMBP:~ user$ docker-machine create --engine-registry-mirror=https://hes89po0.mirror.aliyuncs.com --driver generic --generic-ip-address=10.240.203.48 --generic-ssh-key /Users/user/.ssh/id_rsa --generic-ssh-user=user vm
Running pre-create checks...
Creating machine...
(vm) Importing SSH key...
Waiting for machine to be running, this may take a few minutes...
Detecting operating system of created instance...
Waiting for SSH to be available...
Error creating machine: Error detecting OS: Too many retries waiting for SSH to be available.  Last error: Maximum number of retries (60) exceeded
但是仍然没有成功,后面才突然恍然大悟,我应该到ubuntu虚拟机上去执行这些步骤才对,而不是在本机上,以为是通过ssh来帮助其安装
3)打算直接在ubuntu12.04上运行docker-machine create
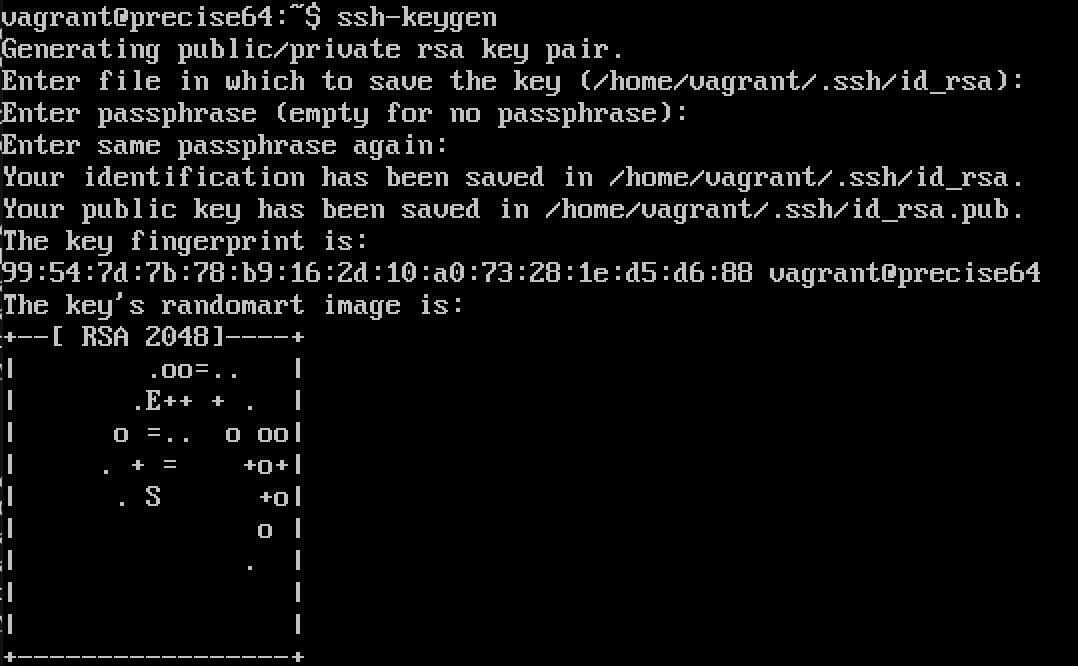
所以所有步骤从头走一遍,先生成密钥:

然后复制密钥给本机:

上图的问题和之前的一样,这里就不管了,直接yes先
然后后面突然想起自己没有在该ubuntu12.04上安装docker-machine呢,然后网上大多是16.04版本的安装教程,所以换了个虚拟机
4)换成了16.04的ubuntu虚拟机
然后后面就安装了一个ubuntu16.04的版本,然后直接运行下面的命令,直接安装doocker-machine:
vagrant@ubuntu-xenial:~$ curl -L https://github.com/docker/machine/releases/download/v0.13.0/docker-machine-`uname -s`-`uname -m` >/tmp/docker-machine && chmod +x /tmp/docker-machine && sudo cp /tmp/docker-machine /usr/local/bin/docker-machine
  % Total    % Received % Xferd  Average Speed   Time    Time     Time  Current
                                 Dload  Upload   Total   Spent    Left  Speed
100   617    0   617    0     0    394      0 --:--:--  0:00:01 --:--:--   394
100 25.3M  100 25.3M    0     0  51350      0  0:08:37  0:08:37 --:--:-- 55686
查看版本:
vagrant@ubuntu-xenial:~$ docker-machine --version
docker-machine version 0.13.0, build 9ba6da9
生成密钥:
vagrant@ubuntu-xenial:~$ ssh-keygen
Generating public/private rsa key pair.
Enter file in which to save the key (/home/vagrant/.ssh/id_rsa):
Enter passphrase (empty for no passphrase):
Enter same passphrase again:
Your identification has been saved in /home/vagrant/.ssh/id_rsa.
Your public key has been saved in /home/vagrant/.ssh/id_rsa.pub.
The key fingerprint is:
SHA256:B5GcbYmYFTNfZkNQQt6w0qEvY7MSPnRSHdGqQxtOoHo vagrant@ubuntu-xenial
The key's randomart image is:
+---[RSA 2048]----+
|       =*BOBB    |
|      + =X+@..   |
|     . .=.*..    |
|    .  .++.      |
|   .  ++S+o      |
|  . Eo ==*       |
|   .  + ..       |
|       o         |
|                 |
+----[SHA256]-----+
然后复制:
vagrant@ubuntu-xenial:~$ ssh-copy-id vagrant@10.0.2.15
/usr/bin/ssh-copy-id: INFO: Source of key(s) to be installed: "/home/vagrant/.ssh/id_rsa.pub"
The authenticity of host '10.0.2.15 (10.0.2.15)' can't be established.
ECDSA key fingerprint is SHA256:Y27AyXNovFytuIHlGpcpX2G0CZlHbgUE4WREk65rp40.
Are you sure you want to continue connecting (yes/no)? yes
/usr/bin/ssh-copy-id: INFO: attempting to log in with the new key(s), to filter out any that are already installed
/usr/bin/ssh-copy-id: INFO: 1 key(s) remain to be installed -- if you are prompted now it is to install the new keys
Permission denied (publickey).
但是上面的又没有成功
解决办法:
先查看ssh是否真的打开:
vagrant@ubuntu-xenial:~$ ps -e |grep ssh
 1582 ?        00:00:00 sshd
 1623 ?        00:00:02 sshd
 2561 ?        00:00:00 sshd
看到sshd即打开
然后后面找到可能是因为vagrant用户之前没有设置密码,导致在识别用户时无密码作为权限标识,所以提示无权限,所以为其设置密码:
vagrant@ubuntu-xenial:~$ sudo passwd vagrant
Enter new UNIX password:
Retype new UNIX password:
passwd: password updated successfully
但是还是没有解决,然后说是还需要更改一些配置,运行:
sudo vim /etc/ssh/sshd_config
然后将下面的值都更改成yes:
RSAAuthentication yes
PubkeyAuthentication yes
RhostsRSAAuthentication yes
PasswordAuthentication yes
然后保存退出,然后运行sudo service ssh restart重启ssh,然后再运行一遍就成功了:
vagrant@ubuntu-xenial:~$ ssh-copy-id vagrant@10.0.2.15
/usr/bin/ssh-copy-id: INFO: Source of key(s) to be installed: "/home/vagrant/.ssh/id_rsa.pub"
/usr/bin/ssh-copy-id: INFO: attempting to log in with the new key(s), to filter out any that are already installed
/usr/bin/ssh-copy-id: INFO: 1 key(s) remain to be installed -- if you are prompted now it is to install the new keys
vagrant@10.0.2.15's password:  //输入的就是你上面设置的密码

Number of key(s) added: 1

Now try logging into the machine, with:   "ssh 'vagrant@10.0.2.15'"
and check to make sure that only the key(s) you wanted were added.
然后create:
vagrant@ubuntu-xenial:~$ docker-machine create --engine-registry-mirror=https://hes89po0.mirror.aliyuncs.com -d generic --generic-ip-address=10.0.2.15 --generic-ssh-key=/home/vagrant/.ssh/id_rsa --generic-ssh-user=vagrant vm
Running pre-create checks...
Creating machine...
(vm) Importing SSH key...
Waiting for machine to be running, this may take a few minutes...
Detecting operating system of created instance...
Waiting for SSH to be available...
Enter passphrase for key '/home/vagrant/.docker/machine/machines/vm/id_rsa':
Detecting the provisioner...
Enter passphrase for key '/home/vagrant/.docker/machine/machines/vm/id_rsa':
Provisioning with ubuntu(systemd)...
Enter passphrase for key '/home/vagrant/.docker/machine/machines/vm/id_rsa':
Enter passphrase for key '/home/vagrant/.docker/machine/machines/vm/id_rsa':
Enter passphrase for key '/home/vagrant/.docker/machine/machines/vm/id_rsa':
Enter passphrase for key '/home/vagrant/.docker/machine/machines/vm/id_rsa':
Enter passphrase for key '/home/vagrant/.docker/machine/machines/vm/id_rsa':
Installing Docker...
Enter passphrase for key '/home/vagrant/.docker/machine/machines/vm/id_rsa':
Enter passphrase for key '/home/vagrant/.docker/machine/machines/vm/id_rsa':
Copying certs to the local machine directory...
Enter passphrase for key '/home/vagrant/.docker/machine/machines/vm/id_rsa':
Enter passphrase for key '/home/vagrant/.docker/machine/machines/vm/id_rsa':
Copying certs to the remote machine...
Enter passphrase for key '/home/vagrant/.docker/machine/machines/vm/id_rsa':
Enter passphrase for key '/home/vagrant/.docker/machine/machines/vm/id_rsa':
Enter passphrase for key '/home/vagrant/.docker/machine/machines/vm/id_rsa':
Enter passphrase for key '/home/vagrant/.docker/machine/machines/vm/id_rsa':
Setting Docker configuration on the remote daemon...
Enter passphrase for key '/home/vagrant/.docker/machine/machines/vm/id_rsa':
Enter passphrase for key '/home/vagrant/.docker/machine/machines/vm/id_rsa':
Enter passphrase for key '/home/vagrant/.docker/machine/machines/vm/id_rsa':
Enter passphrase for key '/home/vagrant/.docker/machine/machines/vm/id_rsa':
Enter passphrase for key '/home/vagrant/.docker/machine/machines/vm/id_rsa':
Checking connection to Docker...
Docker is up and running!
To see how to connect your Docker Client to the Docker Engine running on this virtual machine, run: docker-machine env vm
然后终于成功了,中间的部分都是要求输入密码的地方,不要因为它要求你输入密码过多而以为是失败了,查看:
vagrant@ubuntu-xenial:~$ docker-machine ls
NAME   ACTIVE   DRIVER    STATE     URL                    SWARM   DOCKER     ERRORS
vm     -        generic   Running   tcp://10.0.2.15:2376           v18.09.0
但是我看别人的例子也没有需要输入这么多的密码啊?可能是还需要什么设置但是我错过了,小伙伴们有知道的可以告诉一下我
然后试着不指明密钥和用户看能不能生成机器,--generic-ssh-user如果不指明,使用的是root用户,觉得应该是不会成功的:
vagrant@ubuntu-xenial:~$ docker-machine create --engine-registry-mirror=https://hes89po0.mirror.aliyuncs.com -d generic --generic-ip-address=10.0.2.15 vm2
Running pre-create checks...
Creating machine...
(vm2) No SSH key specified. Assuming an existing key at the default location.
Waiting for machine to be running, this may take a few minutes...
Detecting operating system of created instance...
Waiting for SSH to be available...
Error creating machine: Error detecting OS: Too many retries waiting for SSH to be available.  Last error: Maximum number of retries (60) exceeded
vagrant@ubuntu-xenial:~$ docker-machine ls
NAME   ACTIVE   DRIVER    STATE     URL                    SWARM   DOCKER     ERRORS
vm     -        generic   Running   tcp://10.0.2.15:2376           v18.09.0
vm2    -        generic   Running   tcp://10.0.2.15:2376           v18.09.0
果然发现失败了,但是还是显示生成了vm2机器,生成的机器两个的URL是相同的,因此在一个环境上只能生成一个docker machine,因此一般都会使用virtualbox
如果想要使用的是root用户,可以转到/home/ubuntu目录下,再生成ssh-keygen等步骤
记得将没有成功的vm2移除:
vagrant@ubuntu-xenial:~$ docker-machine rm vm2
About to remove vm2
WARNING: This action will delete both local reference and remote instance.
Are you sure? (y/n): y
Successfully removed vm2


