mac下iterm2配置安装,通过expact实现保存账号,及通过跳板登陆配置
在参考了几款mac不错的ssh工具外,最终选择使用iterm2。本来打算用FinalShell,安装后发现其icon在访达中根本不现实,而且每次访问还需要输入管理员账号密码,强迫症根本受不了...
-
官网下载
https://www.iterm2.com/downloads.html
-
安装
双击.app即可
-
配置
有趣的在于后面的配置
采用expact脚本方式来完成对远程登陆的账号密码配置来进行配置
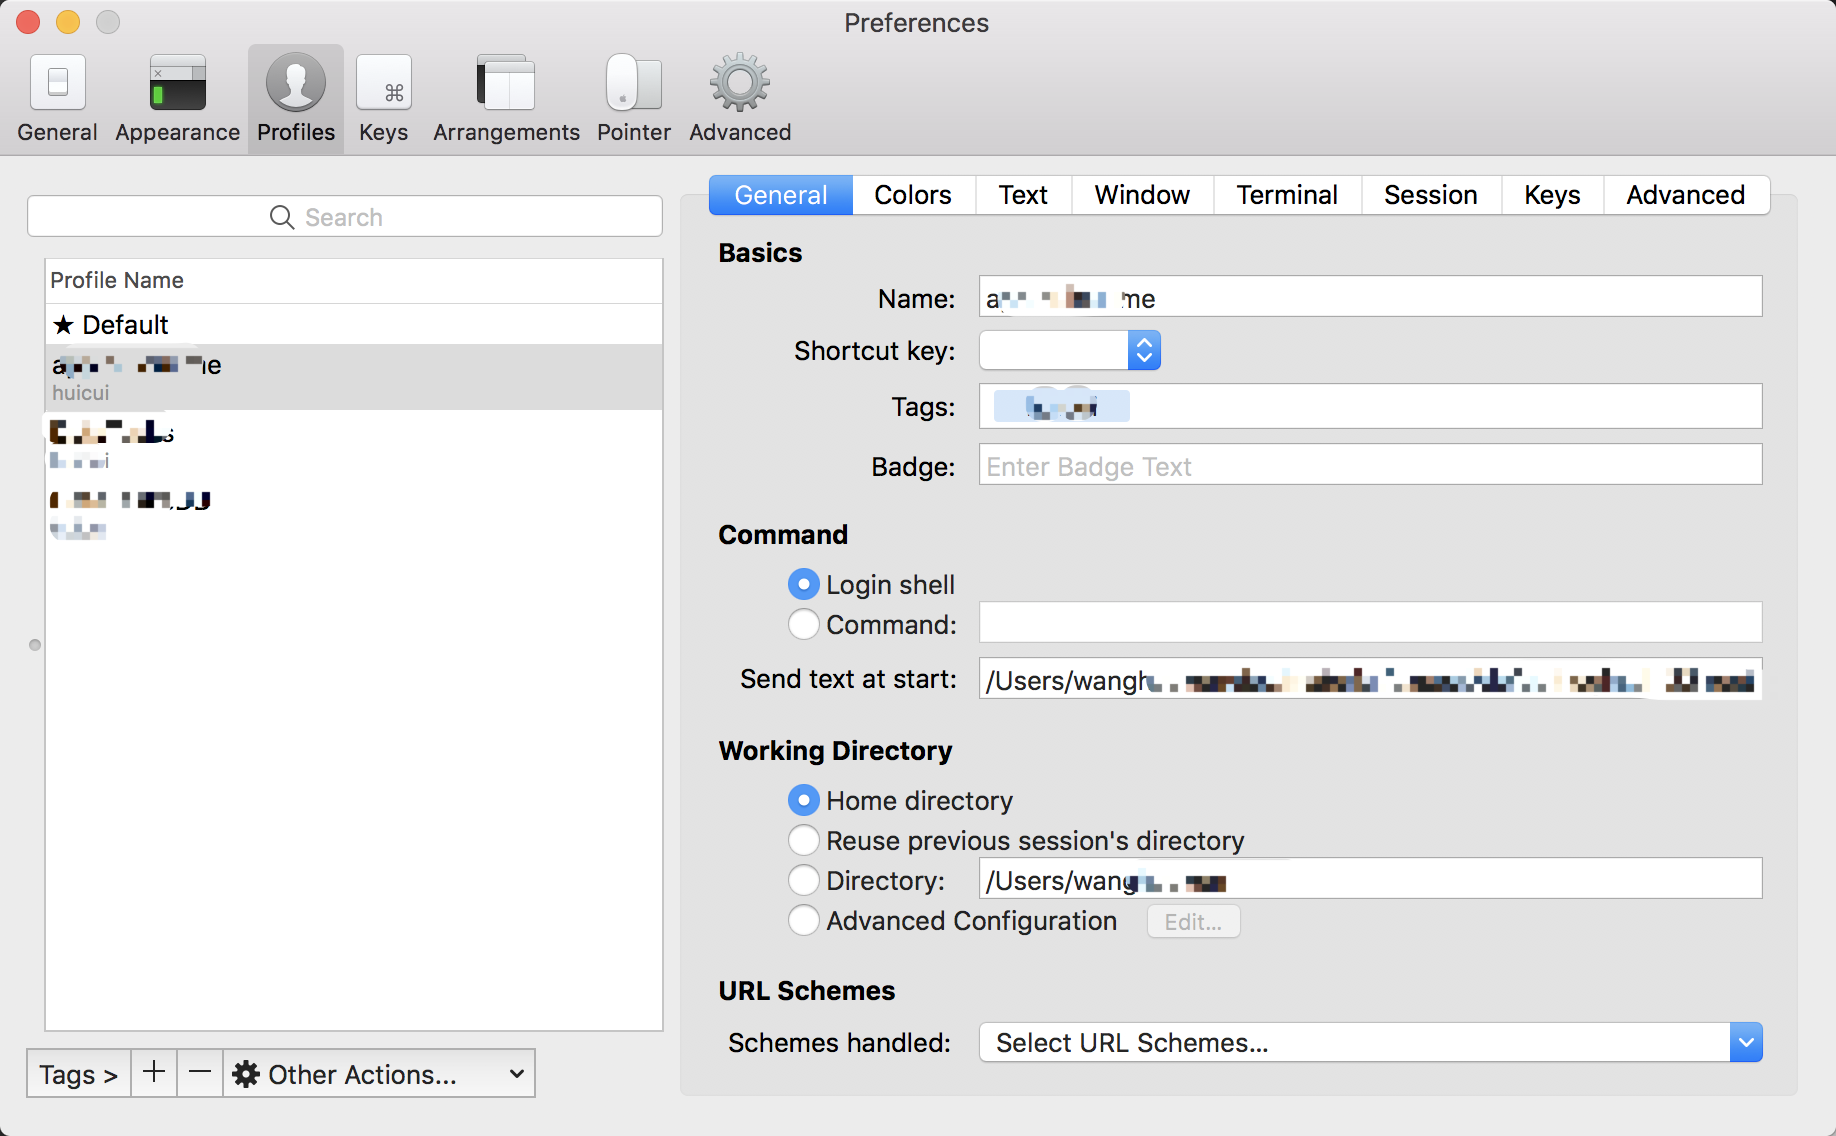
profiles-open profiles

选择Login shell
Send text at start 填写 /Users/whk/dev/defaultlogin.sh 22 root 服务器IP 密码

/Users/whk/dev/defaultlogin.sh 文件如下:
#!/usr/bin/expect

set timeout 30
spawn ssh -p [lindex $argv 0] [lindex $argv 1]@[lindex $argv 2]
expect {
        "(yes/no)?"
        {send "yes\n";exp_continue}
        "password:"
        {send "[lindex $argv 3]\n"}
}
interact
普通登陆参考👆上面的Done!
-
跳板登陆内网
接下来,来点更有意思的,服务器跳板登陆设置
shell文件如下:
#!/usr/bin/expect
set host [lindex $argv 0]

set TERMSERV 跳板机IP
set USER 跳板机用户名
set PASSWORD 跳板机密码
set UATUN 内网服务器用户名
set UATPWD 内网服务器密码

# 登录跳板机
spawn ssh -l $USER $TERMSERV
expect {
        "yes/no" {send "yes\r";exp_continue;}
         "*password:*" { send "$PASSWORD\r" }
        }
# 登录内网
expect "*跳板机用户名@*" {send "ssh -l $UATUN $host\r"}
expect {
        "yes/no" {send "yes\r";exp_continue;}
        "*password:*" { send "$UATPWD\r" }
        }
interact
Send text at start 填写 /Users/whk/dev/defaultlogin.sh 22 服务器IP
Done!
安装配置主题/oh My Zsh/字体/高亮等,可参考 Mac OS 终端利器 iTerm2
相关命令
查看当前系统所支持的命令行环境: cat /etc/shells
查看zsh版本,亦可判断是否安装:zsh --version
切换shell环境,新开窗口生效:chsh -s /bin/zsh
item2快捷键
| 命令 | 说明 |
|---|---|
| command + t | 新建标签 |
| command + w | 关闭标签 |
| command + 数字 command + 左右方向键 | 切换标签 |
| command + enter | 切换全屏 |
| command + f | 查找 |
| command + d | 垂直分屏 |
| command + shift + d | 水平分屏 |
| command + option + 方向键 command + [ 或 command + ] | 切换屏幕 |
| command + ; | 查看历史命令 |
| command + shift + h | 查看剪贴板历史 |
| ctrl + u | 清除当前行 |
| ctrl + l | 清屏 |
| ctrl + a | 到行首 |
| ctrl + e | 到行尾 |
| ctrl + f/b | 前进后退 |
| ctrl + p | 上一条命令 |
| ctrl + r | 搜索命令历史 |
参考地址:
https://www.jianshu.com/p/3757554b907d
https://segmentfault.com/a/1190000009826457
https://www.jianshu.com/p/0f3dcec21a97


