ubuntu22.04 部署 stable-diffusion-webui v1.1.0
GPU设置
系统更新
# apt -y update && apt -y upgrade查看GPU驱动信息
# ubuntu-drivers  devices
== /sys/devices/pci0000:00/0000:00:03.0 ==
modalias : pci:v000010DEd00001E07sv000010DEsd000012FAbc03sc00i00
vendor   : NVIDIA Corporation
model    : TU102 [GeForce RTX 2080 Ti Rev. A]
driver   : nvidia-driver-515 - distro non-free
driver   : nvidia-driver-530-open - distro non-free recommended
driver   : nvidia-driver-530 - distro non-free
driver   : nvidia-driver-470 - distro non-free
driver   : nvidia-driver-418-server - distro non-free
driver   : nvidia-driver-510 - distro non-free
driver   : nvidia-driver-525-server - distro non-free
driver   : nvidia-driver-515-server - distro non-free
driver   : nvidia-driver-525-open - distro non-free
driver   : nvidia-driver-450-server - distro non-free
driver   : nvidia-driver-515-open - distro non-free
driver   : nvidia-driver-525 - distro non-free
driver   : nvidia-driver-470-server - distro non-free
driver   : xserver-xorg-video-nouveau - distro free builtin
# nvidia-detector
nvidia-driver-530安装GPU驱动
# apt install nvidia-driver-530 -y安装cuda-toolkit
# wget https://developer.download.nvidia.com/compute/cuda/repos/ubuntu2204/x86_64/cuda-keyring_1.0-1_all.deb
# sudo dpkg -i cuda-keyring_1.0-1_all.deb
# sudo apt-get update
# sudo apt-get -y install cuda  nvidia-cuda-toolkit nvidia-cudnn
重启主机
# reboot查看CUDA版本
# nvidia-smi
Mon May  8 15:35:30 2023
+---------------------------------------------------------------------------------------+
| NVIDIA-SMI 530.41.03              Driver Version: 530.41.03    CUDA Version: 12.1     |
|-----------------------------------------+----------------------+----------------------+
| GPU  Name                  Persistence-M| Bus-Id        Disp.A | Volatile Uncorr. ECC |
| Fan  Temp  Perf            Pwr:Usage/Cap|         Memory-Usage | GPU-Util  Compute M. |
|                                         |                      |               MIG M. |
|=========================================+======================+======================|
|   0  NVIDIA GeForce RTX 2080 Ti      Off| 00000000:00:03.0 Off |                  N/A |
| 25%   27C    P8                6W / 250W|      1MiB / 11264MiB |      0%      Default |
|                                         |                      |                  N/A |
+-----------------------------------------+----------------------+----------------------+

+---------------------------------------------------------------------------------------+
| Processes:                                                                            |
|  GPU   GI   CI        PID   Type   Process name                            GPU Memory |
|        ID   ID                                                             Usage      |
|=======================================================================================|
|  No running processes found                                                           |
+---------------------------------------------------------------------------------------+
# nvcc --version
nvcc: NVIDIA (R) Cuda compiler driver
Copyright (c) 2005-2021 NVIDIA Corporation
Built on Thu_Nov_18_09:45:30_PST_2021
Cuda compilation tools, release 11.5, V11.5.119
Build cuda_11.5.r11.5/compiler.30672275_0anaconda 设置
anaconda下载地址
https://www.anaconda.com/download#downloads
anaconda下载
# wget https://repo.anaconda.com/archive/Anaconda3-2023.03-1-Linux-x86_64.sh安装 anaconda
# bash Anaconda3-2023.03-1-Linux-x86_64.sh
....
Anaconda3 will now be installed into this location:
/root/anaconda3

  - Press ENTER to confirm the location
  - Press CTRL-C to abort the installation
  - Or specify a different location below

[/root/anaconda3] >>> /data/anaconda3
PREFIX=/data/anaconda3
....
no change     /data/anaconda3/condabin/conda
no change     /data/anaconda3/bin/conda
no change     /data/anaconda3/bin/conda-env
no change     /data/anaconda3/bin/activate
no change     /data/anaconda3/bin/deactivate
no change     /data/anaconda3/etc/profile.d/conda.sh
no change     /data/anaconda3/etc/fish/conf.d/conda.fish
no change     /data/anaconda3/shell/condabin/Conda.psm1
no change     /data/anaconda3/shell/condabin/conda-hook.ps1
no change     /data/anaconda3/lib/python3.10/site-packages/xontrib/conda.xsh
no change     /data/anaconda3/etc/profile.d/conda.csh
modified      /root/.bashrc
配置 anaconda
$ /data/anaconda3/bin/conda init bash
no change     /data/anaconda3/condabin/conda
no change     /data/anaconda3/bin/conda
no change     /data/anaconda3/bin/conda-env
no change     /data/anaconda3/bin/activate
no change     /data/anaconda3/bin/deactivate
no change     /data/anaconda3/etc/profile.d/conda.sh
no change     /data/anaconda3/etc/fish/conf.d/conda.fish
no change     /data/anaconda3/shell/condabin/Conda.psm1
no change     /data/anaconda3/shell/condabin/conda-hook.ps1
no change     /data/anaconda3/lib/python3.10/site-packages/xontrib/conda.xsh
no change     /data/anaconda3/etc/profile.d/conda.csh
modified      /home/ubuntu/.bashrc

==> For changes to take effect, close and re-open your current shell. <==
重新连接shell
anaconda 常用命令
1、创建环境:conda create -n <env_name> <packages>

2、激活环境:conda activate <env_name>

3、退出环境:conda deactivate <env_name>

4、查看已安装的环境信息:conda env list

5、复制环境:conda create -n <new_env_name> --clone <origin_env_name>

6、删除环境:conda env remove -n <env_name>

7、保存环境信息到environment.yaml文件中:conda env export > environment.yaml

8、通过environment.yaml环境文件创建文件: conda env create -f environment.yaml

9、查看已安装的包:conda list

10、搜索包:conda search <package_name1>

11、安装包:conda install <package_name1> <package_name2>

12、卸载包:conda remove <package_name>
python环境
创建虚拟环境
$ conda create -p /data/py_SD1 python=3.10.6
....
#
# To activate this environment, use
#
#     $ conda activate /data/py_SD1
#
# To deactivate an active environment, use
#
#     $ conda deactivate
启动环境
(base) ubuntu@192-168-0-193:/data$ conda activate /data/py_SD1
(/data/py_SD1) ubuntu@192-168-0-193:/data$
stable-diffusion-webui
安装依赖
# apt-get -y install google-perftools安装 stable-diffusion-webui
(/data/py_SD1) ubuntu@192-168-0-193:/data$ bash <(wget -qO- https://raw.githubusercontent.com/AUTOMATIC1111/stable-diffusion-webui/master/webui.sh)

################################################################
Install script for stable-diffusion + Web UI
Tested on Debian 11 (Bullseye)
################################################################

################################################################
Running on ubuntu user
################################################################

################################################################
Create and activate python venv
################################################################

################################################################
Launching launch.py...
################################################################
Using TCMalloc: libtcmalloc.so.4
Python 3.10.6 (main, Oct 24 2022, 16:07:47) [GCC 11.2.0]
...
运行 stable-diffusion-webui
$ bash webui.sh --share --listen

################################################################
Install script for stable-diffusion + Web UI
Tested on Debian 11 (Bullseye)
################################################################

################################################################
Running on ubuntu user
################################################################

################################################################
Repo already cloned, using it as install directory
################################################################

################################################################
Create and activate python venv
################################################################

################################################################
Launching launch.py...
################################################################
Using TCMalloc: libtcmalloc.so.4
Python 3.10.6 (main, Oct 24 2022, 16:07:47) [GCC 11.2.0]
Commit hash: 5ab7f213bec2f816f9c5644becb32eb72c8ffb89
Installing requirements
Launching Web UI with arguments: --share --listen
No module 'xformers'. Proceeding without it.
Loading weights [6ce0161689] from /data/stable-diffusion-webui/models/Stable-diffusion/v1-5-pruned-emaonly.safetensors
Creating model from config: /data/stable-diffusion-webui/configs/v1-inference.yaml
LatentDiffusion: Running in eps-prediction mode
DiffusionWrapper has 859.52 M params.
Applying cross attention optimization (Doggettx).
Textual inversion embeddings loaded(0):
Model loaded in 3.3s (load weights from disk: 0.1s, create model: 0.8s, apply weights to model: 1.1s, apply half(): 0.3s, move model to device: 0.9s).
Running on local URL:  http://0.0.0.0:7860
Stable Diffusion models
模型存放位置
stable-diffusion-webui/models/Stable-diffusion/
写实风格模型
Stable Diffusion, the original model published by CompVis and StabilityAI.
动漫风格模特
使用 Stable Diffusion WebUI
提示
使用“Prompts”和“Ngative Prompts”告诉 AI 要画什么。

文字转图片
输入信息
竹林里的大熊猫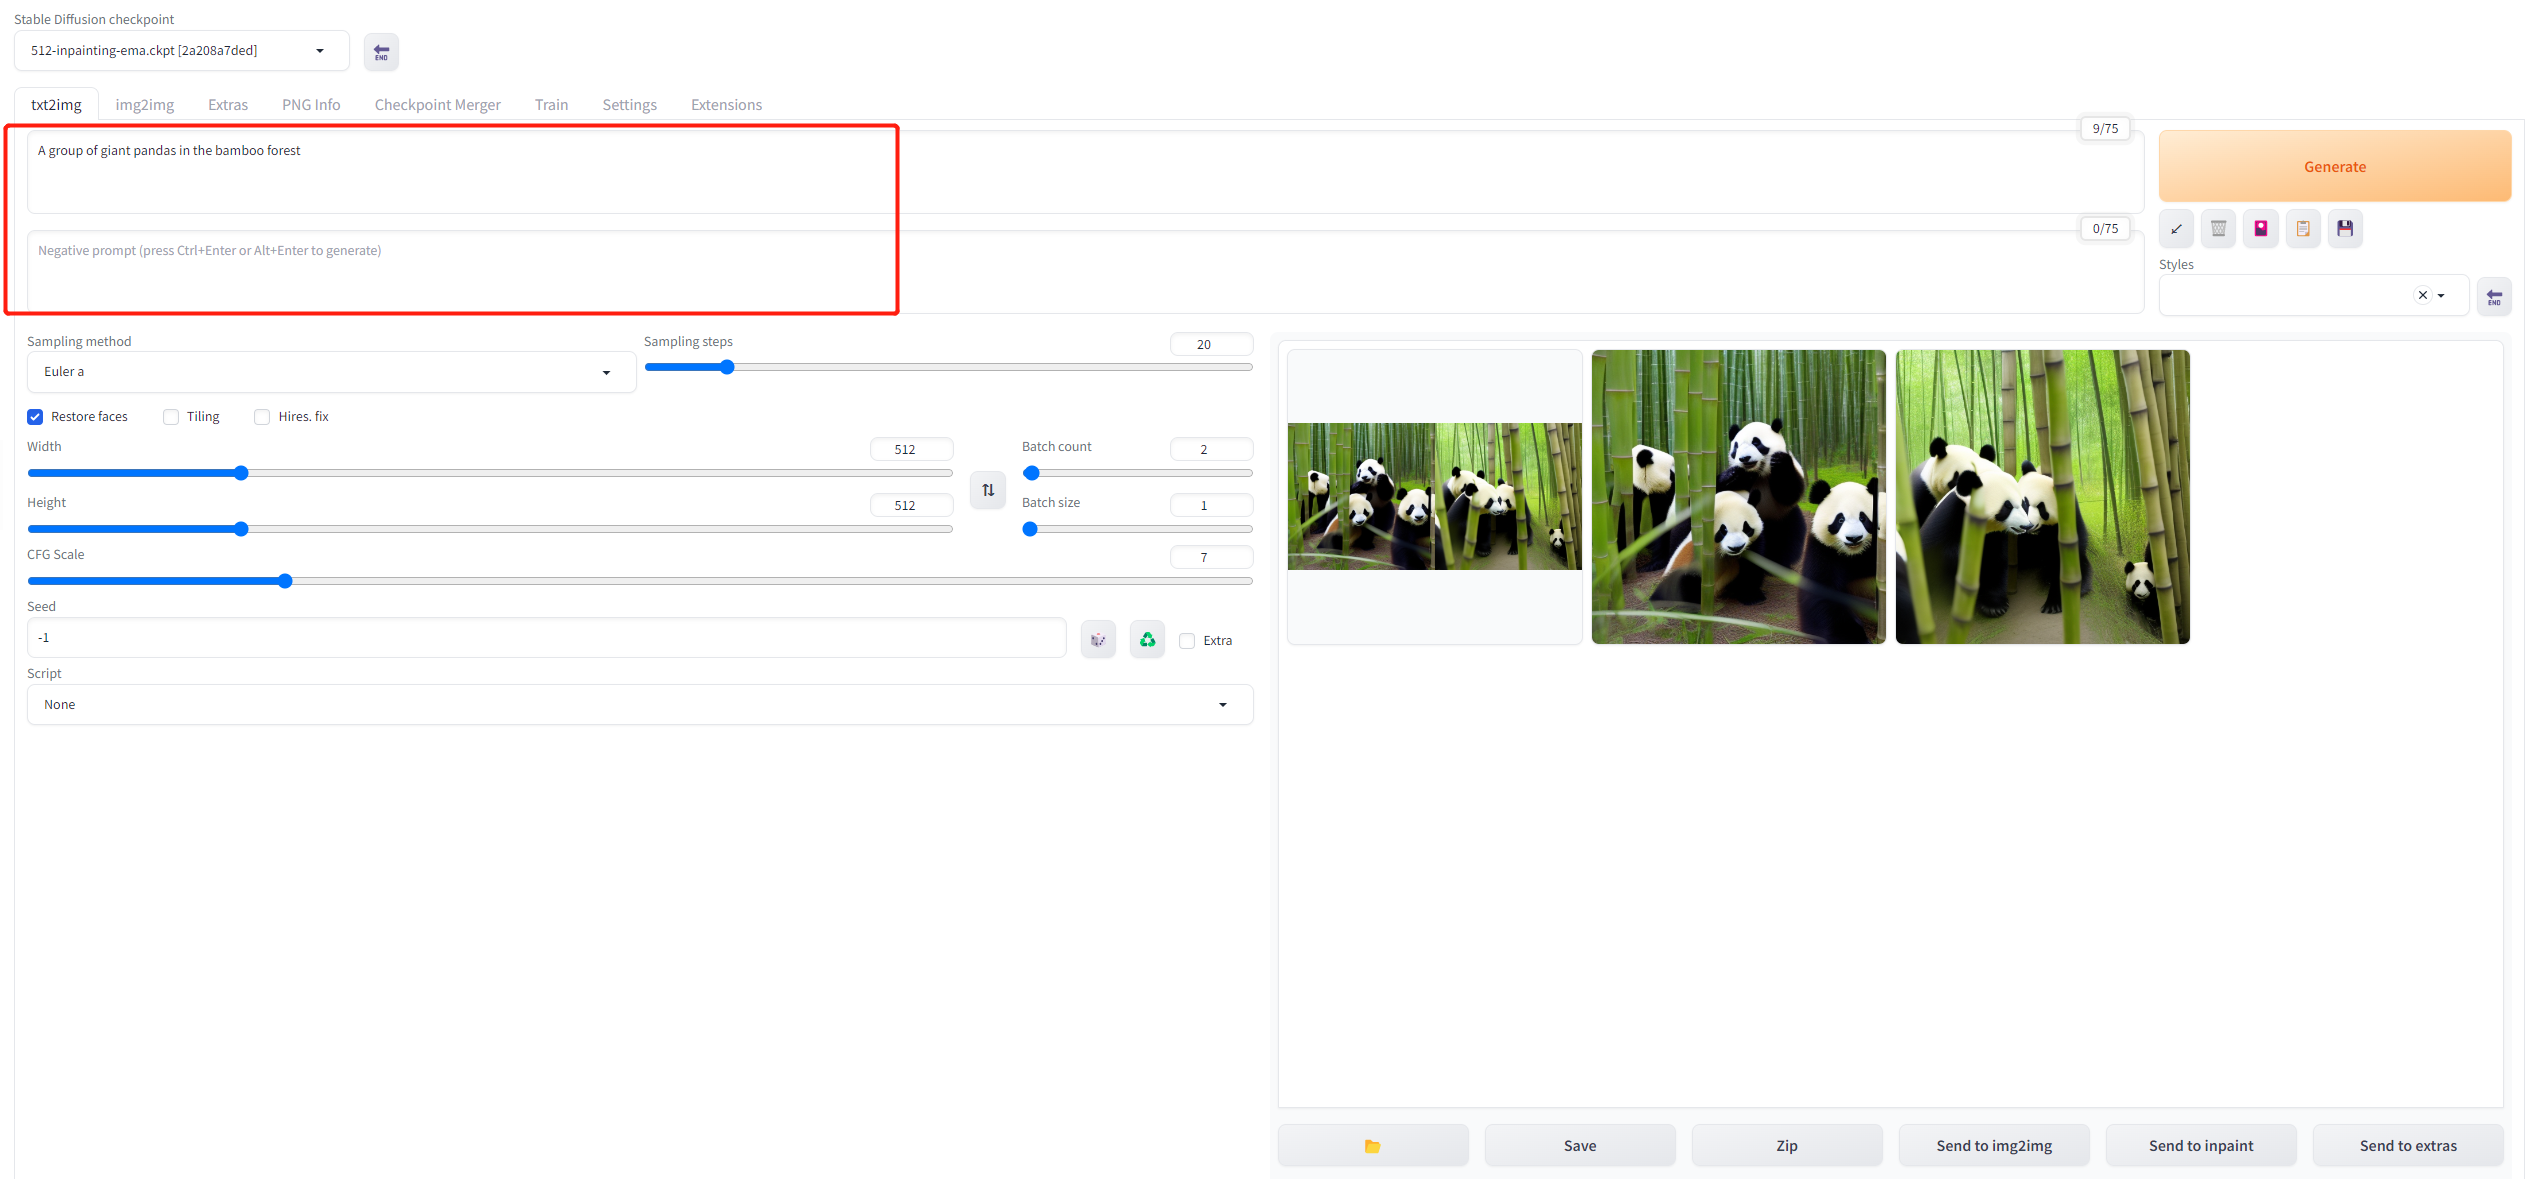
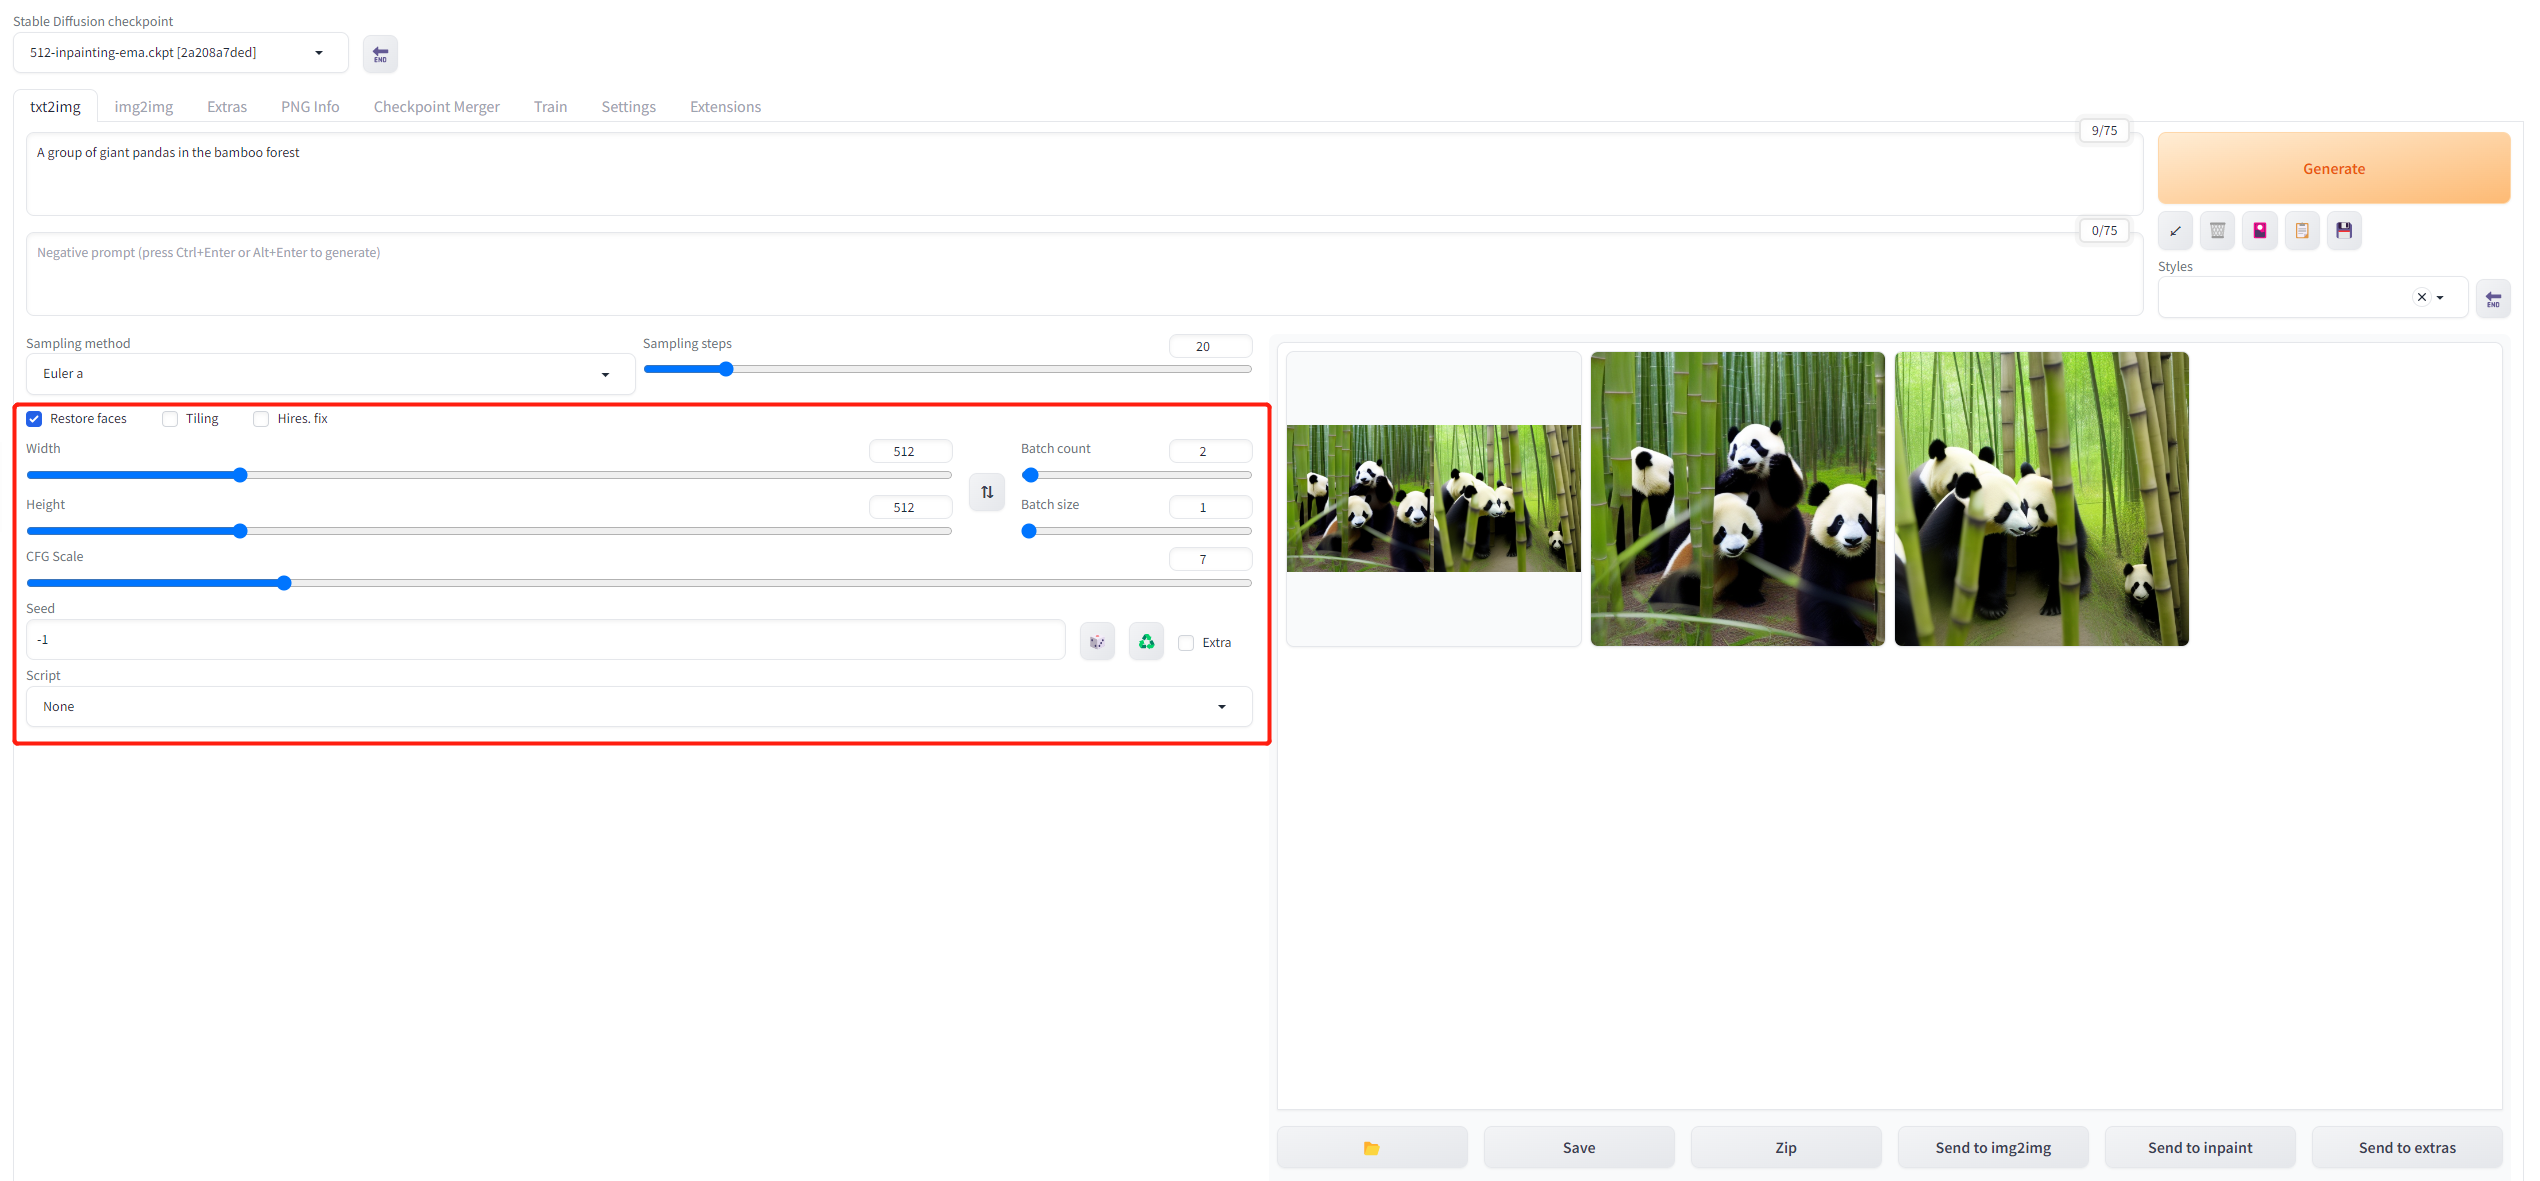
查看Restore faces
单击Generate按钮,它将开始生成图像
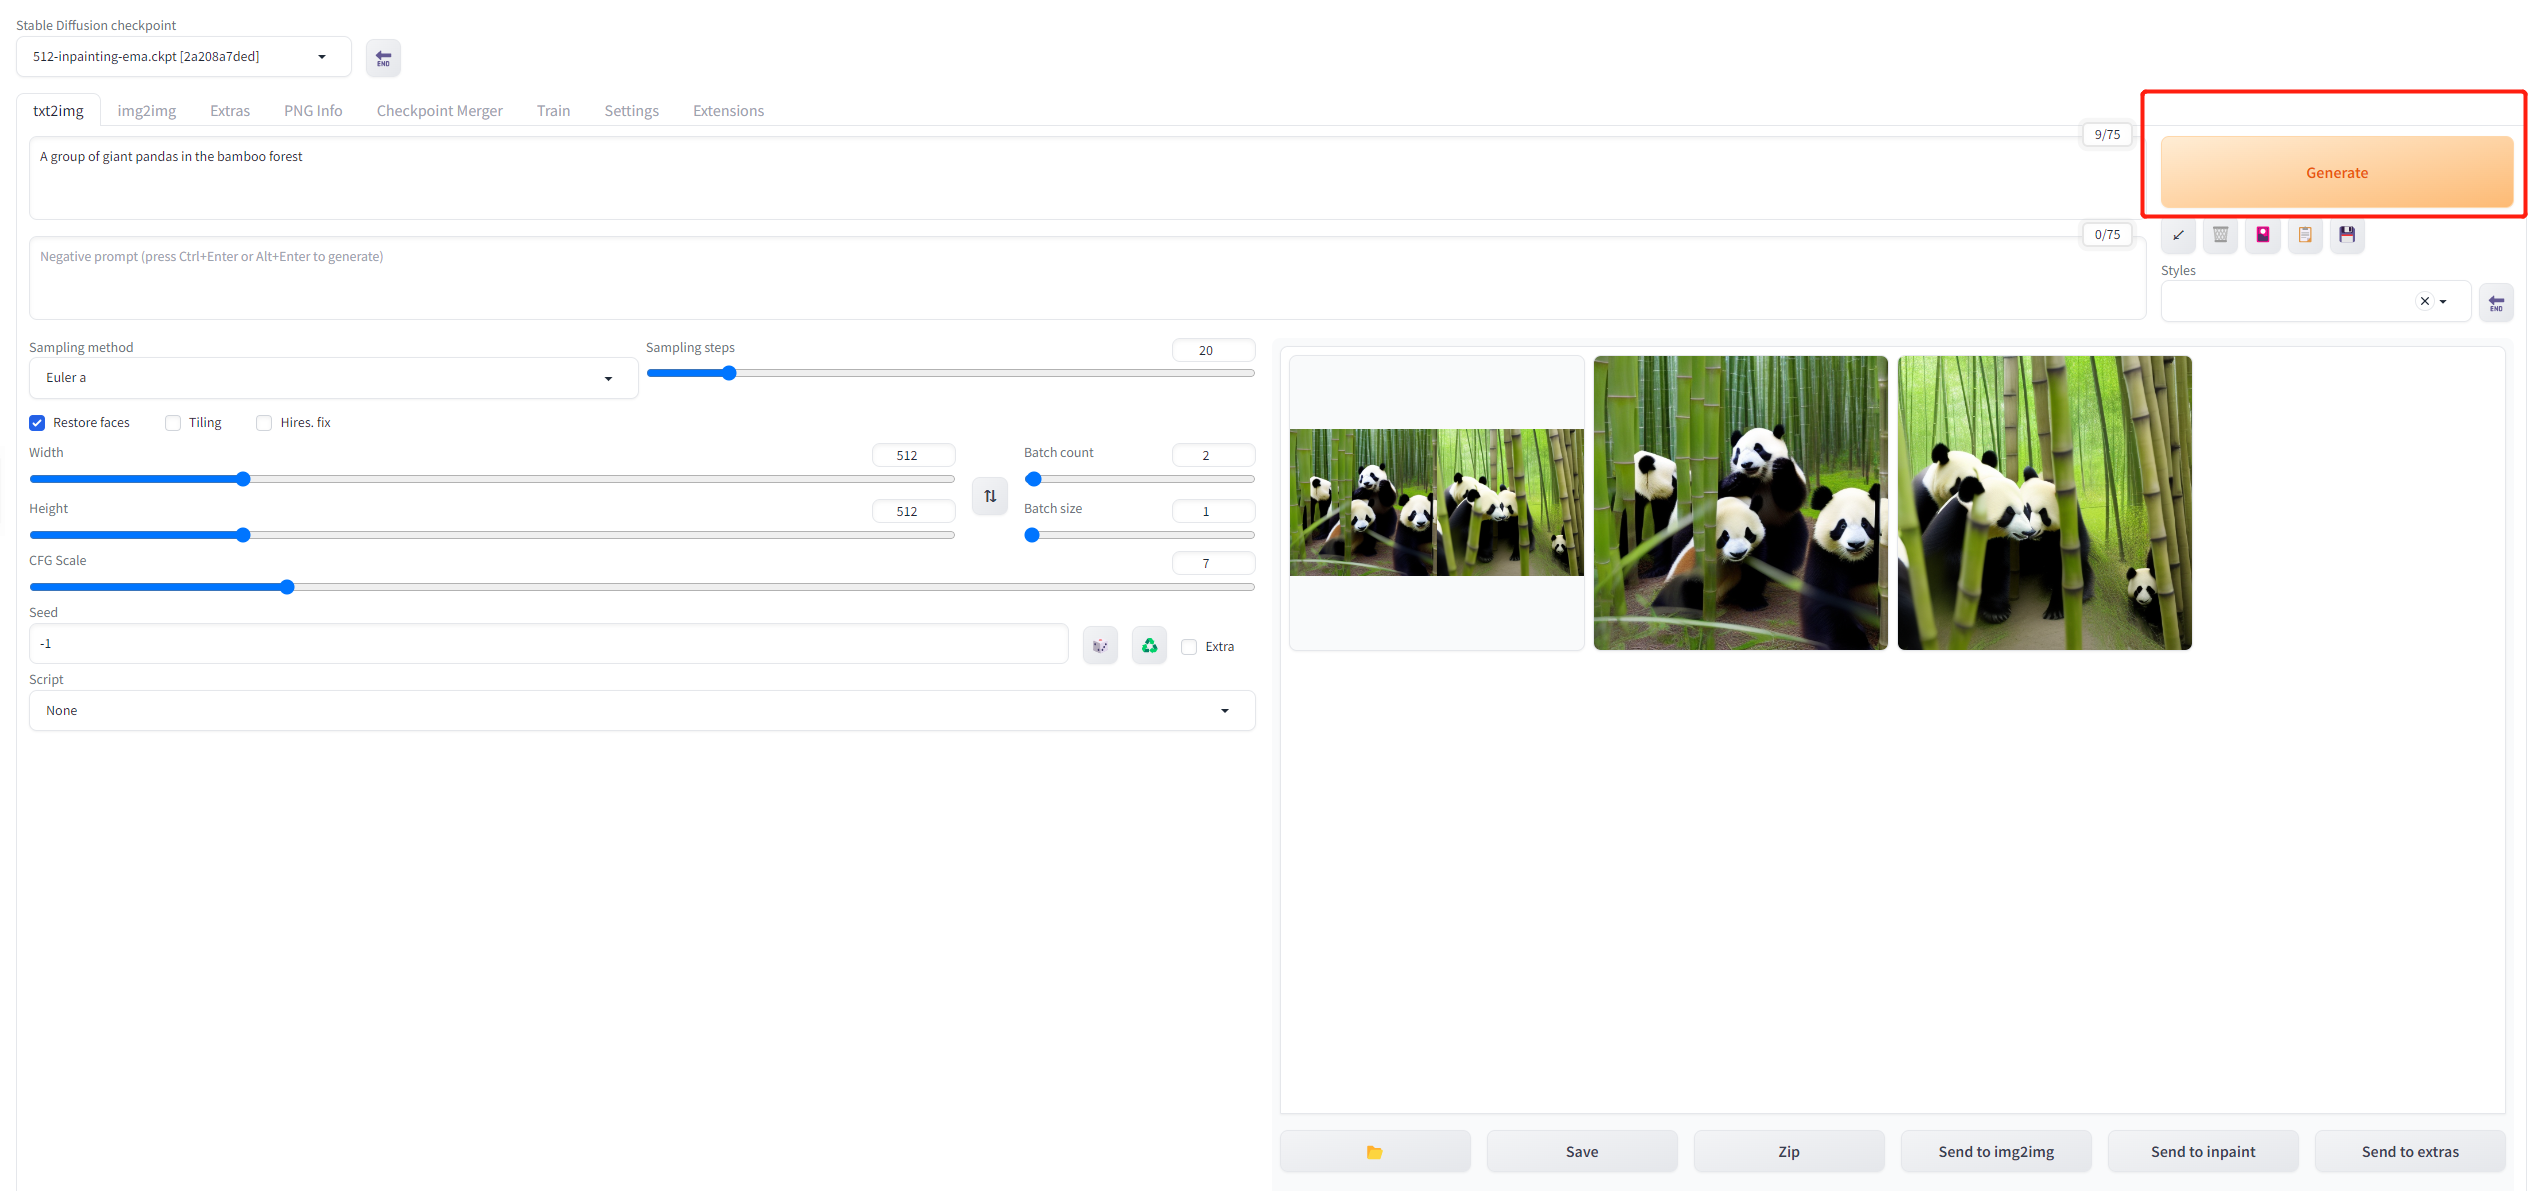
生成图片的位置
所有生成的图像将存储在stable-diffusion-webui/outputs
Batch count值可以一次运行中生成多个图像。
图片到图片
输入提示
点击Interrogate Deepboooru可根据您上传的图片自动生成提示。

上传图片
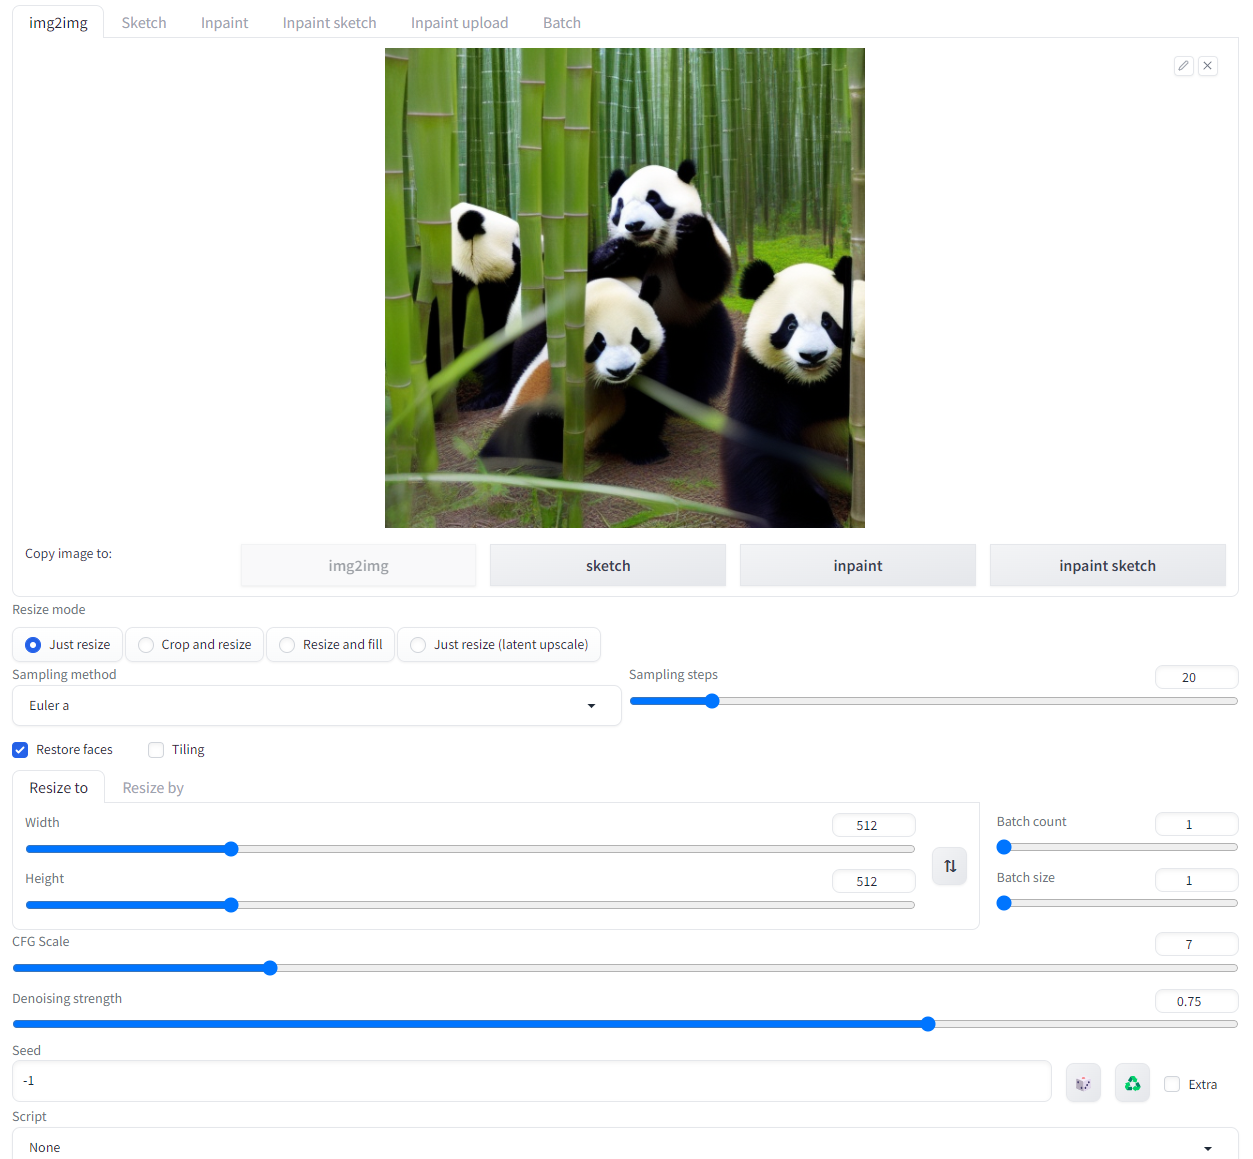
生成图像
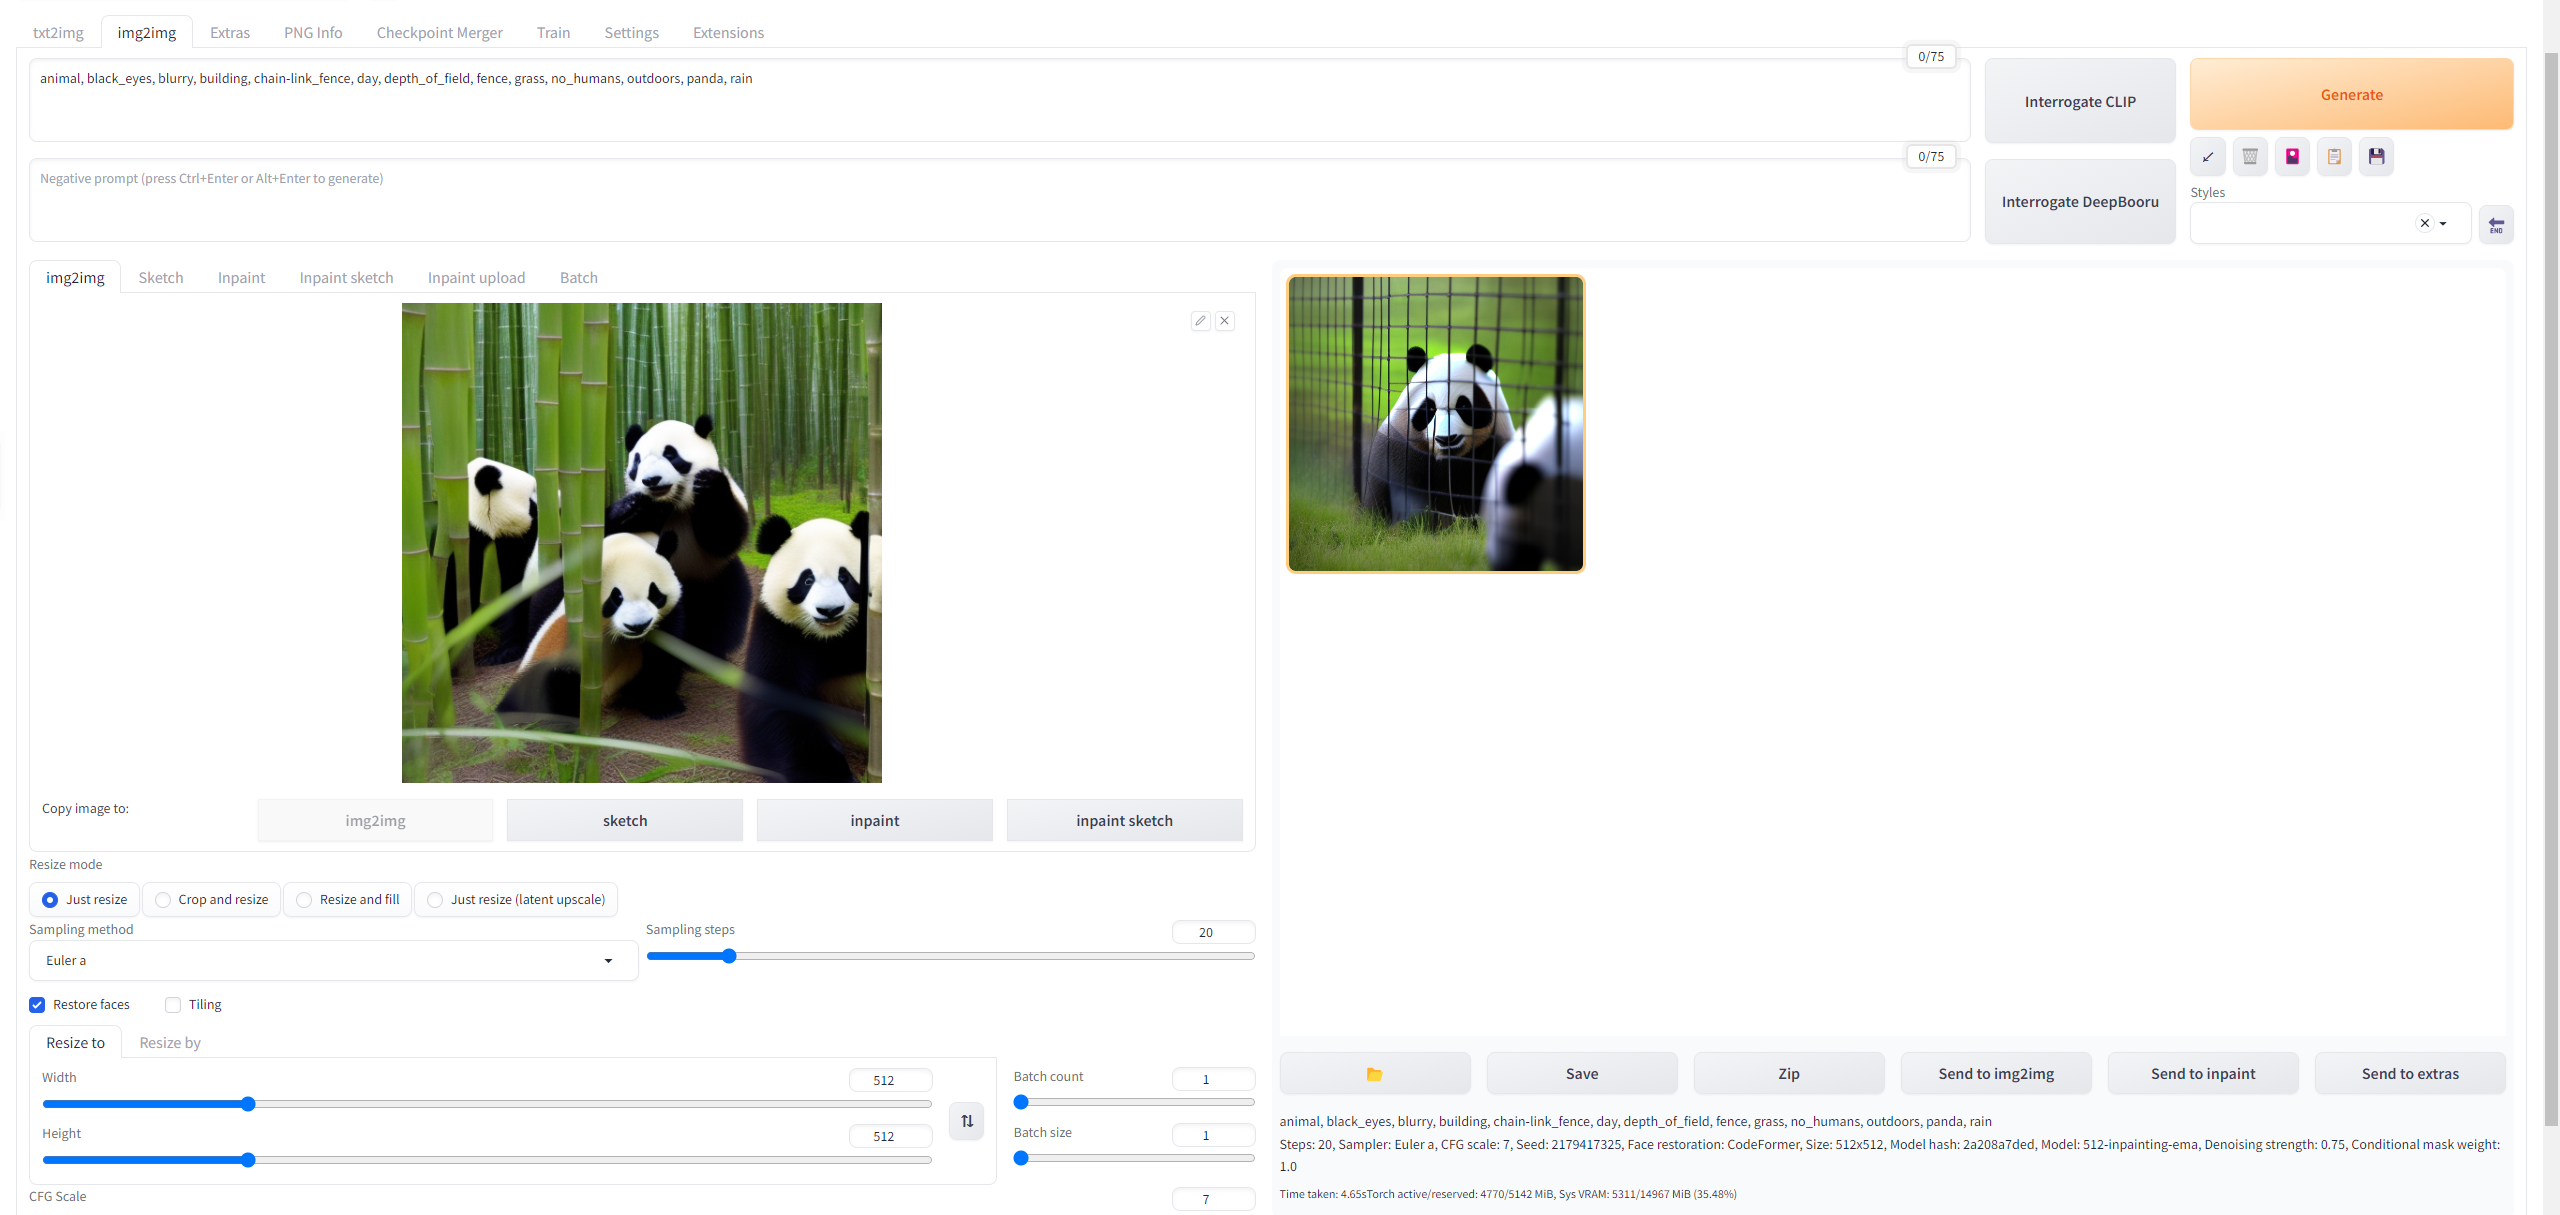
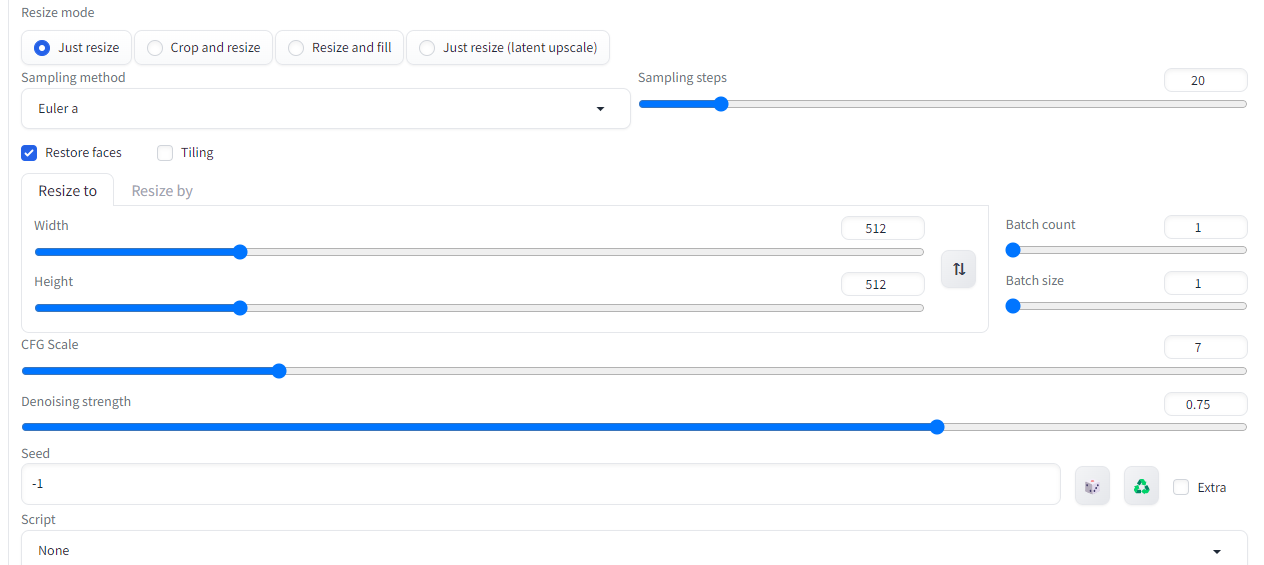
参数界面
Denoising strength 值越低输出的图片和原图越相似。
默认模型下载链接
https://huggingface.co/runwayml/stable-diffusion-v1-5/resolve/main/v1-5-pruned-emaonly.safetensors

https://huggingface.co/stabilityai/stable-diffusion-2-1/resolve/main/v2-1_768-ema-pruned.safetensors
参考文档
https://pytorch.org/get-started/previous-versions/
https://developer.nvidia.cn/cuda-toolkit-archive
https://developer.nvidia.cn/rdp/cudnn-archive
机器学习模型:https://huggingface.co/models
AI 艺术模型国内地址:https://www.liblib.ai/
AI 艺术模型:https://civitai.com/
官网模型下载: https://huggingface.co/stabilityai/stable-diffusion-2-1
github: https://github.com/AUTOMATIC1111/stable-diffusion-webui
真人模型推荐: https://huggingface.co/dreamlike-art/dreamlike-photoreal-2.0
https://huggingface.co/hakurei
免费模型下载: https://rentry.org/sdmodels
