
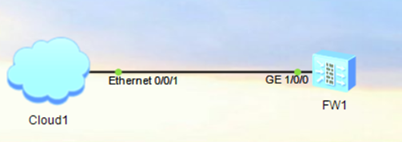
华为--连接管理防火墙
连接管理防火墙
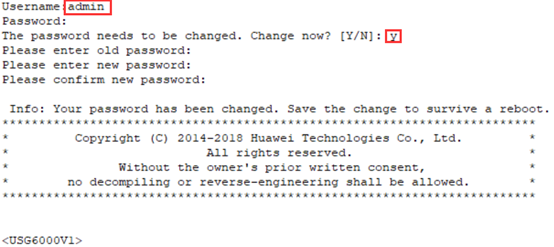
用户名是admin,密码是Admin@123
1.Telnet管理
<FW1>sys 进入系统视图
[FW1]int g1/0/0 进入该接口
[FW1-GigabitEthernet1/0/0]ip add 192.168.10.254 24 给接口配置IP地址
[FW1-GigabitEthernet1/0/0]quit
[FW1]telnet server enable 打开防火墙的Telnet功能
[FW1]int g1/0/0 进入该接口
[FW1-GigabitEthernet1/0/0]service-manage enable 配置接口管理模式
[FW1-GigabitEthernet1/0/0]service-manage telnet permit 允许Telnet
[FW1-GigabitEthernet1/0/0]quit
[FW1]firewall zone trust 进入trust区域
[FW1-zone-trust]add int g1/0/0 将g1/0/0加入该区域
[FW1-GigabitEthernet1/0/0]quit
[FW1]security-policy 设置安全策略
[FW1-policy-security]rule name allow_telnet 配置规则,allow_telnet是定义的规则名
[FW1-policy-security-rule-allow_telnet]source-zone trust 指定源区域为trust
[FW1-policy-security-rule-allow_telnet]destination-zone local 指定目标区域为local
[FW1-policy-security-rule-allow_telnet]action permit 动作是允许
[FW1]user-interface vty 0 4 进入vty接口
[FW1-ui-vty0-4]authentication-mode aaa 指定验证方式为AAA
[FW1-ui-vty0-4]protocol inbound telnet 允许Telnet连接虚拟终端
[FW1-ui-vty0-4]quit
[FW1]aaa 进入AAA配置
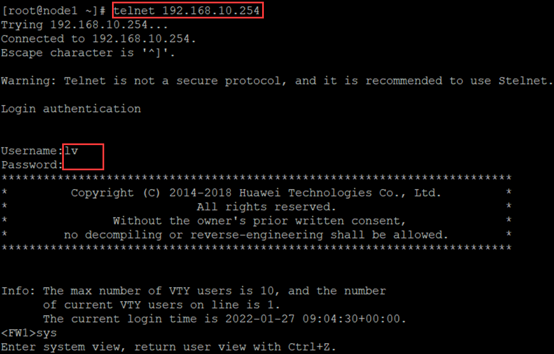
[FW1-aaa]manager-user lv 配置本地用户"lv"
[FW1-aaa-manager-user-lv]password 设置密码
Enter Password: 输入密码
Confirm Password: 确认密码
[FW1-aaa-manager-user-lv]service-type telnet 配置服务类型为Telnet
[FW1-aaa-manager-user-lv]level 3 设置管理级别为3
[FW1-aaa-manager-user-lv]quit
[FW1-aaa]quit
yum -y install telnet
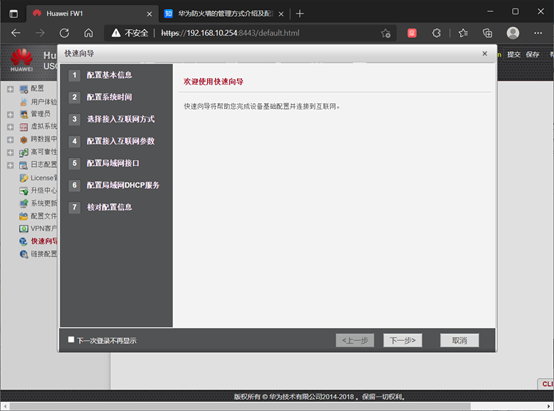
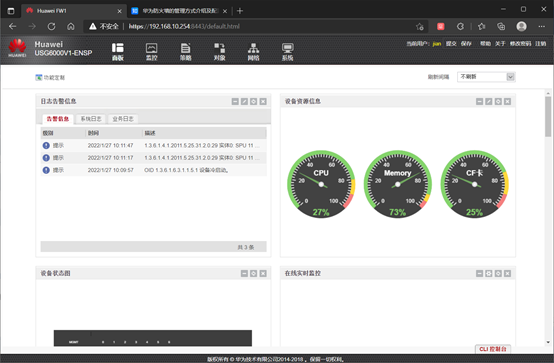
2.web管理
<FW1>sys 进入系统视图
[FW1]int g1/0/0 进入该接口
[FW1-GigabitEthernet1/0/0]ip add 192.168.10.254 24 给接口配置IP地址
[FW1-GigabitEthernet1/0/0]service-manage enable 配置接口管理模式
[FW1-GigabitEthernet1/0/0]service-manage https permit 允许https管理
[FW1-GigabitEthernet1/0/0]service-manage http permit 允许http管理
[FW1-GigabitEthernet1/0/0]quit
[FW1]firewall zone trust 进入trust区域
[FW1-zone-trust]add int g1/0/0 将g1/0/0加入该区域
[FW1-GigabitEthernet1/0/0]quit
[FW1]security-policy 设置安全策略
[FW1-policy-security]rule name allow_web 配置规则,allow_web是定义的规则名
[FW1-policy-security-rule-allow_web]source-zone trust 指定源区域为trust
[FW1-policy-security-rule-allow_web]destination-zone local 指定目标区域为local
[FW1-policy-security-rule-allow_web]action permit 动作是允许
[FW1-policy-security-rule-allow_web]quit
[FW1]web-manager security enable
[FW1]aaa 进入AAA配置
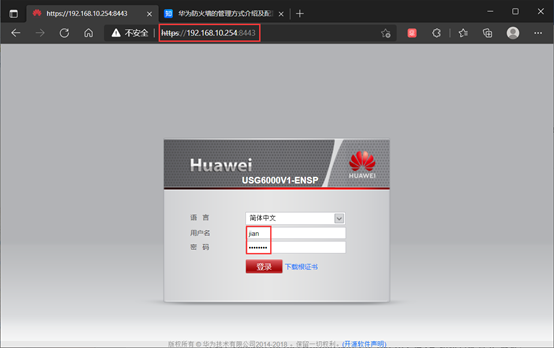
[FW1-aaa]manager-user jian 配置本地用户"jian"
[FW1-aaa-manager-user-jian]password 设置密码
Enter Password: 输入密码
Confirm Password: 确认密码
[FW1-aaa-manager-user-jian]service-type web 指定用户类型
[FW1-aaa-manager-user-jian]level 3 设置管理级别为3
[FW1-aaa-manager-user-jian]quit
[FW1-aaa]quit
3.ssh管理
<FW1>sys 进入系统视图
[FW1]int g1/0/0 进入该接口
[FW1-GigabitEthernet1/0/0]ip add 192.168.10.254 24 给接口配置IP地址
[FW1-GigabitEthernet1/0/0]quit
[FW1]stelnet server enable 打开防火墙的stelnet功能
[FW1]int g1/0/0 进入该接口
[FW1-GigabitEthernet1/0/0]service-manage enable 配置接口管理模式
[FW1-GigabitEthernet1/0/0]service-manage ssh permit 允许ssh
[FW1-GigabitEthernet1/0/0]quit
[FW1]firewall zone trust 进入trust区域
[FW1-zone-trust]add int g1/0/0 将g1/0/0加入该区域
[FW1-GigabitEthernet1/0/0]quit
[FW1]security-policy 设置安全策略
[FW1-policy-security]rule name allow_ssh 配置规则,allow_ssh是定义的规则名
[FW1-policy-security-rule-allow_ssh]source-zone trust 指定源区域为trust
[FW1-policy-security-rule-allow_ssh]destination-zone local 指定目标区域为local
[FW1-policy-security-rule-allow_ssh]action permit 动作是允许
[FW1-policy-security]quit
[FW1]rsa local-key-pair create 创建密钥
The key name will be: FW1_Host
The range of public key size is (512 ~ 2048).
NOTES: If the key modulus is greater than 512,
it will take a few minutes.
Input the bits in the modulus[default = 2048]: 设置密钥的长度,直接回车即可
Generating keys... ..+++++ ........................++ ....++++ ...........++
[FW1]user-interface vty 0 4 进入vty接口
[FW1-ui-vty0-4]authentication-mode aaa 指定验证方式为AAA
[FW1-ui-vty0-4]protocol inbound ssh 允许ssh连接虚拟终端
[FW1-ui-vty0-4]quit
[FW1]ssh user zhao <!--创建本地用户"zhao"
[FW1]ssh user zhao authentication-type password 认证方式是密码
[FW1]ssh user zhao service-type stelnet 配置服务类型为stelnet
[FW1]aaa 进入AAA配置
[FW1-aaa]manager-user zhao 配置本地用户"zhao"
[FW1-aaa-manager-user-zhao]password 设置密码
Enter Password: 输入密码
Confirm Password: 确认密码
[FW1-aaa-manager-user-zhao]service-type ssh 配置服务类型为Telnet
[FW1-aaa-manager-user-zhao]level 3 设置管理级别为3
[FW1-aaa-manager-user-zhao]quit
用户是设置的zhao,密码是a202009.


 浙公网安备 33010602011771号