Swagger
Swagger
介绍
一句话介绍,Swagger是一个接口文档生成工具,同时提供接口测试调用的辅助功能。
使用
-
导入依赖(使用的是swagger2++)
<!--swagger2 --> <dependency> <groupId>io.springfox</groupId> <artifactId>springfox-swagger2</artifactId> <version>2.9.2</version> </dependency> <!--swagger-ui--> <dependency> <groupId>io.springfox</groupId> <artifactId>springfox-swagger-ui</artifactId> <version>2.9.2</version> </dependency> -
要使用swagger需要自定义swagger配置类
package com.sheep.config; import org.springframework.context.annotation.Configuration; import springfox.documentation.swagger2.annotations.EnableSwagger2; /** * Swagger配置类 * 在Swagger2++中使用@EnableSwagger2注解 * 在Swagger3中改为@EnableOpenApi * */ @Configuration @EnableSwagger2 public class SwaggerConfig { } -
测试访问http://localhost:8080/swagger-ui.html
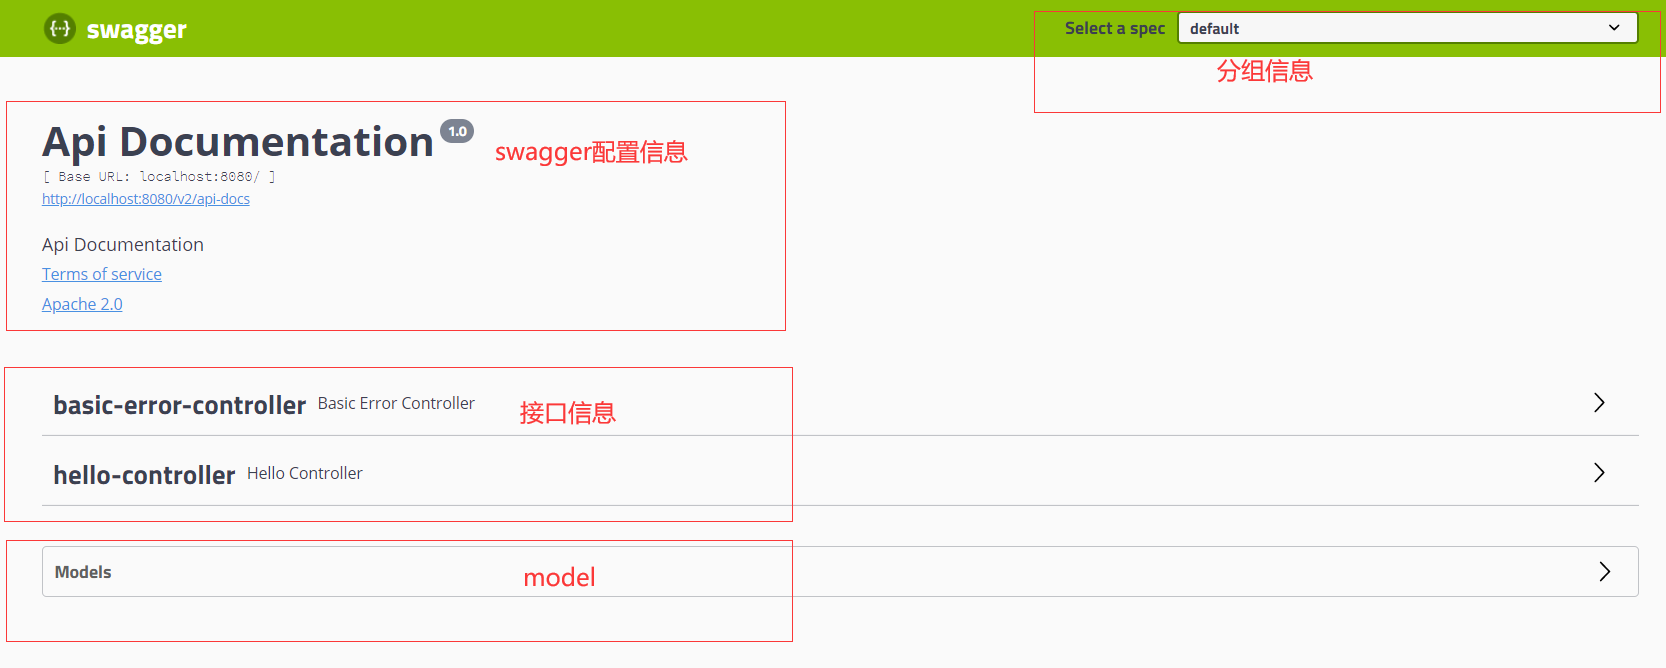
swagger可以分为四块:swagger配置信息、分组信息、model、接口;
可以对swagger的四块进行更改,下面是对swagger的四块的一些配置
自定义Swagger配置信息
package com.sheep.config;

import org.springframework.context.annotation.Configuration;
import springfox.documentation.swagger2.annotations.EnableSwagger2;

/**
 * Swagger配置类
 *      在Swagger2++中使用@EnableSwagger2注解
 *      在Swagger3中改为@EnableOpenApi
 * */
@Configuration
@EnableSwagger2
public class SwaggerConfig {
    @Bean
    public Docket docket2(){
        return new Docket(DocumentationType.SWAGGER_2).apiInfo(apiInfo());
    }

    /*配置Swagger信息=apiInfo*/
    private ApiInfo apiInfo(){
        Contact contact = new Contact("保持热爱,奔赴山海^_^", "https://www.cnblogs.com/w-eye", "sheep");
        return new ApiInfo(
                "保持热爱,奔赴山海^_^的SwaggerAPI文档",
                "即使再小的帆也能远航",
                "v2.0.0",
                "https://www.cnblogs.com/w-eye",
                contact,
                "Apache 2.0",
                "https://www.cnblogs.com/w-eye",
                new ArrayList()
        );
    }
}
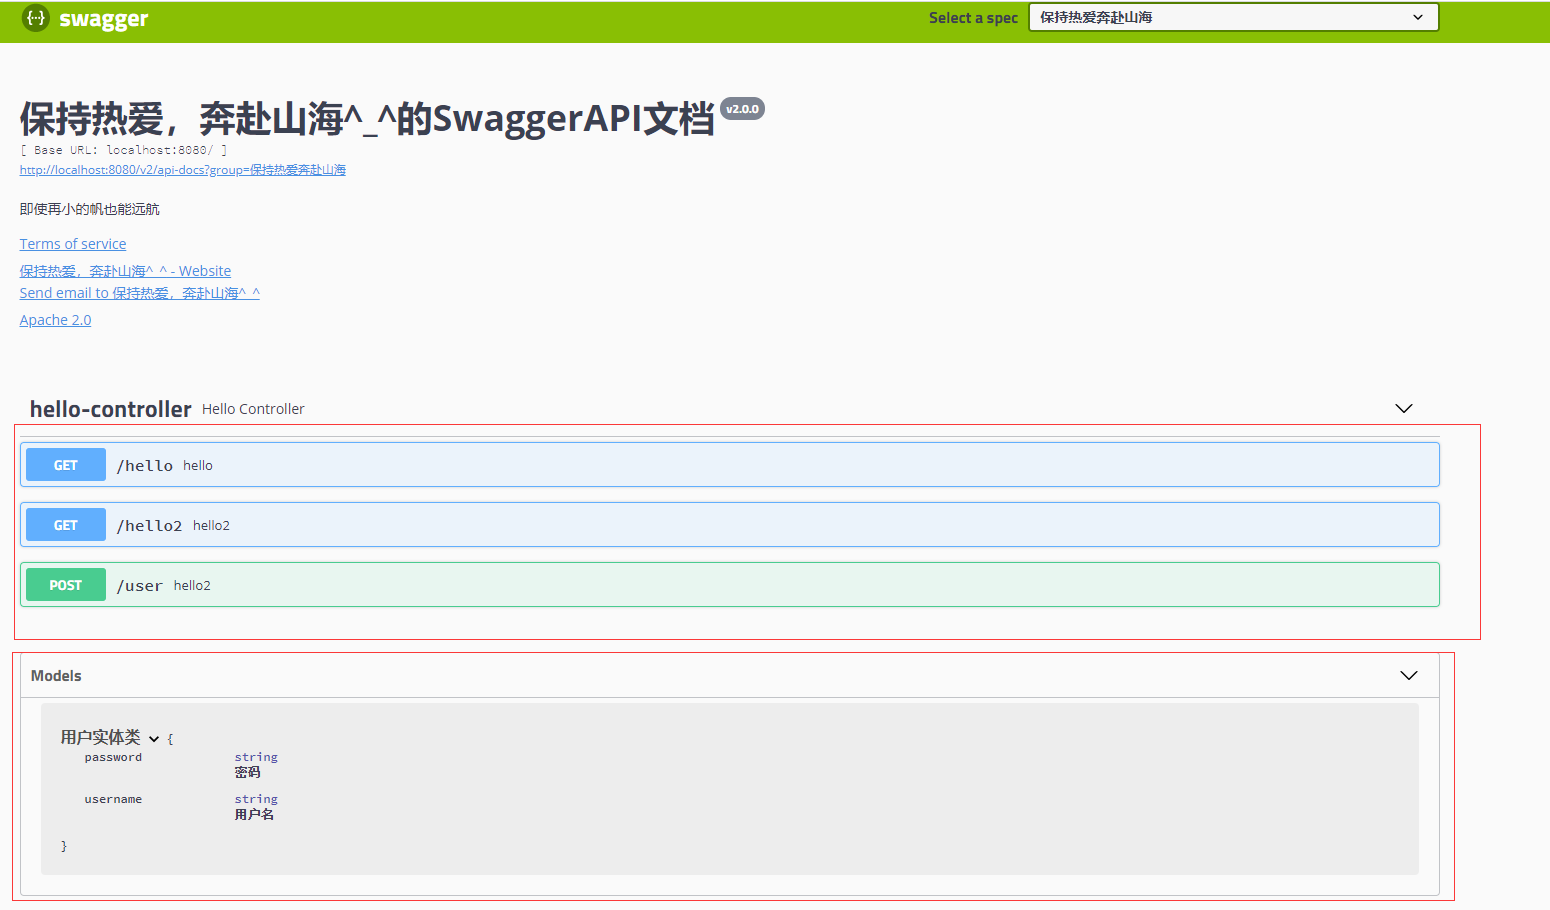
Swagger配置作者信息:
swagger的实例bean是Docket,所有通过配置Docket实例来配置Swagger,通过apiInfo()属性配置文档信息,再把apiInfo()与Docket实例关联new Docket(DocumentationType.SWAGGER_2).apiInfo(apiInfo());

接口扫描和Model注释
创建实体类(Model)
package com.sheep.pojo;

import io.swagger.annotations.ApiModel;
import io.swagger.annotations.ApiModelProperty;

/**
 * @ApiModel("用户实体类"):添加注释,在Swagger图形化界面中Model中会显示该实体类为"用户实体类"
 * @ApiModelProperty("密码"):与以上注解一样,注释功能
 * @Api("注释")
 * */
@ApiModel("用户实体类")
public class User {
    @ApiModelProperty("用户名")
    public String username;
    @ApiModelProperty("密码")
    public String password;
}
com.sheep.controller下创建接口
package com.sheep.controller;

import com.sheep.pojo.User;
import io.swagger.annotations.Api;
import io.swagger.annotations.ApiOperation;
import io.swagger.annotations.ApiParam;
import org.springframework.web.bind.annotation.GetMapping;
import org.springframework.web.bind.annotation.PostMapping;
import org.springframework.web.bind.annotation.RestController;

/**
 * @ApiOperation("hello2"):用在方法上
 * @ApiParam("用户名"):用在方法参数上
 * */
@RestController
public class HelloController {

    @GetMapping(value = "/hello")
    public String hello(){
        return "hello";
    }

    /*只要我们的接口中,返回值中存在实体类,他就会被扫描到Swagger中*/
    @PostMapping(value = "/user")
    public User hello2(){
        return new User();
    }

    @ApiOperation("hello2")
    @GetMapping("/hello2")
    public String hello(@ApiParam("用户名") String username){
        return "hello"+username;
    }
}
@ApiParam();@ApiOperation();一个用在方法上,一个用在方法参数上,使用后会在实时页面显示
SwaggerConfig中配置扫描接口
package com.sheep.config;

import org.springframework.context.annotation.Configuration;
import springfox.documentation.swagger2.annotations.EnableSwagger2;

/**
 * Swagger配置类
 *      在Swagger2++中使用@EnableSwagger2注解
 *      在Swagger3中改为@EnableOpenApi
 * */
@Configuration
@EnableSwagger2
public class SwaggerConfig {
    @Bean
    public Docket docket2(){
        return new Docket(DocumentationType.SWAGGER_2)
            .apiInfo(apiInfo())//文档配置信息
            .groupName("保持热爱奔赴山海")//自定义名称
            .select()//扫描接口RequestHandlerSelectors.basePackage("com.sheep.controller")下的包
            .apis(RequestHandlerSelectors.basePackage("com.sheep.controller"))
            .build();
    }

    /*配置Swagger信息=apiInfo*/
    private ApiInfo apiInfo(){
        Contact contact = new Contact("保持热爱,奔赴山海^_^", "https://www.cnblogs.com/w-eye", "sheep");
        return new ApiInfo(
                "保持热爱,奔赴山海^_^的SwaggerAPI文档",
                "即使再小的帆也能远航",
                "v2.0.0",
                "https://www.cnblogs.com/w-eye",
                contact,
                "Apache 2.0",
                "https://www.cnblogs.com/w-eye",
                new ArrayList()
        );
    }
}
除了.apis()外还可以设置:
//apis:指定要扫描的包
    //RequestHandlerSelectors,配置要扫描的包
        //.basePackage("com.sheep.controller"):指定要扫描的包
        //.apis(RequestHandlerSelectors.any()):扫描全部
        //.apis(RequestHandlerSelectors.none()):不扫描
        //RequestHandlerSelectors.withClassAnnotation():扫描类上的注解
        //.apis(RequestHandlerSelectors.withMethodAnnotation():扫描方法上的注解
//paths():过滤
    //PathSelectors
        //.paths(PathSelectors.any())
        //.paths(PathSelectors.none())
        //.paths(PathSelectors.ant("/sheep/**"))
        //.paths(PathSelectors.regex("正则"))
自定义Swagger开启关闭
package com.sheep.config;

import org.springframework.context.annotation.Configuration;
import springfox.documentation.swagger2.annotations.EnableSwagger2;

/**
 * Swagger配置类
 *      在Swagger2++中使用@EnableSwagger2注解
 *      在Swagger3中改为@EnableOpenApi
 * */
@Configuration
@EnableSwagger2
public class SwaggerConfig {
    @Bean
    public Docket docket2(){
        return new Docket(DocumentationType.SWAGGER_2)
            .apiInfo(apiInfo())//文档配置信息
            .groupName("保持热爱奔赴山海")//自定义名称
            .enable(false)//配置是否启动Swagger,如果为false,浏览器将无法访问
            .select()//扫描接口RequestHandlerSelectors.basePackage("com.sheep.controller")下的包
            .apis(RequestHandlerSelectors.basePackage("com.sheep.controller"))
            .build();
    }

    /*配置Swagger信息=apiInfo*/
    private ApiInfo apiInfo(){
        Contact contact = new Contact("保持热爱,奔赴山海^_^", "https://www.cnblogs.com/w-eye", "sheep");
        return new ApiInfo(
                "保持热爱,奔赴山海^_^的SwaggerAPI文档",
                "即使再小的帆也能远航",
                "v2.0.0",
                "https://www.cnblogs.com/w-eye",
                contact,
                "Apache 2.0",
                "https://www.cnblogs.com/w-eye",
                new ArrayList()
        );
    }
}
多环境开启关闭浏览器:
1、application.yaml中配置多个环境
2、SwaggerConfig配置实现多环境配置
思路:判断当前环境——如果是开发或者测试环境则为true,否则为false ——再将true(false)作为参数.enable()
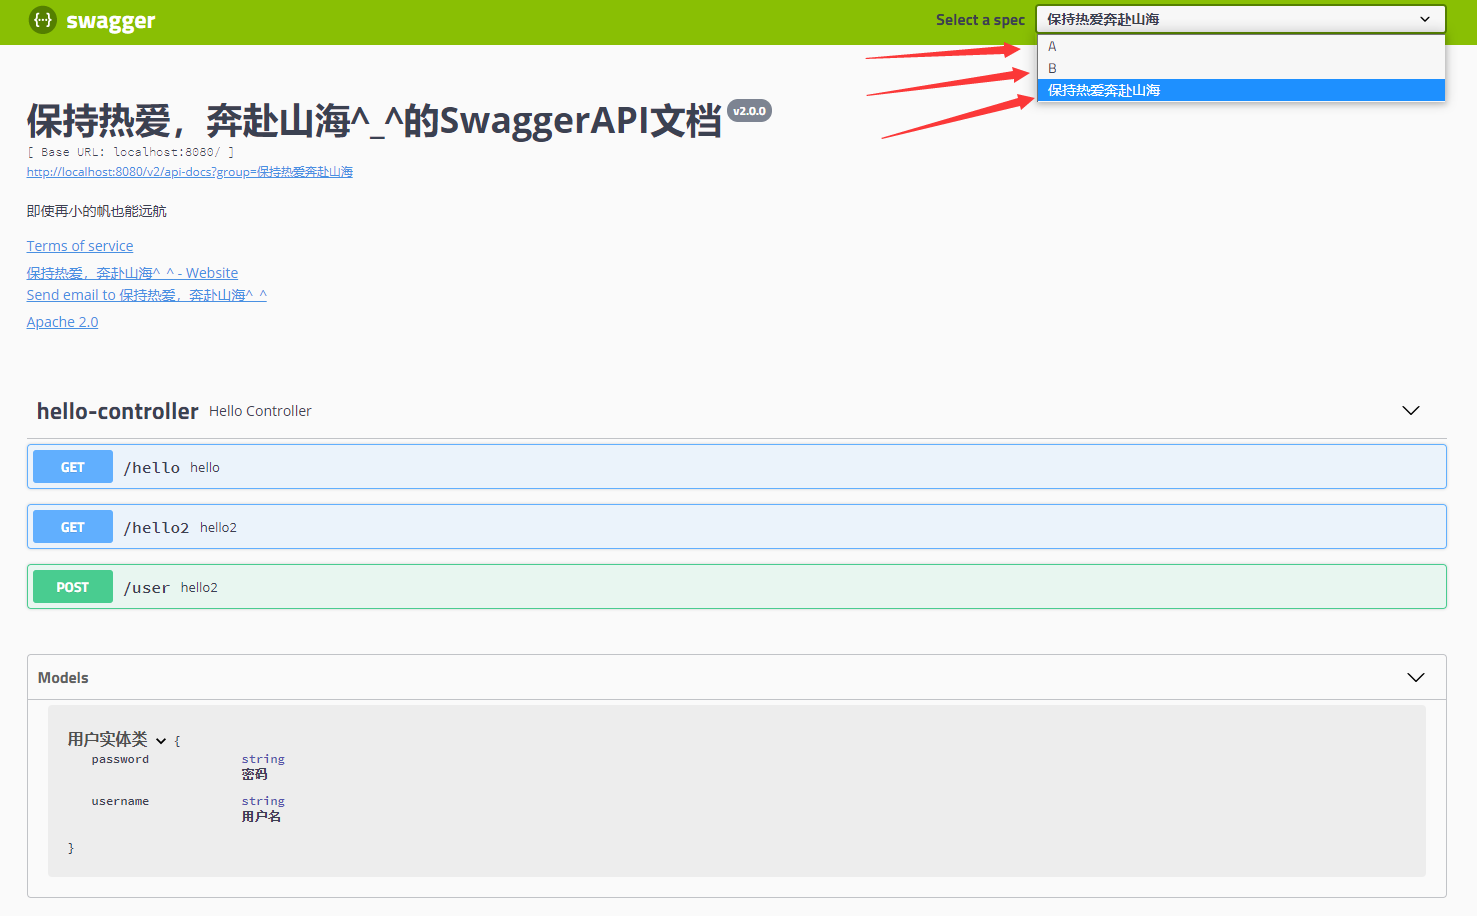
分组
再Swagger实例beanDocket中可以分组,默认为default。可通过groupName()方法配置分组
/*配置多个分组1*/
@Bean
public Docket docket1(){
    return new Docket(DocumentationType.SWAGGER_2).apiInfo(apiInfo()).groupName("A");
}
/*多个分组2*/
@Bean
public Docket docket2(){
    return new Docket(DocumentationType.SWAGGER_2).apiInfo(apiInfo()).groupName("B");
}
/*配置Swagger信息=apiInfo*/
private ApiInfo apiInfo(){
    Contact contact = new Contact("保持热爱,奔赴山海^_^", "https://www.cnblogs.com/w-eye", "sheep");
    return new ApiInfo(
            "保持热爱,奔赴山海^_^的SwaggerAPI文档",
            "即使再小的帆也能远航",
            "v2.0.0",
            "https://www.cnblogs.com/w-eye",
            contact,
            "Apache 2.0",
            "https://www.cnblogs.com/w-eye",
            new ArrayList()
    );
}
还历史以真诚,还生命以过程。 ——余秋雨

 浙公网安备 33010602011771号