pytest3
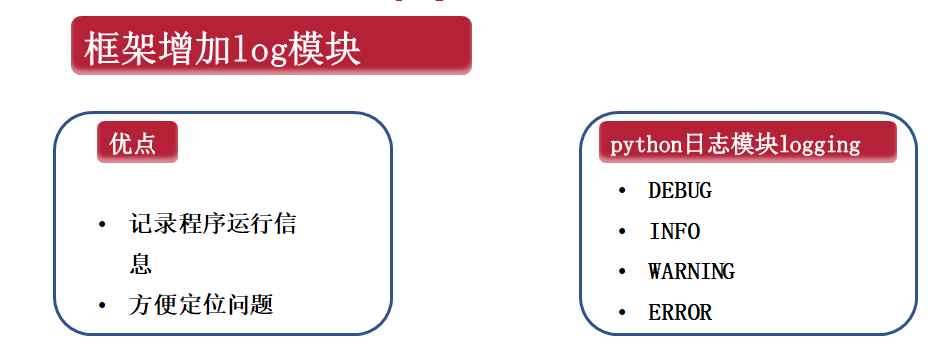
log模块,即加个log.py文件

import  logging

logging.debug('调试日志')
logging.info('消息日志')
logging.warning('警告日志')
logging.error('错误日志')
logging.critical('严重错误日志')
# 从上到下等级越来越高,debug等级最低,critical等级最高,默认warning、error、critical才会打印,debug和info不会打印
#utils/log_utils
import logging
import os
import time

root_path = os.path.dirname(os.path.dirname(os.path.realpath(__file__)))
print(root_path)
log_path = os.path.join(root_path, 'log')
print(log_path)


class Logger:
    def __init__(self):
        # 定义日志位置和文件名
        self.logname = os.path.join(log_path, "{}.log".format(time.strftime("%Y-%m-%d")))
        # 定义一个日志容器
        self.logger = logging.getLogger("log")
        # 设置日志打印的级别
        self.logger.setLevel(logging.DEBUG)
        # 创建日志输入的格式
        self.formater = logging.Formatter('[%(asctime)s][%(filename)s %(lineno)d][%(levelname)s]: %(message)s')
        # 创建日志处理器,用来存放日志文件
        self.filelogger = logging.FileHandler(self.logname, mode='a', encoding="UTF-8")
        # 创建日志处理器,在控制台打印
        self.console = logging.StreamHandler()
        # 设置控制台打印日志级别
        self.console.setLevel(logging.DEBUG)
        # 文件存放日志级别
        self.filelogger.setLevel(logging.DEBUG)
        # 文件存放日志格式
        self.filelogger.setFormatter(self.formater)
        # 控制台打印日志格式
        self.console.setFormatter(self.formater)
        # 将日志输出渠道添加到日志收集器中
        self.logger.addHandler(self.filelogger)
        self.logger.addHandler(self.console)

logger = Logger().logger

if __name__ == '__main__':
    logger.debug('调试日志')
    logger.info('消息日志')
    logger.warning('警告日志')
    logger.error('错误日志')
    logger.critical('严重错误日志')
    logger.info("---测试开始---")
    logger.debug("---测试结束---")
抄上面这个Logger即可,需要按照需求调整里面的路径path
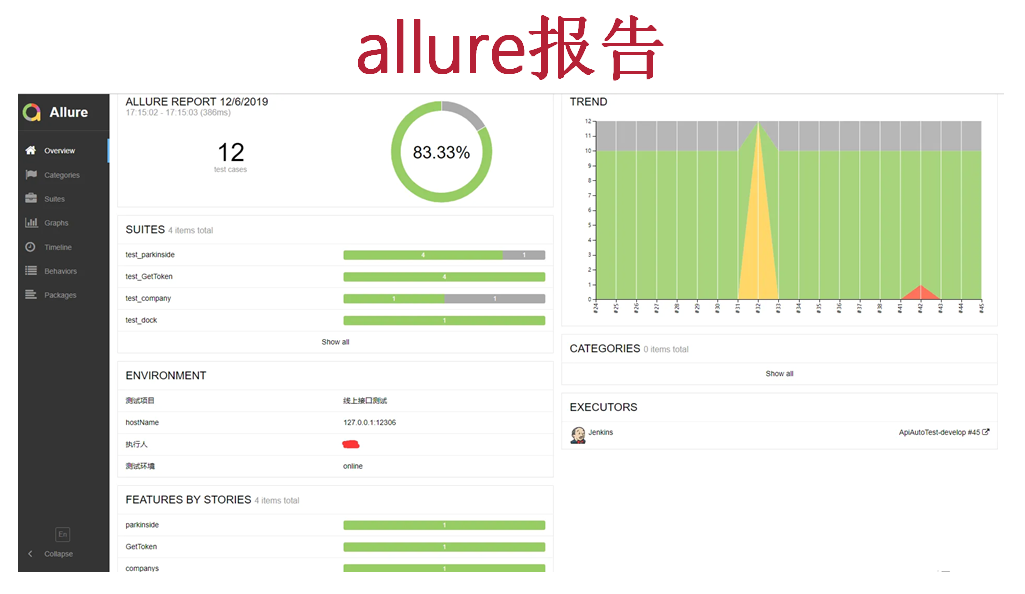
allure报告


1、安装allure-pytest
pip install -i https://pypi.tuna.tsinghua.edu.cn/simple allure-pytest

装java,配置java的环境变量,cmd运行java,cmd运行javac都行的话说明弄好了
2、下载allure命令行工具,添加到环境变量的path中
allure是一个命令行工具,需要去github上下载最新版https://github.com/allure-framework/allure2/releases
下载安装包并解压到自己电脑某个文件夹,然后再复制allure的bin路径,添加到环境变量的path中,cmd运行allure --version能行就弄好了
3、配置pytest.ini
addopts =
    -vs
    --alluredir ./report
#设置执行pytest运行测试用例时默认的参数,-q简略
#--alluredir ./report 在此文件的上一级下生成report文件夹存放allure生成的的json和text文件,直接在测试用例那点三角运行会以测试用例文件找上一级,用Terminal命令行则以本ini文件找上一级,所以用命令行运行测试文件
不然就得运行完用例后,在终端运行如下命令

5、在Terminal用命令行运行测试用例,生成report文件夹存放allure生成的的json和text文件
pytest testcases/test_case_optimize/case_optimize.py
6、两个方式打开报告
在Terminal/cmd运行allure的serve命令
allure serve ./report #./report指想要打开报告的那个文件夹目录,cmd写绝对路径,terminal写绝对路径/根据pytest.ini文件内配置好的testpaths写相对路径
在Terminal运行allure的generate命令
allure generate report
#1、生成报告,默认生成的文件夹名叫allure-report,想换个名字的话就allure generate report -o new

allure open allure-report
#2、打开生成报告的文件夹
allure具体用法

#testcases/test_case_optimize/case_optimize_class.py
import allure
import requests
import pytest

from api.api import mobile_query
from utils.read import base_data

url = base_data.read_ini()['host']['api_sit_url']
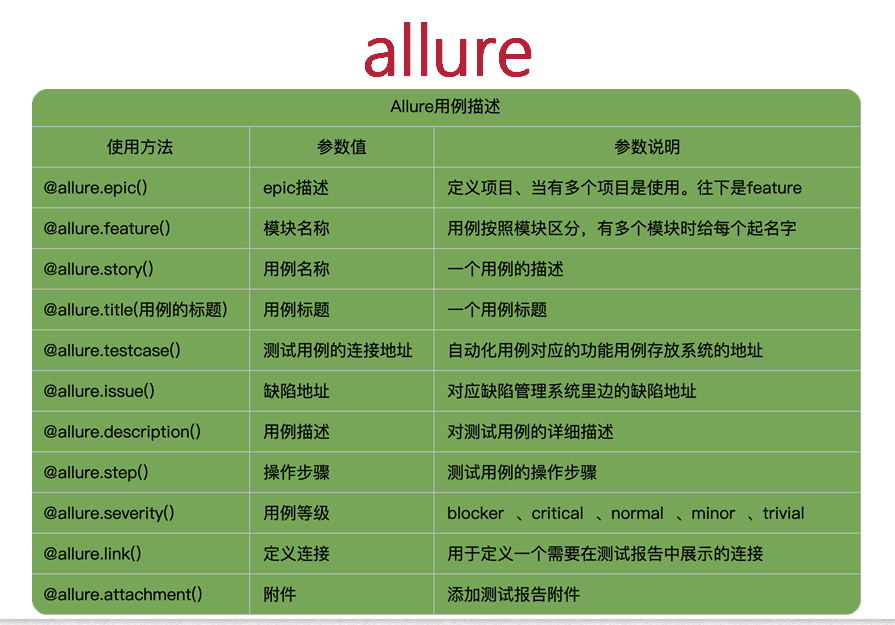
@allure.epic("数据进制项目epic")#这条和下面那条都只能写在测试类外,其他写在测试类里
@allure.feature("手机号模块feature")
class TestMobile:
    @allure.story("杭州的手机号story")
    @allure.title("测试手机号归属地title")
    @allure.testcase("http://www.baidu.com",name="接口地址testcase")
    @allure.issue("http://www.baidu.com",name="缺陷地址issue")
    @allure.link("http://www.baidu.com", name="链接地址link")
    @allure.description("当前手机号是13456755448,归属地是杭州的description")
    @allure.step("先进行归属地的操作step")
    @allure.severity("critical")
    def test_mobile(self):
        param = base_data.read_data()["mobile_belong"]
        result = mobile_query(param)
        assert result.success is True
        assert result.body['status'] == 0
        assert result.body['msg'] == "ok"
        assert result.body['result']["shouji"] == "13456755448"
        assert result.body['result']["province"] == "浙江"
        assert result.body['result']["city"] == "杭州"
        assert result.body['result']["company"] == "中国移动"
        assert result.body['result']["cardtype"] is None
        assert result.body['result']["areacode"] == "0571"

        @allure.story("杭州的手机号story")
        @allure.title("测试手机号归属地title")
        @allure.testcase("http://www.baidu.com", name="接口地址testcase")
        @allure.issue("http://www.baidu.com", name="缺陷地址issue")
        @allure.link("http://www.baidu.com", name="链接地址link")
        @allure.description("当前手机号是13456755448,归属地是杭州的description")
        @allure.step("先进行归属地的操作step")
        @allure.severity("critical")
        def test_mobile_dynamic(self):
            param = base_data.read_data()["mobile_belong_dynamic"]["params"]
            title = base_data.read_data()["mobile_belong_dynamic"]["title"]
            story = base_data.read_data()["mobile_belong_dynamic"]["story"]
            allure.dynamic.story(story)#@的()只能写字符串且写在函数外,直接allure.dynamic的里面可以写变量且写在函数内,两者功能一样
            allure.dynamic.title(title)
            result = mobile_query(param)
            assert result.body['status'] == 0
            assert result.body['msg'] == "ok"
            assert result.body['result']["shouji"] == "13456755448"
            assert result.body['result']["province"] == "浙江"
            assert result.body['result']["city"] == "杭州"
            assert result.body['result']["company"] == "中国移动"
            assert result.body['result']["cardtype"] is None
            assert result.body['result']["areacode"] == "0571"

if __name__ == '__main__':
    pytest.main()
写好代码后,再进行第五步运行测试用例和第六步打开报告即可在allure网页上看到变动
allure添加环境信息
1、通过第五步,以命令行运行测试用例生成的report文件夹内,新建一个文件:environment.properties,此文件名是固定的
2、按照自己想法想写什么写什么,想写多少写多少,格式如下,但内容不局限,注意等号前后不能有空格,不能是中文
author=yun
version=5.0
yuming=http://www.baidu.com
environment=pro
3、再进行第六步打开报告即可
allure功能展示测试用例的参数展示删除
一开始的参数展示如下:

删除参数展示的步骤:
在项目文件中找到External Libraries/<Python 3.8 (项目名)>/site-packages/allure_pytest/listener.py
在 def pytest_runtest_setup(self, item)里的最后找到test_result.parameters.extend,即如下的灰色部分,注释掉

再运行测试用例生成报告,启动报告即可。
但对于我的allure来说,删除参数是成功了,但现实测试条数也跟着少了_(:з」∠)_可是版本也不高啊,所以我还是别删了。_(:з」∠)_


