PyTorch
1.Torch.nn
class torch.nn.Conv2d(in_channels, out_channels, kernel_size, stride=1, padding=0, dilation=1, groups=1, bias=True)
卷积
//1是输入图像的channel
//6是输出图像的channel
//5是卷积核大小
nn.Conv2d(1, 6, 5)
class torch.nn.Linear(in_features, out_features, bias=True)
对输入数据做线性变换:y=Ax+b,全连接
2.torch.nn.functional
torch.nn.functional.max_pool2d(input, kernel_size, stride=None, padding=0, dilation=1, ceil_mode=False, return_indices=False)
import torch.nn.functional as F
//使用2*2的核进行maxpooling
x = F.max_pool2d(F.relu(self.conv1(x)), (2, 2))
3.torch.optim
import torch.optim as optim
# create your optimizer
optimizer = optim.SGD(net.parameters(), lr = 0.01)

# in your training loop:
optimizer.zero_grad() # zero the gradient buffers
output = net(input)
loss = criterion(output, target)
loss.backward()
optimizer.step() # Does the update
4.torch.cat(inputs, dimension=0) → Tensor
torch.cat(inputs, dimension=0) → Tensor通道合并
x = torch.randn(2, 3)

0.5983 -0.0341 2.4918

1.5981 -0.5265 -0.8735

torch.cat((x, x,), 0)
0.5983 -0.0341 2.4918

1.5981 -0.5265 -0.8735
0.5983 -0.0341 2.4918

1.5981 -0.5265 -0.8735
将多维展开到1维
x = x.view(x.size(0),-1)
5.torch.autograd
class torch.autograd.Variable
2个重要变量
-
data – 包含的
Tensor -
grad – 保存着
Variable的梯度。
6.torch.nn.Conv2d
class torch.nn.Conv2d(in_channels, out_channels, kernel_size, stride=1, padding=0, dilation=1, groups=1, bias=True)
7.torch.nn.BatchNorm2d
class torch.nn.BatchNorm2d(num_features, eps=1e-05, momentum=0.1, affine=True)
8.torch.nn.MaxPool2d
class torch.nn.MaxPool2d(kernel_size, stride=None, padding=0, dilation=1, return_indices=False, ceil_mode=False)
PyTorch数据增强方法
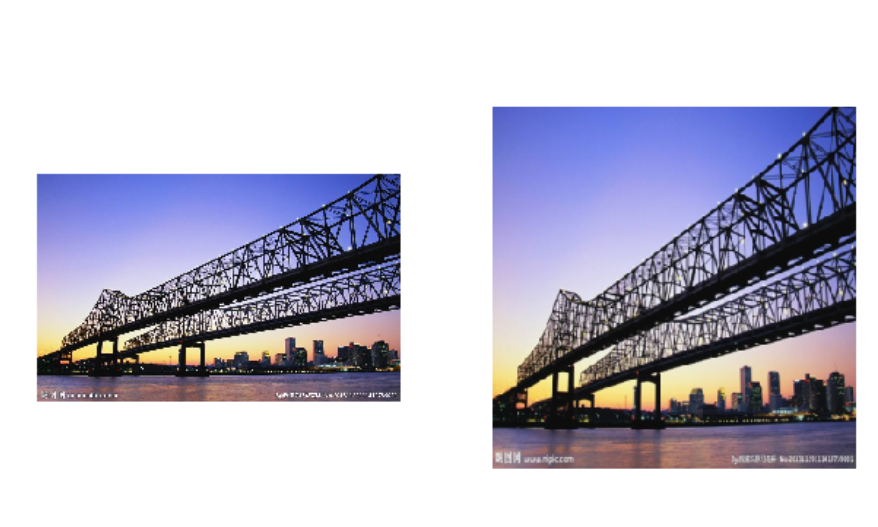
1.对图片进行一定比例缩放
torchvision.transforms.Resize()
第一个参数是一个 tuple,图片会直接把宽和高缩放到这个大小;第二个参数表示放缩图片使用的方法,比如最邻近法,或者双线性差值等,一般双线性差值能够保留图片更多的信息,所以 pytorch 默认使用的是双线性差值
import matplotlib.pyplot as plt
from torchvision import transforms as tfs
from PIL import Image
#pic.shape(640, 1024, 3)
pic = Image.open('bridge.jpg')
resize = tfs.Resize((300,300))
pic1 = resize(pic)

plt.subplot(1,2,1)
plt.imshow(pic)
plt.axis('off') # 不显示坐标轴

plt.subplot(1,2,2)
plt.imshow(pic1)
plt.axis('off') # 不显示坐标轴

plt.show()
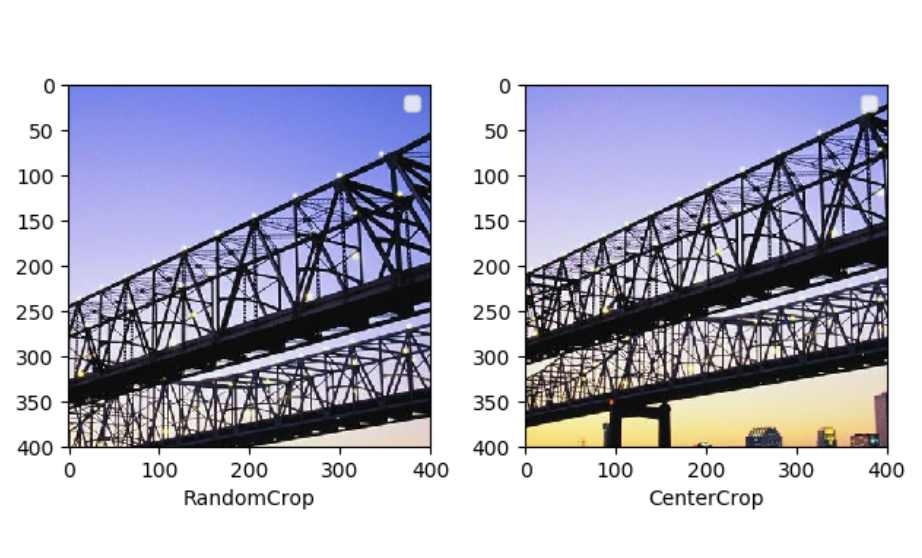
2.对图片进行随机位置的截取
随机位置截取能够提取出图片中局部的信息,使得网络接受的输入具有多尺度的特征,所以能够有较好的效果。在 torchvision 中主要有下面两种方式,一个是 torchvision.transforms.RandomCrop(),传入的参数就是截取出的图片的长和宽,对图片在随机位置进行截取;第二个是 torchvision.transforms.CenterCrop()
传入的参数就是截取出的图片的长和宽,会在图片的中心进行截取
import matplotlib.pyplot as plt
from torchvision import transforms as tfs
from PIL import Image
#pic.shape(640, 1024, 3)
pic = Image.open('bridge.jpg')
#随机位置截取,多截几次结果不一样
random_crop = tfs.RandomCrop((400,400))
pic1 = random_crop(pic)

#中心位置截取,多截几次结果一样
center_crop = tfs.CenterCrop((400,400))
pic2 = center_crop(pic)
plt.subplot(1,2,1)
plt.imshow(pic1)
plt.xlabel('RandomCrop')
plt.legend()

plt.subplot(1,2,2)
plt.imshow(pic2)
plt.xlabel('CenterCrop')
plt.legend()

plt.show()
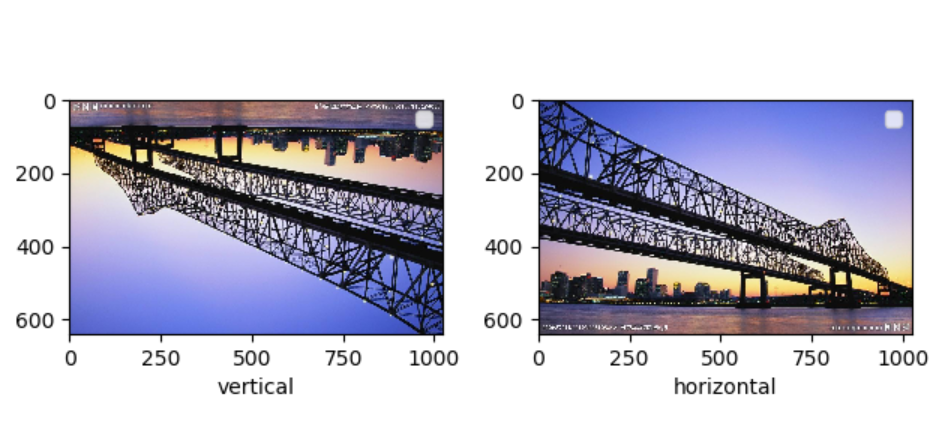
3.对图片进行随机的水平和竖直翻转
随机翻转使用的是 torchvision.transforms.RandomHorizontalFlip() 和 torchvision.transforms.RandomVerticalFlip(),翻转概率是0.5,有可能不翻转
import matplotlib.pyplot as plt
from torchvision import transforms as tfs
from PIL import Image
#pic.shape(640, 1024, 3)
pic = Image.open('bridge.jpg')
#随机垂直翻转
random_vertical_flip = tfs.RandomVerticalFlip()
pic1 = random_vertical_flip(pic)

#随机水平翻转
random_horizontal_flip = tfs.RandomHorizontalFlip()
pic2 = random_horizontal_flip(pic)
plt.subplot(1,2,1)
plt.imshow(pic1)
plt.xlabel('vertical')
plt.legend()

plt.subplot(1,2,2)
plt.imshow(pic2)
plt.xlabel('horizontal')
plt.legend()

plt.show()
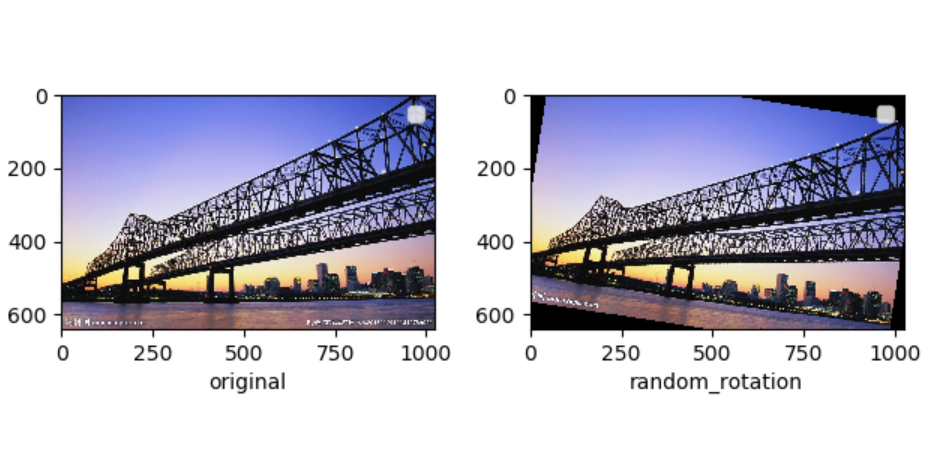
4.对图片进行随机角度的旋转
在 torchvision 中,使用 torchvision.transforms.RandomRotation() 来实现,其中第一个参数就是随机旋转的角度,比如填入 10,那么每次图片就会在 -10 ~ 10 度之间随机旋转
import matplotlib.pyplot as plt
from torchvision import transforms as tfs
from PIL import Image
#pic.shape(640, 1024, 3)
pic = Image.open('bridge.jpg')
#随机旋转10度
random_rotation = tfs.RandomRotation(10)
pic1 = random_rotation(pic)

plt.subplot(1,2,1)
plt.imshow(pic)
plt.xlabel('original')
plt.legend()

plt.subplot(1,2,2)
plt.imshow(pic1)
plt.xlabel('random_rotation')
plt.legend()

plt.show()
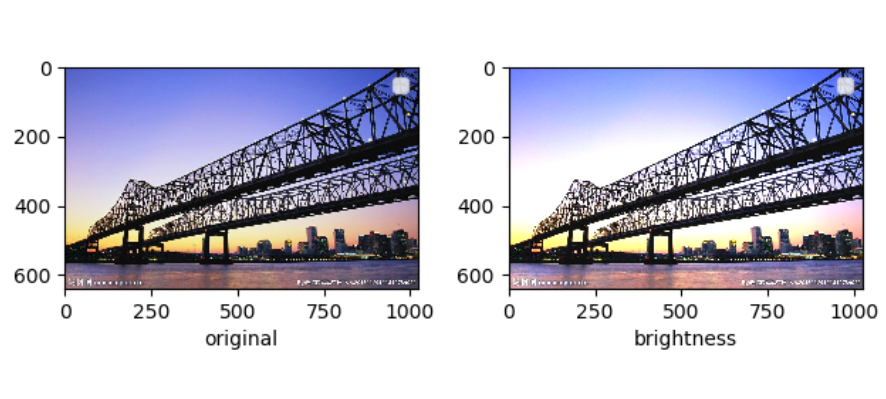
5.对图片进行亮度、对比度和颜色的随机变化
在 torchvision 中主要使用 torchvision.transforms.ColorJitter() 来实现的,第一个参数就是亮度的比例,第二个是对比度,第三个是饱和度,第四个是颜色
参数:
brightness(亮度,float类型)——调整亮度的程度,从 [max(0,1-brightness), 1+brightness] 中均匀选取。
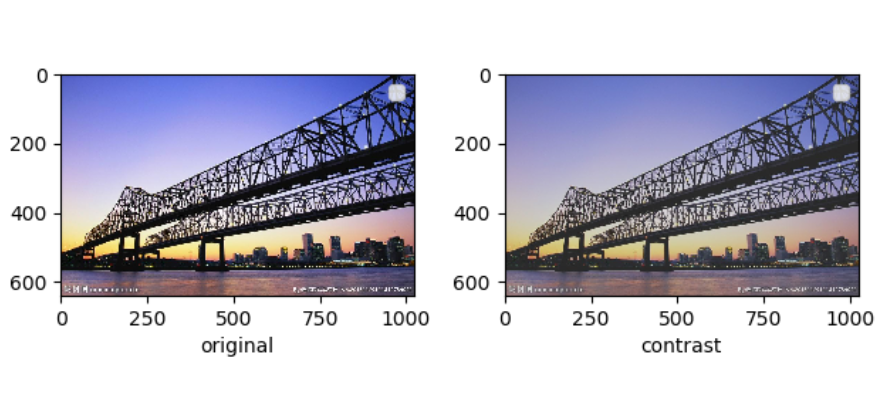
contrast(对比度,float类型)——调整对比度的程度,从 [max(0,1-contrast),1+contrast] 中均匀选取。
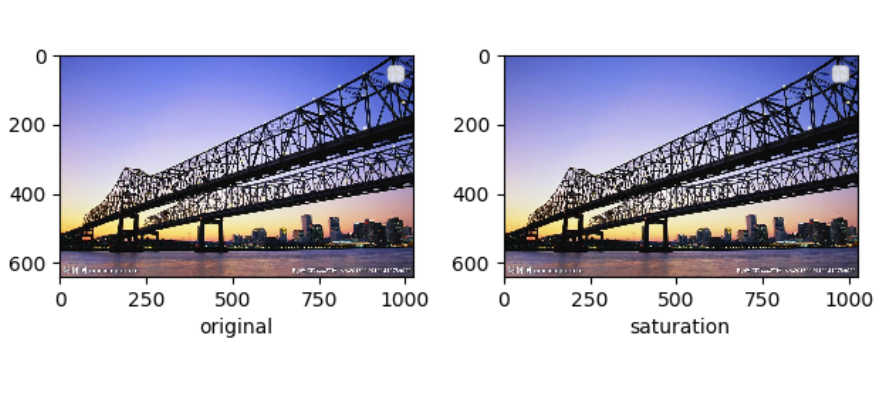
saturation(饱和度,float类型)——调整饱和度的程度, [max(0,1-saturation),1+saturation] 中均匀选取。
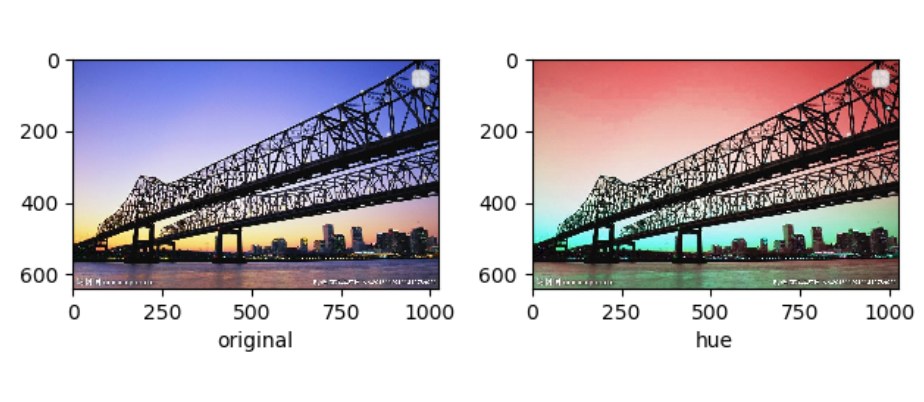
hue(色相,float类型) —— 调整色相的程度,从 [-hue,hue] 等均匀选择, 其中hue的大小为 [0, 0.5]。
pic = Image.open('bridge.jpg')
#亮度
brightness = tfs.ColorJitter(brightness=0.5)
pic1 = brightness(pic)
#对比度
contrast = tfs.ColorJitter(contrast=0.4)
pic2 = contrast(pic)
#饱和度
saturation = tfs.ColorJitter(saturation=0.3)
pic3 = saturation(pic)
#饱和度
hue = tfs.ColorJitter(hue=0.4)
pic4 = hue(pic)
亮度
对比度
饱和度
色相
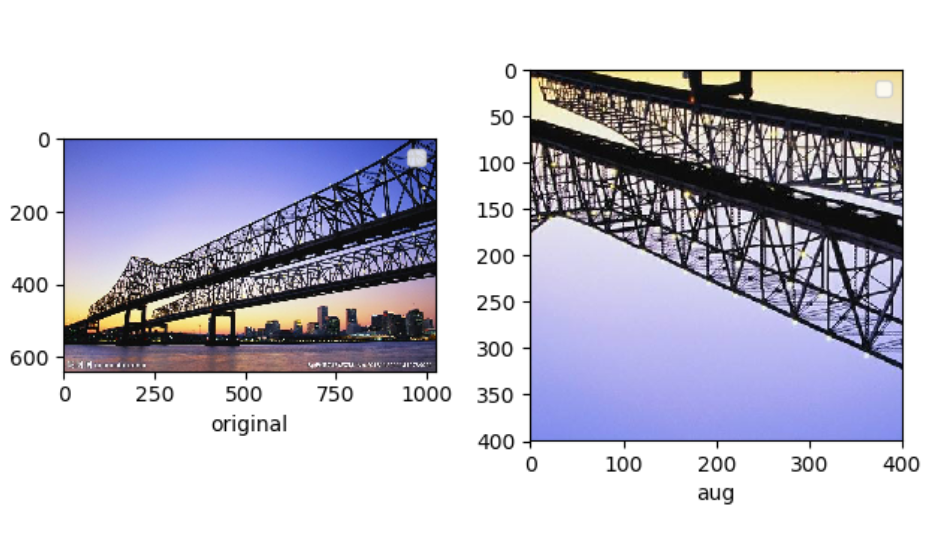
多个数据增强方法组合使用
import matplotlib.pyplot as plt
from torchvision import transforms as tfs
from PIL import Image
#pic.shape(640, 1024, 3)
pic = Image.open('bridge.jpg')

aug = tfs.Compose([
    #旋转5度
    tfs.RandomRotation(5),
    #垂直翻转
    tfs.RandomVerticalFlip(),
    #随机裁剪到400,,400
    tfs.RandomCrop((400,400))
])

pic1 = aug(pic)
plt.subplot(1,2,1)
plt.imshow(pic)
plt.xlabel('original')
plt.legend()

plt.subplot(1,2,2)
plt.imshow(pic1)
plt.xlabel('aug')
plt.legend()

plt.show()
将增强后的PIL.Image转换为PyTorch的Tensor供神经网络处理,使用 torchvision.transforms.ToTensor(),使用MNIST数据集并对数据集增强
#数据增强
def data_augmentation(x):
    transform = torchvision.transforms.Compose([
        torchvision.transforms.Resize(40),
        torchvision.transforms.RandomHorizontalFlip(),
        torchvision.transforms.RandomHorizontalFlip(),
        torchvision.transforms.RandomCrop(28),
        torchvision.transforms.ColorJitter(brightness=0.5, contrast=0.5, hue=0.5),
        torchvision.transforms.ToTensor()
    ])
    x = transform(x)
    return x

train_data = torchvision.datasets.MNIST(
    './mnist', train=True, transform=data_augmentation, download=True
)
torchvision.transforms.Normalize
class torchvision.transforms.Normalize(mean, std),这个数据增强方法会把数据的通道数变为3,在MNIST上本来单通道的结果变成3通道了

 浙公网安备 33010602011771号