Terraform 入门教程之快速编排OpenStack-002
Terraform架构

OpenStack环境准备
部署一个单节点的OpenStack环境,参考这篇文档
https://docs.openstack.org/devstack/latest/guides/single-machine.html
- Add your user
We need to add a user to install DevStack. (if you created a user during install you can skip this step and just give the user sudo privileges below)
$ sudo useradd -s /bin/bash -d /opt/stack -m stack
Since this user will be making many changes to your system, it will need to have sudo privileges:
$ apt-get install sudo -y || yum install -y sudo
$ echo "stack ALL=(ALL) NOPASSWD: ALL" >> /etc/sudoers
On some systems you may need to use sudo visudo.
From here on you should use the user you created. Logout and login as that user:
$ sudo su stack && cd ~
- Download DevStack
We’ll grab the latest version of DevStack via https:
$ sudo apt-get install git -y || sudo yum install -y git
$ git clone https://opendev.org/openstack/devstack
$ cd devstack
- Run DevStack
Now to configure stack.sh. DevStack includes a sample in devstack/samples/local.conf. Create local.conf as shown below to do the following:
Set FLOATING_RANGE to a range not used on the local network, i.e. 192.168.1.224/27. This configures IP addresses ending in 225-254 to be used as floating IPs.
Set FIXED_RANGE to configure the internal address space used by the instances.
Set the administrative password. This password is used for the admin and demo accounts set up as OpenStack users.
Set the MySQL administrative password. The default here is a random hex string which is inconvenient if you need to look at the database directly for anything.
Set the RabbitMQ password.
Set the service password. This is used by the OpenStack services (Nova, Glance, etc) to authenticate with Keystone.
local.conf should look something like this:
[[local|localrc]]
FLOATING_RANGE=192.168.1.224/27
FIXED_RANGE=10.11.12.0/24
ADMIN_PASSWORD=supersecret
DATABASE_PASSWORD=iheartdatabases
RABBIT_PASSWORD=flopsymopsy
SERVICE_PASSWORD=iheartksl
Note: There is a sample local.conf file under the samples directory in the devstack repository.
- Run DevStack:
$ ./stack.sh
Terraform安装
- MacOS 安装Terraform
brew install hashicorp/tap/terraform
- Debian:
curl -fsSL https://apt.releases.hashicorp.com/gpg | sudo apt-key add -
sudo apt-add-repository "deb [arch=amd64] https://apt.releases.hashicorp.com $(lsb_release -cs) main"
sudo apt-get update && sudo apt-get install terraform
- CentOS:
sudo yum install -y yum-utils
sudo yum-config-manager --add-repo https://rpm.releases.hashicorp.com/RHEL/hashicorp.repo
sudo yum -y install terraform
查看OpenStack信息
查看OpenStack基本内容用于初始化TF的基本信息
认证URL,用于terraform调用OpenStack认证
[root@openstack-allinone ~]# openstack endpoint list --service keystone
+----------------------------------+-----------+--------------+--------------+---------+-----------+-------------------------------+
| ID                              | Region    | Service Name | Service Type | Enabled | Interface | URL                          |
+----------------------------------+-----------+--------------+--------------+---------+-----------+-------------------------------+
| 5ff3198fce8546edaaed246b0b890906 | RegionOne | keystone    | identity    | True    | public    | http://192.168.60.140:5000/v3 |
| 93bc23dc7bfe4043bced0da899eb2bdb | RegionOne | keystone    | identity    | True    | internal  | http://192.168.60.140:5000/v3 |
| cf1be5fe294d48d79a7d17e1953d1b83 | RegionOne | keystone    | identity    | True    | admin    | http://192.168.60.140:5000/v3 |
+----------------------------------+-----------+--------------+--------------+---------+-----------+-------------------------------+
查看网络列表
[root@openstack-allinone ~]# openstack network list
+--------------------------------------+---------+--------------------------------------+
| ID                                  | Name    | Subnets                              |
+--------------------------------------+---------+--------------------------------------+
| 23f58d17-118d-4a2a-ac3e-e859a08b2f97 | private | ea7584f4-e7df-4862-9800-83fb1bab1037 |
| 6c3ed25b-2a44-487a-b6f0-fc0dda9407dc | public  | a4296e1f-ebef-4f2a-a36e-5994fc457445 |
+--------------------------------------+---------+--------------------------------------+
查看安全组
[root@openstack-allinone ~]#  openstack security group list
+--------------------------------------+---------+------------------------+----------------------------------+------+
| ID                                  | Name    | Description            | Project                          | Tags |
+--------------------------------------+---------+------------------------+----------------------------------+------+
| 576e6bd7-4e05-4e90-a7fe-c5c7faa2887a | default | Default security group |                                  | []  |
| 8fdd6bf9-cdda-4fb1-82d8-f2161f99f4ff | default | Default security group | 614ae836097f4e4c8a5a8e6d979f9f7b | []  |
| b444ec97-76c6-4964-8fe9-0e81ad2a966a | default | Default security group | 3da3d412c29a47198c6564bc763ac395 | []  |
+--------------------------------------+---------+------------------------+----------------------------------+------+
查看可用区
[root@openstack-allinone ~]# openstack availability zone list
+-----------+-------------+
| Zone Name | Zone Status |
+-----------+-------------+
| internal  | available  |
| nova      | available  |
| nova      | available  |
+-----------+-------------+
查看机器类型
[root@openstack-allinone ~]# openstack flavor list
+----+-----------+-------+------+-----------+-------+-----------+
| ID | Name      |  RAM | Disk | Ephemeral | VCPUs | Is Public |
+----+-----------+-------+------+-----------+-------+-----------+
| 1  | m1.tiny  |  512 |    1 |        0 |    1 | True      |
| 2  | m1.small  |  2048 |  20 |        0 |    1 | True      |
| 3  | m1.medium |  4096 |  40 |        0 |    2 | True      |
| 4  | m1.large  |  8192 |  80 |        0 |    4 | True      |
| 5  | m1.xlarge | 16384 |  160 |        0 |    8 | True      |
+----+-----------+-------+------+-----------+-------+-----------+
查看镜像列表
openstack image list
+--------------------------------------+--------+--------+
| ID                                  | Name  | Status |
+--------------------------------------+--------+--------+
| 2d018602-4faa-45c3-bad1-1fb042ca342a | cirros | active |
+--------------------------------------+--------+--------+
查看管理域
[root@openstack-allinone ~]# openstack domain list
+---------+---------+---------+--------------------+
| ID      | Name    | Enabled | Description        |
+---------+---------+---------+--------------------+
| default | Default | True    | The default domain |
+---------+---------+---------+--------------------+
Terraform语法介绍
resource "aws_vpc" "main" {
  cidr_block = var.base_cidr_block
}

<BLOCK TYPE> "<BLOCK LABEL>" "<BLOCK LABEL>" {
  # Block body
  <IDENTIFIER> = <EXPRESSION> # Argument
}
variable "image_id" {
  type = string
  default = "centos7"
}
variable "availability_zone_names" {
  type    = list(string)
  default = ["us-west-1a"]}
variable "docker_ports" {
  type = list(object({
    internal = number
    external = number
    protocol = string
  }))
  default = [
    {
      internal = 8300
      external = 8300
      protocol = "tcp"
    }
  ]}
使用变量
resource "aws_instance" "example" {
  instance_type = "t2.micro"
  ami           = var.image_id
}
自定义判断生效规则
variable "image_id" {
  type        = string
  description = "The id of the machine image (AMI) to use for the server."

  validation {
    condition     = length(var.image_id) > 4 && substr(var.image_id, 0, 4) == "ami-"
    error_message = "The image_id value must be a valid AMI id, starting with \"ami-\"."
  }}
准备Terraform脚本文件
我这里直接在Gitlab找一个脚本例子下载下来:
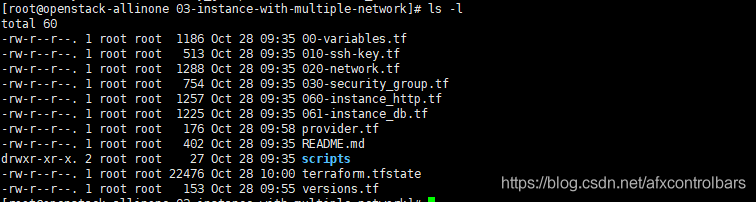
- provider.tf
cat provider.tf
provider "openstack" {
  user_name = "admin"
  tenant_name = "admin"
  password  = "9e08a4a3559d4bce"
  auth_url  = "http://192.168.60.140:5000/v3"
  domain_name = "Default"
}
- variables.tf 参数初始化
# Params file for variables
#### GLANCE
variable "image" {
  type    = string
  default = "Centos 7"
}
#### NEUTRON
variable "external_network" {
  type    = string
  default = "external-network"
}
# UUID of external gateway
variable "external_gateway" {
  type    = string
  default = "f67f0d72-0ddf-11e4-9d95-e1f29f417e2f"
}
variable "dns_ip" {
  type    = list(string)
  default = ["8.8.8.8", "8.8.8.4"]
}

#### VM HTTP parameters ####
variable "flavor_http" {
  type    = string
  default = "t2.medium"
}
variable "network_http" {
  type    = map(string)
  default = {
    subnet_name = "subnet-http"
    cidr        = "192.168.1.0/24"
  }
}

variable "http_instance_names" {
  type    = set(string)
  default = ["http-instance-1",
            "http-instance-2",
            "http-instance-3"]
}
#### VM DB parameters ####
variable "flavor_db" {
  type    = string
  default = "t2.medium"
}
variable "network_db" {
  type    = map(string)
  default = {
    subnet_name = "subnet-db"
    cidr        = "192.168.2.0/24"
  }
}
variable "db_instance_names" {
  type    = set(string)
  default = ["db-instance-1",
            "db-instance-2",
            "db-instance-3"]
}
- 网络资源初始化 network.tf
#### NETWORK CONFIGURATION ####
# Router creation
resource "openstack_networking_router_v2" "generic" {
  name                = "router-generic"
  external_network_id = var.external_gateway
}
# Network creation
resource "openstack_networking_network_v2" "generic" {
  name = "network-generic"
}
#### HTTP SUBNET ####
# Subnet http configuration
resource "openstack_networking_subnet_v2" "http" {
  name            = var.network_http["subnet_name"]
  network_id      = openstack_networking_network_v2.generic.id
  cidr            = var.network_http["cidr"]
  dns_nameservers = var.dns_ip
}
# Router interface configuration
resource "openstack_networking_router_interface_v2" "http" {
  router_id = openstack_networking_router_v2.generic.id
  subnet_id = openstack_networking_subnet_v2.http.id
}
#### DB SUBNET ####
# Subnet db configuration
resource "openstack_networking_subnet_v2" "db" {
  name            = var.network_db["subnet_name"]
  network_id      = openstack_networking_network_v2.generic.id
  cidr            = var.network_db["cidr"]
  dns_nameservers = var.dns_ip
}
# Router interface configuration
resource "openstack_networking_router_interface_v2" "db" {
  router_id = openstack_networking_router_v2.generic.id
  subnet_id = openstack_networking_subnet_v2.db.id
}
- 安全组初始化 security_group.tf
cat 030-security_group.tf
# Acces group, open input port 80 and ssh port
resource "openstack_compute_secgroup_v2" "http" {
  name        = "http"
  description = "Open input http port"
  rule {
    from_port  = 80
    to_port    = 80
    ip_protocol = "tcp"
    cidr        = "0.0.0.0/0"
  }
}

# Open mariadb port
resource "openstack_compute_secgroup_v2" "db" {
  name        = "db"
  description = "Open input db port"
  rule {
    from_port  = 3306
    to_port    = 3306
    ip_protocol = "tcp"
    cidr        = "0.0.0.0/0"
  }
}
# Open Apache2 port
resource "openstack_compute_secgroup_v2" "ssh" {
  name        = "ssh"
  description = "Open input ssh port"
  rule {
    from_port  = 22
    to_port    = 22
    ip_protocol = "tcp"
    cidr        = "0.0.0.0/0"
  }
}
- 创建虚拟机 instance_http.tf
cat 060-instance_http.tf
#### INSTANCE HTTP ####
# Create instance
resource "openstack_compute_instance_v2" "http" {
  for_each    = var.http_instance_names
  name        = each.key
  image_name  = var.image
  flavor_name = var.flavor_http
  key_pair    = openstack_compute_keypair_v2.user_key.name
  user_data  = file("scripts/first-boot.sh")
  network {
    port = openstack_networking_port_v2.http[each.key].id
  }
}
# Create network port
resource "openstack_networking_port_v2" "http" {
  for_each      = var.http_instance_names
  name          = "port-http-${each.key}"
  network_id    = openstack_networking_network_v2.generic.id
  admin_state_up = true
  security_group_ids = [
    openstack_compute_secgroup_v2.ssh.id,
    openstack_compute_secgroup_v2.http.id,
  ]
  fixed_ip {
    subnet_id = openstack_networking_subnet_v2.http.id
  }
}
# Create floating ip
resource "openstack_networking_floatingip_v2" "http" {
  for_each = var.http_instance_names
  pool    = var.external_network
}
# Attach floating ip to instance
resource "openstack_compute_floatingip_associate_v2" "http" {
  for_each    = var.http_instance_names
  floating_ip = openstack_networking_floatingip_v2.http[each.key].address
  instance_id = openstack_compute_instance_v2.http[each.key].id
}
- terraform.tfstate
This state is used by Terraform to map real world resources to your configuration, keep track of metadata, and to improve performance for large infrastructures.
Terraform uses this local state to create plans and make changes to your infrastructure. Prior to any operation, Terraform does a refresh to update the state with the real infrastructure.
使用TF创建的资源,后期为了继续可以使用TF进行维护和更新是不可以手动通过OpenStack的API去删除资源的,会导致实际资源和state记录的状态不一致。
- 从state文件删除对象,而不销毁实际资源
The terraform state rm command is used to remove items from the Terraform state. This command can remove single resources, single instances of a resource, entire modules, and more.
Usage: terraform state rm [options] ADDRESS...

terraform state rm 'packet_device.worker'
terraform state rm 'module.foo.packet_device.worker'
- 删除实际资源
To delete a specific resource, run the following command:
terraform destroy -target=resource_type.resource_name
For example, to delete just the VM in the configuration that you applied earlier, run this command:
terraform destroy -target=opc_compute_instance.default
- Terraform执行三板斧
terraform init # 初始化执行环境,读取相关脚本参数和配置
terraform plan # 预估执行动作,预估资源创建
terraform apply # 执行创建资源
-
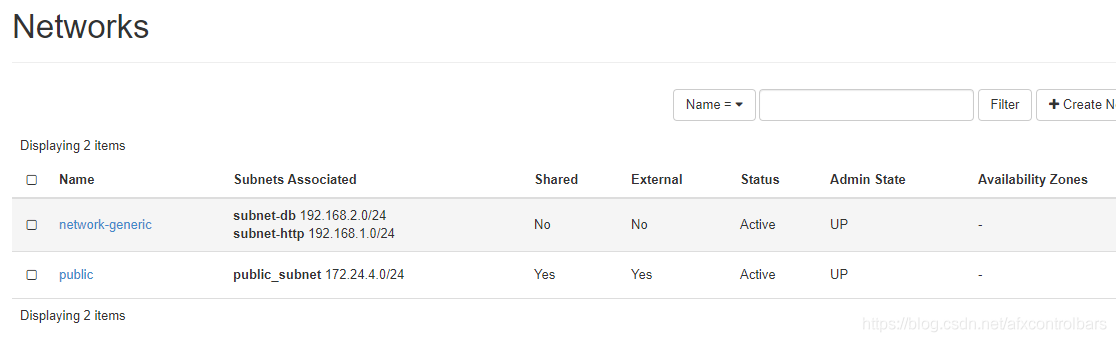
通过TF成功创建资源
网络
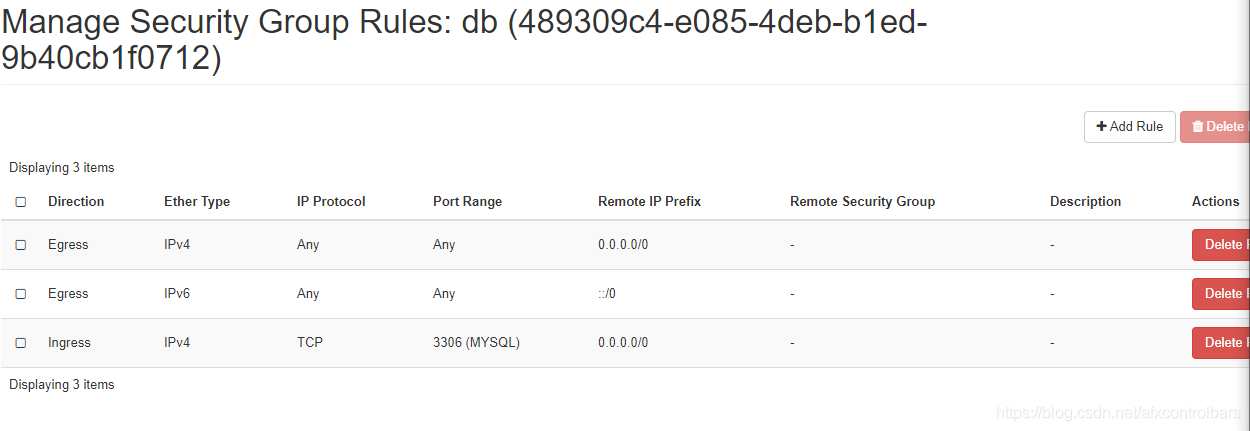
安全组
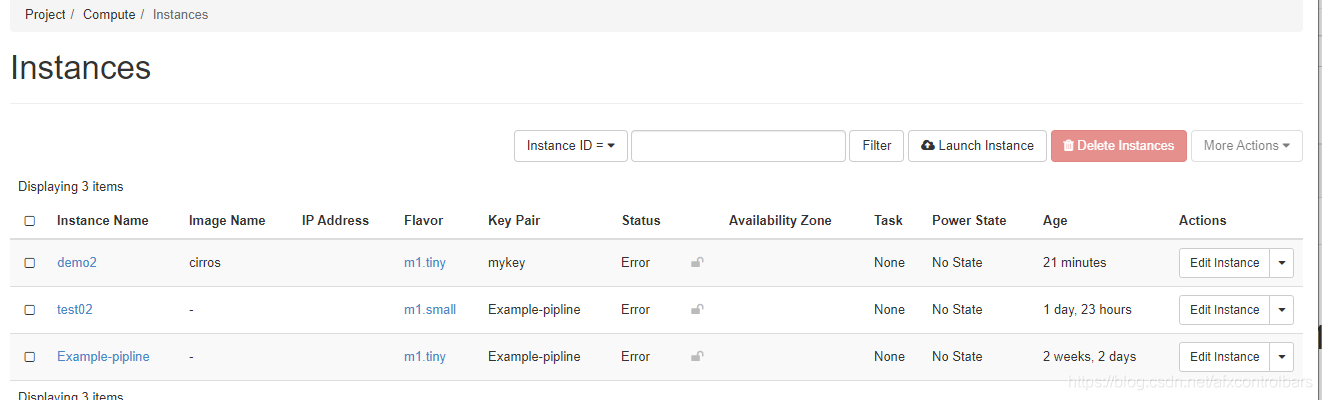
实例
-
报错处理
[root@openstack-allinone 04-instance-with-loadbalancer]# terraform init

Initializing the backend...

Initializing provider plugins...
- Finding latest version of hashicorp/openstack...

Error: Failed to install providers

Could not find required providers, but found possible alternatives:

  hashicorp/openstack -> terraform-provider-openstack/openstack

If these suggestions look correct, upgrade your configuration with the
following command:
    terraform 0.13upgrade .
执行这个命令可以修复这个问题
terraform 0.13upgrade .
