gitlab-ci自动化发布
首先部署gitlab
>参考https://help.aliyun.com/zh/ecs/use-cases/deploy-and-use-gitlab
安装一个minikube
curl -LO https://storage.googleapis.com/minikube/releases/latest/minikube-linux-amd64
sudo install minikube-linux-amd64 /usr/local/bin/minikube
不能是使用root直接启动,强制启动就行了,别忘了首先装好docker,不用docker driver的可以不装,具体不赘述了
minikube start --force
###网络还可以的话,很快就装好
###安装helm
>参考https://helm.sh/zh/docs/intro/install/
curl -fsSL -o get_helm.sh https://raw.githubusercontent.com/helm/helm/main/scripts/get-helm-3
chmod 700 get_helm.sh
./get_helm.sh
###添加gitlab chart仓库
helm search repo -l gitlab/gitlab-runner
helm repo add gitlab https://charts.gitlab.io
helm repo update gitlab
###拉取chart包
helm pull gitlab/gitlab-runner
###创建一个名称空间
kubectl create ns cicd
##去gitlab上copy一下gitlab-runner的token:SVCBg3u8ZzYTsyc792Q3配置到runnerRegistrationToken
###修改values.yaml按照你的需要修改
image:
registry: registry.gitlab.com
image: gitlab-org/gitlab-runner
replicas: 2
gitlabUrl: http://192.168.1.108
runnerRegistrationToken: "SVCBg3u8ZzYTsyc792Q3"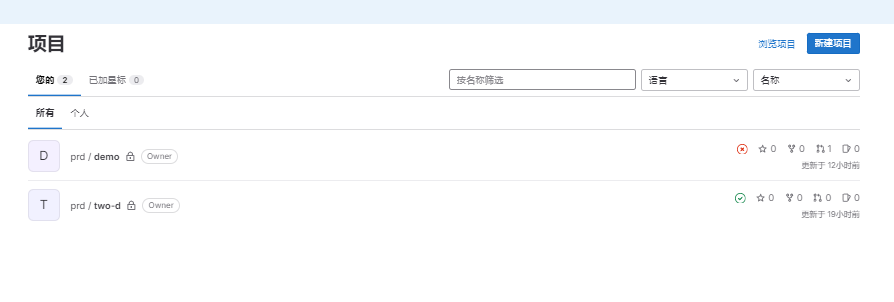
rbac:
create: true
runners:
config: |
[[runners]]
[runners.kubernetes]
namespace = "{{.Release.Namespace}}"
executor = "kubernetes"
image = "alpine"
privileged = true
configPath: ""
cache: {}
###
helm install --namespace cicd gitlab-runner -f values.yaml gitlab/gitlab-runner
###这就基本上可以了
###接下来就开始ci了, .gitlab-ci.yml配置未完待续
- 创建一个项目


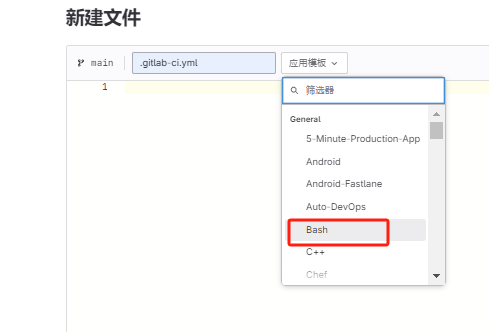
输入.gitlab-ci.yml会自动让你选模板,我这里随便选了一个bash,你可以按需求自己来
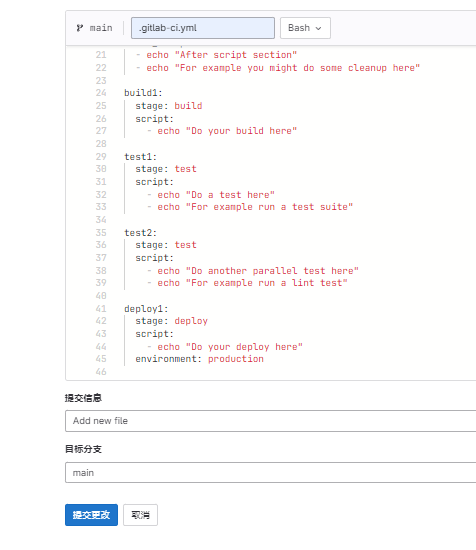
vim .gitlab-ci.yml
#下面很清晰了随意修改吧比如添加提交条件当提交main分支的时候就退出if [ $CI_COMMIT_BRANCH == main ]; then exit 1;fi
#这里使用的是alpine:latest镜像,本地网络拉不下来busybox:latest
# This file is a template, and might need editing before it works on your project.
# You can copy and paste this template into a new `.gitlab-ci.yml` file.
# You should not add this template to an existing `.gitlab-ci.yml` file by using the `include:` keyword.
#
# To contribute improvements to CI/CD templates, please follow the Development guide at:
# https://docs.gitlab.com/ee/development/cicd/templates.html
# This specific template is located at:
# https://gitlab.com/gitlab-org/gitlab/-/blob/master/lib/gitlab/ci/templates/Bash.gitlab-ci.yml

# See https://docs.gitlab.com/ee/ci/yaml/index.html for all available options

# you can delete this line if you're not using Docker
image: alpine:latest

before_script:
  - echo "Before script section"
  - if [ $CI_COMMIT_BRANCH == main ]; then exit 1;fi
  - echo "For example you might run an update here or install a build dependency"
  - echo "Or perhaps you might print out some debugging details"

after_script:
  - echo "After script section"
  - echo "For example you might do some cleanup here"

stages:
  - test
  - build
  - deploy


build1:
  stage: build
  script:
    - echo "Do your build here"

test1:
  stage: test
  script:
    - echo "Do a test here"
    - echo "For example run a test suite"

test2:
  stage: test
  script:
    - echo "Do another parallel test here"
    - echo "For example run a lint test"

deploy1:
  stage: deploy
  script:
    - echo "Do your deploy here"
  environment: production
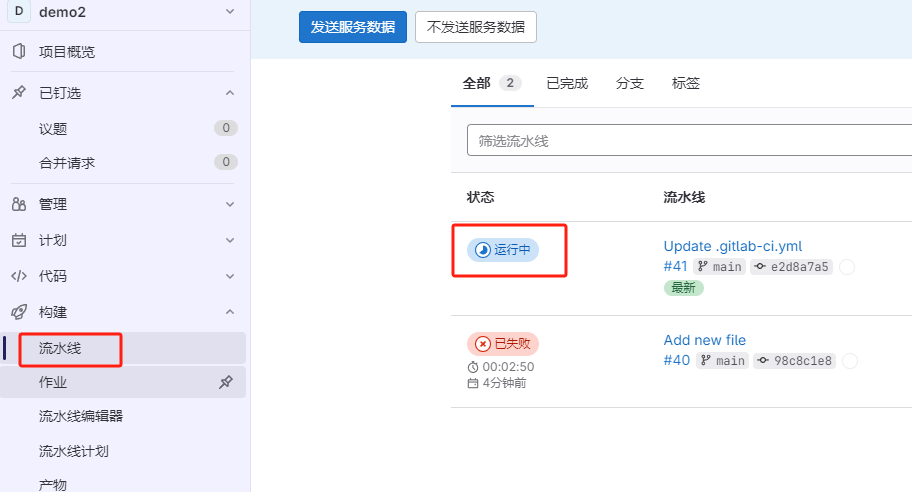
查看作业这里按照预期的退出了
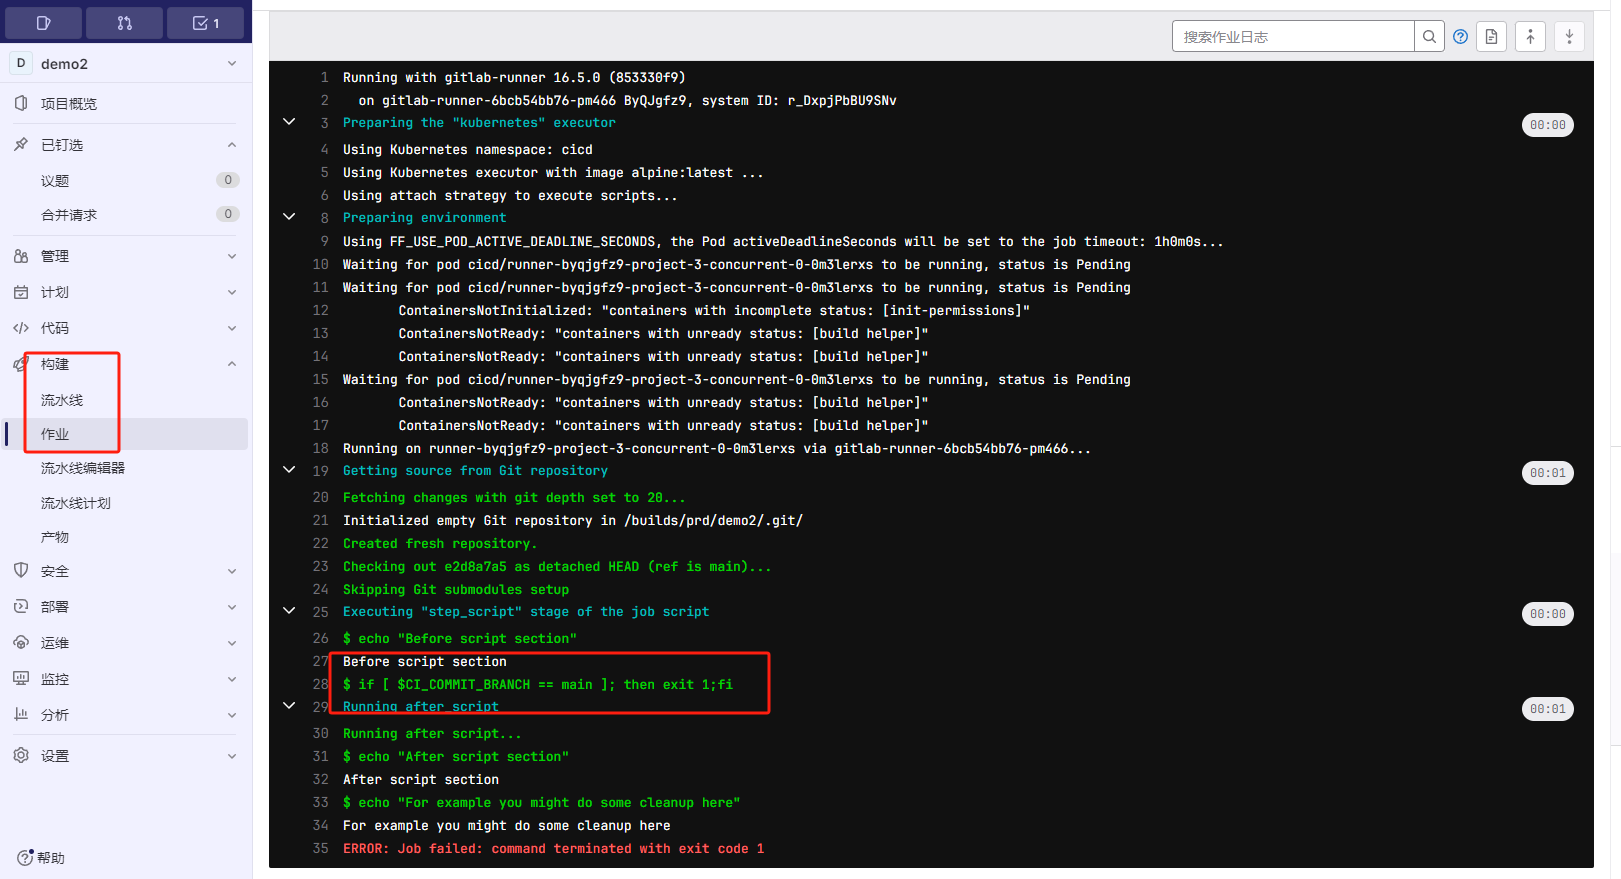
注释掉这一行再提交

看结果,这里全部的stage都通过了,演示发布完成

posted on 2023-10-25 22:47 virtualwxg 阅读(15) 评论(0) 编辑 收藏 举报


