Matplotlib.pyplot.scatter 散点图绘制
matplotlib.pyplot.scatter(x, y, s=None, c=None, marker=None, cmap=None, norm=None, vmin=None, vmax=None, alpha=None, linewidths=None, *, edgecolors=None, plotnonfinite=False, data=None, **kwargs)
| 属性 | 参数 | 意义 |
|---|---|---|
| 坐标 | x,y | 输入点列的数组,长度都是size |
| 点大小 | s | 点的直径数组,默认直径20,长度最大size |
| 点颜色 | c | 点的颜色,默认蓝色 'b',也可以是个 RGB 或 RGBA 二维行数组。 |
| 点形状 | marker | MarkerStyle 点的样式,默认小圆圈 'o'。 |
| 调色板 | cmap | Colormap,默认 None,标量或者是一个 colormap 的名字,只有 c 是一个浮点数数组时才使用。如果没有申明就是 image.cmap。 |
| 亮度(1) | norm | Normalize,默认 None,数据亮度在 0-1 之间,只有 c 是一个浮点数的数组的时才使用。 |
| 亮度(2) | vmin,vmax | 亮度设置,在 norm 参数存在时会忽略。 |
| 透明度 | alpha | 透明度设置,0-1 之间,默认 None,即不透明 |
| 线 | linewidths | 标记点的长度 |
| 颜色 | edgecolors | 颜色或颜色序列,默认为 'face',可选值有 'face', 'none', None。 |
| plotnonfinite | 布尔值,设置是否使用非限定的 c ( inf, -inf 或 nan) 绘制点。 | |
| **kwargs | 其他参数。 |
MarkerStyle
| marker | description | 描述 |
|---|---|---|
"." |
point | 点 |
"," |
pixel | 像素 |
"o" |
circle | 圆 |
"v" |
triangle_down | 倒三角 |
"^" |
triangle_up | 正三角 |
"<" |
triangle_left | 左三角 |
">" |
triangle_right | 右三角 |
"1" |
tri_down | |
"2" |
tri_up | |
"3" |
tri_left | |
"4" |
tri_right | |
"8" |
octagon | 八角形 |
"s" |
square | 正方形 |
"p" |
pentagon | 五角 |
"P" |
plus (filled) | |
"*" |
star | 星星 |
"h" |
hexagon1 | |
"H" |
hexagon2 | |
"+" |
plus | +号 |
"x" |
x | X 号 |
"X" |
x (filled) | |
"D" |
diamond | |
"d" |
thin_diamond | |
| ``" | "`` | vline |
"_" |
hline | |
0 (TICKLEFT) |
tickleft | |
1 (TICKRIGHT) |
tickright | |
2 (TICKUP) |
tickup | |
3 (TICKDOWN) |
tickdown | |
4 (CARETLEFT) |
caretleft | |
5 (CARETRIGHT) |
caretright | |
6 (CARETUP) |
caretup | |
7 (CARETDOWN) |
caretdown | |
8 (CARETLEFTBASE) |
caretleft (centered at base) | |
9 (CARETRIGHTBASE) |
caretright (centered at base) | |
10 (CARETUPBASE) |
caretup (centered at base) | |
11 (CARETDOWNBASE) |
caretdown (centered at base) | |
"None", " " or "" |
nothing | |
'$...$' |
Render the string using mathtext. E.g "$f$" for marker showing theletter f. |
|
verts |
A list of (x, y) pairs used for Path vertices. The center of the marker is located at (0, 0) and the size is normalized, such that the created path is encapsulated inside the unit cell. |
|
| path | A ~matplotlib.path.Path instance. |
|
(numsides, 0, angle) |
A regular polygon with numsides |
|
sides, rotated by angle. |
||
(numsides, 1, angle) |
A star-like symbol with numsides |
|
sides, rotated by angle. |
||
(numsides, 2, angle) |
An asterisk with numsides sides, |
|
rotated by angle. |
示例
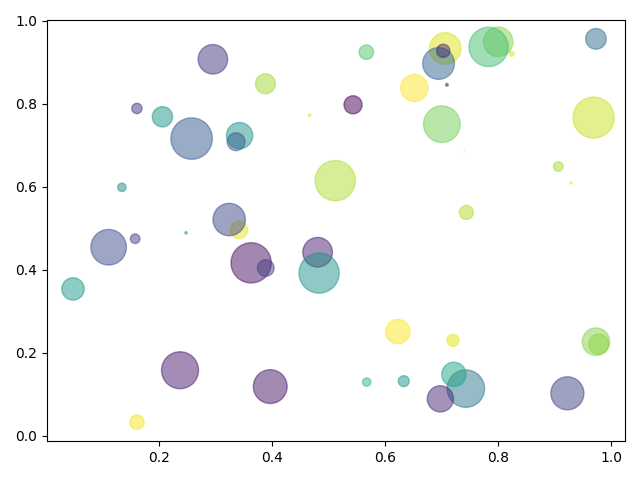
import numpy as np
import matplotlib.pyplot as plt

# Fixing random state for reproducibility
np.random.seed(19680801)

N = 50
x = np.random.rand(N)
y = np.random.rand(N)
colors = np.random.rand(N)  # 颜色可以随机
area = (30 * np.random.rand(N)) ** 2  # 随机大小
# x,y,s,c 的 size 需要一致
plt.scatter(x, y, s=area, c=colors, alpha=0.5)
plt.show()

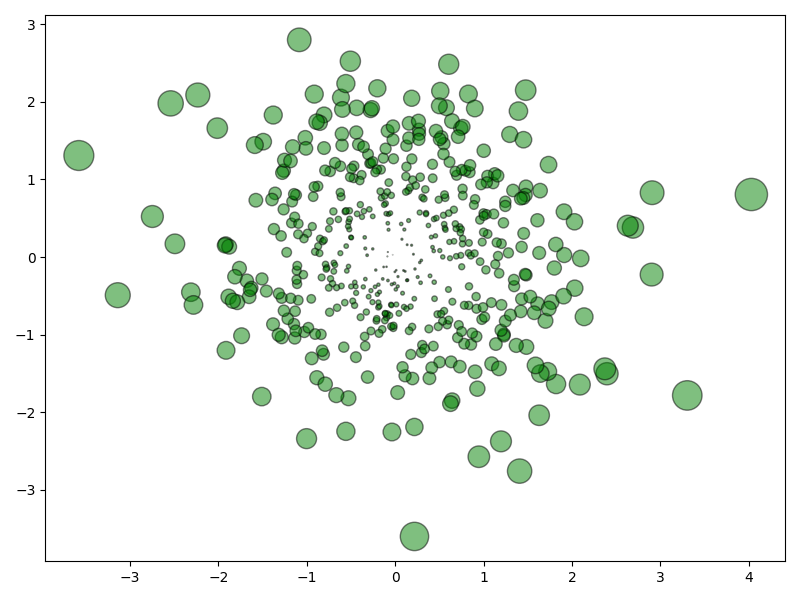
多元高斯的情况
# 设置画布大小
fig = plt.figure(figsize=(8, 6))
# Generating a Gaussion dataset:
# creating random vectors from the multivariate normal distribution
# given mean and covariance
mu_vec1 = np.array([0, 0])
cov_mat1 = np.array([[1, 0], [0, 1]])
X = np.random.multivariate_normal(mu_vec1, cov_mat1, 500)
R = X ** 2
R_sum = R.sum(axis=1)
plt.scatter(X[:, 0], X[:, 1], c='green', marker='o', s=32. * R_sum, edgecolor='black', alpha=0.5)
plt.show()

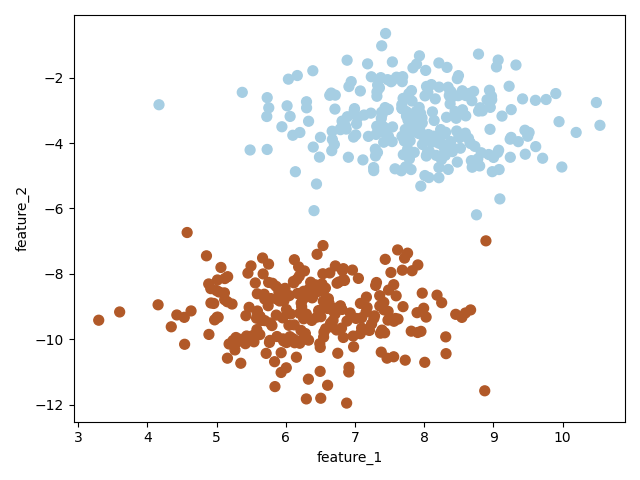
make_blobs
import numpy as np
from sklearn.datasets import make_blobs  # 为了快速方便的创建数据集,此处采用 scikit-learn 里的 make_blobs
import matplotlib.pyplot as plt

# 创建一个数据集,X有两个特征,y={-1,1}
X, y = make_blobs(n_samples=500, centers=2, random_state=6)
y[y == 0] = -1
plt.scatter(X[:, 0], X[:, 1], c=y, s=50, cmap=plt.cm.Paired)
plt.xlabel("feature_1")
plt.ylabel("feature_2")
plt.show()

源码地址:https://gitee.com/VipSoft/VipPython/matplotlib/pyplot_scatter.py
https://matplotlib.org/stable/gallery/index
本文来自博客园,作者:VipSoft 转载请注明原文链接:https://www.cnblogs.com/vipsoft/p/17983868
分类:
AI / Python


【推荐】编程新体验,更懂你的AI,立即体验豆包MarsCode编程助手
【推荐】凌霞软件回馈社区,博客园 & 1Panel & Halo 联合会员上线
【推荐】抖音旗下AI助手豆包,你的智能百科全书,全免费不限次数
【推荐】博客园社区专享云产品让利特惠,阿里云新客6.5折上折
【推荐】轻量又高性能的 SSH 工具 IShell:AI 加持,快人一步
· 一个费力不讨好的项目,让我损失了近一半的绩效!
· 清华大学推出第四讲使用 DeepSeek + DeepResearch 让科研像聊天一样简单!
· 实操Deepseek接入个人知识库
· CSnakes vs Python.NET:高效嵌入与灵活互通的跨语言方案对比
· Plotly.NET 一个为 .NET 打造的强大开源交互式图表库
2023-01-24 Axure 母版与元件