Matplotlib.pyplot.plot 绘图
Matplotlib.pyplot.scatter 散点图绘制
Matplotlib.pyplot 创建图形、在图形中创建创建一个绘图区域、在绘图区域中你那个绘制一些线、在图形中添加标签之类
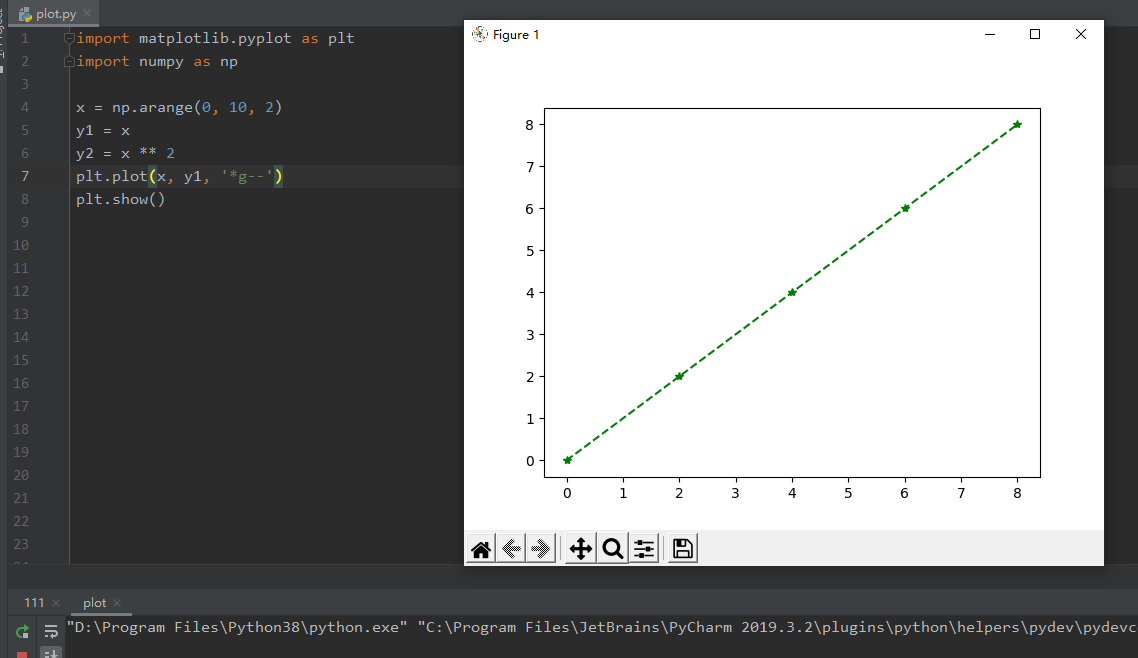
画二维平面图
x = np.arange(0, 10, 2)
y1 = x
y2 = x ** 2
plt.plot(x, y1, '*g--') #g 表示颜色
plt.show()
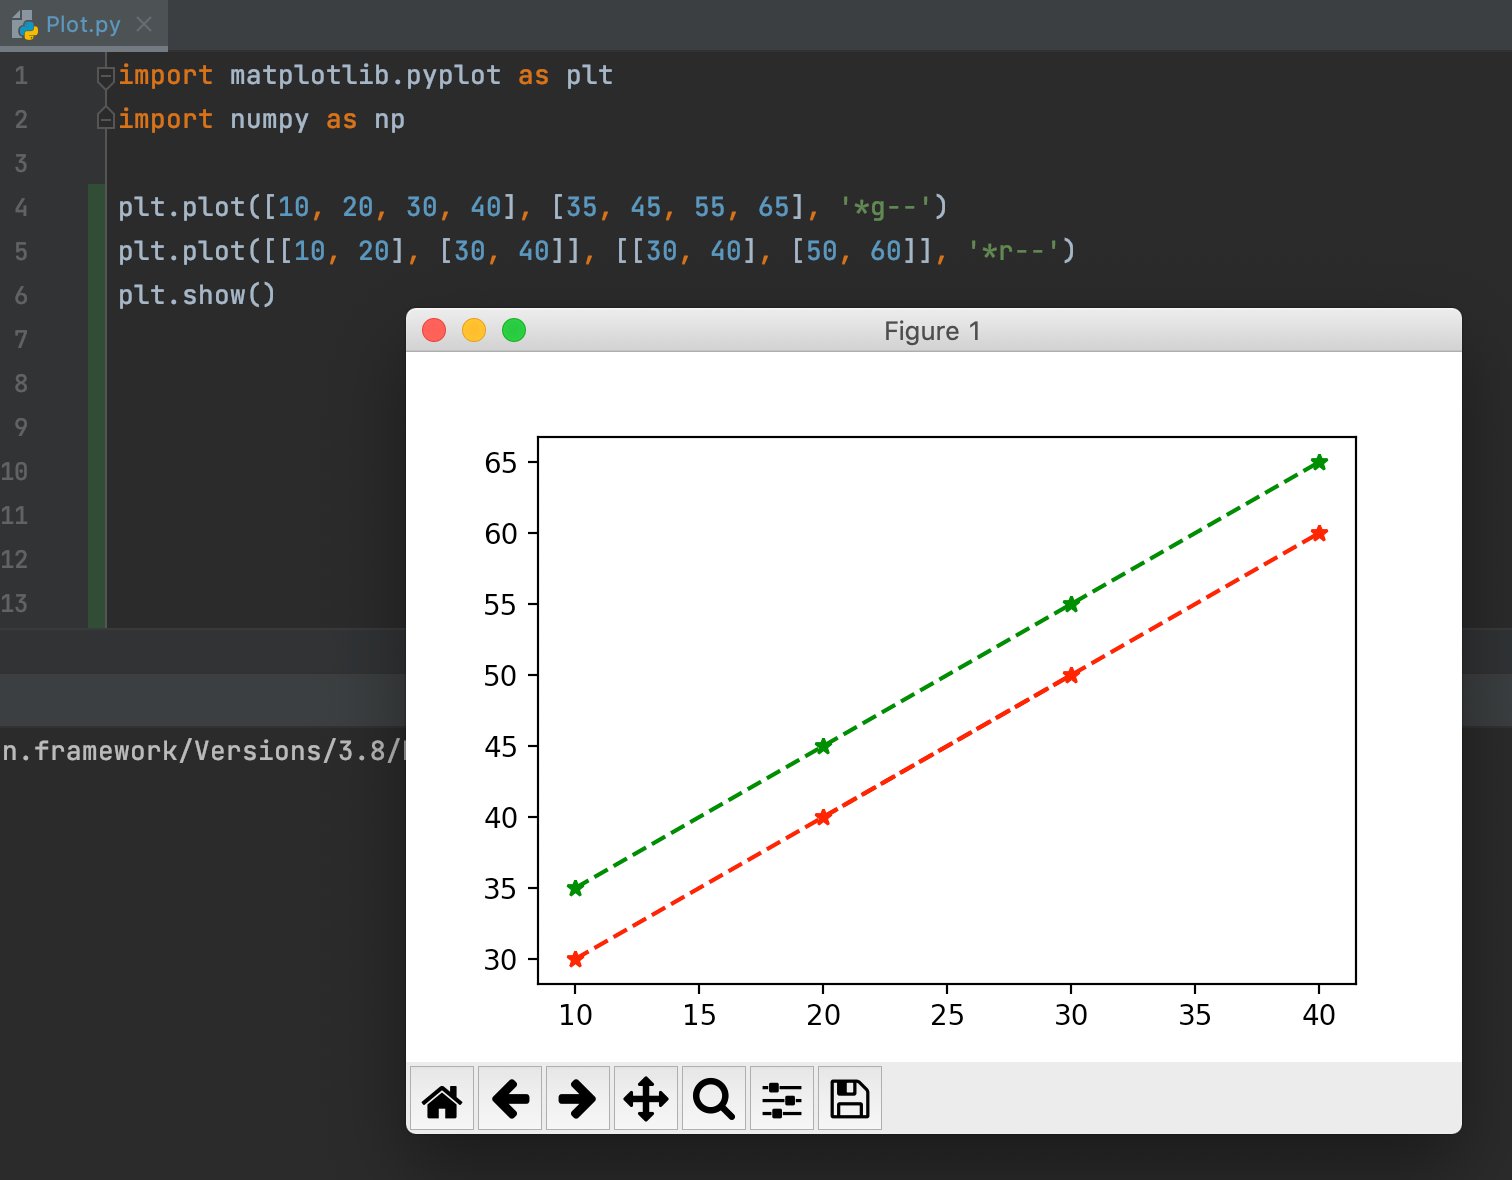
同一个坐标系里画多条线段
import matplotlib.pyplot as plt
import numpy as np

plt.plot([10, 20, 30, 40], [35, 45, 55, 65], '*g--')
plt.plot([[10, 20], [30, 40]], [[30, 40], [50, 60]], '*r--')
plt.show()
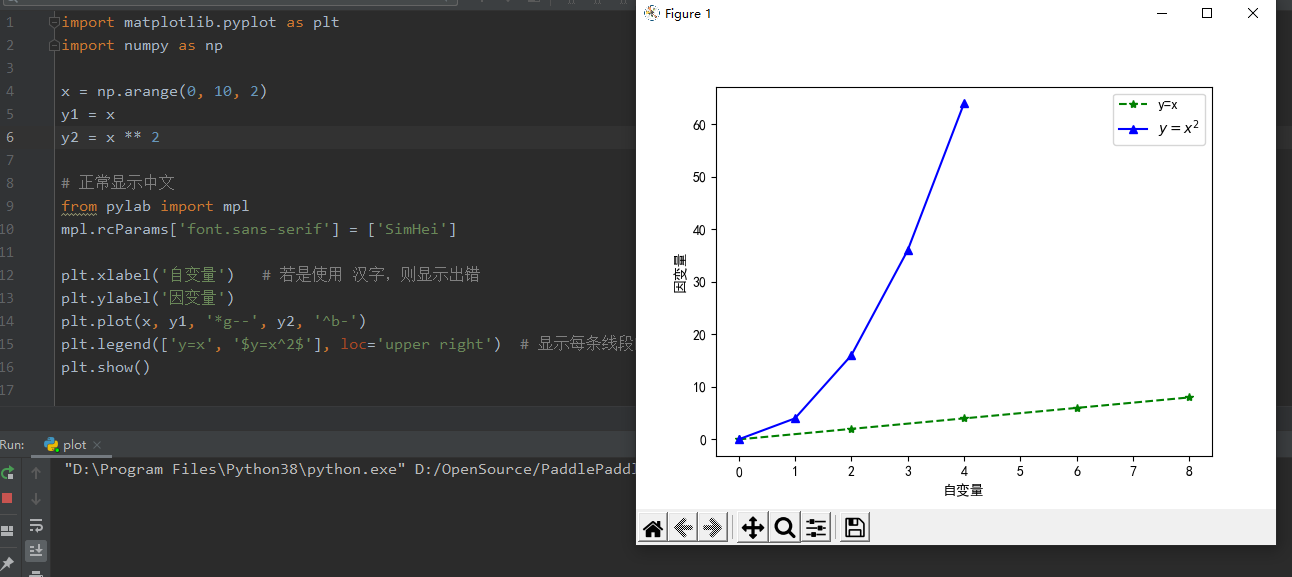
import matplotlib.pyplot as plt
import numpy as np

x = np.arange(0, 10, 2)
y1 = x
y2 = x ** 2

# 正常显示中文
from pylab import mpl
mpl.rcParams['font.sans-serif'] = ['SimHei']

plt.xlabel('自变量')   # 若是使用 汉字,则显示出错
plt.ylabel('因变量')
plt.plot(x, y1, '*g--', y2, '^b-')
plt.legend(['y=x', '$y=x^2$'], loc='upper right')  # 显示每条线段的解释, $$ 里是 LaTeX语句
# 保存图片
plt.savefig('./Big Title.png')
# 防止图片部分缺失 方法一 增大画布
fig = plt.figure(figsize=(8,4))
# 防止图片部分缺失 方法一 紧致布局
plt.tight_layout()
#增大分辨率
plt.savefig('./Big Title.png', dpi=400)
plt.show()
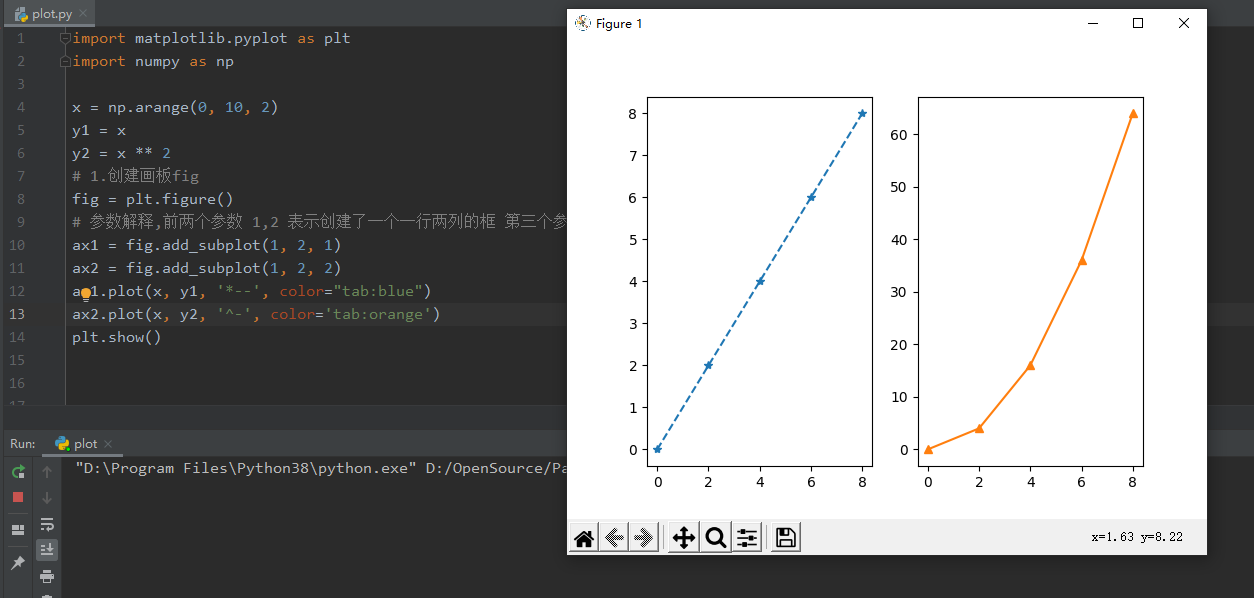
分别放两个框中
import matplotlib.pyplot as plt
import numpy as np

x = np.arange(0, 10, 2)
y1 = x
y2 = x ** 2
# 1.创建画板fig
fig = plt.figure(figsize=(9, 6)) # 指定画板大小
# 参数解释,前两个参数 1,2 表示创建了一个一行两列的框 第三个参数表示当前所在的框
ax1 = fig.add_subplot(1, 2, 1)
ax2 = fig.add_subplot(1, 2, 2)
ax1.plot(x, y1, '*--', color="tab:blue")
ax2.plot(x, y2, '^-', color='tab:orange')
plt.show()
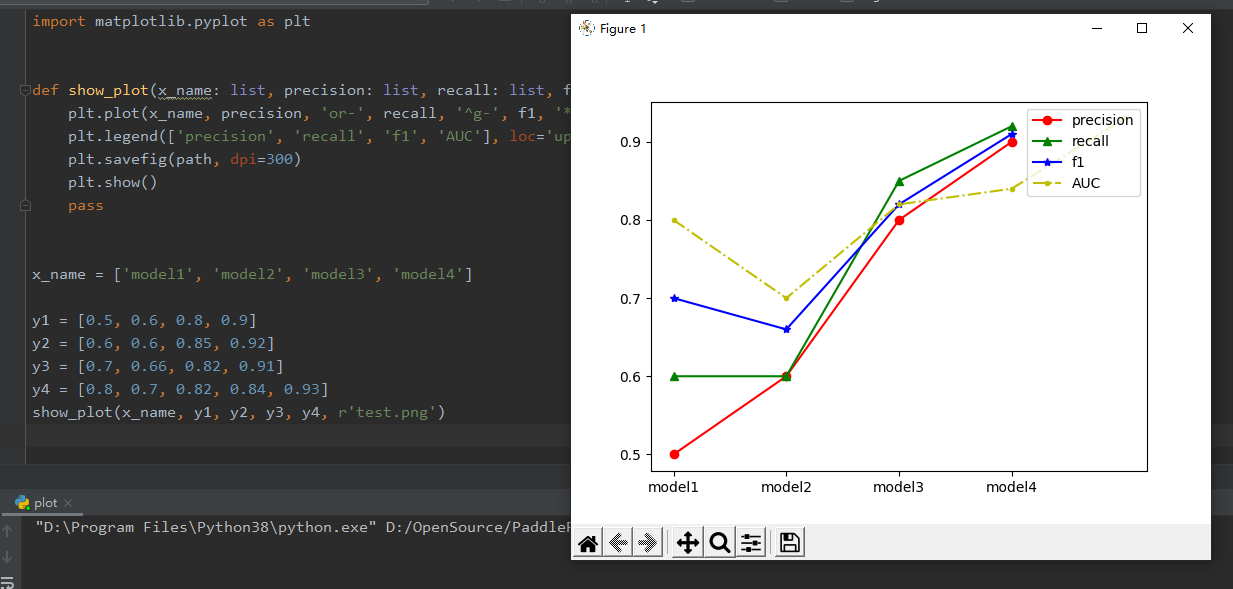
函数封装
import matplotlib.pyplot as plt

def show_plot(x_name: list, precision: list, recall: list, f1: list, AUC: list, path):
    plt.plot(x_name, precision, 'or-', recall, '^g-', f1, '*b-', AUC, '.y-.')
    plt.legend(['precision', 'recall', 'f1', 'AUC'], loc='upper right')
    plt.savefig(path, dpi=300)
    plt.show()
    pass

x_name = ['model1', 'model2', 'model3', 'model4']

y1 = [0.5, 0.6, 0.8, 0.9]
y2 = [0.6, 0.6, 0.85, 0.92]
y3 = [0.7, 0.66, 0.82, 0.91]
y4 = [0.8, 0.7, 0.82, 0.84, 0.93]
show_plot(x_name, y1, y2, y3, y4, r'test.png')
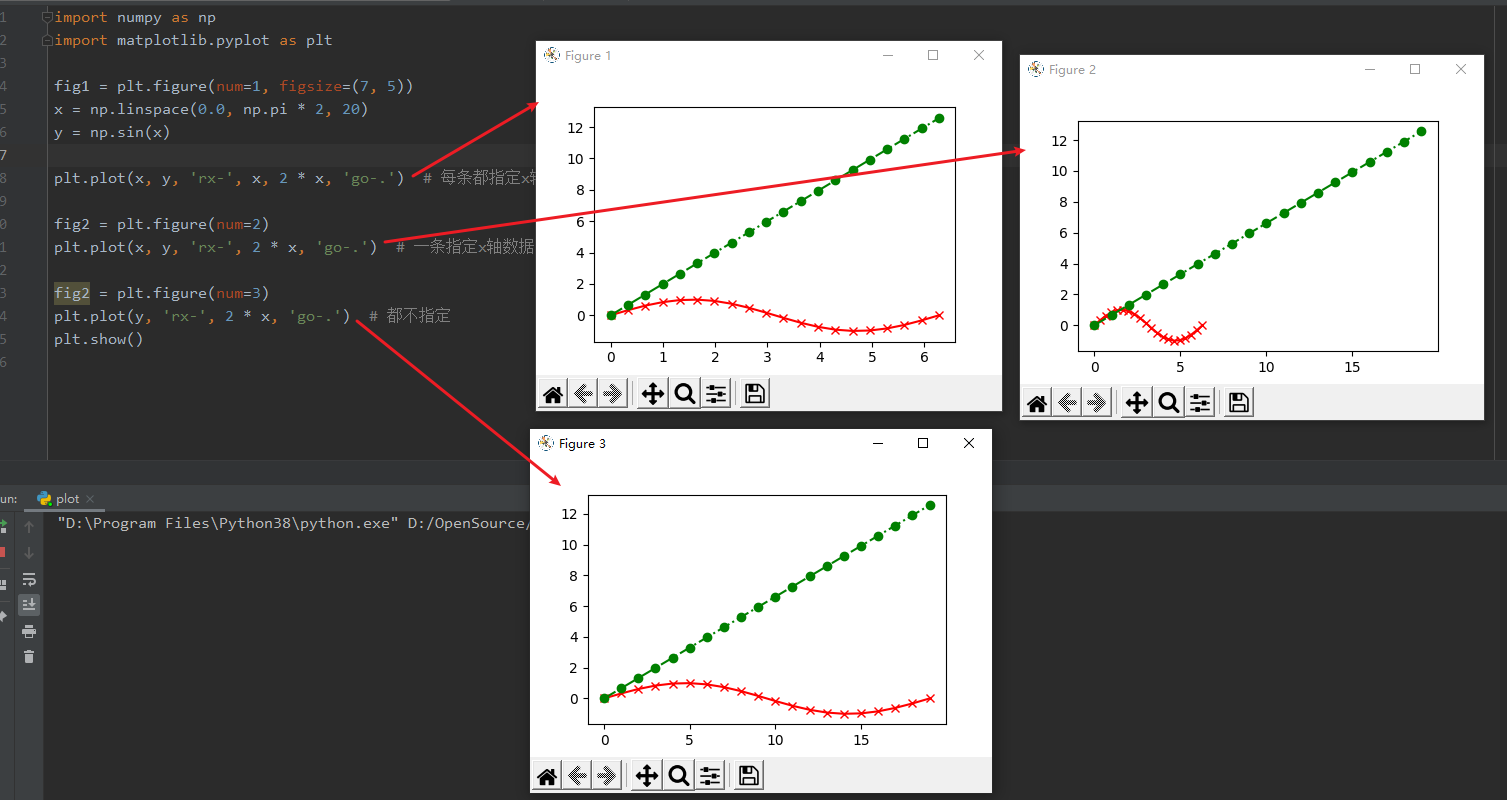
画多条曲线
import numpy as np
import matplotlib.pyplot as plt

fig1 = plt.figure(num=1, figsize=(7, 5))  # 指定画板大小
x = np.linspace(0.0, np.pi * 2, 20)
y = np.sin(x)

plt.plot(x, y, 'rx-', x, 2 * x, 'go-.')  # 每条都指定x轴数据

fig2 = plt.figure(num=2)
plt.plot(x, y, 'rx-', 2 * x, 'go-.')  # 一条指定x轴数据,其他不指定

fig2 = plt.figure(num=3)
plt.plot(y, 'rx-', 2 * x, 'go-.')  # 都不指定
plt.show()
说明
format_string 控制曲线的格式字符串,可选,由颜色字符、风格字符和标记字符组成
颜色
| 字符 | 说明 | 字符 | 说明 | 字符 | 说明 |
|---|---|---|---|---|---|
| 'r' | 红色 | 'g' | 绿色 | 'b' | 蓝色 |
| 'c' | 青绿色 | 'k' | 黑色 | 'y' | 黄色 |
| 'w' | 白色 | 'm' | 洋红色 |
风格
| 字符 | 说明 | 字符 | 说明 | 字符 | 说明 | 字符 | 说明 |
|---|---|---|---|---|---|---|---|
| '-' | 实线 | '–' | 破折线 | '-.' | 点画线 | ':' | 虚线 |
风格
| 字符 | 说明 | 字符 | 说明 | 字符 | 说明 |
|---|---|---|---|---|---|
| '.' | 点标记 | ',' | 像素标记 | 'o' | 实心圈标记 |
| 'v' | 倒三角标记 | '^' | 上三角标记 | '>' | 右三角标记 |
| '<' | 左三角标记 | 'h' | 竖六边形标记 | 'H' | 横六边形标记 |
| '+' | 十字标记 | 'x' | x标记 | 'D' | 菱形标记 |
| 'd' | 瘦菱形标记 | '|' | 垂直线标记 | '*' | 星形标记 |
| 'p' | 实心五角标记 | 's' | 实心方形标记 | '4' | 右花三角标记 |
| '3' | 左花三角标记 | '2' | 上花三角标记 | '1' | 下花三角标记 |
使用方法
plt.plot(x, y,'g')
plt.plot(x, y,color='green')

plt.plot(x, y,'go')
plt.plot(x, y,color='green',marker = 'o')

plt.plot(x, y,'go-.')
本文来自博客园,作者:VipSoft 转载请注明原文链接:https://www.cnblogs.com/vipsoft/p/17401410.html

