deckgl飞线加箭头
需求
两个地点的连线中介需要箭头指向
源数据
cosnt arcData=[
  {
    id: "14",
    name: "测试数据1",
    width: 3,
    end: {lat: -37, lon: -122},
    start: {lat: -51, lon: 0}
  }
]
飞线层(两点连线 arcLayer)
import { ArcLayer } from '@deck.gl/layers'

const arcLayer = new ArcLayer({
  data: arcData,
  pickable: true,
  getWidth: d => d.width,
  getHeight: 0.4,
  widthUnits: 'pixels',
  greatCircle:true,
  getSourcePosition: d => [d.start.lon, d.start.lat],
  getTargetPosition: d => [d.end.lon, d.end.lat],
  getSourceColor: d => d.color,
  getTargetColor: d => d.color,
  updateTriggers: {
    data: [arcData],
  },
})
箭头层(IconLayer)
箭头的图片
import { IconLayer } from '@deck.gl/layers'

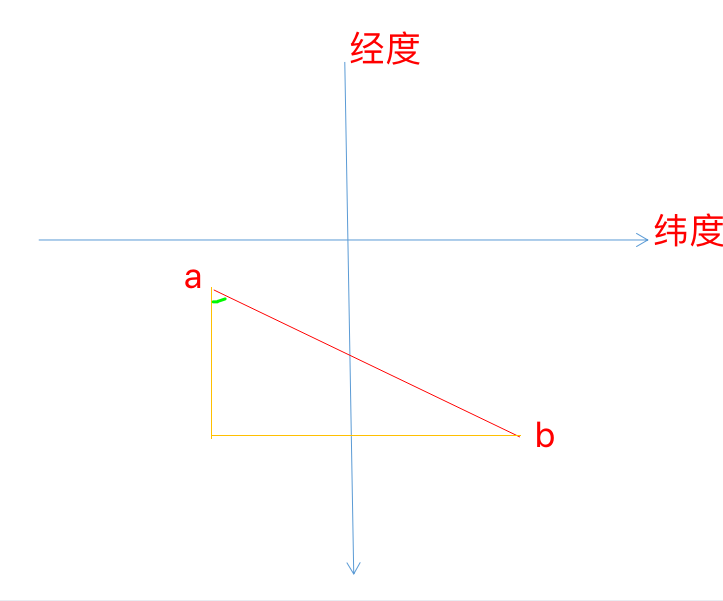
// 获取弧度值
const getCosValue = (d) => {
  const { start, end } = d
  // 临边
  const b = start.lat - end.lat
  // 斜边
  const c = Math.sqrt(b * b + (start.lon - end.lon) * (start.lon - end.lon))
  // b/c得cos值  acos(反余弦求得弧度) *180/PI  弧度转角度
  // const angle = Math.acos(b / c) * 180 / Math.PI
  return Math.acos(b / c)
}

// 箭头
const getIcon = (d) => {
  const v = getCosValue(d) < 1 ? 1.1 : getCosValue(d)
  return {
    url: '图片的位置',
    width: 22,
    height: 22,
    anchorX: 10 / v,
    anchorY: 22 / v,
    mask: true,
  }
}

// 箭头的Icon
const ArcLayerArrowIcon = (data) => {
  const arrowIcon = new IconLayer({
    id: `icon-arrowIcon-${Math.random()}`,
    data,
    getIcon,
    pickable: true,
    sizeScale: 1,
    sizeUnits: 'pixels',
    getPosition: d => [d.end.lon, d.end.lat],
    getColor: d => d.color,
    getSize: d => 22,
    // onClick,
    updateTriggers: {
      data,
    },
    getAngle: d => {
      const angle = getCosValue(d) * 180 / Math.PI
      return (360 * 0.4 + angle) % 360
    }
  })
  return arrowIcon
}

// 调用
const arrowIcon = ArcLayerArrowIcon(arcData)
线和箭头绘制到地图
setLayers([ arcLayer, arrowIcon])

// 地图部分
import DeckGL from '@deck.gl/react'
const [layers, setLayers] = useState([])
<DeckGL
  layers={[layers]}
实现逻辑


