

[Vue]vue-router嵌套路由(子路由)
总共添加两个子路由,分别命名Collection.vue(我的收藏)和Trace.vue(我的足迹)
1、重构router/index.js的路由配置,需要使用children数组来定义子路由,具体如下:

import Vue from 'vue'
import Router from 'vue-router'
import Home from '@/Home'
import Brand from '@/Brand'
import Member from '@/Member'
import Cart from '@/Cart'
import Me from '@/Me'

import Collection from '@/Collection'
import Trace from '@/Trace'
import Default from '@/Default'

Vue.use(Router)

export default new Router({
  // mode: 'history',
  // base: __dirname,
  // linkActiveClass: 'active', // 更改激活状态的Class值
  routes: [
    {
      path: '/',
      name: 'Home',
      component: Home
    },
    {
      path: '/brand',
      name: 'Brand',
      component: Brand
    },
    {
      path: '/member',
      name: 'Member',
      component: Member
    },
    {
      path: '/cart',
      name: 'Cart',
      component: Cart
    },
    {
      path: '/me',
      name: 'Me',
      component: Me,
      children: [
        {
          path: 'collection',//以“/”开头的嵌套路径会被当作根路径,所以子路由上不用加“/”;在生成路由时,主路由上的path会被自动添加到子路由之前,所以子路由上的path不用在重新声明主路由上的path了。
          name: 'Collection',
          component: Collection
        },
        {
          path: 'trace',
          name: 'Trace',
          component: Trace
        }
      ]
    }
  ]
})
2、Me.vue的代码如下:
<template>
  <div class="me">
    <div class="tabs">
      <ul>
        <!--<router-link :to="{name: 'Default'}" tag="li" exact>默认内容</router-link>-->
        <router-link :to="{name: 'Collection'}" tag="li" >我的收藏</router-link>
        <router-link :to="{name: 'Trace'}" tag="li">我的足迹</router-link>
      </ul>
    </div>
    <div class="content">
      <router-view></router-view>//<router-link> 就是定义页面中点击的部分,<router-view> 定义显示部分,就是点击后,区配的内容显示在什么地方,会被匹配到的组件替换掉
    </div>
  </div>
</template>
<script type="text/ecmascript-6">

</script>
<style lang="less" rel="stylesheet/less" type="text/less" scoped>
  .me{
    .tabs{
      & > ul, & > ul > li {
        margin: 0;
        padding: 0;
        list-style: none;
      }
      & > ul{
        display: flex;
        border-bottom: #cccccc solid 1px;
        & > li{
          flex: 1;
          text-align: center;
          padding: 10px;
          &.router-link-active {
            color: #D0021B;
          }
        }
      }
    }
  }
</style>
3.页面效果:
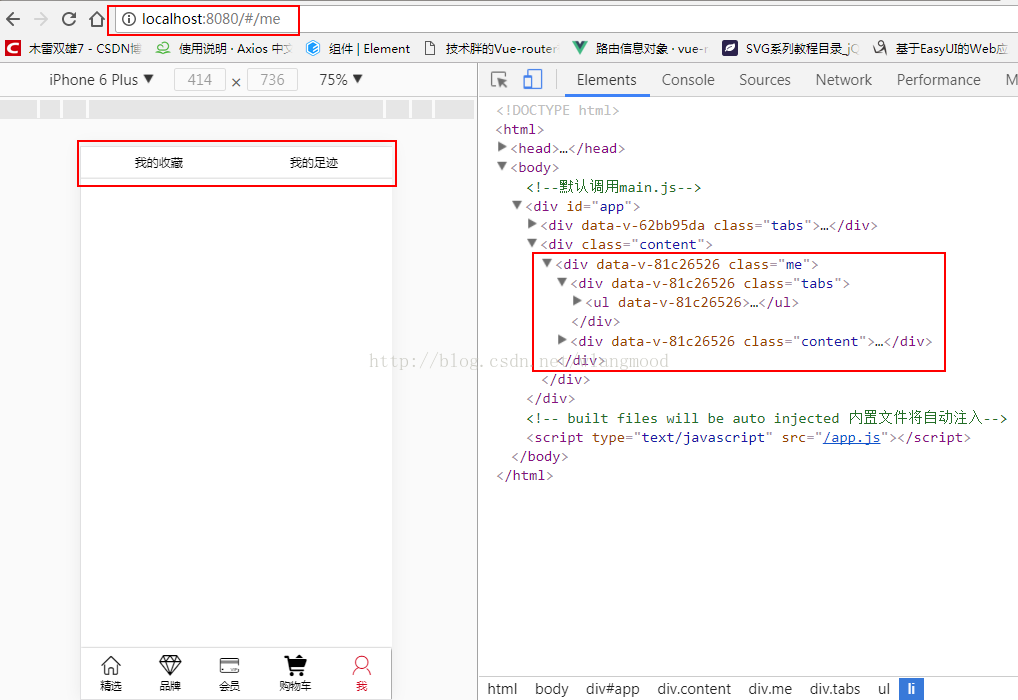
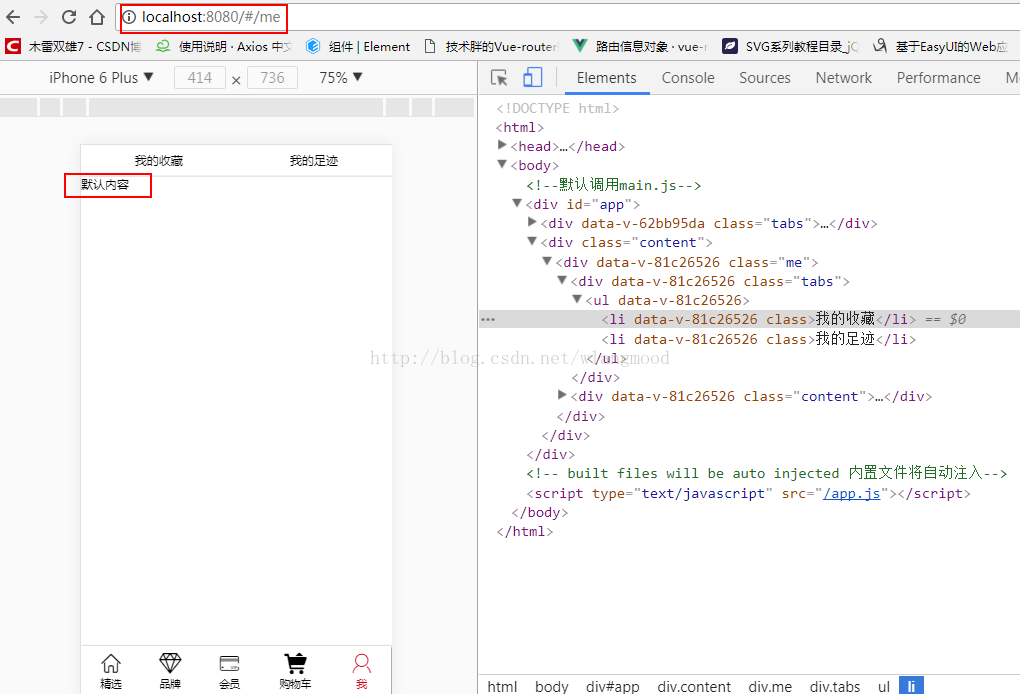
当访问到http://localhost:8080/#/me时,组件Me中<router-view>并没有渲染出任何东西,这是因为没有匹配到合适的子路由。如果需要渲染一些默认内容,需要在children中添加一个空的子路由:
{
      path: '',
      name: 'Default',
      component: Default
},
此时浏览器的效果:默认组件Default被渲染出来了:
分类:
Vue.js


【推荐】国内首个AI IDE,深度理解中文开发场景,立即下载体验Trae
【推荐】编程新体验,更懂你的AI,立即体验豆包MarsCode编程助手
【推荐】抖音旗下AI助手豆包,你的智能百科全书,全免费不限次数
【推荐】轻量又高性能的 SSH 工具 IShell:AI 加持,快人一步
· 基于Microsoft.Extensions.AI核心库实现RAG应用
· Linux系列:如何用heaptrack跟踪.NET程序的非托管内存泄露
· 开发者必知的日志记录最佳实践
· SQL Server 2025 AI相关能力初探
· Linux系列:如何用 C#调用 C方法造成内存泄露
· 震惊!C++程序真的从main开始吗?99%的程序员都答错了
· 别再用vector<bool>了!Google高级工程师:这可能是STL最大的设计失误
· 单元测试从入门到精通
· 【硬核科普】Trae如何「偷看」你的代码?零基础破解AI编程运行原理
· 上周热点回顾(3.3-3.9)