05 vue项目01-组件关系、bootstrap
1、django后端项目
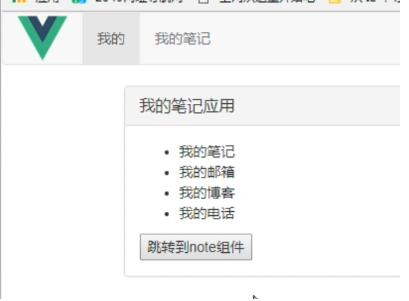
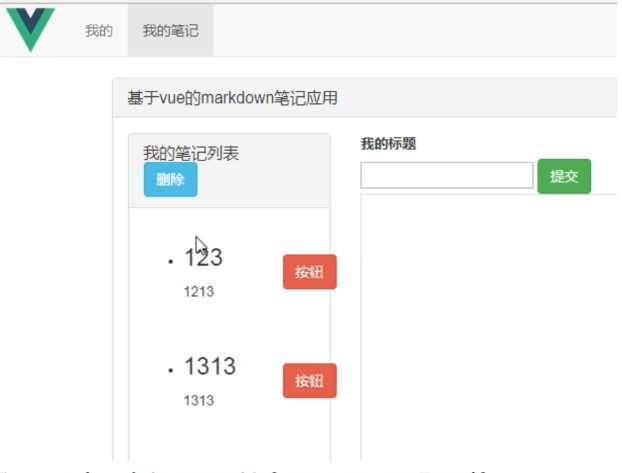
1、项目预期
配置前端静态资源


页面展示
2、django项目代码
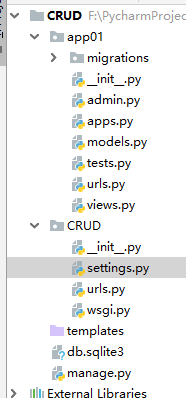
主url

from django.contrib import admin
from django.urls import path,include
from app01 import urls

urlpatterns = [
    path('admin/', admin.site.urls),

    # url分发
    path('api/v1/', include('app01.urls'), name="app01"),

]
url
from django.urls import path,include

from .views import CommentViewSet

urlpatterns = [
    # url分发
    path('comments/',CommentViewSet.as_view()),

]
view
from rest_framework.views import APIView
from rest_framework.response import Response

data = [
        {"markdown": "##vue初认识", "title": "day1 vue学习", "content": "vue初认识"},
        {"markdown": "#vue全家桶", "title": "day2 vue进阶", "content": "vue全家桶"},
        ]


class CommentViewSet(APIView):
    """笔记"""
    def get(self,request):

        return Response(data)

    def post(self,request):
        print(request.data)
        data.append(request.data)
        print(data)
        return Response(data)
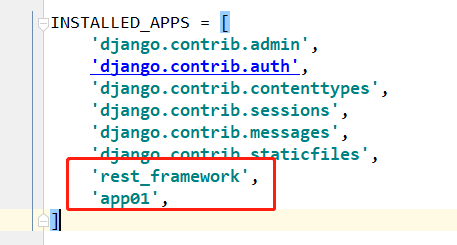
settings
runserver django项目


2、vue项目生成
vue全家桶
vue+vue-route+vuex
1、webpack模板
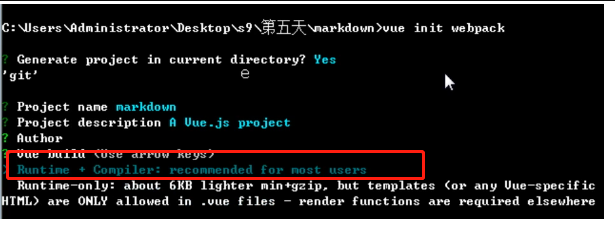
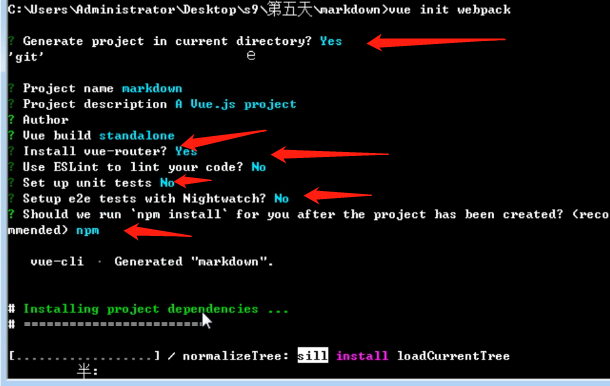
vue init webpack  # 初始化
npm run dev    # 启动

生态系统

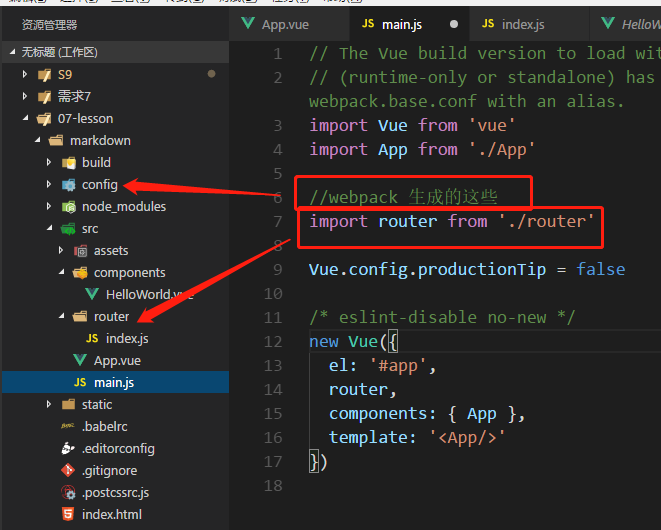
2、目录结构分析
(1)webpack生成这些
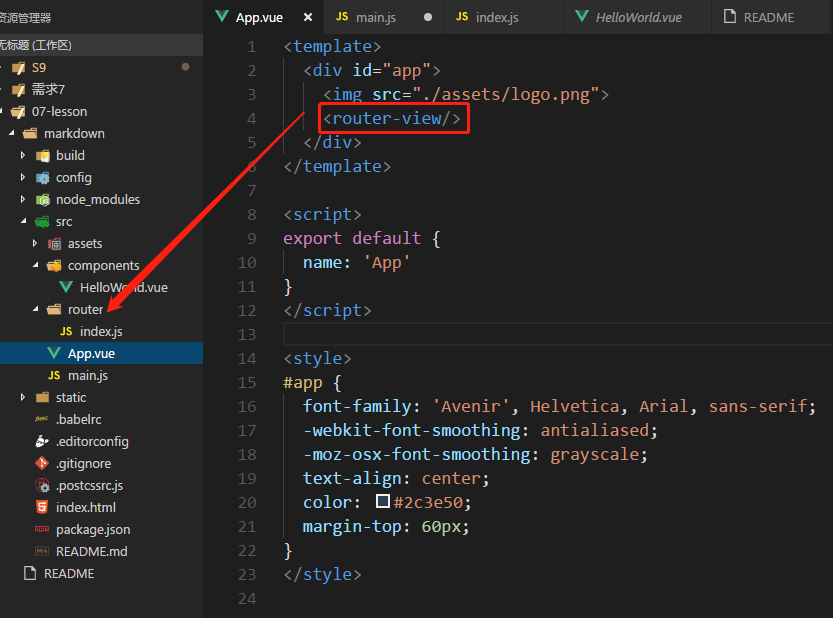
(2)App.vue 显示
router-view怎么理解?
(3)HelloWorld 组件

3、项目实现01
1、组件关系
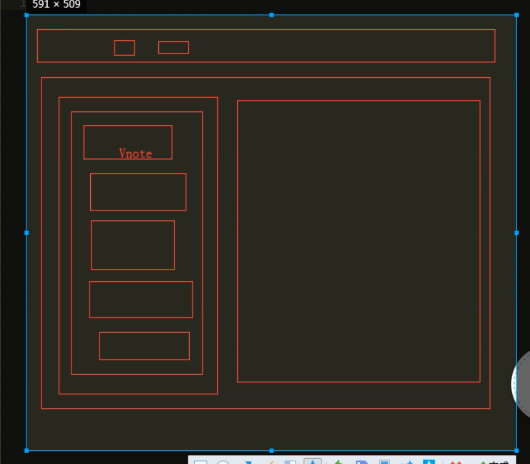
2、Vmain、Vnote
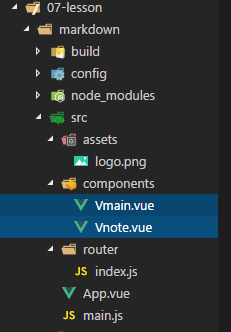
1、Vmain.vue
<template>
    <div class="main">
        主页
    </div>

</template>

<script>
export default {
    name:"Vmain",
    data(){
        return{}
    }
}
</script>

<style scoped>

</style>
Vnote.vue

<template>
    <div class="note">
        笔记
    </div>

</template>

<script>
export default {
    name:"Vnote",
    data(){
        return{}
    }
}
</script>

<style scoped>

</style>
2、router路由绑定子组件
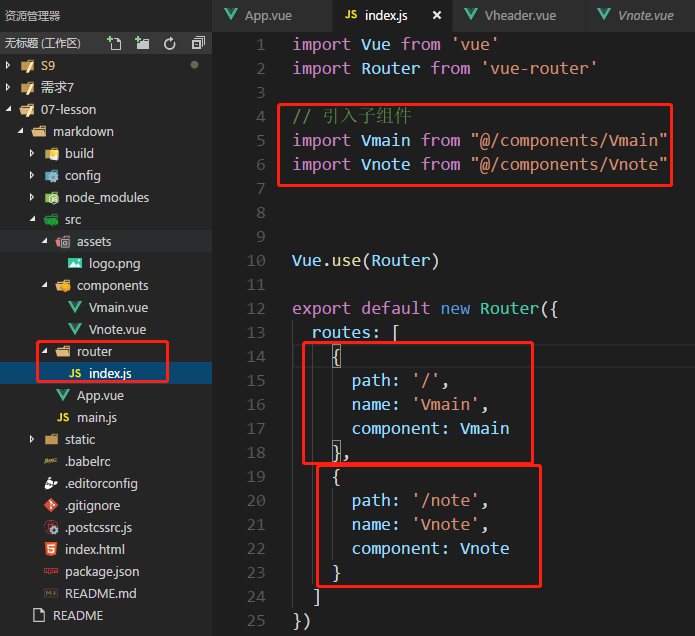
3、App.vue显示
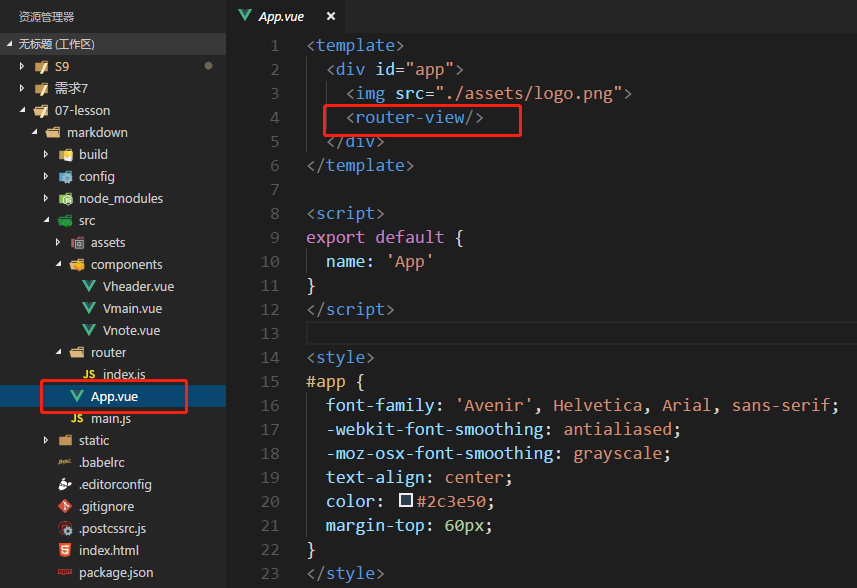
3、如何使用bootstrap?
1、导入bootstrap
(1)npm下载

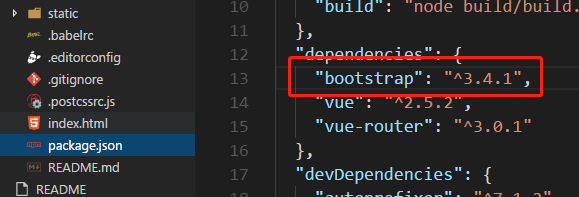
(2)导入
// 1.0 导入bootstrap
import "bootstrap/dist/css/bootstrap.min.css"

(3)引入成功


4、Vheader:使用bootstrap
1、创建Vheader
<template>


</template>

<script>
export default {
    name:"VHeader",
    data(){
        return{}
    }
}
</script>

<style scoped>

</style>
2、在Vheader 放入bootstrap代码
bootstrap官网 https://www.bootcss.com

在Vheader 放入bootstrap代码

3、App.vue使用Vheadr组件

效果图

5、Vheader:路由切换保持状态
(1)版本1:使用组件

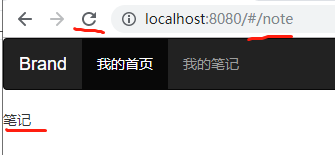
刷新,无法还原
(2)版本2:v-for,active显示
路由切换保持状态
拿路由的path 遍历url;
vue-router 官网 https://router.vuejs.org/zh/

Vheader.vue
<template>

    <nav class="navbar navbar-inverse">
    <div class="container-fluid">
        <!-- Brand and toggle get grouped for better mobile display -->
        <div class="navbar-header">
        </button>
        <a class="navbar-brand" href="#">Brand</a>
        </div>

        <!-- Collect the nav links, forms, and other content for toggling -->
        <div class="collapse navbar-collapse" id="bs-example-navbar-collapse-1">

        <ul class="nav navbar-nav">

            <li v-for='(item,index) in routes' :class="{active:index==currentIndex}" @click='activeHandler(index)'>
                <router-link :to="item.url">{{ item.title }}</router-link>
            </li>

        </ul>

        </div><!-- /.navbar-collapse -->
    </div><!-- /.container-fluid -->
    </nav>

</template>

<script>
    export default {
        name: "VHeader",
        data() {
            return {
            routes: [
                { url: "/", title: "我的首页" },
                { url: "/note", title: "我的笔记" }
            ],
            currentIndex: 0
            };
        },
        methods: {
            activeHandler(index) {
            this.currentIndex = index;
            }
        },
        created(){
            console.log(11111111)
            console.log(this.$route)

            // 刷新可以返回到首页
            for(var i=0; i<this.routes.length; i++){
                if(this.routes[i].url == this.$route.path){
                    this.currentIndex = i;
                    return;
                }
            }
        }
        };
</script>

<style scoped>
</style>
4、项目实现02
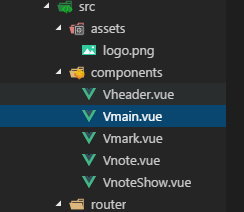
1、我的首页:Vmian


<template>

    <div class="container">
        <div class="row">
            <div class="col-md-12">

                <!-- bootstrap 带标题的面板 -->
                <div class="panel panel-default">
                <div class="panel-heading">
                    <h3 class="panel-title">我的笔记列表</h3>
                </div>
                <div class="panel-body">
                    <ul>
                        <li><a href="#">我的笔记</a></li>
                        <li><a href="#">我的博客</a></li>
                        <li><a href="#">我的公司信息</a></li>
                    </ul>
                </div>
                </div>

            </div>

        </div>
    </div>


</template>

<script>
export default {
    name:"Vmain",
    data(){
        return{}
    }
}
</script>

<style scoped>

</style>
2、我的笔记:Vnote=VnoteShow+Vmark
1、组件关系


2、markdwon
Vmark.vue
<template>
    <div class='wrap'>
        <div class="mark">

            <textarea rows="10" cols="100" class='editor' v-model='markValue'></textarea>

            <div class='show' v-html='currentValue'></div>

        </div>
    </div>
</template>

<script>
import Marked from "marked";
export default {
  name: "Vmark",
  data() {
    return {
      markValue: ""
    };
  },
  methods: {},
  computed: {
    currentValue() {
      return Marked(this.markValue);
    }
  }
};
</script>

<style>

.mark {
  width: 800px;
  height: 400px;
  margin: 0 auto;
}
.editor,.show {
  float: left;
  width: 395px;
  height: 400px;
  border: 1px solid #666;
}
</style>
npm install marked --save

VnoteShow.vue
<template>
    <div class="note">
        笔记
    </div>

</template>

<script>
export default {
    name:"Vnote",
    data(){
        return{}
    }
}
</script>

<style scoped>

</style>
Vnote.vue
<template>

    <div class="container">
        <div class="row">
            <div class="col-md-3">

                <div class="panel panel-default">
                    <div class="panel-heading">我的笔记列表</div>
                    <div class="panel-body">

                        <!-- 笔记列表 -->
                        <VnoteShow></VnoteShow>

                    </div>
                </div>

            </div>

            <div class="col-md-9">
                <div class="panel panel-default">

                    <div class="panel-heading">
                        请输入文字标题: <input type="text">
                    </div>

                    <div class="panel-body">

                        <!-- markdown -->
                        <Vmark></Vmark>

                    </div>

                </div>

            </div>

        </div>
    </div>


</template>

<script>
// 1导入
import Vmark from "./Vmark"
import VnoteShow from "./VnoteShow"

export default {
    name:"Vnote",
    data(){
        return{}
    },
    components:{
        // 2挂载
        Vmark,
        VnoteShow,
    }
}
</script>

<style scoped>

</style>

3、笔记详情页:VnoteShow=VnoteLIst+VnoteItem
1、组件关系图


2、三个组件
VnoteShow.vue
<template>
    <div class="note">

        <VnoteList></VnoteList>

    </div>

</template>

<script>
    import VnoteList from "./VnoteList"
    export default {
        name:"VnoteShow",
        data(){
            return{}
        },
        components:{
            VnoteList,
        }
    }
</script>

<style scoped>

</style>
VnoteList.vue
<template>
    <ul>
        <VnoteItem></VnoteItem>
    </ul>

</template>

<script>
    import VnoteItem from "./VnoteItem"
    export default {
        name:"VnoteList",
        data(){
            return{}
        },
        components:{
            VnoteItem,
        }
    }
</script>

<style scoped>

</style>
VnoteItem.vue
<template>
    <li>
        <h2>我的笔记标题</h2>
        <p>笔记内容</p>
    </li>

</template>

<script>
export default {
    name:"VnoteItem",
    data(){
        return{}
    }
}
</script>

<style scoped>

</style>

