01_3大配置管理工具、SaltStack安装、修改minion_id
1.配置管理
1.1 puppet
- /'pʌpɪt/ 木偶;傀儡;受他人操纵的人

使用自有的puppet描述语言,可管理配置文件、用户、cron任务、软件包、系统服务等。
问题:
学习曲线非常陡峭
centos上装个puppet,Ruby环境让人头大
puppet没有远程执行功能(执行100台服务器命令),只能借助Func第三方工具
Func烂,真烂,难用。
1.2 Ansible

1. 优点:
出名原因,被红帽收购,redhat所有东西会附属ansible的自动化部署
轻量级,容易使用,不需要装agent, (salt 需要装minion,也可以不用装,直接使用ssh)
python开发
2.缺点:
没有agent,大规模环境下,通过ssh(串行,10个10个跑)会很慢,(salt是并行的)
3.国内趋势
Ansible + SaltStack(主)
Ansible 200台机器 并发50 CPU负载80 不停报错
2000台就是噩梦
1.3 SaltStack

强化版的FUNC (远程执行),弱化版的Puppet
1. 传统方法:
1万台服务器
ssh循环登陆节点列表并执行一堆命令
容易出错,效率低下,网络安全,ssh密钥和命令执行权限
2. 来源
作者住在,salt盐湖城
各种stack很火,openstack
3. 四大功能
       (1)远程执行 Remote Execution
      1w台机器同时执行命令

       (2)配置(状态)管理 Configuration Managemet
      修改配置文件,重新load,怎么干,装什么服务

      (3)事件驱动 Event-Driven Infrastructure
      epoll 被动的,监听描述符,我centos挂了,事件发到队列,salt执行某些操作

       (4)云管理 Salt Cloud
      管理所有的公有云和私有云,不用学习各种云的API,salt已经封装好了
4.所有东西可以定制
描述语言,模板语言,web,所有centos执行命令,自己写状态写脚本,官方东西太多了,api
5. 组件 SaltStack Components
 Salt Master
 Salt Minions
    为什么叫奴才?
       认证的机制:  地主同意,奴才才能来地主家干活
            奴才认你为地主,你才是地主

Execution Modules  执行模块
Formulas (States)   状态
.....
2.saltstack安装
安装官网:https://repo.saltstack.com
master端 192.168.194.131
minion端 192.168.194.132
2.1 安装centos,初始化
1.关闭SELinux,iptables。
关闭Linux中的iptables,firewalld,SELINUX https://blog.csdn.net/zha6476003/article/details/89425811
注:生成环境需要iptables开启 master端4505、4506端口,
#关闭firewalld,禁止开机启动
[root@VM_0_13_centos var]# systemctl stop firewalld
[root@VM_0_13_centos var]# systemctl disable firewalld.service

#关闭iptables
[root@VM_0_13_centos var]# systemctl stop iptables
2.修改网卡配置,去掉UUID MAC等(克隆机器问题)
解决CentOS克隆虚拟机无法上网问题(UUID、MAC、IP)https://blog.csdn.net/qq_35428201/article/details/81435679
重新生成网卡
https://blog.csdn.net/weixin_42291597/article/details/83690681
[root@linux-node1 network-scripts]# cat /etc/sysconfig/network-scripts/ifcfg-ens33

[root@linux-node2 ~]# vim /etc/sysconfig/network-scripts/ifcfg-ens33
删除或注释HWADDR和UUID两行内容,修改IP
3.配置hostname,配置hosts
为什么需要修改hostname?
其实需要在hosts里面配置,然后根据dns服务器查找 minion,可以更快的找到
根据域名链接,更快更好
[root@localhost ~]# hostname linux-node1.example.com
[root@localhost ~]# hostname linux-node2.example.com

[root@localhost ~]# cat /etc/sysconfig/network   # 重启后生效
# Created by anaconda
NETWORKING=yes
HOSTNAME=linux-node1.example.com

[root@localhost ~]# cat /etc/sysconfig/network   # 重启后生效
# Created by anaconda
NETWORKING=yes
HOSTNAME=linux-node2.example.com
[root@localhost ~]# cat /etc/hosts
127.0.0.1 localhost localhost.localdomain localhost4 localhost4.localdomain4
::1 localhost localhost.localdomain localhost6 localhost6.localdomain6
192.168.194.131 linux-node1.example.com linux-node1
192.168.194.132 linux-node2.example.com linux-node2
2.2、安装不同版本
https://repo.saltstack.com/2018.3.html#rhel
测试环境 python3+ centos7 + salt 2019.2.1
https://mirrors.aliyun.com/saltstack/2019.2.html#rhel
具体直接下载,该版本对应的repo
2.2 安装Repo,salt
why?
redhat Python 3 support requires that EPEL be previously installed
1、安装repo (SaltStack repository and key) (有待商榷,请看上面)
方法1:
[root@localhost ~]# yum install https://repo.saltstack.com/py3/redhat/salt-ppy3-repo-latest.el7.noarch.rpm
方法2:aliyun镜像 https://mirrors.aliyun.com
[root@localhost ~]# cd /etc/yum.repos.d/
[root@localhost yum.repos.d]# wget https://mirrors.aliyun.com/repo/epel-7.repo
方法3:安装2019版本
[root@host-192-168-23-22 yum-root-MoFHI0]# cat /etc/yum.repos.d/saltstack.repo
[saltstack-repo]
name=SaltStack repo for RHEL/CentOS $releasever
baseurl=https://repo.saltstack.com/yum/redhat/$releasever/$basearch/latest
enabled=1
gpgcheck=0
作业:
cobbler同步它们的yum仓库到自己的电脑?
saltstack有自己的yum源 https://repo.saltstack.com
zabbix有自己的yum源 https://repo.zabbix.com
2.更新缓存
[root@localhost ~]# yum clean expire-cache
3.安装salt
master端
[root@localhost ~]# yum install salt-master -y
[root@localhost ~]# yum install salt-minion -y
minion端
[root@localhost ~]# yum install salt-minion -y

4.启动salt-master
只在,master端
[root@localhost ~]# systemctl restart salt-master
3. 运行Salt
1.启动minion
(1)minion配置文件
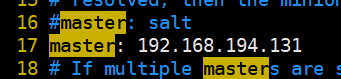
[root@localhost ~]# vim /etc/salt/minion
配置master的ip
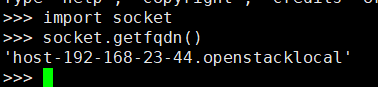
配置id
id:默认通过python的方法socket.getfqdn()去获取fqdn名。所以要求设置好主机名并能解析。也可以使用IP地址,看业务需求。
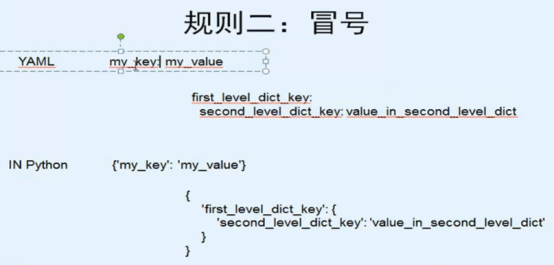
冒号有空格
多一个空格都报错

(2)启动minion
[root@localhost ~]# systemctl restart salt-minion
2. 公钥管理
可以直接在master配置文件,打开auto_accept开关,如果minion比较多的话
1. 如何认证的?
认证机制
已经告诉minion了,master是谁
现在需要master同意接受minion
安全问题
通信之前进行认证,公钥私钥(类同与ssh认证)

(1)查看状态
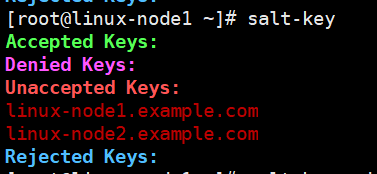
[root@linux-node1 ~]# salt-key --help
-a   ACCEPT  # 支持通配符
-A  --accept-all
(2)接受minion
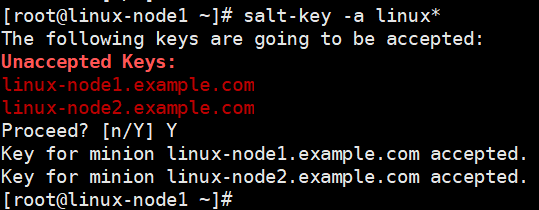
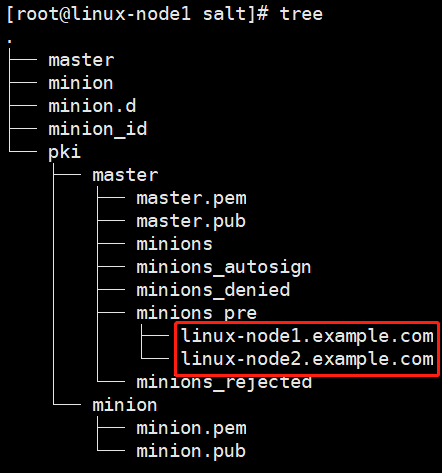
(3)公钥交互的过程
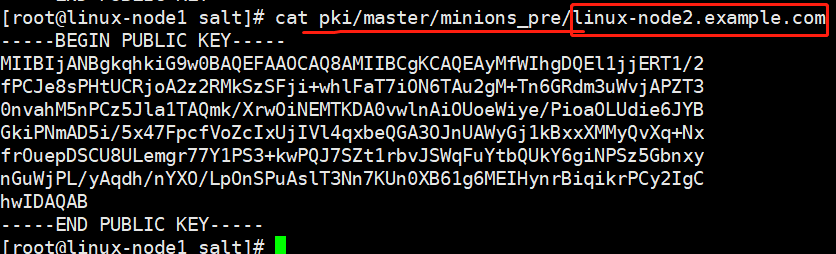
master端,把能控制的主机放在minion
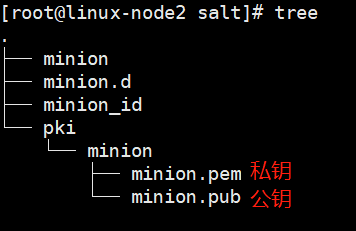
minion端,得到master的公钥
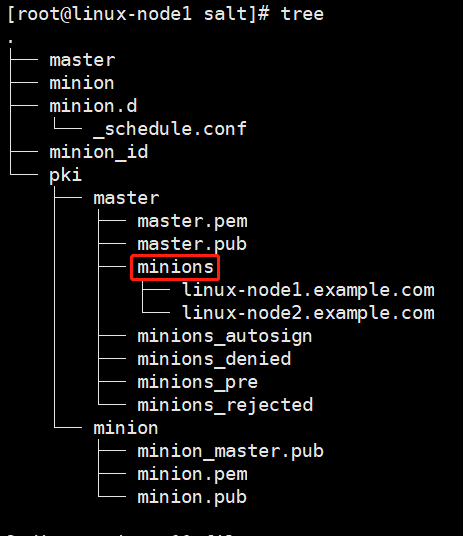
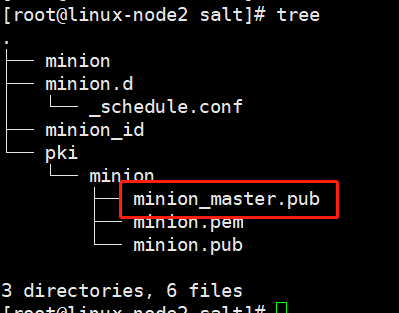
AES加密的
高级加密标准(英语:Advanced Encryption Standard,缩写:AES),在密码学中又称Rijndael加密法,是美国联邦政府采用的一种区块加密标准。
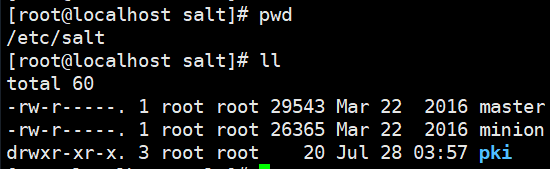
2.1 minion_id的生成过程
https://my.oschina.net/u/877567/blog/199136

2.2 如何修改id
1.停止minion
2.master端 salt-key -d 删除id
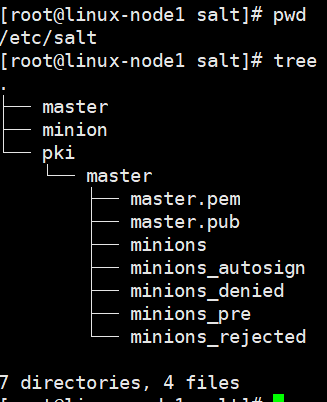
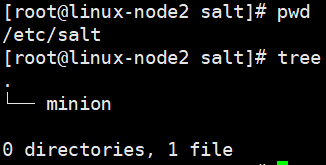
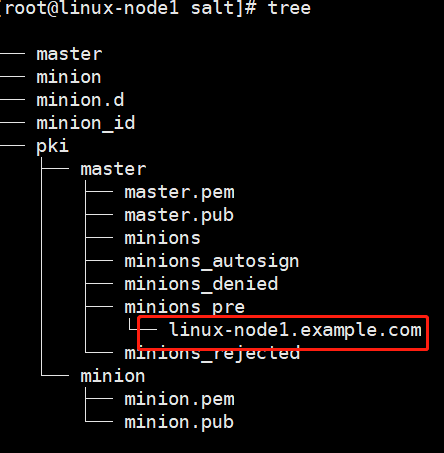
3.minion删除pki (实质删除 rm -rf pki/minion)
4. 删除minion_id
5. 修改minion的id,再启动,再在salt-master操作
需求:
多个匹配时候,如何以ip进行匹配,执行salt命令
根据的是 id 进行匹配的
现在将id的值由hostname改为ip地址
操作
# 1.停止minion
[root@host-192-168-23-44 salt]# pwd
/etc/salt
[root@host-192-168-23-44 salt]# systemctl stop salt-minion

# 2.master删除minion
[root@host-192-168-23-39 ]# salt-key -d host-192-168-23-44*

# 3.minion删除pki、缓存的minion_id
[root@host-192-168-23-44 salt]# rm -rf pki/     # 实质删除 rm -rf pki/minion
[root@host-192-168-23-44 salt]# rm -rf minion_id

# 4.minion修改id
[root@host-192-168-23-44 salt]# vim /etc/salt/minion

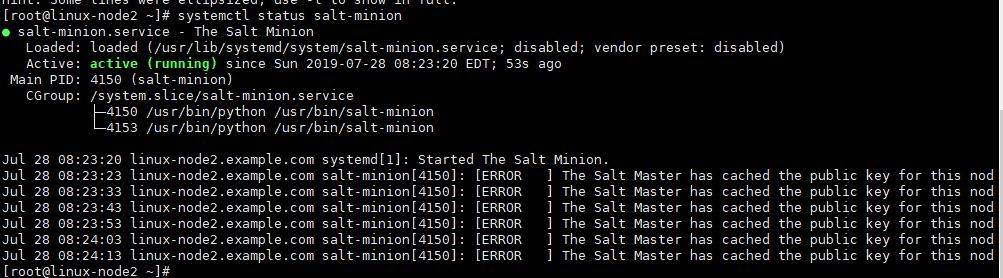
# 5.重启minion,在master重新操作
 [root@host-192-168-23-44 salt]# systemctl restart salt-minion
[root@host-192-168-23-44 salt]# systemctl status salt-minion -l
3.远程执行
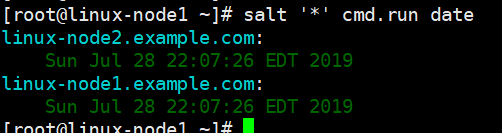
salt 命令
*是通配符,转义了就行
[root@linux-node1 ~]# salt '*' test.ping
[root@linux-node1 ~]# salt \* test.ping
[root@linux-node1 ~]# salt "*" test.ping
* 匹配了所有了目标
test 模块
ping 模块的方法
ssh中Ping是ICMP
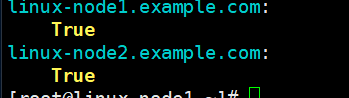
这里的ping,是master给minion发了一个包,能收到返回True
‘uptime’ 方法的参数
[root@linux-node1 ~]# salt '*' cmd.run 'uptime'
linux-node1.example.com:
     11:07:37 up  1:01,  1 user,  load average: 0.01, 0.04, 0.05
linux-node2.example.com:
     11:07:37 up  1:01,  1 user,  load average: 0.00, 0.01, 0.05
[root@linux-node1 ~]# salt '*' cmd.run 'free -m'
linux-node2.example.com:
                  total        used        free      shared  buff/cache   available
    Mem:            972         129         453           7         389         651
    Swap:          2047           0        2047
linux-node1.example.com:
                  total        used        free      shared  buff/cache   available
    Mem:            972         288         289           7         394         488
4.通信机制
(1)端口开放
minion不需要监听端口,minion只需要连到master上。
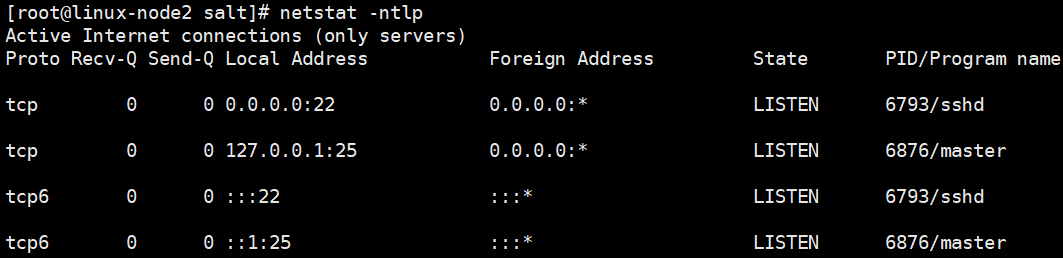
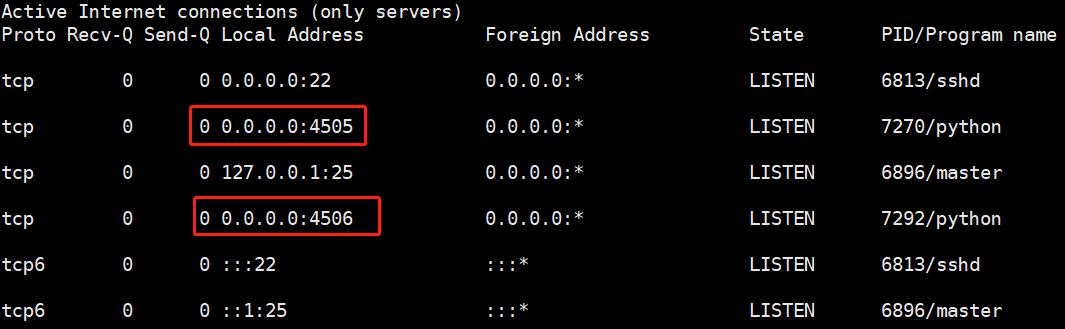
master端:4505,4506。
(2)ZeroMQ http://zeromq.org
官方文档:https://docs.saltstack.com/en/latest/topics/development/topology.html
底层通信利用了ZeroMQ
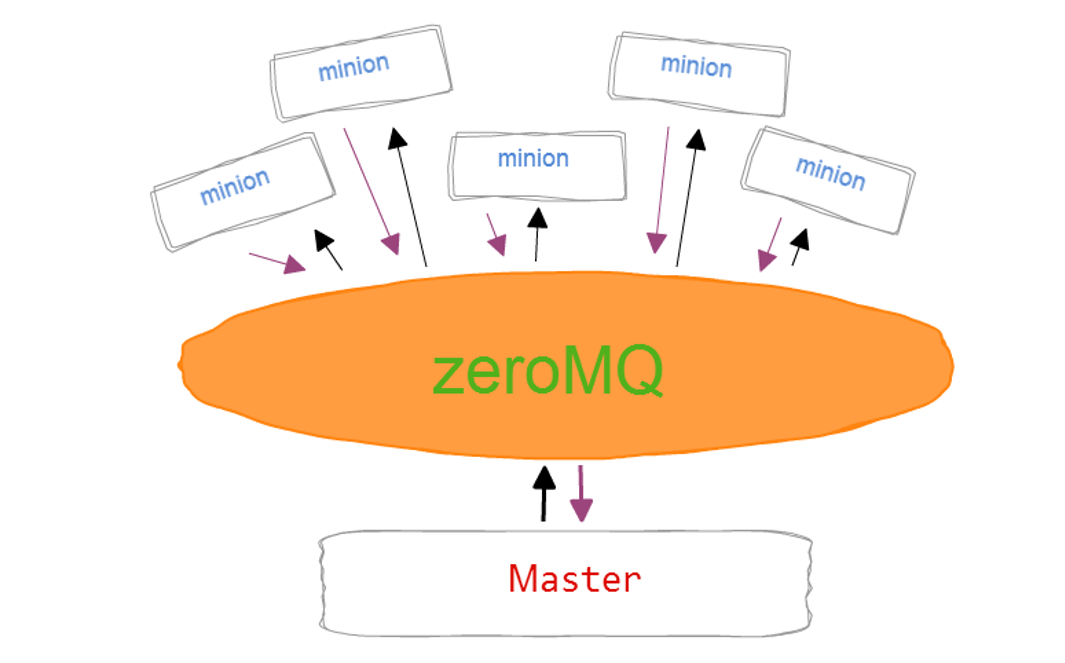
(1)发送与订阅 (订报纸,并行)
所有minion会连接到4505,发送命令。所有主机同时执行,同时返回

(2)4506接受返回,请求与相应。
5. 配置管理
https://docs.saltstack.com/en/latest/topics/yaml/index.html
1.YAML语法
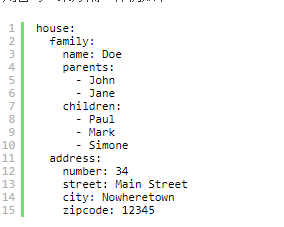
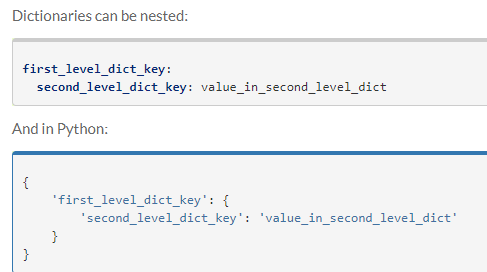
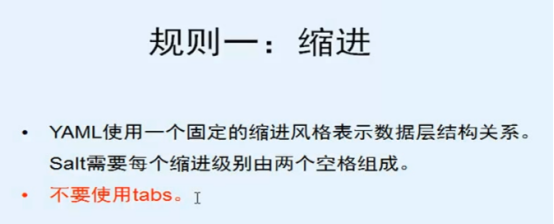
语法规则:3个基本规则
缩进2个空格
冒号后面必有空格:除了路径与结尾
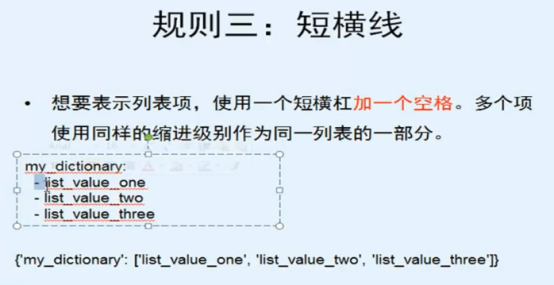
短横线后1个空格
2. 状态配置文件放哪?
[root@host-192-168-23-39 master]# vim /etc/salt/master
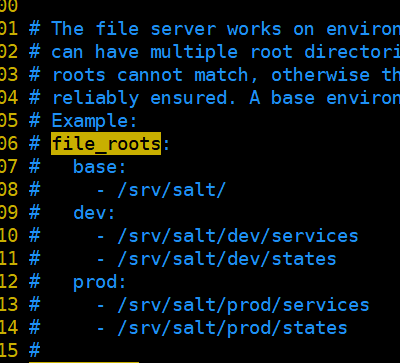
# base # test测试环境 # 开发环境
3. 配置master
[root@host-192-168-23-39 master]# vim /etc/salt/master
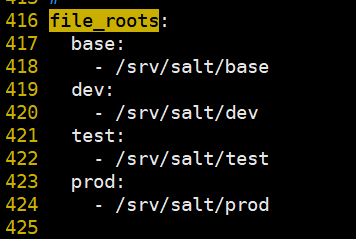
[root@linux-node1 ~]# mkdir -p /srv/salt/{base,dev,test,prod}
[root@linux-node1 ~]# tree /srv/salt/
/srv/salt/
├── base
├── dev
├── prod
└── test
# 每次修改master配置文件必须重启master
[root@linux-node1 ~]# systemctl restart salt-master
4. 配置Apache的sls
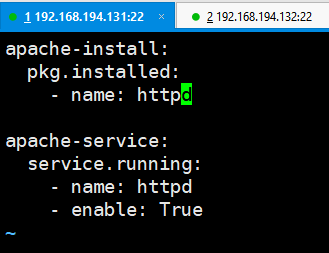
[root@linux-node1 base]# tree
.
└── web
    └── apache.sls

1 directory, 1 file
[root@linux-node1 base]# cd web/
[root@linux-node1 web]# cat apache.sls
apache-install:
  pkg.installed:
    - name: httpd

apache-service:
  service.running:
    - name: httpd
    - enable: True
远程执行模块,配置管理模块
apache-install:
  pkg.installed:  # 不同系统,包安装命令
    - name: httpd

apache-service:         # id,不能重复
  service.running:      # 状态模块:方法
    - name: httpd        #参数  # name包的名称:
    - enable: True                 # enable 开机启动:
5. 执行命令
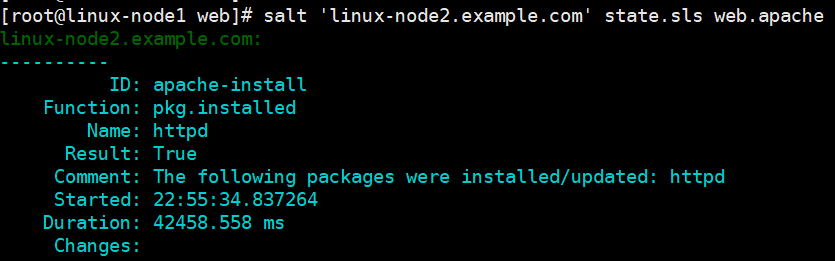
[root@linux-node1 web]# salt 'linux-node2.example.com' state.sls web.apache saltenv=prod

[root@linux-node1 web]# salt 'linux-node2.example.com' state.sls web.apache
# 默认在base环境下
# 对应 apache.sls中的各个参数
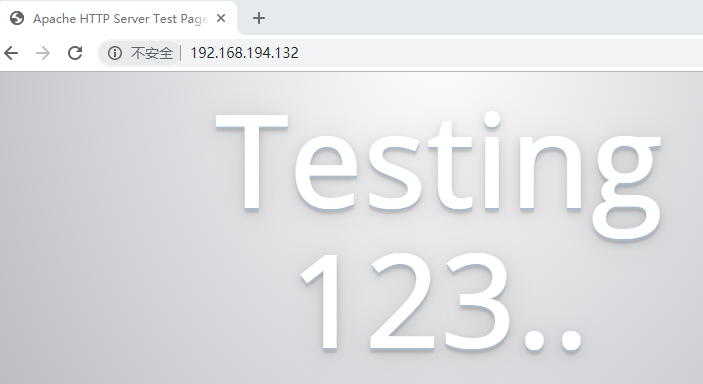
test下,http服务已经安装,启动了
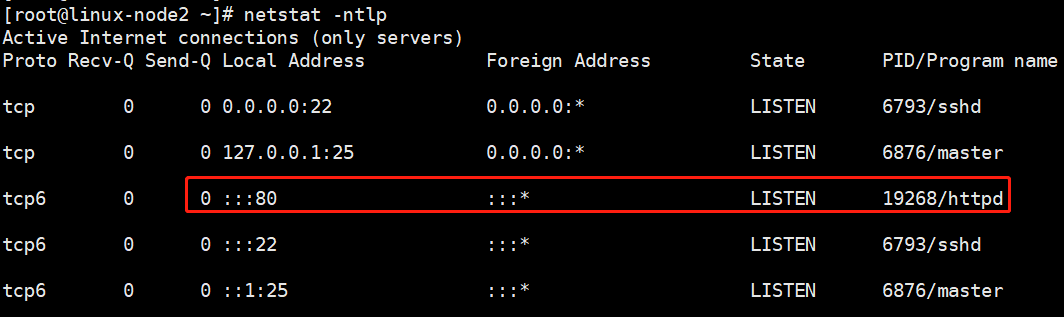
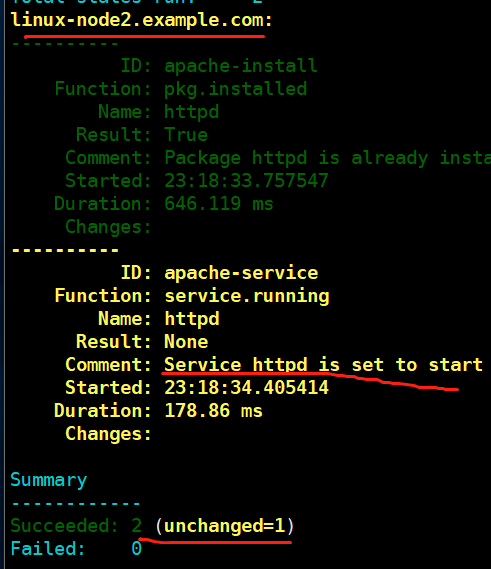
minion关闭httpd,在来一遍
[root@linux-node2 ~]# systemctl stop httpd
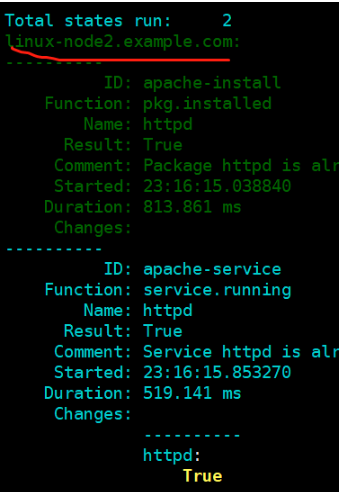
[root@linux-node1 web]# salt 'linux-node2.example.com' state.sls web.apache


linux-node2.example.com:
----------
          ID: apache-install
    Function: pkg.installed
        Name: httpd
      Result: True
     Comment: Package httpd is already installed.
     Started: 23:00:32.264555
    Duration: 627.531 ms
     Changes:
----------
          ID: apache-service
    Function: service.running
        Name: httpd
      Result: True
     Comment: Service httpd is already enabled, and is running
     Started: 23:00:32.892558
    Duration: 413.061 ms
     Changes:
              ----------
              httpd:
                  True

Summary
------------
Succeeded: 2 (changed=1)
Failed:    0
------------
Total states run:     2
6. 高级配置 top.sls
上述都是不自动化的,自动化是:我说干活,你们就干活
(1)top.file # 默认在base环境下
[root@linux-node1 ~]# vim /etc/salt/master

(2)编写top.sls
[root@linux-node1 base]# pwd
/srv/salt/base
[root@linux-node1 base]# cat top.sls
base:
  '*':
    - web.apache
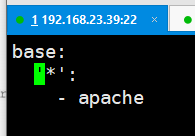
base:     # 环境
  '*':      # 所有节点执行这个状态
    - web.apache   # 执行web目录下的apache.sls
(3)执行命令,高级状态 highstate
[root@linux-node1 base]# salt '*' state.highstate
* 通知谁,所有主机干活,在所有节点上执行这个highstate
topfile里面*是指定哪些主机节点干活。

(4)test
100台机器,先在1个上面跑一下,再在其他上面跑
[root@linux-node1 base]# salt '*' state.highstate test=True # 不是真的执行,如何执行的话,会发生什么
先关闭node2的 httpd
4. 总结
1.出现问题
Question1:
只有一个秘钥
只出现一个主机
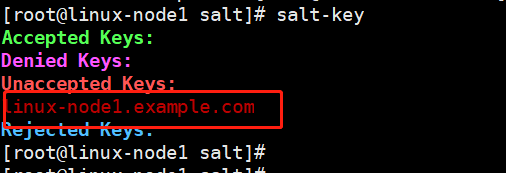
解决方法: 其他机器的minion配置文件有错误,注意空格,冒号
Question2:
[root@linux-node1 ~]# systemctl status salt-minion
Jul 28 05:52:10 linux-node1.example.com salt-minion[9702]: [ERROR   ] The Salt Master has cached the public key for this node, this salt minion will wait for 10 seconds before attempting to re-authenticate

salt master已缓存此节点的公钥,此salt minion将等待10秒,然后再尝试重新验证。
网上参考:
https://www.cnblogs.com/phennry/p/5419451.html
https://www.cnblogs.com/phennry/p/5419451.html
https://blog.csdn.net/xiegh2014/article/details/53114257
https://blog.51cto.com/molewan/2060851
解决办法:
请务必关闭selinux和iptables
2. 小提醒
知识获取廉价,文档获取廉价,你抄我我抄你
我的时间很贵
培训的价值,用更短的时间学会这个东西

 浙公网安备 33010602011771号