WSS学习笔记(3) – 在“用户控件”中使用SPGridView
SPGridView是从GridView继承下来的,所以也可以在用户控件中使用它。
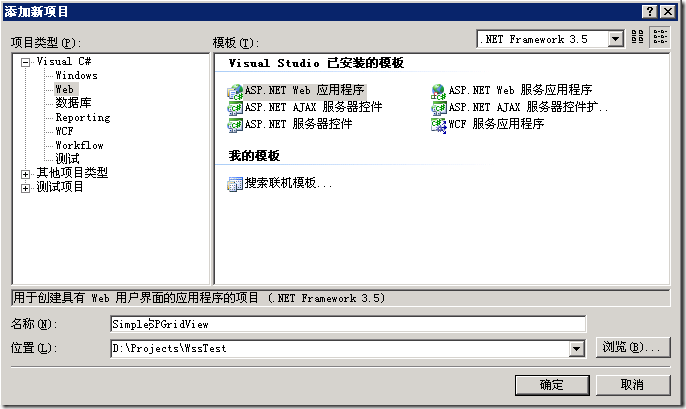
1、创建类库 SimpleSPGridView
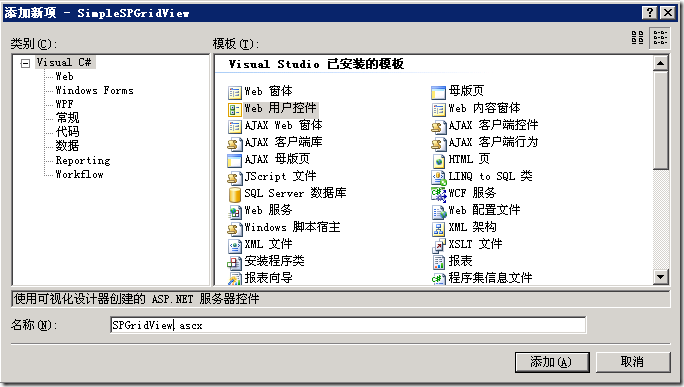
2、创建用户控件 SPGridView.ascx
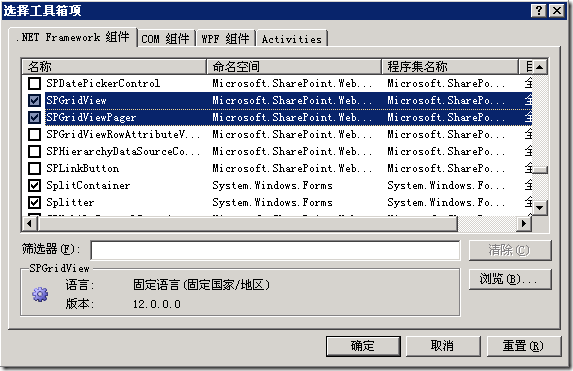
3、在工具栏中添加 SPGridView 和 SPGridViewPager 并拖到ascx页面中。
4、SPGridView是不支持自动生成数据列的,将 SPGridView 的 AutoGenerateColumns 设置为 False ,将 SPGridViewPager 的 GridViewId 指向 SPGridView,并添加 ClickNext 事件
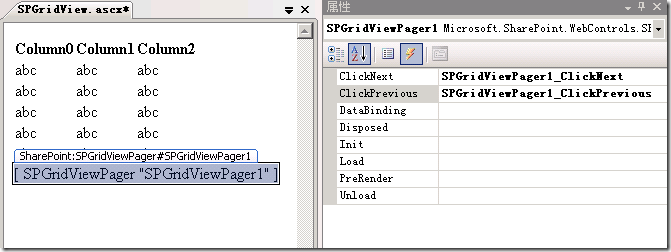
5、
ASCX页面:
<%@ Control Language="C#" AutoEventWireup="true" CodeBehind="SPGridView.ascx.cs"
    Inherits="SimpleSPGridView.SPGridView" %>
<%@ Register Assembly="Microsoft.SharePoint, Version=12.0.0.0, Culture=neutral, PublicKeyToken=71e9bce111e9429c"
    Namespace="Microsoft.SharePoint.WebControls" TagPrefix="SharePoint" %>
<SharePoint:SPGridView ID="SPGridView1" runat="server" AutoGenerateColumns="False">
</SharePoint:SPGridView>
<SharePoint:SPGridViewPager ID="SPGridViewPager1" runat="server" GridViewId="SPGridView1"
    OnClickNext="SPGridViewPager1_ClickNext" OnClickPrevious="SPGridViewPager1_ClickPrevious">
</SharePoint:SPGridViewPager>
CS代码:
using System;
using System.Collections;
using System.Configuration;
using System.Data;
using System.Web;
using System.Web.Security;
using System.Web.UI;
using System.Web.UI.HtmlControls;
using System.Web.UI.WebControls;
using System.Web.UI.WebControls.WebParts;

using Microsoft.SharePoint;
using Microsoft.SharePoint.WebControls;

namespace SimpleSPGridView
{
    public partial class SPGridView : System.Web.UI.UserControl
    {
        protected void Page_Load(object sender, EventArgs e)
        {
            SPDataSource ds = new SPDataSource();
            ds.ID = "SimpleDataSource";
            Controls.Add(ds);

            SPWeb web = SPControl.GetContextWeb(Context);
            SPList list = web.Lists["SimpleList"];
            ds.List = list;

            SPGridView1.AutoGenerateColumns = false;
            SPGridView1.EnableViewState = false;

            //添加字段
            SPBoundField col = new SPBoundField();
            col.DataField = "ColID";
            col.SortExpression = "ColID";
            col.HeaderText = "ColID";
            SPGridView1.Columns.Add(col);

            col = new SPBoundField();
            col.DataField = "ColName";
            col.SortExpression = "ColName";
            col.HeaderText = "ColName";
            SPGridView1.Columns.Add(col);

            col = new SPBoundField();
            col.DataField = "ColDate";
            col.SortExpression = "ColDate";
            col.HeaderText = "ColDate";
            SPGridView1.Columns.Add(col);

            SPGridView1.AllowPaging = true;
            SPGridView1.AllowSorting = true;

            //设置分组
            SPGridView1.AllowGrouping = true;
            SPGridView1.AllowGroupCollapse = true;
            SPGridView1.GroupField = "ColName";
            SPGridView1.GroupFieldDisplayName = "分组";

            //绑定数据源
            SPGridView1.PageSize = 3;
            SPGridView1.DataSourceID = "SimpleDataSource";
            SPGridView1.DataBind();
        }

        protected void SPGridViewPager1_ClickNext(object sender, EventArgs e)
        {
            SPGridView1.DataSourceID = "SimpleDataSource";
            SPGridView1.DataBind();
        }

        protected void SPGridViewPager1_ClickPrevious(object sender, EventArgs e)
        {

        }

    }
}
用户控件创建完成,现在创建一个测试列表 SimpleList
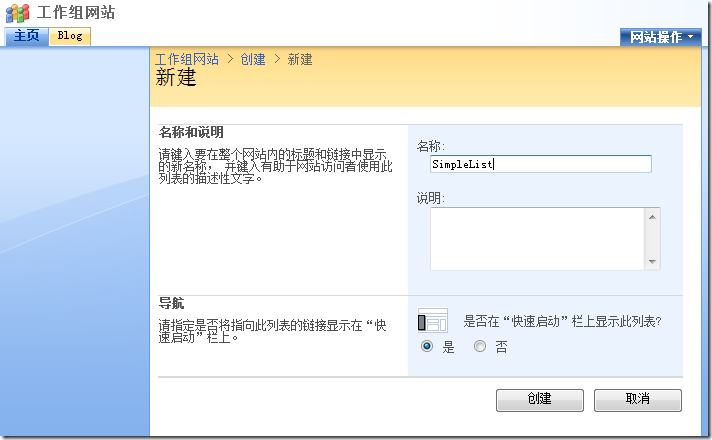
1、新建自定义列表
2、添加三个栏
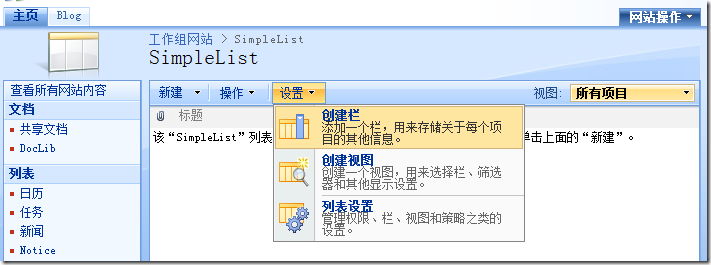
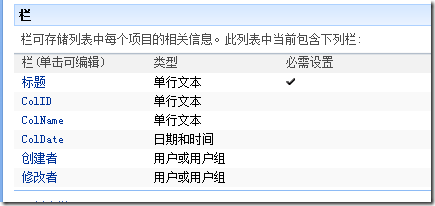
ColID 单行文本
ColName 单行文本
ColDate 日期和时间
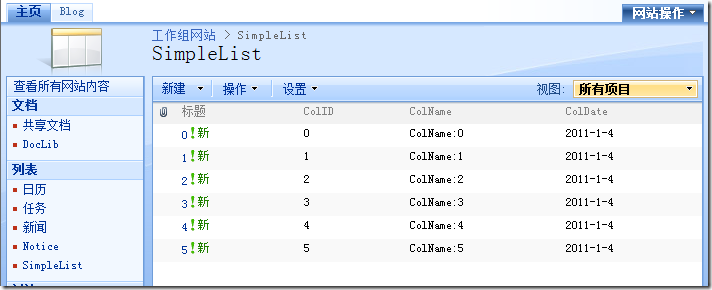
3、创建一些测试数据
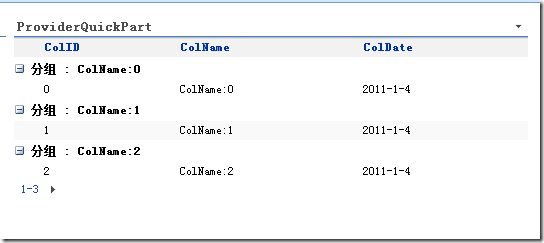
按照上一节中的方法,用QuickPart部署该用户控件,结果显示如下图:
Vengen
2011-01-04


 浙公网安备 33010602011771号