

1、使用vite创建项目
// 执行下面命令
yarn create vite

1、输入项目名称
2、选择项目框架(vanilla表示js原生项目,vue, react分别代表各自的框架)
2、使用vite构建vue2项目
vite自带的vue版本是vue3版本,那么需要创建vue2版本就需要依赖手动配置,需要用到的依赖如下图

具体的流程可以参看相关的github仓库
3、vite常规的配置
在vue中配置jsx配置
import { defineConfig } from 'vite'
import vue from '@vitejs/plugin-vue'
import vueJsx from '@vitejs/plugin-vue-jsx' // 使用jsx  yarn add @vitejs/plugin-vue-jsx

// https://vitejs.dev/config/
export default defineConfig({
  plugins: [vue(), vueJsx()],
})
注意:以上是vue3项目的建立,如果需要进行vue2项目的建立 ,可以在vanilla的选项上,再使用 (Vue 2 支持:underfin/vite-plugin-vue2)如vue3的项目进行配置,但是vue2需要手动安装
在vite中配置路径别名
import { defineConfig } from 'vite'
import vue from '@vitejs/plugin-vue'
import vueJsx from '@vitejs/plugin-vue-jsx' // 使用jsx

// https://vitejs.dev/config/
export default defineConfig({
  plugins: [vue(), vueJsx()],
  resolve: {
    alias: {
      '@styles': '/src/styles', // 表示 @styles定位到了根目录下的src/styles目录下
      '@app': '/src',  // 配置全局的应用目录
    },
  },
})
注意:使用上述方法进行路径别名配置的时候,但是在vscode中的ts还是会报错,这时就需要进行以下的配置
{
  "compilerOptions": {
    ...
    "paths": {
      "@app": ["./src"],
      "@app/*": ["./src/*"],
      "@style": ["./src/styles"],
      "@style/*": ["./src/styles/*"]
    }
  },
  "include": ["src/**/*.ts", "src/**/*.d.ts", "src/**/*.tsx", "src/**/*.vue"],
  "references": [{ "path": "./tsconfig.node.json" }]
}
引用举例
import { defineComponent } from 'vue'
import test from '@styles/test.module.less'

export default defineComponent({
  setup() {
    return () => <div class={test.container} onClick={() => console.log('test')}>this is App</div>
  },
})
如果需要添加css的预处理器
# .scss and .sass
npm install -D sass

# .less
npm install -D less

# .styl and .stylus
npm install -D stylus
vite中配置typescript使用
在vite的普通项目中配置typescript需要做如下工作
// 步骤1
yarn add typescript -D

// 步骤2 生成typescript配置
tsc --init

// 步骤3
在tsconfig.json中添加下面配置

"compilerOptions": {
  ...
  "isolatedModules": true,
}

// 步骤4,在build的时候在package.json中添加下面配置

"build": "vue-tsc --noEmit && vite build", (vue项目)
"build": "tsc --noEmit && vite build" (普通项目)
Glob 导入
Vite 支持使用特殊的 import.meta.glob 函数从文件系统导入多个模块
const modules = import.meta.glob('./dir/*.js')
注意:如果在自搭建的vite普通项目中没有import.meta的类型提示就需要在ts.config.json中添加如下配置
{
  "compilerOptions": {
    ...
    "types": ["vite/client"],
    }
  },
}
vite静态资源的导入
-
将资源引入为 URL
import imgUrl from './img.png'
document.getElementById('hero-img').src = imgUrl
-
显式 URL 引入(得到的是该文件的路径)
import workletURL from 'extra-scalloped-border/worklet.js?url'
CSS.paintWorklet.addModule(workletURL)
-
将资源引入为字符串(读取文件里的内容进行引入)
import shaderString from './shader.glsl?raw'
-
导入脚本作为 Worker(即相当于开启一个新的进程进行处理)
# 定义一个worker.ts文件
let num: number = 0

export const timeoutCount = (): void => {
  num += 1
  postMessage(num)  // 向进程派送信息
  setTimeout(timeoutCount, 1000)
}

timeoutCount()

#以worker的形式引用

import { defineComponent } from 'vue'
import test from '@styles/test.module.less'
import Worker from './lib/post?worker'

export default defineComponent({
  setup() {
    return () => (
      <div class={test.container}>
        this is App{' '}
        <button
          onClick={() => {
            const w = new Worker()
            w.onmessage = (e) => {  // 监听派送出来的信息
              console.log(e)
            }
          }}
        >
          button
        </button>
      </div>
    )
  },
})
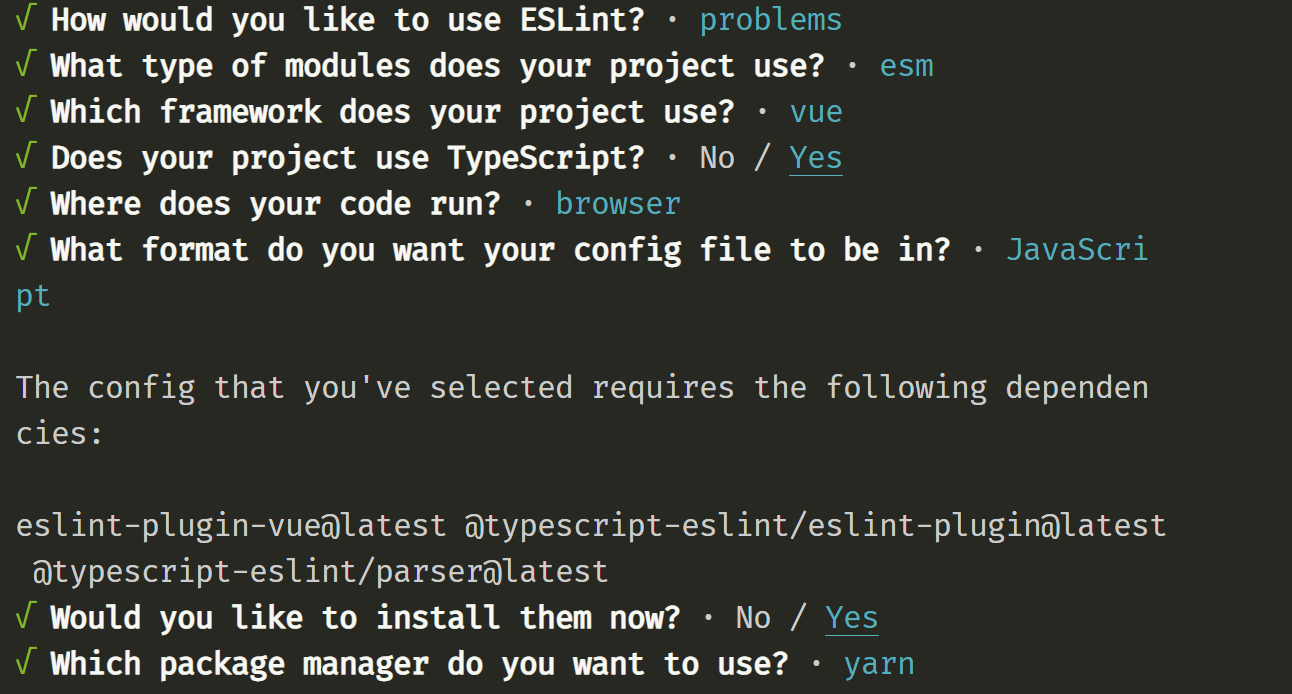
使用eslint与pretty格式化项目代码
- 安装初始依赖包
yarn add eslint eslint-plugin-vue @typescript-eslint/eslint-plugin @typescript-eslint/parser -D
- 在package.json添加script命令
{
    "scripts" {
        // 检查 src 目录下所有js、vue、ts文件,--fix 是可以自动修复部分错误
        "lint": "eslint src/**/*.{js,vue,ts} --fix",
        // 初始化配置 .eslintrc.js 配置文件
        "lint:create": "eslint --init"
    }
}
- 执行 yarn lint:create 选择指定的(如vue框架)自动生成 .eslintrc.js文件
- 对eslint的配置进行符合vue3项目的调整
module.exports = {
  env: {
    browser: true,
    es2021: true,
  },
  parser: 'vue-eslint-parser',
  extends: ['eslint:recommended', 'plugin:vue/vue3-essential', 'plugin:@typescript-eslint/recommended'],
  parserOptions: {
    ecmaVersion: 'latest',
    parser: '@typescript-eslint/parser',
    sourceType: 'module',
  },
  plugins: ['vue', '@typescript-eslint'],
  rules: {
    'no-console': process.env.NODE_ENV === 'production' ? 'warn' : 'off',
    'no-debugger': process.env.NODE_ENV === 'production' ? 'warn' : 'off',
    //强制使用单引号
    quotes: ['error', 'single'],
    //强制不使用分号结尾
    semi: ['error', 'never'],
  },
}
注意:需要添加其他配置的,可以根据 文档:https://eslint.bootcss.com/docs/user-guide/configuring 进行配置
- 添加 .editorconfig配置
[*.{js,jsx,ts,tsx,vue}]
indent_style = space
indent_size = 2
trim_trailing_whitespace = true
insert_final_newline = true
- 配置 .prettierrc 文件
{
   //开启 eslint 支持
  "eslintIntegration": true,
  //使用单引号
  "singleQuote": true,
  //结尾不加分号
  "semi": false
  "endofLine": "lf"
}
- 添加husky lint-staged 支持(注意:如果当前的lint-staged版本不好用,可以使用 11.2.6版本)
// 使用以下命令可以实现自动安装与配置

npx mrm@2 lint-staged
常规配置
  "lint-staged": {
    "src/**/*.js": "eslint --cache --fix",
    "src/**/*.{ts,vue,js,jsx,tsx}": "prettier --write"
  }
注意:如果在ts文件中没有声明,但实际中存在的变量,可以在eslintrc.js中配置globals true 等价于 writeable,false等价于 readable如下
  globals: {
    abc: true,
  },
4、vite中的环境变量
在vite环境中,获取环境变量需要通过 import.meta.env 来获取, 在vite中默认存在以下几个变量
BASE_URL  // 相当于axios中的base url
DEV       // 是否是开发环境
MODE      // 当前的模式
PROD      // 是否是生产环境
SSR       // 是否是后端渲染
用户可以自定义环境变量
.env             // 不管是生产环境还是开发环境都可以访问得到
.env.production  // 生产环境中可以访问得到
.env.development // 开发环境中可以访问得到
.env.test        // 可以自定义环境,但是需要在启动的时候在 package.json中配置启动环境  test: "vite --mode test" 相当于指定了模式
注意: 在定义非默认变量的时候,通常来讲,vite是不会识别的,需要在变量前添加 VITE_(变量名)=demo 如以下示例
VITE_DEMO=ARE YOU OK????   //可以正常识别

ABC=HAHA  // 不能识别
通常来讲typescript模式下使用系统默认的变量时,系统会有提示,如果需要系统提示自定义变量,那么可以在 vite-env.d.ts中添加声明, 如下所示
/// <reference types="vite/client" />

interface ImportMetaEnv {
  VITE_DEMO: string
}

 浙公网安备 33010602011771号