C语言—VScode配置环境
0.前言
运行系统为【Windows11专业版】
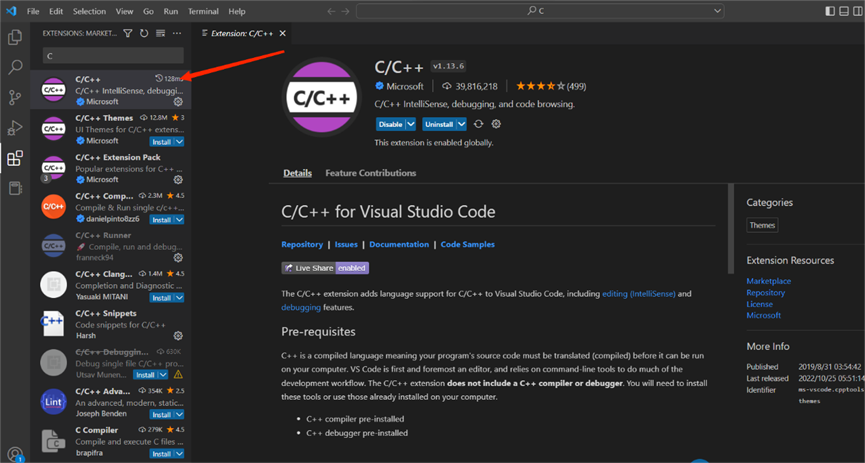
1.安装VScode
官网下载 VScode
或使用电脑自带【Microsoft Store】(微软商店)下载。
2.运行配置VScode
3. 安装编译器(MinGW-W64 GCC)
下载地址
官网:MinGW-w64
蓝奏云:https://hyborn.lanzouw.com/iqb1x0i0wwjc
密码:0000
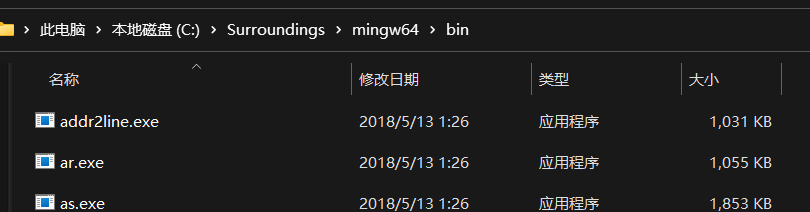
下载完成后把压缩包解压在C盘目录下新建一个名为【Surroundings】文件夹中。

进入【mingw64】-【bin】后复制路径。
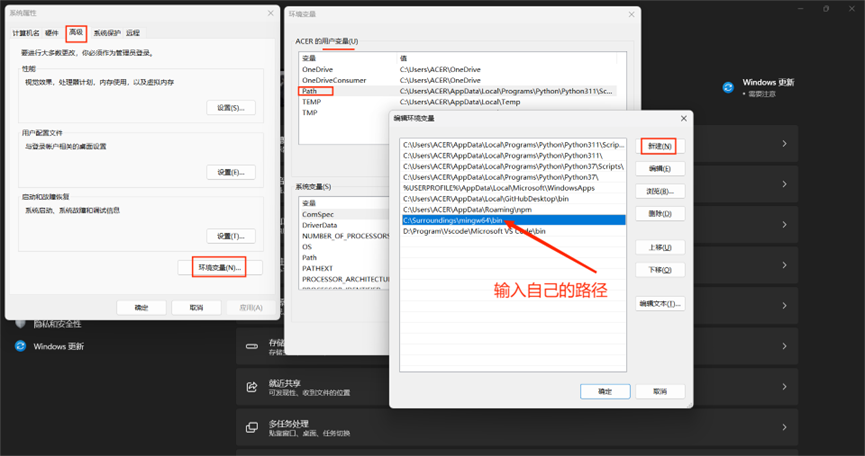
在设置搜索框中输入【查看高级系统设置】打开后
依次点击【高级】-【环境变量】-用户变量中的【Path】-【新建变量】
路径是C:\Surroundings\mingw64\bin
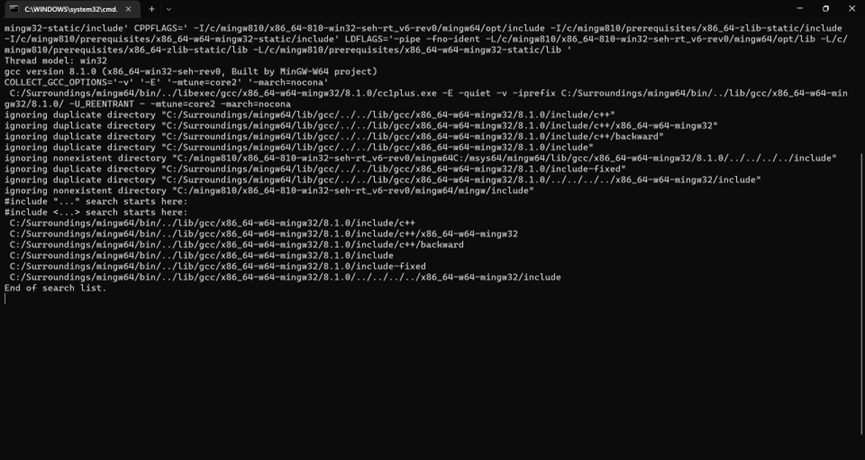
确定后:按住【Win】+R 调出运行窗口输入cmd回车后
在命令行窗口输入【gcc -v -E -x c++ -】结果是下图则以上步骤正确
4.配置VScode
在D或E盘新建一个专门运行C语言程序的文件夹后在菜单栏依次点击菜单栏中的【File】-【Open Folder】找到刚才新建的文件夹,然后点击选择文件夹打开这个项目文件。
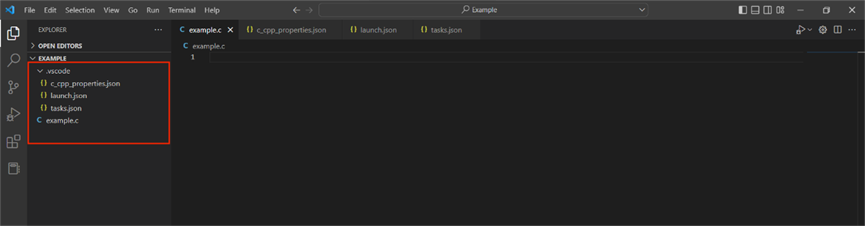
然后在里面新建一个后缀名.c的文件和【.vscode】文件夹且在.vscode中新建
【c_cpp_properties.json】、【launch.json】、【tasks.json】三个文件
1.在c_cpp_properties.json内输入以下代码:
c_cpp_properties.json
{
    "configurations": [
        {
            "name": "Win32",
            "includePath": [
                "${workspaceRoot}",
                "C:/Surroundings/mingw64/include/**",
                "C:/Surroundings/mingw64/bin/../lib/gcc/x86_64-w64-mingw32/8.1.0/include/c++",
                "C:/Surroundings/mingw64/bin/../lib/gcc/x86_64-w64-mingw32/8.1.0/include/c++/x86_64-w64-mingw32",
                "C:/Surroundings/mingw64/bin/../lib/gcc/x86_64-w64-mingw32/8.1.0/include/c++/backward",
                "C:/Surroundings/mingw64/bin/../lib/gcc/x86_64-w64-mingw32/8.1.0/include",
                "C:/Surroundings/mingw64/bin/../lib/gcc/x86_64-w64-mingw32/8.1.0/include-fixed",
                "C:/Surroundings/mingw64/bin/../lib/gcc/x86_64-w64-mingw32/8.1.0/../../../../x86_64-w64-mingw32/include"
            ],
            "defines": [
                "_DEBUG",
                "UNICODE",
                "__GNUC__=6",
                "__cdecl=__attribute__((__cdecl__))"
            ],
            "intelliSenseMode": "msvc-x64",
            "browse": {
                "limitSymbolsToIncludedHeaders": true,
                "databaseFilename": "",
                "path": [
                    "${workspaceRoot}",
                    "C:/Surroundings/mingw64/include/**",
                    "C:/Surroundings/mingw64/bin/../lib/gcc/x86_64-w64-mingw32/8.1.0/include/c++",
                    "C:/Surroundings/mingw64/bin/../lib/gcc/x86_64-w64-mingw32/8.1.0/include/c++/x86_64-w64-mingw32",
                    "C:/Surroundings/mingw64/bin/../lib/gcc/x86_64-w64-mingw32/8.1.0/include/c++/backward",
                    "C:/Surroundings/mingw64/bin/../lib/gcc/x86_64-w64-mingw32/8.1.0/include",
                    "C:/Surroundings/mingw64/bin/../lib/gcc/x86_64-w64-mingw32/8.1.0/include-fixed",
                    "C:/Surroundings/mingw64/bin/../lib/gcc/x86_64-w64-mingw32/8.1.0/../../../../x86_64-w64-mingw32/include"
                ]
            }
        }
    ],
    "version": 4
}
2.在launch.json内输入以下代码:
launch.json
{
    "version": "0.2.0",
    "configurations": [
        {
            "name": "(Windows) Launch",
            "type": "cppvsdbg",
            "request": "launch",
            "program": "cmd",
            "preLaunchTask": "echo",
            "args": [
                "/C",
                "${fileDirname}\\${fileBasenameNoExtension}.exe",
                "&",
                "echo.",
                "&",
                "pause"
            ],
            "stopAtEntry": false,
            "cwd": "${workspaceFolder}",
            "environment": [],
            "externalConsole":true
        },
        {
            "name": "(gdb) Launch",
            "type": "cppdbg",
            "request": "launch",
            "program": "${workspaceFolder}/${fileBasenameNoExtension}.exe",
            "args": [],
            "stopAtEntry": false,
            "cwd": "${workspaceFolder}",
            "environment": [],
            "externalConsole": true,
            "MIMode": "gdb",
            "miDebuggerPath": "C:\\Surroundings\\mingw64\\bin\\gdb.exe",// 自己电脑的gdb
            "preLaunchTask": "echo",//这里和task.json的label相对应
            "setupCommands": [
                {
                    "description": "Enable pretty-printing for gdb",
                    "text": "-enable-pretty-printing",
                    "ignoreFailures": true
                }
            ]

        }
    ]
}
3. 在tasks.json文件中输入以下代码:
tasks.json
{
    // See https://go.microsoft.com/fwlink/?LinkId=733558
    // for the documentation about the tasks.json format
    "version": "2.0.0",
    "tasks": [
        {
            "label": "echo",
            "type": "shell",
            "command": "gcc",
            "args": [
                "-g",
                "${file}",
                "-o",
                "${fileBasenameNoExtension}.exe",
                "-fexec-charset=GBK"//解决中文乱码
            ]
        }
    ],
    "presentation": {
        "echo": true,
        "reveal": "always",
        "focus": false,
        "panel": "shared",
        "showReuseMessage": true,
        "clear": false
    }
}
现在.c后缀名文件里面写程序了,以下输出我们熟悉的hello world:
测试代码
 #include"stdio.h"
int main()
{
    printf("hello,world");
    return 0;
}
最后按【F5】运行

出现“hello,world”表示成功。
5.附加:
- 代码中的路径需要修改为自己的文件路径。
- 之后运行C程序都需要放在那个新建的目录下。

 浙公网安备 33010602011771号