
Xshell 连接linux 虚拟机
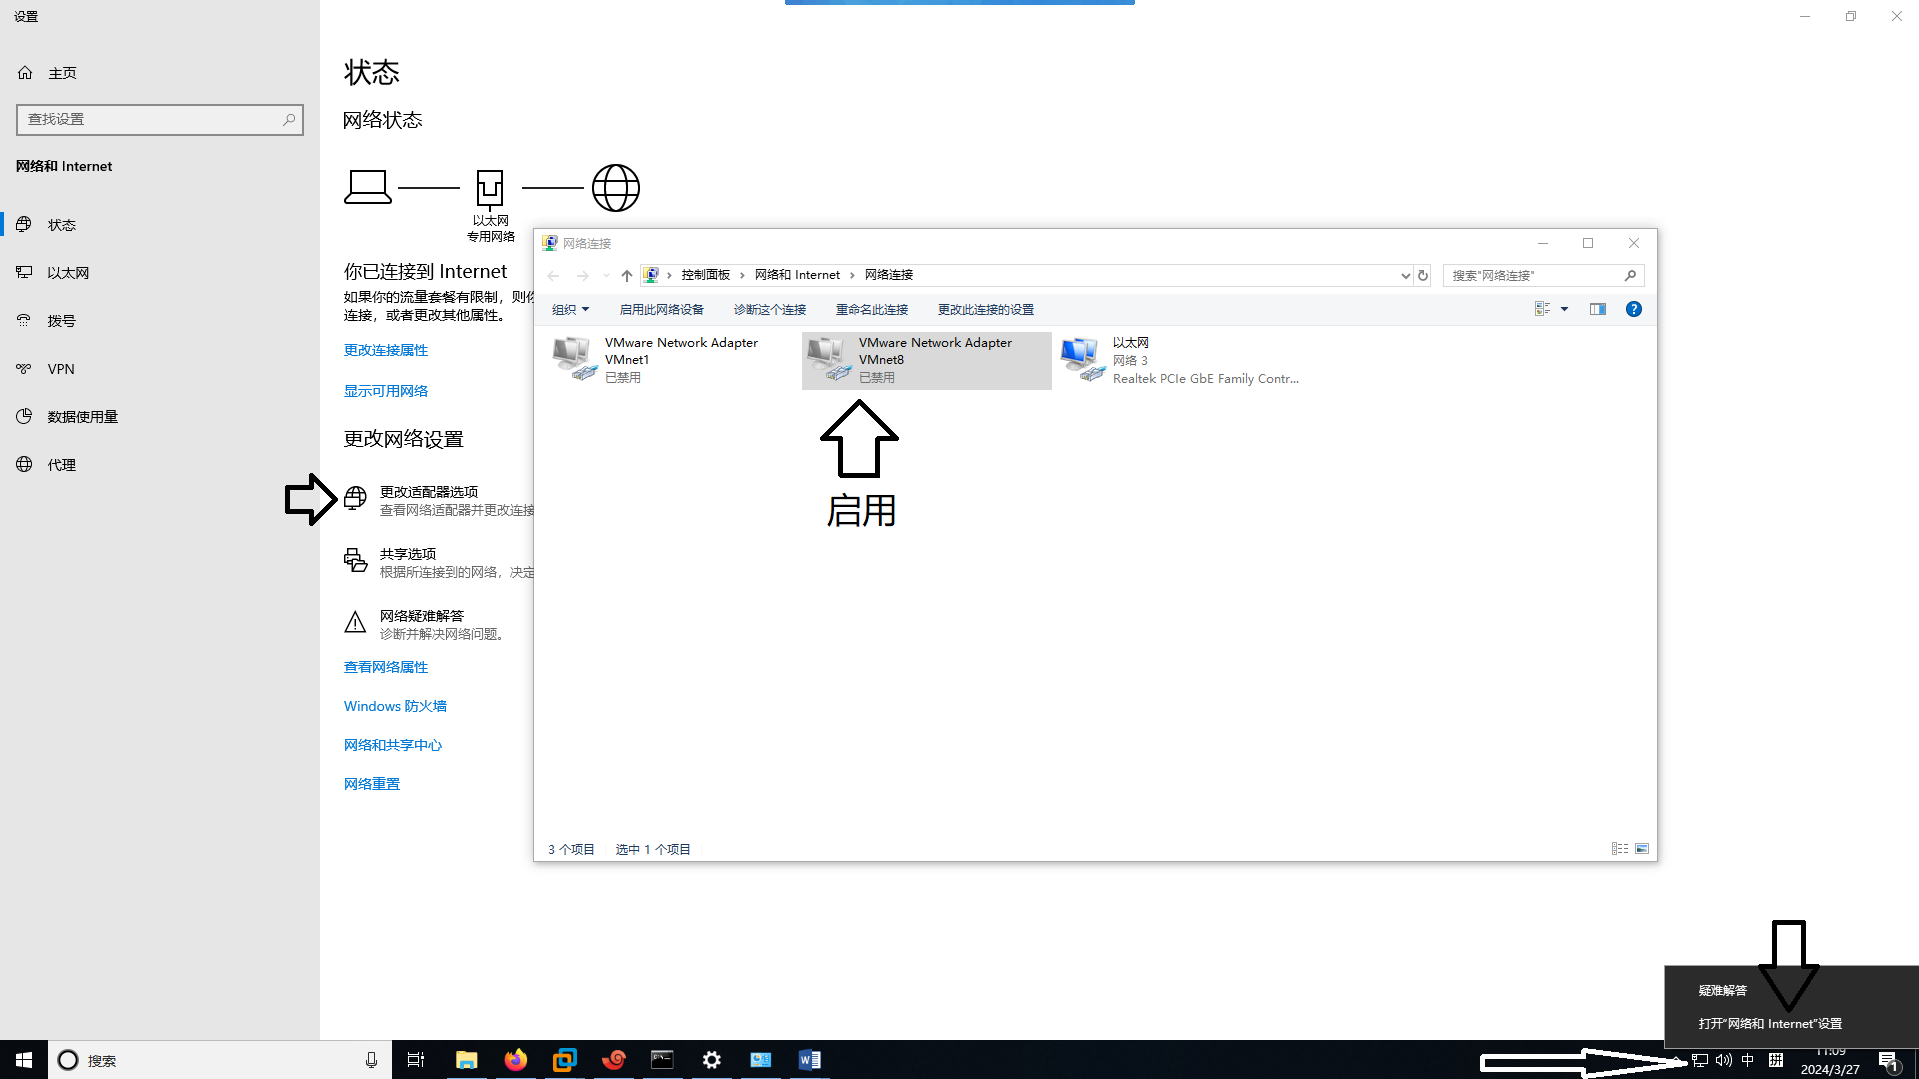
修改配置文件
[root@bogon ~]# ifconfig
ens160: flags=4163<UP,BROADCAST,RUNNING,MULTICAST>  mtu 1500
        inet 192.168.183.133  netmask 255.255.255.0  broadcast 192.168.183.255
        inet6 fe80::20c:29ff:fe12:80d6  prefixlen 64  scopeid 0x20<link>
        ether 00:0c:29:12:80:d6  txqueuelen 1000  (Ethernet)
        RX packets 2174  bytes 1961105 (1.8 MiB)
        RX errors 0  dropped 0  overruns 0  frame 0
        TX packets 815  bytes 64414 (62.9 KiB)
        TX errors 0  dropped 0 overruns 0  carrier 0  collisions 0

lo: flags=73<UP,LOOPBACK,RUNNING>  mtu 65536
        inet 127.0.0.1  netmask 255.0.0.0
        inet6 ::1  prefixlen 128  scopeid 0x10<host>
        loop  txqueuelen 1000  (Local Loopback)
        RX packets 36  bytes 3032 (2.9 KiB)
        RX errors 0  dropped 0  overruns 0  frame 0
        TX packets 36  bytes 3032 (2.9 KiB)
        TX errors 0  dropped 0 overruns 0  carrier 0  collisions 0

virbr0: flags=4099<UP,BROADCAST,MULTICAST>  mtu 1500
        inet 192.168.122.1  netmask 255.255.255.0  broadcast 192.168.122.255
        ether 52:54:00:cb:2a:2e  txqueuelen 1000  (Ethernet)
        RX packets 0  bytes 0 (0.0 B)
        RX errors 0  dropped 0  overruns 0  frame 0
        TX packets 0  bytes 0 (0.0 B)
        TX errors 0  dropped 0 overruns 0  carrier 0  collisions 0

[root@bogon ~]# vim /etc/sysconfig/network-scripts/ifcfg-ens160

TYPE=Ethernet
PROXY_METHOD=none
BROWSER_ONLY=no
BOOTPROTO=dhcp
DEFROUTE=yes
IPV4_FAILURE_FATAL=no
IPV6INIT=yes
IPV6_AUTOCONF=yes
IPV6_DEFROUTE=yes
IPV6_FAILURE_FATAL=no
IPV6_ADDR_GEN_MODE=eui64
NAME=ens160
UUID=20270779-e880-431b-a8a2-a78c6914d830
DEVICE=ens160
ONBOOT=yes         //改为yes
~
~
~
~
~
~
~
~
Type  :qa!  and pr...anges and exit Vim           15,9         全部
重启网络服务或者重启
CentOS7
点击查看代码
[root@localhost ~]# vim /etc/sysconfig/network-scripts/ifcfg-ens33

TYPE=Ethernet
PROXY_METHOD=none
BROWSER_ONLY=no
BOOTPROTO=dhcp
DEFROUTE=yes
IPV4_FAILURE_FATAL=no
IPV6INIT=yes
IPV6_AUTOCONF=yes
IPV6_DEFROUTE=yes
IPV6_FAILURE_FATAL=no
IPV6_ADDR_GEN_MODE=stable-privacy
NAME=ens33
UUID=2f3341e2-ffe2-4ba6-884c-33f9cbb69f0b
DEVICE=ens33
ONBOOT=yes

~
~
~
~
~
<etc/sysconfig/network-scripts/ifcfg-ens33" 16L, 281C 11,1

[root@localhost ~]# vim /etc/ssh/ssh_config       //开启端口22

#   IdentityFile ~/.ssh/identity
#   IdentityFile ~/.ssh/id_rsa
#   IdentityFile ~/.ssh/id_dsa
#   IdentityFile ~/.ssh/id_ecdsa
#   IdentityFile ~/.ssh/id_ed25519
   Port 22
   Protocol 2
#   Cipher 3des


[root@localhost ~]# vim /etc/ssh/sshd_config

# Authentication:
PermitRootLogin yes             //允许root通过ssh登录
PermitEmptyPasswords no         // 不允许空密码以ssh登录
#LoginGraceTime 2m
#PermitRootLogin yes
#StrictModes yes
#MaxAuthTries 6
#MaxSessions 10

[root@localhost ~]# systemctl restart sshd       //重启sshd服务
[root@localhost ~]# systemctl enable sshd        //sshd服务开机自启动
[root@localhost ~]# ps -e | grep sshd            //查看
  1937 ?        00:00:00 sshd
  2040 ?        00:00:00 sshd


【推荐】国内首个AI IDE,深度理解中文开发场景,立即下载体验Trae
【推荐】编程新体验,更懂你的AI,立即体验豆包MarsCode编程助手
【推荐】抖音旗下AI助手豆包,你的智能百科全书,全免费不限次数
【推荐】轻量又高性能的 SSH 工具 IShell:AI 加持,快人一步
· 震惊!C++程序真的从main开始吗?99%的程序员都答错了
· 【硬核科普】Trae如何「偷看」你的代码?零基础破解AI编程运行原理
· 单元测试从入门到精通
· 上周热点回顾(3.3-3.9)
· winform 绘制太阳,地球,月球 运作规律