
spring cloud sleuth
新建spring boot工程trace-1,添加pom依赖


<dependency>
            <groupId>org.springframework.cloud</groupId>
            <artifactId>spring-cloud-starter-eureka</artifactId>
        </dependency>
        <dependency>
            <groupId>org.springframework.cloud</groupId>
            <artifactId>spring-cloud-starter-ribbon</artifactId>
        </dependency>
        <!--<dependency>-->
            <!--<groupId>org.springframework.cloud</groupId>-->
            <!--<artifactId>spring-cloud-sleuth-stream</artifactId>-->
        <!--</dependency>-->
        <dependency>
            <groupId>org.springframework.cloud</groupId>
            <artifactId>spring-cloud-starter-sleuth</artifactId>
        </dependency>
        <!--<dependency>-->
            <!--<groupId>org.springframework.cloud</groupId>-->
            <!--<artifactId>spring-cloud-starter-zipkin</artifactId>-->
        <!--</dependency>-->
        <dependency>
            <groupId>org.springframework.boot</groupId>
            <artifactId>spring-boot-starter-web</artifactId>
        </dependency>
Trace1Application
import org.slf4j.Logger;
import org.slf4j.LoggerFactory;
import org.springframework.boot.SpringApplication;
import org.springframework.boot.autoconfigure.SpringBootApplication;
import org.springframework.cloud.client.discovery.EnableDiscoveryClient;
import org.springframework.cloud.client.loadbalancer.LoadBalanced;
import org.springframework.context.annotation.Bean;
import org.springframework.web.bind.annotation.RequestMapping;
import org.springframework.web.bind.annotation.RequestMethod;
import org.springframework.web.bind.annotation.RestController;
import org.springframework.web.client.RestTemplate;

@RestController
@EnableDiscoveryClient
@SpringBootApplication
public class Trace1Application {

    public static void main(String[] args) {
        SpringApplication.run(Trace1Application.class, args);
    }

    private final Logger logger= LoggerFactory.getLogger(getClass());
    @Bean
    @LoadBalanced
    RestTemplate restTemplate(){
        return new RestTemplate();
    }
    @RequestMapping(value = "/trace-1",method = RequestMethod.GET)
    public String trace(){
        logger.info("===call trace-1===");
        return restTemplate().getForEntity("http://trace-2/trace-2",String.class).getBody();
    }
}
配置
spring.application.name=trace-1
server.port=9101
eureka.client.service-url.defaultZone=http://localhost:1111/eureka/
再建一个trace-2,依赖同上
Trace2Application
import org.slf4j.Logger;
import org.slf4j.LoggerFactory;
import org.springframework.boot.SpringApplication;
import org.springframework.boot.autoconfigure.SpringBootApplication;
import org.springframework.cloud.client.discovery.EnableDiscoveryClient;
import org.springframework.cloud.client.loadbalancer.LoadBalanced;
import org.springframework.context.annotation.Bean;
import org.springframework.web.bind.annotation.RequestMapping;
import org.springframework.web.bind.annotation.RequestMethod;
import org.springframework.web.bind.annotation.RestController;
import org.springframework.web.client.RestTemplate;

@RestController
@EnableDiscoveryClient
@SpringBootApplication
public class Trace2Application {

    public static void main(String[] args) {
        SpringApplication.run(Trace2Application.class, args);
    }

    private final Logger logger= LoggerFactory.getLogger(getClass());

    @RequestMapping(value = "/trace-2",method = RequestMethod.GET)
    public String trace(){
        logger.info("===call trace-2===");
        return "Trace";
    }
}
启动之前的eureka-server,启动trace-1和trace-2

访问:http://localhost:9101/trace-1
在控制台中查看日志
trace-1

trace-2

可以看到trace-1中的TraceId c44f784f0a901bd8 已经被传到trace-2中了,这里就实现了服务的跟踪
这里的第二个值是TraceId,第三个值是SpanId,第四个值表示是否将信息输出到Zipkin等服务中收集
这里需要设置一个收集的频率
spring.sleuth.sampler.percentage=1
默认是0.1,改成1方便测试
将trace-1和trace-2中的pom依赖取消注释
<dependency>
            <groupId>org.springframework.cloud</groupId>
            <artifactId>spring-cloud-sleuth-zipkin</artifactId>
        </dependency>
在docker中运行Zipkin
docker run -d -p 9411:9411 openzipkin/zipkin
配置中添加Zipkin地址
spring.zipkin.base-url=http://10.202.203.29:9411
运行trace-1,trace-2,打开:http://localhost:9101/trace-1 多刷新几次
可以看到第四个值是true


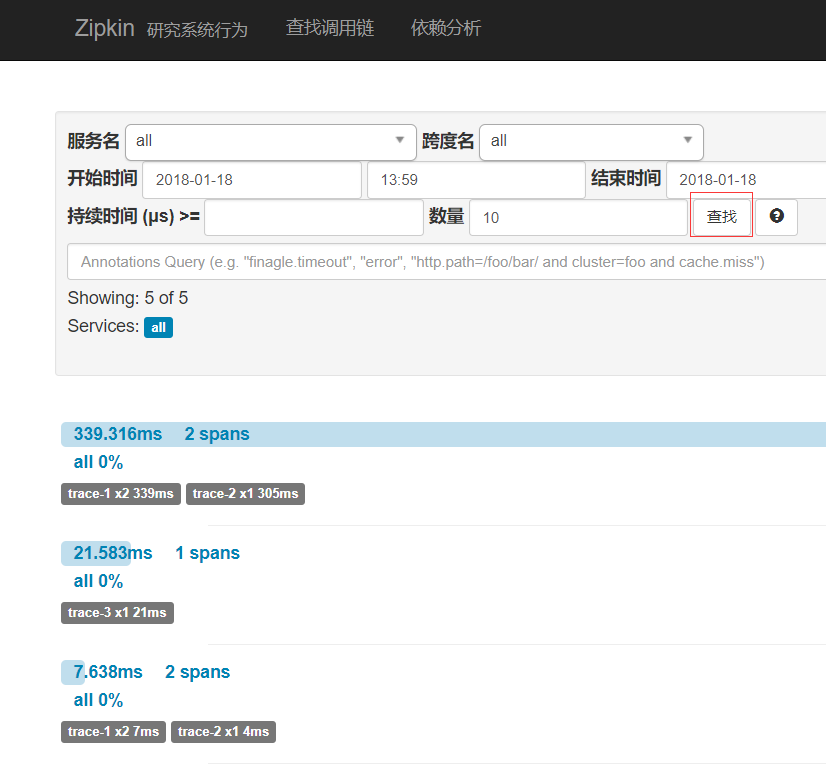
打开Zipkin地址:http://10.202.203.29:9411/zipkin/ 点击查找

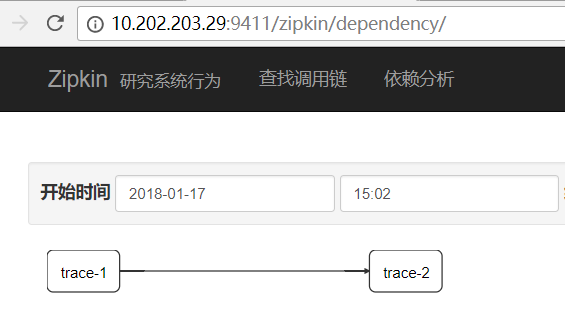
查看依赖分析

 浙公网安备 33010602011771号