spring cloud bus
RabbitMQ
在docker中运行rabbitmq
docker run -d -p 5672:5672 -p 8080:15672 rabbitmq:3-management
浏览器打开:http://10.202.203.29:8080/
默认用户名/密码都是guest
在Admin页面添加用户
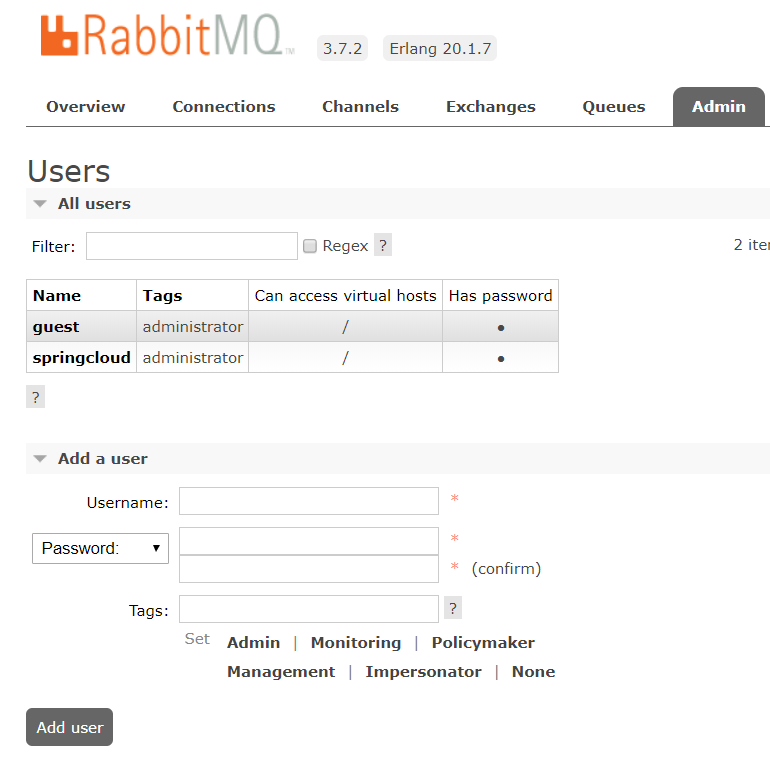
新添加的用户是没有权限的
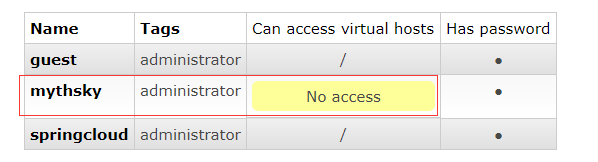
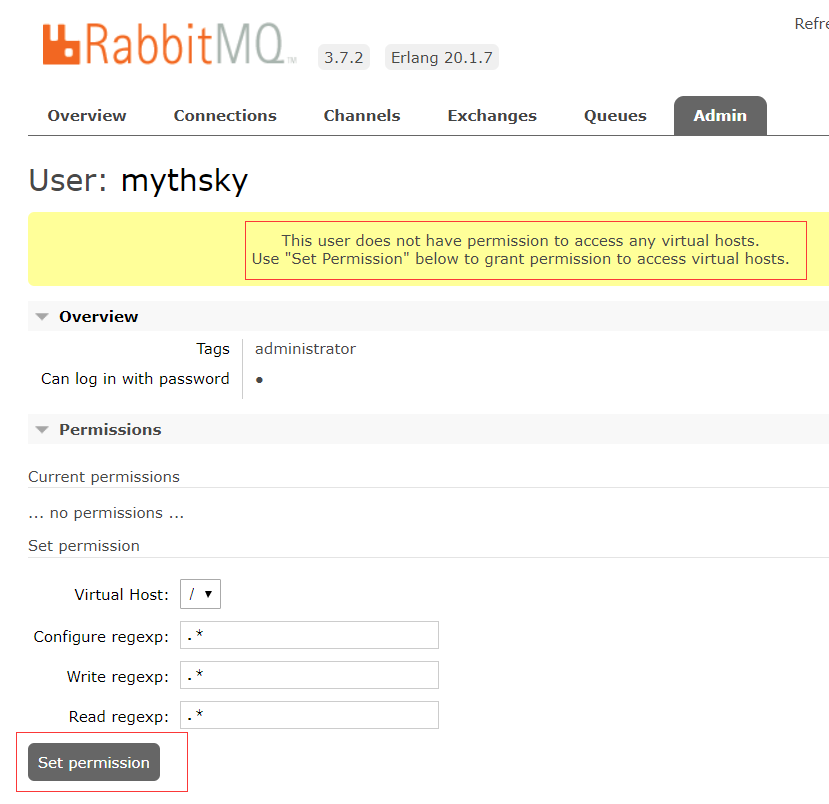
点击用户名进去,按提示添加权限
这样就可以在程序中访问了。
创建spring boot 项目,添加pom依赖


<dependency>
            <groupId>org.springframework.cloud</groupId>
            <artifactId>spring-cloud-starter-bus-amqp</artifactId>
        </dependency>
添加发送类Sender
import org.springframework.amqp.core.AmqpTemplate;
import org.springframework.beans.factory.annotation.Autowired;
import org.springframework.stereotype.Component;

import java.util.Date;
@Component
public class Sender {
    @Autowired
    private AmqpTemplate amqpTemplate;

    public void send(){
        String context="hello "+new Date();
        System.out.println("Sender: "+context);
        amqpTemplate.convertAndSend("hello",context);
    }
}
添加接收类Receiver
import org.springframework.amqp.rabbit.annotation.RabbitHandler;
import org.springframework.amqp.rabbit.annotation.RabbitListener;
import org.springframework.stereotype.Component;

@Component

public class Receiver {
    @RabbitListener(queues = "hello")
    @RabbitHandler
    public void process(String hello){
        System.out.println("Receiver: "+hello);
    }
}
注意这里的@RabbitListener(queues = "hello")不要加在类上,而是加在方法上,官方的教程这里是错误的
添加配置类RabbitConfig
import org.springframework.amqp.core.Queue;
import org.springframework.context.annotation.Bean;
import org.springframework.context.annotation.Configuration;

@Configuration
public class RabbitConfig {
    @Bean
    public Queue helloQueue(){
        return new Queue("hello");
    }
}
配置文件
spring.application.name=rabbitmq-hello

spring.rabbitmq.host=10.202.203.29
spring.rabbitmq.port=5672
spring.rabbitmq.username=springcloud
spring.rabbitmq.password=123456
单元测试
@RunWith(SpringRunner.class)
@SpringBootTest
public class RabbitmqHelloApplicationTests {
    @Autowired
    private Sender sender;
    @Test
    public void contextLoads() {
        sender.send();
    }
}
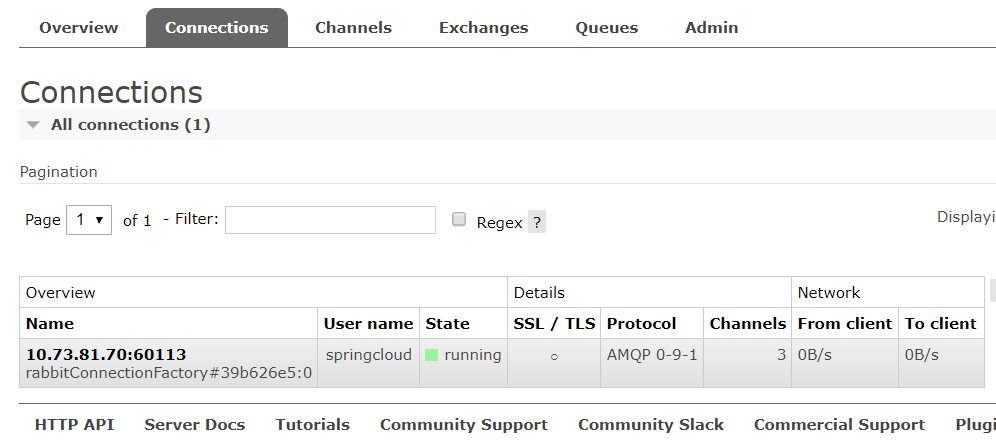
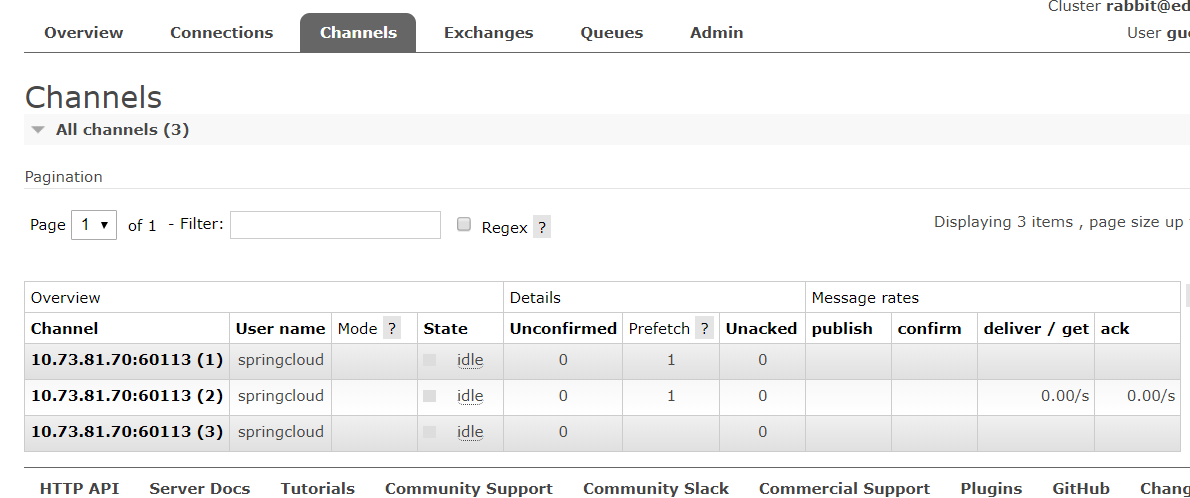
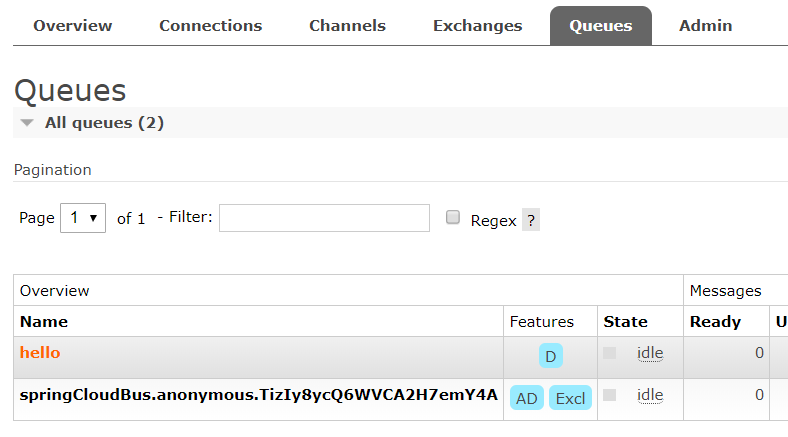
启动应用,在RabbitMQ管理界面中查看连接
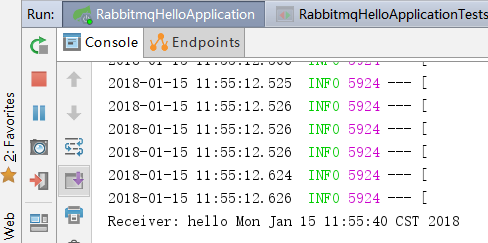
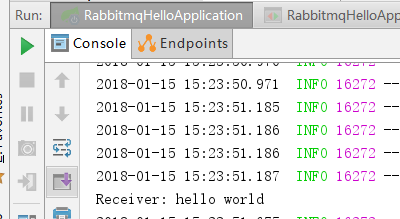
运行单元测试,可以在控制台看到结果
再查看管理页面
开启应用的接受监控后,可以在rabbitmq管理界面直接发送消息,需要指定编码格式

在控制台可以看到接收到了消息

 浙公网安备 33010602011771号