spring cloud config
服务端
创建spring boot 工程,命名为config-server,在pom中添加引用


<parent>
        <groupId>org.springframework.boot</groupId>
        <artifactId>spring-boot-starter-parent</artifactId>
        <version>1.5.9.RELEASE</version>
        <relativePath/> <!-- lookup parent from repository -->
    </parent>

    <properties>
        <project.build.sourceEncoding>UTF-8</project.build.sourceEncoding>
        <project.reporting.outputEncoding>UTF-8</project.reporting.outputEncoding>
        <java.version>1.8</java.version>
        <spring-cloud.version>Edgware.RELEASE</spring-cloud.version>
    </properties>

    <dependencies>
        <dependency>
            <groupId>org.springframework.cloud</groupId>
            <artifactId>spring-cloud-config-server</artifactId>
        </dependency>

        <dependency>
            <groupId>org.springframework.boot</groupId>
            <artifactId>spring-boot-starter-test</artifactId>
            <scope>test</scope>
        </dependency>
    </dependencies>

    <dependencyManagement>
        <dependencies>
            <dependency>
                <groupId>org.springframework.cloud</groupId>
                <artifactId>spring-cloud-dependencies</artifactId>
                <version>${spring-cloud.version}</version>
                <type>pom</type>
                <scope>import</scope>
            </dependency>
        </dependencies>
    </dependencyManagement>
在程序入口类添加@EnableConfigServer注解
import org.springframework.boot.SpringApplication;
import org.springframework.boot.autoconfigure.SpringBootApplication;
import org.springframework.cloud.config.server.EnableConfigServer;

@EnableConfigServer
@SpringBootApplication
public class ConfigServerApplication {

    public static void main(String[] args) {
        SpringApplication.run(ConfigServerApplication.class, args);
    }
}
在application.properties中添加配置
spring.application.name=config-server
server.port=7001

spring.cloud.config.server.git.uri=https://github.com/m13810859213/SpringCloud-Learning
spring.cloud.config.server.git.search-paths=config
spring.cloud.config.server.git.username=xxxx
spring.cloud.config.server.git.password=xxxx
在github新建项目https://github.com/m13810859213/SpringCloud-Learning
目录下添加一个config目录,在其中添加几个配置文件
运行config-server,打开http://localhost:7001/configClient-dev.properties

可以看到已经连接到了github上并读取了配置,这里的URL和配置文件的映射关系如下:
- /{appliaction}/{profile}[/{label}]
- /{application}-{profile}.yml
- /{label}/{application}-{profile}.yml
- /{application}-{profile}.properties
- /{label}/{application}-{profile}.properties
{label}对应Git上的不同分支,不指定默认为master
客户端
创建config-client的spring boot应用,在pom中添加引用
<dependency>
            <groupId>org.springframework.cloud</groupId>
            <artifactId>spring-cloud-starter-config</artifactId>
        </dependency>
        <dependency>
            <groupId>org.springframework.boot</groupId>
            <artifactId>spring-boot-starter-web</artifactId>
        </dependency>
添加一个bootstrap.properties配置文件
spring.application.name=configClient
spring.cloud.config.profile=dev
spring.cloud.config.label=master
spring.cloud.config.uri=http://localhost:7001

server.port=7002
这里的配置与Git中的文件相对应
创建一个TestController
import org.springframework.beans.factory.annotation.Autowired;
import org.springframework.cloud.context.config.annotation.RefreshScope;
import org.springframework.core.env.Environment;
import org.springframework.web.bind.annotation.RequestMapping;
import org.springframework.web.bind.annotation.RequestMethod;
import org.springframework.web.bind.annotation.RestController;

@RefreshScope
@RestController
public class TestController {
    @Autowired
    private Environment env;
    @RequestMapping(value = "/from",method = RequestMethod.GET)
    public String from(){
        return env.getProperty("from","undefiend");
    }
}
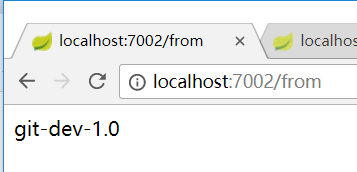
运行程序,打开http://localhost:7002/from

 浙公网安备 33010602011771号