AFL++ Fuzz一个libexif例子
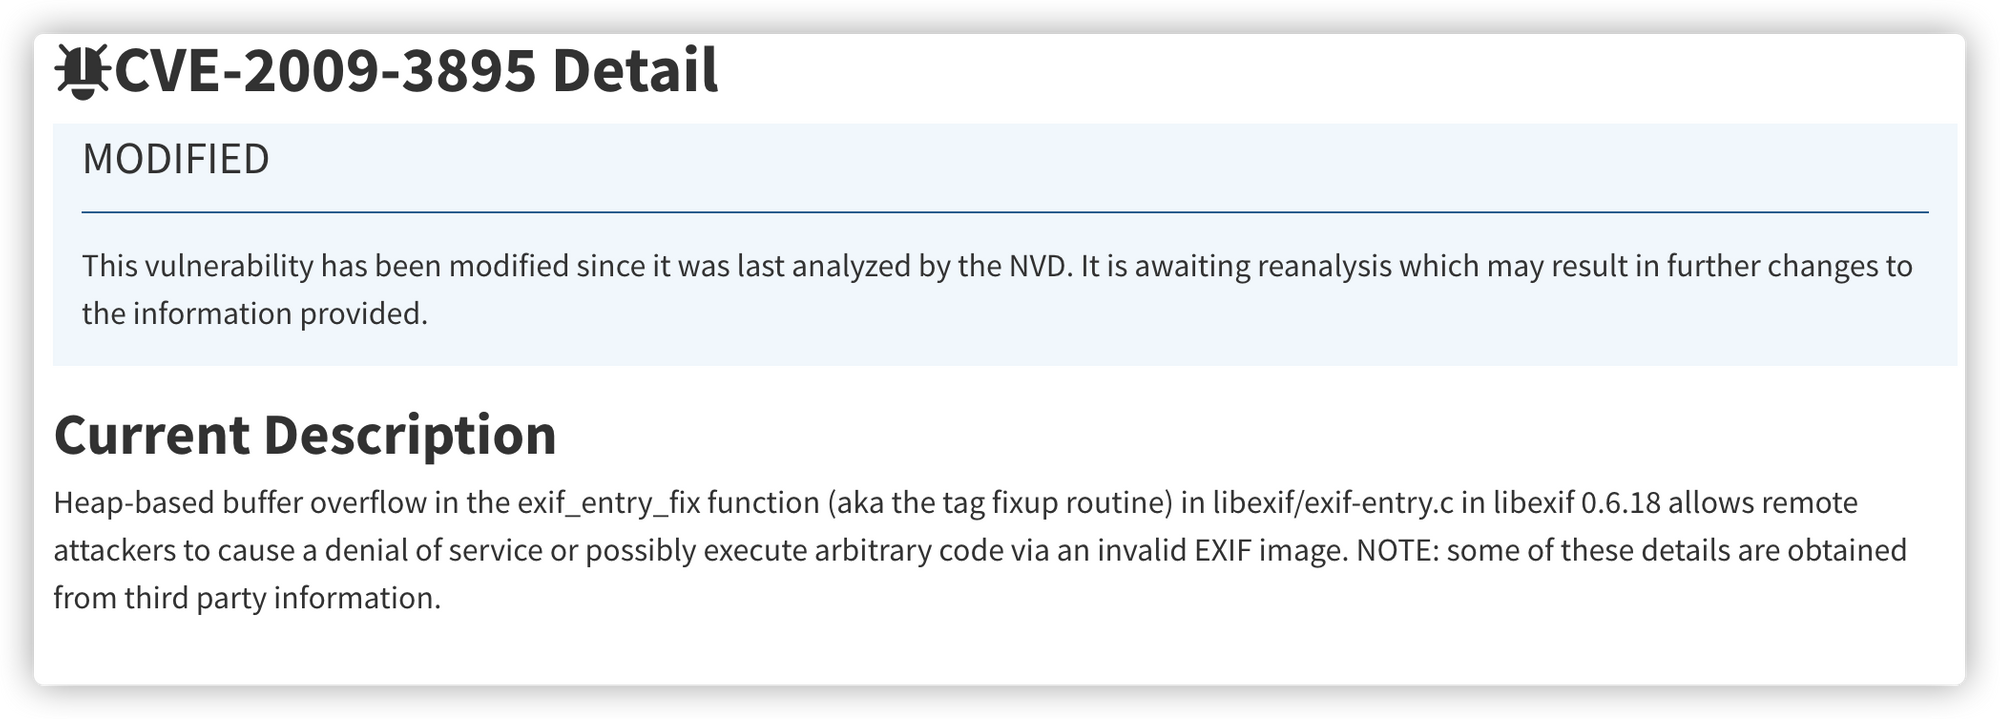
CVE-2009-3895
首先在NVD找到漏洞描述如下:
大致意思是说:libexif 0.6.18 中的 libexif/exif-entry.c 中的 exif_entry_fix 函数中基于堆的缓冲区溢出允许远程攻击者导致拒绝服务或可能通过无效的 EXIF 图像执行任意代码
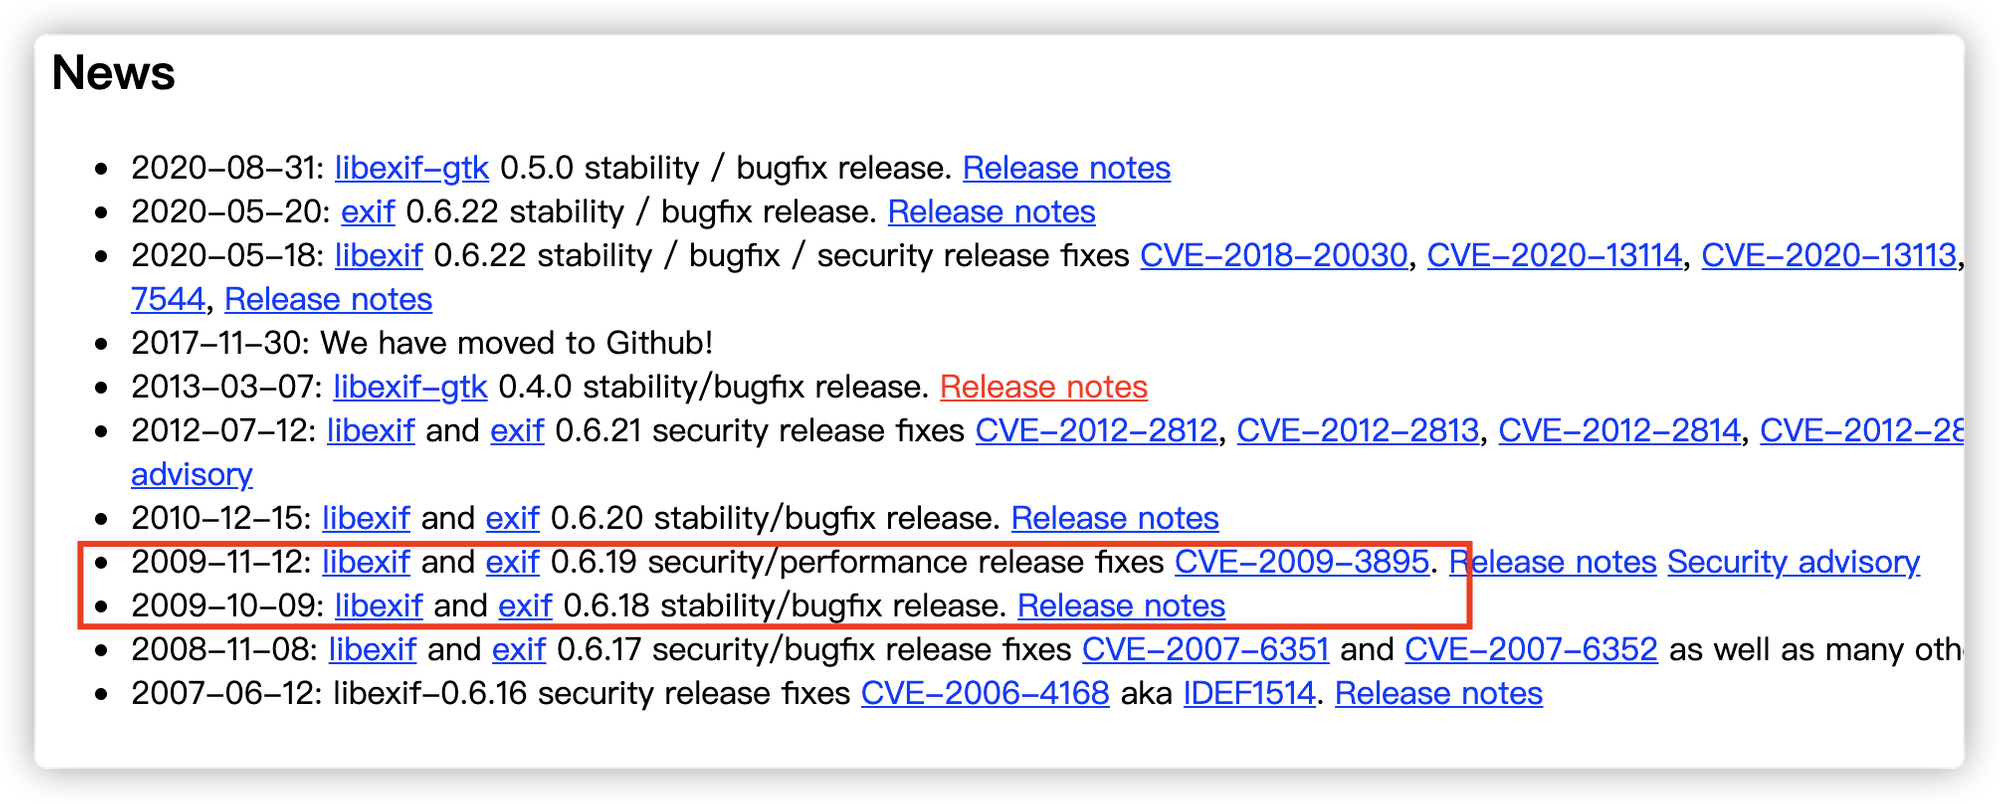
接下来找到libexif 0.6.18 ,官方在0.6.19版本修复了此漏洞:
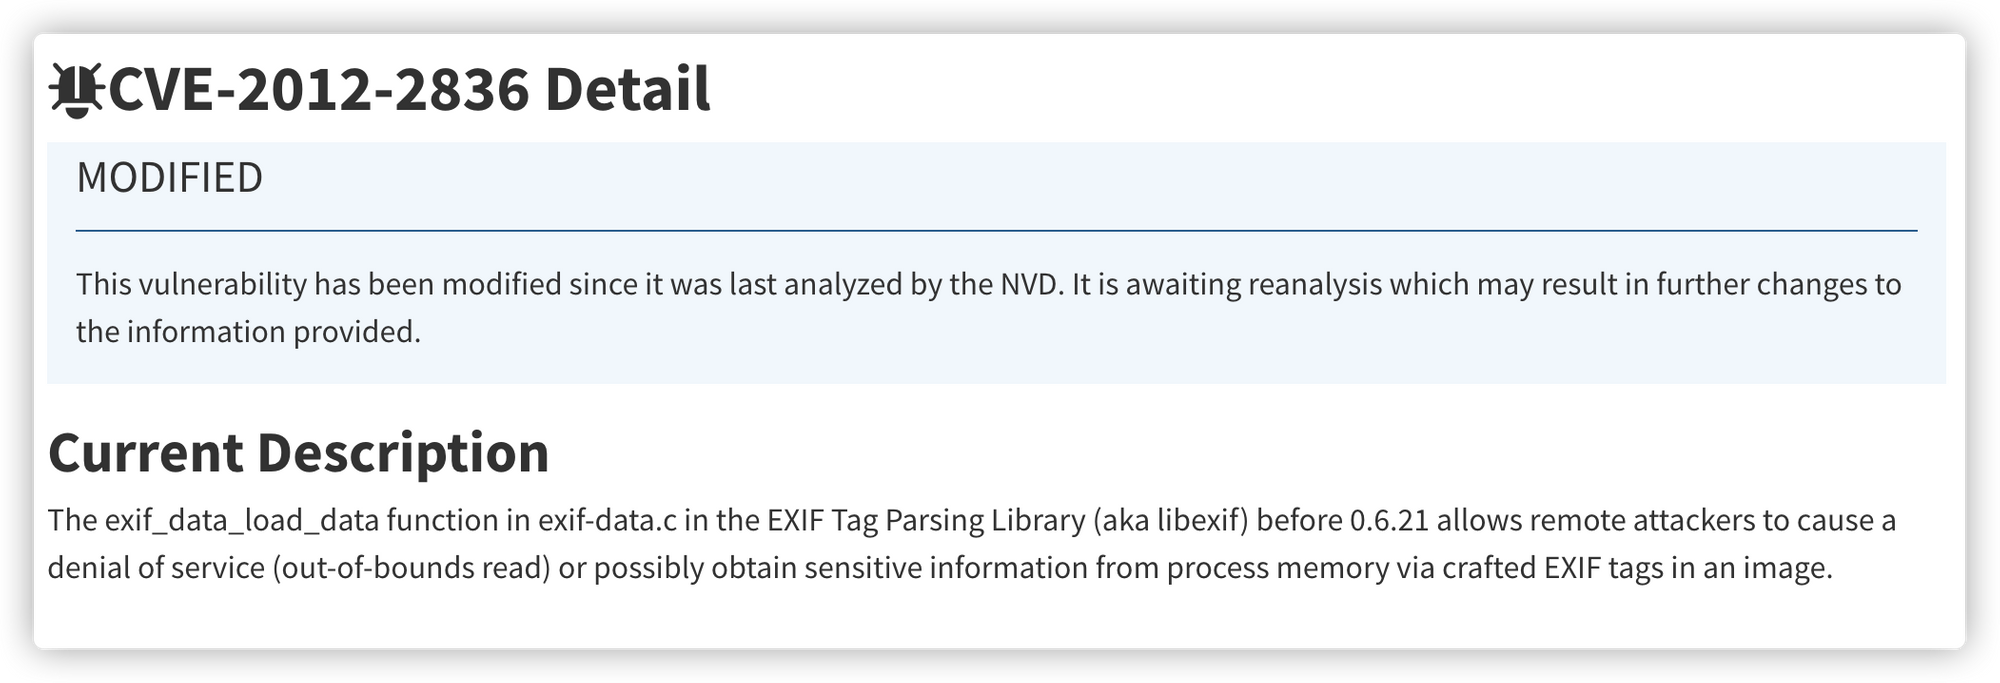
CVE-2012-2836
同样在NVD中找到漏洞描述:
大致意思:0.6.21 之前的 EXIF 标签解析库(又名 libexif)中的 exif-data.c 中的 exif_data_load_data 函数允许远程攻击者造成拒绝服务(越界读取)或可能通过精心设计的方式从进程内存中获取敏感信息图像中的 EXIF 标签。简单来说也就是存在越界访问漏洞
官方在0.6.21版本修复了此漏洞:
实验目的
- 使用外部应用程序Fuzz库文件
- 使用
afl-clang-lto,这是一种无碰撞检测,它比afl-clang-fast更快并提供更好的结果
实验环境
所有测试都在Ubuntu 20.04.2 LTS上测试过。强烈建议您使用相同的操作系统版本以避免不同的Fuzz结果,并在物理机而不是虚拟机上运行 AFL++ ,以获得最佳性能
Fuzz过程
下载相关文件
首先创建一个文件夹用于存放Fuzz目标:
找到libexif文件,下载并解压:
因为libexif编译后是一个库文件,所以还需要下载使用库接口的应用程序,这里选择exif命令行0.6.15
构建
首先回到libexif库文件目录下进行编译:
此时库文件已经编译好了,再进入exif目录进行编译:
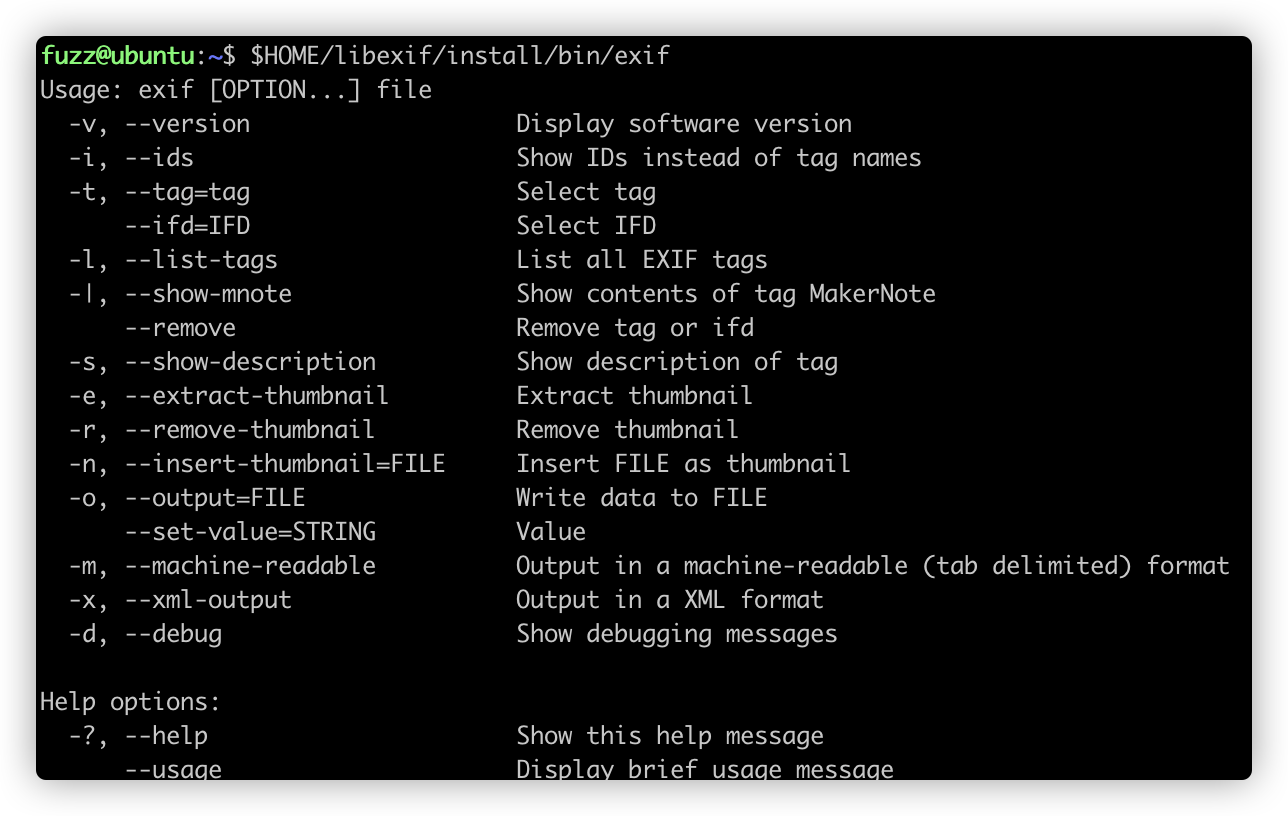
测试exif能否运行只需要输入:
此时应该看到如下内容:
执行Fuzz
首先要确定程序是做什么的,要输入什么内容,希望返回什么内容,可以先阅读程序帮助信息,并测试程序功能。
Exif是一种文件格式,这是在网上搜索到的相关描述:
可交换图像文件格式(英语:Exchangeable image file format,官方简称Exif),是专门为数码相机的照片设定的,可以记录数码照片的属性信息和拍摄数据。
举个例子,就像下面这样:
那么就需要找到这样的文件样本,好在万能的GitHub啥都有,可以直接下载:
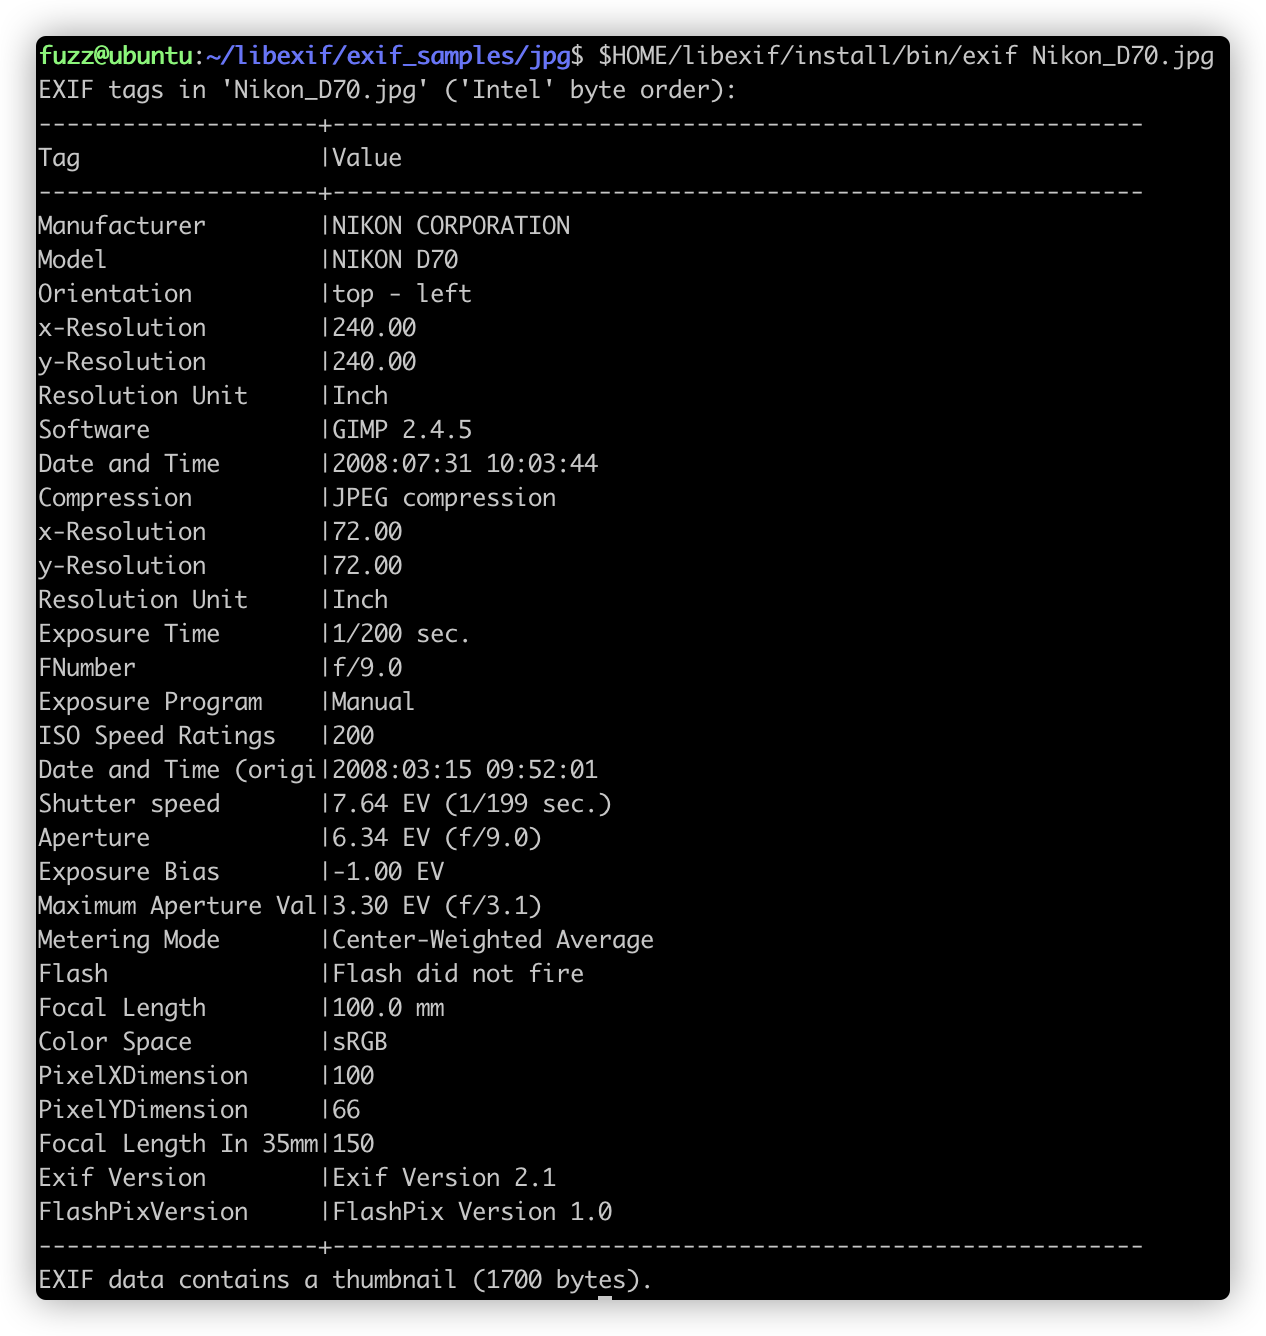
下载好后进入目录,使用exif命令随便查看一张图片的信息:
可以看到如下结果:
现在程序功能已经知道了,需要使用afl编译器重新编译程序来执行Fuzz。这次使用afl-clang-lto作为编译器来构建程序,afl-clang-lto相比于afl-clang-fast是更好的选择,因为它是一种无碰撞检测,而且比afl-clang-fast 快。
如果不确定何时使用哪种编译器,可参考如下内容:
使用编译器重新构建程序:
然后可以开始愉快的Fuzz了:
漏洞复现及修复
漏洞复现
几分钟后可获得多个crash:
使用GDB将crash文件输入到程序中:
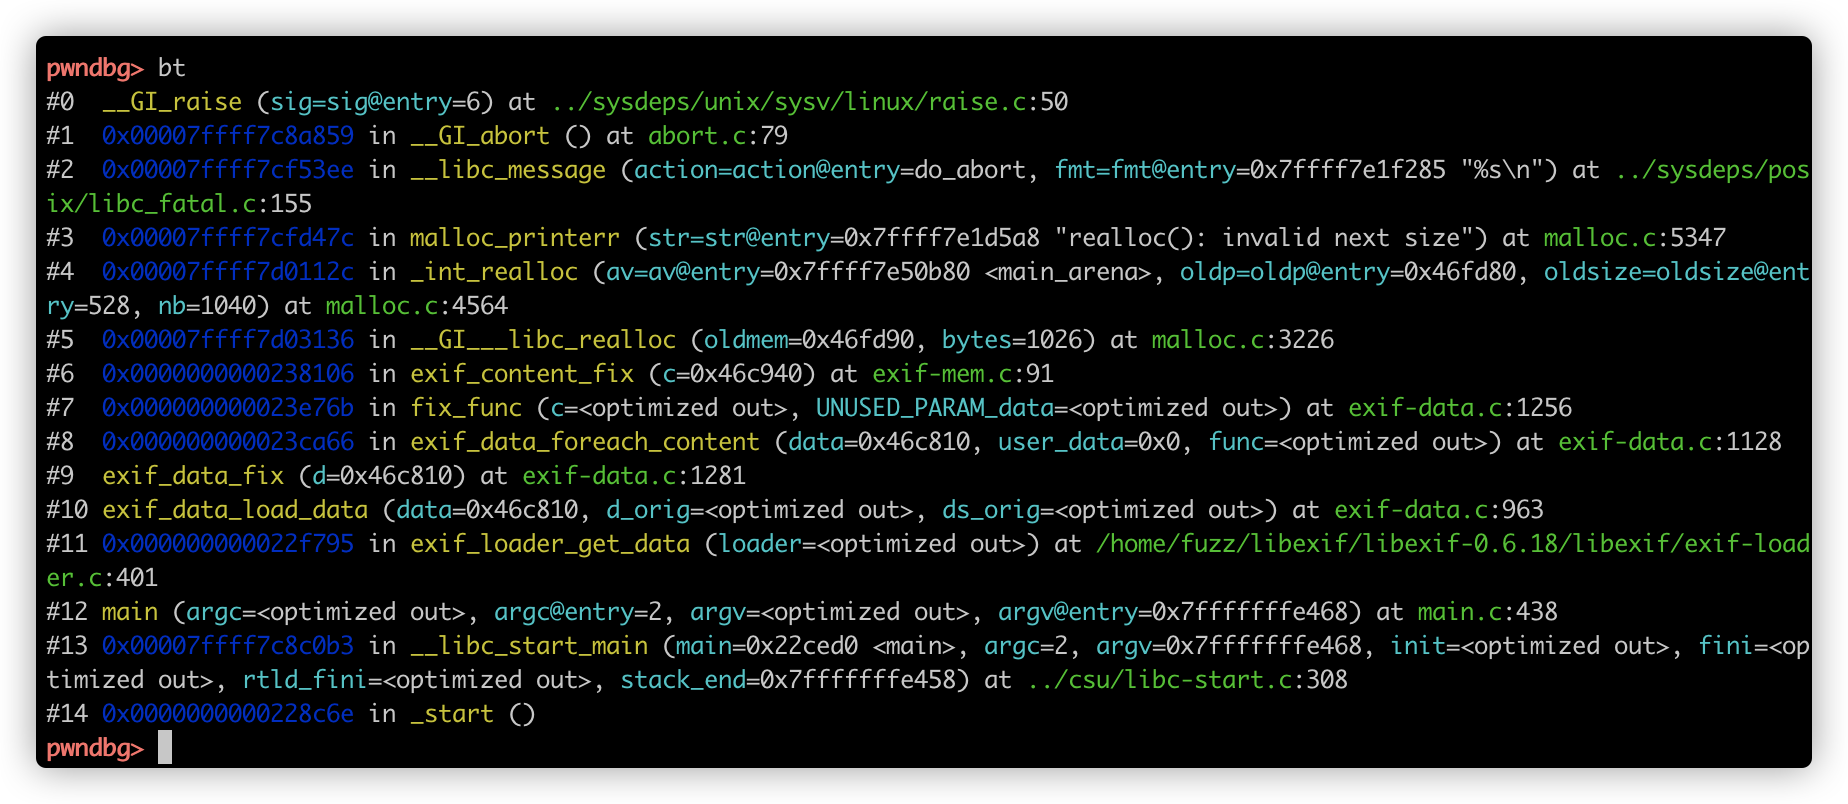
查看栈回溯:
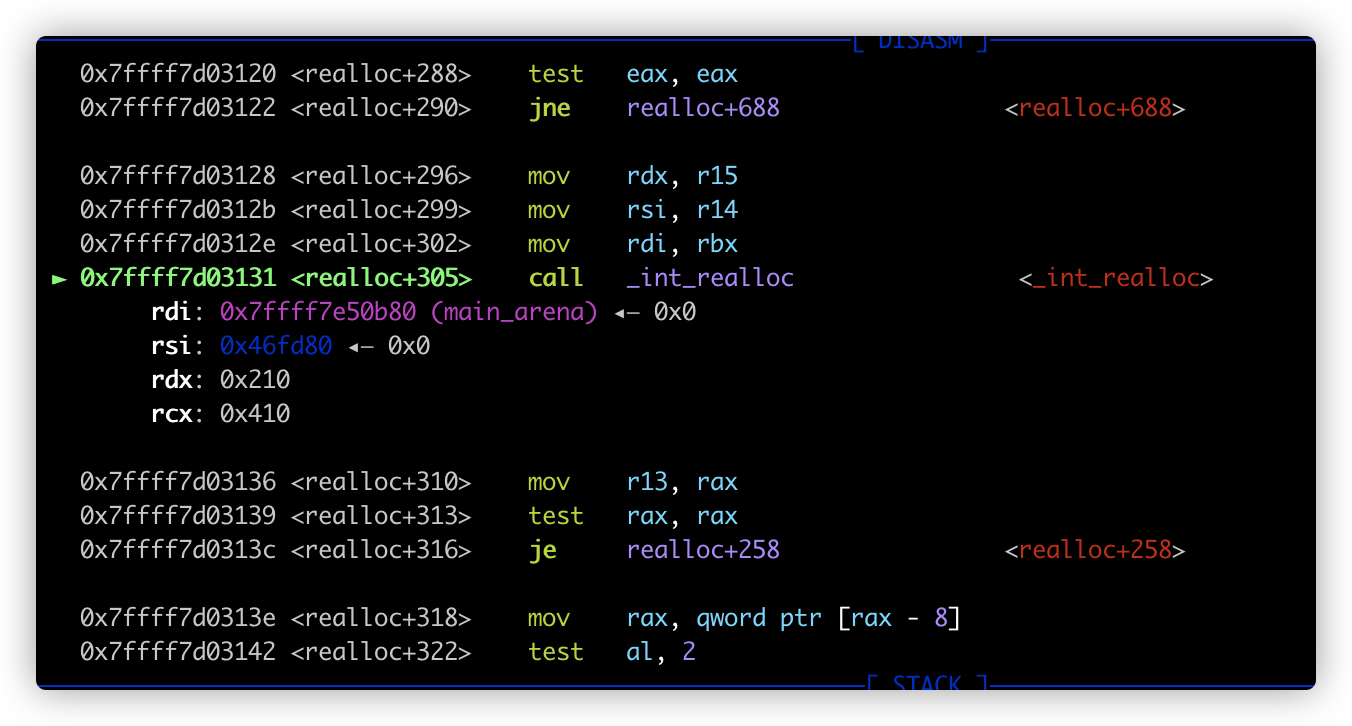
可看出明显是malloc_printerr使程序crash,那么再往父函数找,找到exif_content_fix函数,在此处下断点,重新运行程序,单步跟踪,看看是什么原因使程序崩溃。跟踪到__GI___libc_realloc函数时,在_int_realloc报错,查看参数如下:
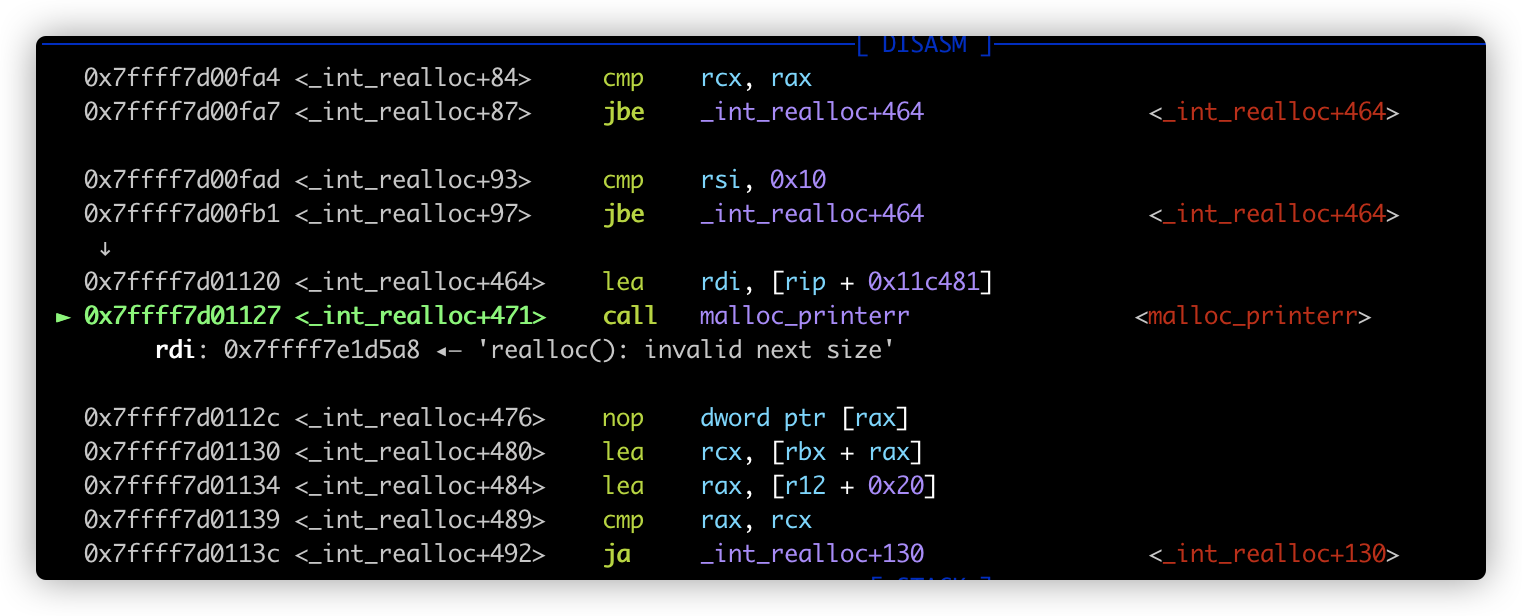
_int_realloc函数定义:void* _int_realloc(mstate av, mchunkptr oldp, INTERNAL_SIZE_T oldsize, INTERNAL_SIZE_T nb) ,单步跟进_int_realloc,得到如下结果:
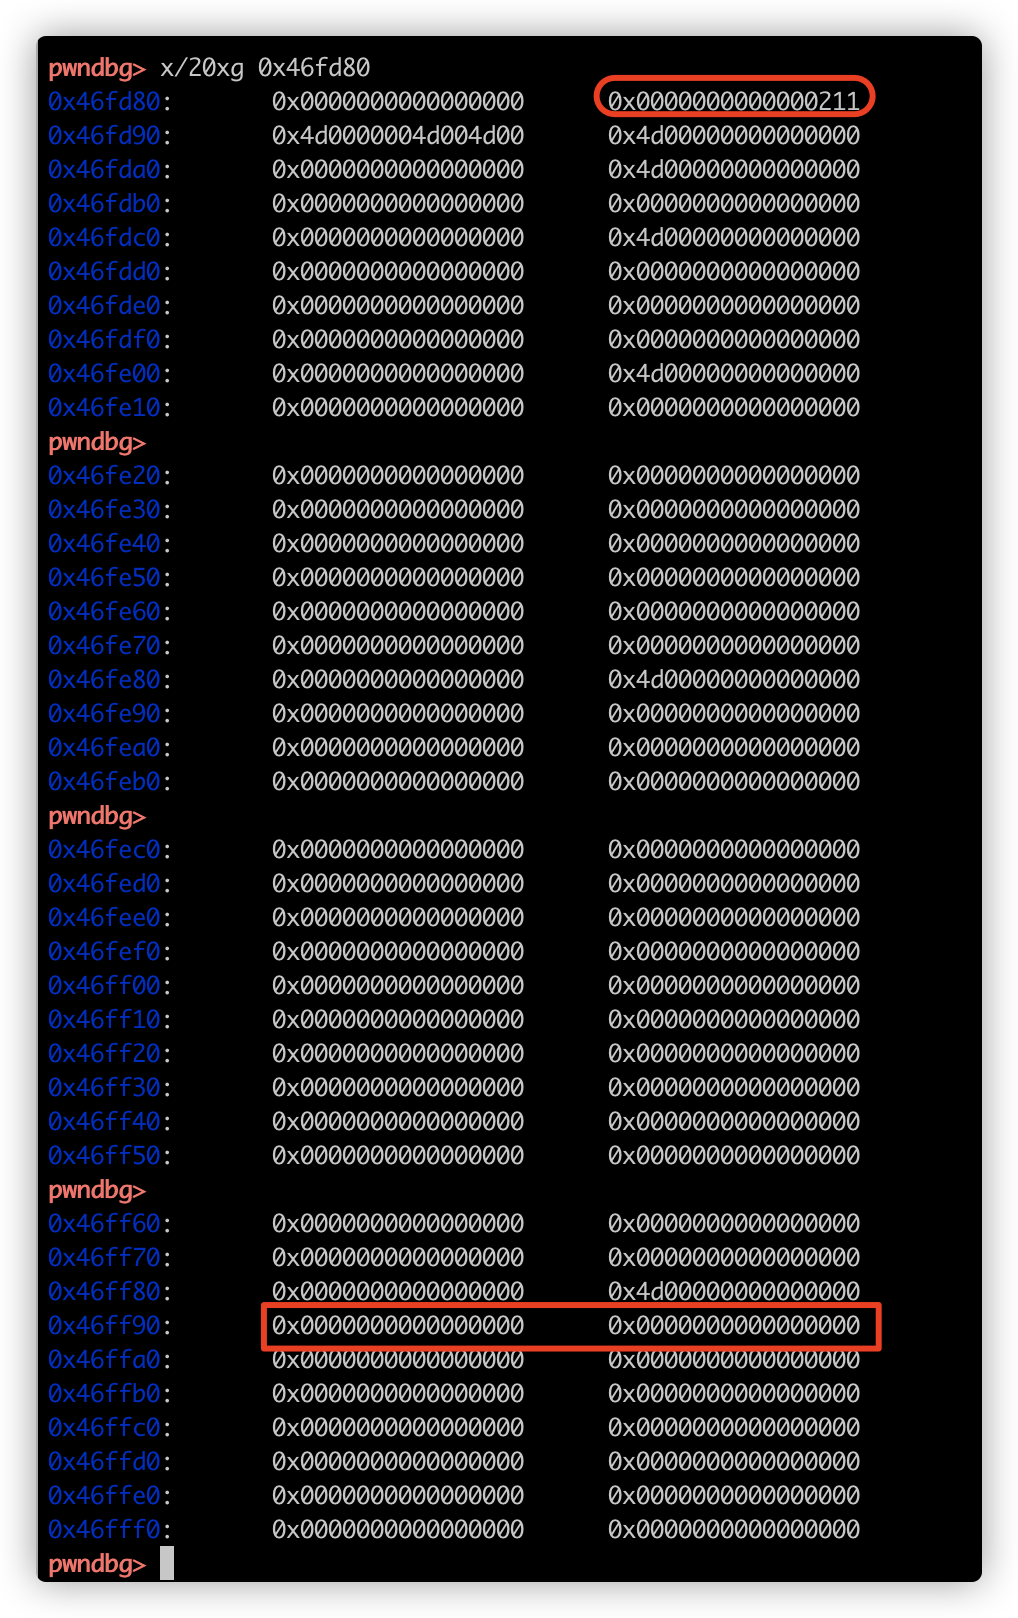
查看堆中内容,观察到下一chunk的size域已经堆溢出被破坏,无法malloc导致程序crash:
修复
可以在GitHub中查看修复代码:
Fix a buffer overflow on corrupt EXIF data. · libexif/libexif@8ce72b7
Fix a buffer overflow on corrupted JPEG data · libexif/libexif@00986f6
总结
-
在进行Fuzz时,信息收集同等重要,如果是复现,需要知晓Fuzz目标的CVE信息。如果是漏洞挖掘过程,则难度会更上一个等级。
-
熟悉程序的构建过程、程序的功能是必不可少的步骤,如果完全不知道程序是干嘛的,那漏洞挖掘也就无从下手。
-
在复现漏洞时,应该考虑怎么去证明这个漏洞,以及程序是如何崩溃的,可以在崩溃时的上层函数打上断点单步跟踪,观察参数和函数调用过程
-
另外:可以使用Eclipse-CDT 代替 GDB 进行调试,这是一个界面化的工具,需要有Java环境,下载链接:
CDT Downloads | The Eclipse Foundation
具体使用方法就不赘述了,网上有得很。工具都无所谓,看自己喜欢哪种,我就习惯GDB
__EOF__

本文链接:https://www.cnblogs.com/unr4v31/p/15247691.html
关于博主:评论和私信会在第一时间回复。或者直接私信我。
版权声明:本博客所有文章除特别声明外,均采用 BY-NC-SA 许可协议。转载请注明出处!
声援博主:如果您觉得文章对您有帮助,可以点击文章右下角【推荐】一下。您的鼓励是博主的最大动力!





【推荐】国内首个AI IDE,深度理解中文开发场景,立即下载体验Trae
【推荐】编程新体验,更懂你的AI,立即体验豆包MarsCode编程助手
【推荐】抖音旗下AI助手豆包,你的智能百科全书,全免费不限次数
【推荐】轻量又高性能的 SSH 工具 IShell:AI 加持,快人一步
· 从 HTTP 原因短语缺失研究 HTTP/2 和 HTTP/3 的设计差异
· AI与.NET技术实操系列:向量存储与相似性搜索在 .NET 中的实现
· 基于Microsoft.Extensions.AI核心库实现RAG应用
· Linux系列:如何用heaptrack跟踪.NET程序的非托管内存泄露
· 开发者必知的日志记录最佳实践
· winform 绘制太阳,地球,月球 运作规律
· AI与.NET技术实操系列(五):向量存储与相似性搜索在 .NET 中的实现
· 超详细:普通电脑也行Windows部署deepseek R1训练数据并当服务器共享给他人
· 上周热点回顾(3.3-3.9)
· AI 智能体引爆开源社区「GitHub 热点速览」