vue笔记
Vue笔记
前言
使用Vue需要node.js环境,所以这里需要利用nvm安装node.js。
node 和 npm 相关的名词很多,比较容易混淆。
下面对这些名词做个统一梳理
node:一个基于 Chrome V8 引擎的 JavaScript 运行时;提供了 JavaScript 的运行环境。可以直接到 node 官网下载安装nvm:node.js 版本管理工具;不同项目可能需要不同版本的 node;可以使用 nvm 来管理 node.js 版本npm:node.js 包管理工具;用来管理 node.js 中的第三方插件;新版本的 node 在安装的时候,会自动安装对应版本的 npmnrm:npm 源的管理工具,可以用来方便的切换 npm 源cnpm:使用的是淘宝的源。用法跟 npm 完全一致。cnpm 经常会有问题,所以在很多地方不推荐使用yarn:经过重新设计的崭新的 npm 客户端;运行速度显著提升,整个安装时间比 npm 少。一般推荐使用 yarn 代替 npmnpx:一个 npm 包执行器。我们可以使用 npx 来执行各种命令。
不同node.js版本对应的第三方插件不同,不同的教程使用的node.js版本也不同,建议使用和教程一致的node.js版本,不然插件有兼容性问题。(使用别人的项目,node.js也需要和项目的一致,不然也有兼容性问题)
nvm常用命令
nvm ls :列出所有已安装的 node 版本

nvm list available :显示所有可下载的版本

nvm install stable :安装最新版 node

nvm install [node版本号] :安装指定版本 node

nvm uninstall [node版本号] :删除已安装的指定版本

nvm use [node版本号] :切换到指定版本 node   //要使用管理员权限的命令提示符执行该命令

nvm current :当前 node 版本
node.js常用命令
node -v  查看当前node版本
node 进入js的运行环境,可以直接js代码
node 文件名  用node环境来执行一个文件
ctrl + c  退出node指令/用来关闭服务
环境搭建
- 下载安装nvm,然后配置nvm国内镜像(加快下载插件速度), 下面是nvm的settings.txt配置文件,前面root和path可以自定义路径
root: D:\soft\nvm
path: D:\soft\nodejs
node_mirror: https://npm.taobao.org/mirrors/node/
npm_mirror: https://npm.taobao.org/mirrors/npm/
- 使用nvm install [node版本] 安装node.js
nvm install 12.4.0
- vue项目需要vue-cli插件,安装vue-cli,安装过vue2的要先卸载
npm install -g @vue/cli
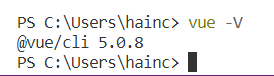
4. 查看vue安装是否成功
vue -V
创建Vue项目
-
创建一个空文件夹,用开发工具打开,我使用的是vscode
-
在终端输入vue create 项目名称
vue create vue-demo
- 选择模板方式进行安装,如下图
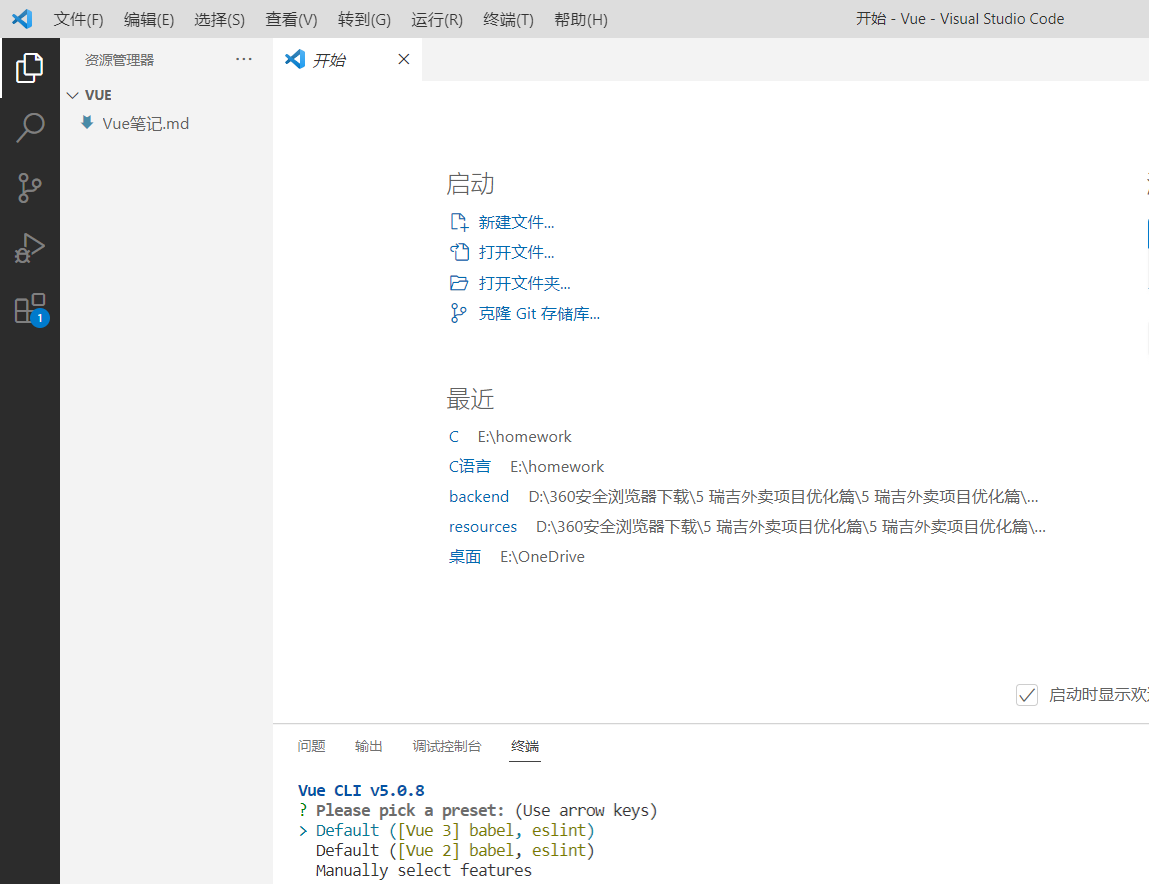
第一个是创建vue3项目,第二个是vue2项目,第三个是手动进行项目配置创建。上下按键选择,回车键确认,这里选择第3种。
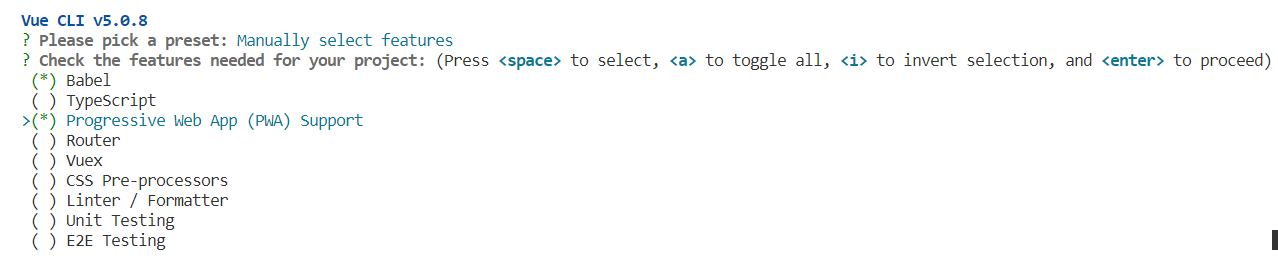
使用空格键进行选择,如上图,然后回车确认。
-
Babel 支持babel,使用babel将源代码进行转码( es6 -> es5)
-
TypeScript 安装ts
-
Progressive Web App (PWA) Support ,使用渐进式网页应用 (选上)
-
Router 路由模块
-
Vuex 状态管理(需要用到就选上)
-
CSS Pre-processors css预处理器
-
Linter / Formatter 代码校验 ,这里建议不选上,代码校验比较严格,多个一个空格都会报错
-
Unit Testing 单元测试(一般不需要)
-
E2E Testing 端到端测试(一般不用),然后选择vue2或者vue3,这里选择3

-
选择配置文件存在哪里,这里选第一个

是否保存刚才上面的选项,这里不保存输入n,回车创建项目

创建完项目,如下图
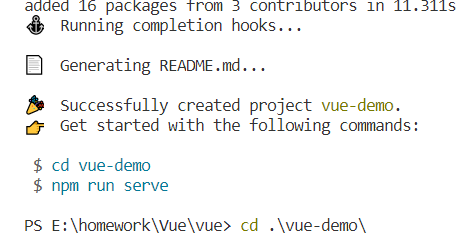
运行项目
注意创建完项目后,要cd切换到vue-demo才可以运行项目。
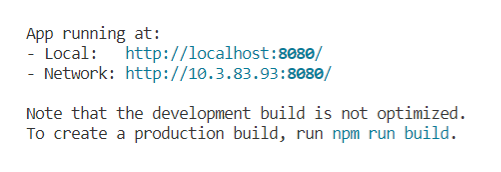
输入npm run serve 就可以运行项目了,然后浏览器地址栏输入地址,就可以访问创建好的项目,如下图
http://localhost:8080

通过以上方法生成的项目目录为脚手架,脚手架是用于快速生成vue项目的基础架构,创建完脚手架后,vue3项目的目录结构如下图
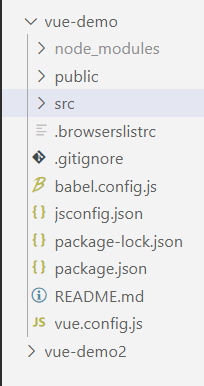
目录说明
1. node_modules:npm加载项目的依赖模块,类似maven的pom文件
可以通过 npm instal [依赖包名称]安装缺少/需要的依赖
2. public目录:公共资源目录,存放图片和HTML等静态文件,打包时会把该文件夹下的资源原封不动复制到dist文件夹下。index.html首页
	在首页文件中,一般只定义一个空的根节点:
	<div id="app"></div>
	该节点时main.js文件中定义的实例挂载点,内容通过vue组件来填充。
3. src:源码目录
	main.js ---- 入口js文件
        import { createApp } from 'vue'  //从vue中引入createApp
        import App from './App.vue'   // 引入同目录下的App.vue组件 ,下面2个意思差不多
        import router from './router'
        import store from './store'
        //使用store状态组件和router路由组件创建App实例
        //并把实例挂载到index.html文件中的id=‘app’的<div></div>根节点。
        createApp(App).use(store).use(router).mount('#app')

    App.vue ---- 根组件,页面入口文件,所有页面都是在App.vue下进行切换的,负载构建定义及页面组件归集。
    components ---- 公共组件目录
    assets ---- 资源(静态)目录,这里的资源会被wabpack构建
    routes ---- 前端路由
    store ---- (容器目录,存放应用中大部分的状态)应用级数据(state)
    views ---- 页面目录
4. gitignore: 配置上传git忽略的文件,配置了上传到git时不会把该文件也上传。
5. package.json:npm包配置文件,定义项目的npm脚本、依赖包等信息
6. package-lock.json: 版本管理使用的文件。
7. README.md:项目的说明文档,markdown格式。
其他的文件这里使用不到,不说明可以自行百度。
Vue语言基础-es6语法
赋值语句
let命令
<!DOCTYPE html>
<html lang="en">
<head>
<meta charset="UTF-8">
<meta http-equiv="X-UA-Compatible" content="IE=edge">
<meta name="viewport" content="width=device-width, initial-scale=1.0">
<title>for循环中的var与let</title>
<script>
window.onload = function(){
var myVar = document.getElementById('varCount')
var myLet = document.getElementById('letCount')
//输出10个10
for(var i = 0 ; i < 10; i++){
setTimeout(function(){
myVar.innerHTML+=i+' ';
})
}
//输出0-9,let定义变量
for(let i = 0 ; i < 10; i++){
setTimeout(function(){
myLet.innerHTML+=i+' ';
})
}
}
</script>
</head>
<body>
<div id="varCount">var变量循环:</div>
<div id="letCount">let变量循环:</div>
</body>
</html>
总结:变量i是用var声明的,在全局范围内都有效;let声明的变量仅在块级作用域有效。
const命令
用const命令声明的是一个只读的常量,必须声明常量立即初始化,否则报错。
const PI = 3.14  //正确
PI = 3.143323  //报错,常量不可变
const foo;  //报错没有赋值
const和let作用域相同,const保证的是变量指向的地址不能改动,修饰简单类型的数据(数字,字符串,布尔值)相当于常量;
但对于复合类型(对象或数组)变量指向的内存地址只是一个指针,只能保证指针是固定的,指向的数据结构不能保证不可变。
      const obj = {}; //定义const对象
        obj.name = 'lb';  //对象赋值
        obj.age = 23;
        console.log(obj) //输出对象
        // obj = {} //报错,不能将obj指向另外一个对象。

        const names = [];
        names.push('lb');
        console.log(names.length) //输出数组长度,只有一个元素
        // names = ['jsoo'];  //报错,不能将另外一个数组赋值给names常量数组
        names.push('jsoo'); //只能通过push添加元素
        console.log(names);
解构赋值(箭头函数)
结构数据和构造数据相反,不是构造一个新的对象或数组,而是逐个拆分现有的对象或数组来提前所需的数据。
ES6允许按照一定模式从数组和对象中提取值再对变量赋值,这称为解构。这种新模式会映射出正在结构的数据结构,只有那些与模式相匹配的数据才会被提取出来。
数组的解构赋值
数组解构赋值是按照等号左边与右边的匹配进行的,语法结构如下
let [var1,var2,...varN] = array //其中,varN表示一个变量;array表示数组
数组解构时数组的元素时按次序排序的,变量取值由位置决定。下面时数组解构赋值的基本方式。
(1)模式匹配
let [a,b,c] = [1,2,3] //解构后 a=1,b=2,c=3
(2) 嵌套方式
let[foo,[[bar],baz]] = [1,[[2],3]] // 解构后,foo=1,bar=2,baz=3
(3) 不完全解构
let[x,,y] = [1,2,3] // 解构后,x=1,y=3
(4) 使用省略号解构
let[head,...tail] = [1,2,3,4]; //解构后 :head =1 ,tail=[2,3,4]
解构不成功,变量的值就是undefined,如下
let [x,y] = ['a'] ; //解构后:x='a' , y为undefined
(5) 含有默认值的解构
let [a=0,b=1,c=2] = [1,undefined]; //解构后:a=1,b=1,c=2 ,b和c使用默认值,undefined覆盖不了b,b已经有值。
(6)字符串解构的处理
var [a,b,c] = 'hello' //解构后,a='h' b = 'e' c='l'
对象的解构赋值
对象的解构赋值和数组的区别在于,数组是按照顺序,而对象是按照名称进行匹配的,如果名称不匹配则解构失败,输出undefined
(1) 基本形式
let {foo,bar} = {foo:'aaa',bar:'bbb'}; //解构后:foo='aaa',bar='bbb'
(2) 左边变量也是key:value的形式
let {foo:baz} = {foo:'aaa',bar:'bbb'};  //解构后:foo:'aaa'
let obj = {first:'hello',last:'world'};
let {first:f,last:l} = obj;   //解构后 f=hello , l=world;
(3)解构的正常情况。
let {foo:foo,bar:bar} = {foo:'aaa',bar:'bbb'};
可以简化为 let {foo,bar} = {foo:'aaa',bar:'bbb'};;
也就是说,对象的解构赋值的内部机制,是先找到同名属性,然后再赋值给对应的变量。真正被赋值的是后者,不是前者。 原本是key:value形式,在对象解构中变成了,value:key形式。
解构赋值的用途
- 从函数返回多个值
函数只能返回一个值,需要返回多个值时,只能返回数组或对象,然后通过数组或对象的解构赋值。
function example(){
	return [1,2,3];  //返回一个数组
}
let[a,b,c]= example(); //数组解构赋值  ,a=1,b=2,c=3

function example2(){
	return{
		foo:1,bar:2
	};
}
let{foo,bar} = example2(); //对象解构赋值,foo=1,bar=2
- 函数参数的定义
解构赋值可以方便将一组参数与变量名对应起来。
<!DOCTYPE html>
<html lang="en">
<head>
    <meta charset="UTF-8">
    <meta http-equiv="X-UA-Compatible" content="IE=edge">
    <meta name="viewport" content="width=device-width, initial-scale=1.0">
    <title>解构赋值作用</title>
    <script>
        window.onload=function(){
            let myDisplay=document.getElementById("display");
            myDisplay.innerHTML= arraySum([1,2,3])+"<br>";
            myDisplay.innerHTML+= objectSum({z:4,y:5,x:6});
            function arraySum([x,y,z]){
                return x+y+z;
            }
            function objectSum({x,y,z}){ //注意形参的变量名也要和传参的一致,不然解构失败,顺序没关系
                return x+y+z;
            }
        }
    </script>
</head>
<body>
    <div id="display"></div>
</body>
</html>
- 提取json数据
<!DOCTYPE html>
<html lang="en">
<head>
    <meta charset="UTF-8">
    <meta http-equiv="X-UA-Compatible" content="IE=edge">
    <meta name="viewport" content="width=device-width, initial-scale=1.0">
    <title>对json数据解构</title>
    <script>
        window.onload=function(){
            let jsonData = {
                name:"刘斌",
                age:23,
                like:['羽毛球','足球']
            };
            //json数据结构
            let{name,age,like}= jsonData;
            console.log(name,age); //输出解构后的值
            for(let i = 0 ; i < like.length; i++){
                console.log(like[i]); //遍历like数组
            }
        }
    </script>
</head>
<body>
</body>
</html>
- 遍历map结构
任何部署了iterator接口的对象,都可以使用for...of循环遍历。map支持iterator,配合变量的结构赋值。
<!DOCTYPE html>
<html lang="en">
<head>
    <meta charset="UTF-8">
    <meta http-equiv="X-UA-Compatible" content="IE=edge">
    <meta name="viewport" content="width=device-width, initial-scale=1.0">
    <title>Document</title>
    <script>
        window.onload=function(){
            const map = new Map();
            map.set('name','猪头');
            map.set('age',32);

            //for .. of遍历map集合
            for(let[key,value] of map){
                console.log(key,value);
            }

            console.log("================================");
            for(let[key] of map){
                console.log(key); //只遍历key
            }
            console.log("==================================");

            for(let[,value] of map){
                console.log(value);  //只遍历value
            }
        }
    </script>
</head>
<body>
</body>
</html>
箭头函数
//通常函数的定义语法如下:
function 函数名(形参[,形参]){    ->  如 function fn1(a,b){ return a+b }  或者 var fn2=(a,b){ return a+b }
	//函数体
}

//使用es6箭头函数语法定义函数,将原函数的function关键字和函数名都删除,并使用箭头 => 连接参数列表和函数体,上面可以修改成下面:
(a,b)=>{
	return a+b           //或者是  var fn3 = (a,b) => {return a+b}
}
- 箭头函数的简化
//(1) 当函数参数只有一个,括号可以省略,但没有参数时,不可省略括号,如下
var fn1 = () => {}  //无参数
var fn2 = a =>  {}  //一个参数
var fn3 = (a,b) => {} //多个参数
var fn4 = (a,b,..args) => {}  //可变参数

//(2)如果函数体只有一条return语句时,可以省略{}和return 关键字,但函数体包含多条语句时,不能省略{}和return关键字,如下
() => 'hello'   //函数返回字符串 'hello'
(a,b) => a+b   //函数返回 a+b
(a) => { a=a+1  return a}  //多条语句,不可省略{}和return
- 箭头函数与解构赋值
<!DOCTYPE html>
<html lang="en">
<head>
    <meta charset="UTF-8">
    <meta http-equiv="X-UA-Compatible" content="IE=edge">
    <meta name="viewport" content="width=device-width, initial-scale=1.0">
    <title>Document</title>
    <script>
        arrow_remainder = ([i,j]) => i%j;  //求余数
        console.log('8 % 3 = '+arrow_remainder([8,3]));

        arrow_max = (...args) => Math.max(...args); //求可变参数的最大值
        // max = arrow_max(...[993,1,5]); //这种形式也可以
        max = arrow_max(32,92,44,193,4)  //注意可变参数里面只能存放一种类型,不能放基本类型又放数组,如arrow_max(32,92,[32,54])
        console.log(max);
    </script>
</head>
<body>
</body>
</html>
数组与字符串扩展
数组方法
es6中新增加了一些操作方法。
- map()方法
map()方法用于遍历数组中的每个元素,让其作为参数执行一个指定的函数,然后将每个返回值形成一个新数组,map()方法不改变原数组的值,语法格式如下:
let 新数组名 = 数组名.map(function(参数){
	//函数体
})
或者简化成以下格式:
let 新数组名 = 数组名.map((参数) => {   //这里的参数可以是index索引,或者指定对象
	//函数体
})
map()方法的应用
<!DOCTYPE html>
<html lang="en">
<head>
    <meta charset="UTF-8">
    <meta http-equiv="X-UA-Compatible" content="IE=edge">
    <meta name="viewport" content="width=device-width, initial-scale=1.0">
    <title>Document</title>
    <script>
        let arr = [1,2,3];
        let newArr = arr.map(item => item*2);  //数组每个元素*2返回
        console.log(arr)//原数组
        console.log(newArr);//新数组

        let arrScore = [90,42,66]
        let score = arrScore.map(item  => item>=60?item>=90 ? '优秀':'及格':'不及格'); //item>=60?item>=90 相当于 if(item>=60){if(item>=90)}
        console.log(arrScore);//成绩组
        console.log(score); //转换数组  结果['优秀','不及格','及格']
    </script>
</head>
<body>
</body>
</html>
forEach()方法
forEach()方法是从头到尾遍历数组,为每个元素调用指定函数,该方法将改变原数组本身,并且指定调用函数的参数依次是:数组元素、元素的索引、数组本身。语法格式如下:
数组名.forEach(function(数组元素,元素的索引,数组本身){
	//函数体
})
简化:
数组名.forEach((数组元素,元素的索引,数组本身) => {
	//函数体
})
forEach()方法应用
<!DOCTYPE html>
<html lang="en">
<head>
    <meta charset="UTF-8">
    <meta http-equiv="X-UA-Compatible" content="IE=edge">
    <meta name="viewport" content="width=device-width, initial-scale=1.0">
    <title>Document</title>
    <script>
        let arr = [1,2,3,4]
        console.log(arr);//旧数组
        arr.forEach((element,index,arr)=>{
            arr[index] = element+1; //当前index会自增
        })
        console.log(arr);//新数组  [2,3,4,5]
    </script>
</head>
<body>
</body>
</html>
filter()方法
filter()方法对数组元素执行特定函数后返回的一个子集,也称为过滤方法。
简单来说,就是用filter()方法过滤掉数组不满足条件的值,返回一个新数组,不改变原数组的值,语法格式如下
数组名.filter((参数列表)=>{//函数体})
参数列表是每次循环的传入的形参,函数体执行过滤条件,过滤条件是保留下来的数据
如:let arr = [60,70,80,87,90]
let result = arr.filter(tmp=> tmp%3==0) // 新数组result=[60,87,90]   tmp是每次循环的数组元素,每次循环过滤tmp对3取余不为0的数据
filter()方法的应用
<!DOCTYPE html>
<html lang="en">
<head>
    <meta charset="UTF-8">
    <meta http-equiv="X-UA-Compatible" content="IE=edge">
    <meta name="viewport" content="width=device-width, initial-scale=1.0">
    <title>Document</title>
    <script>
        let arrJson=[
            {language:'web',price:42},
            {language:'c++',price:87},
            {language:'json',price:63},
            {language:'ES6',price:99},
        ]
        let arrResult = arrJson.filter(item=> item.price>=65); //过滤掉价格小于65的语言
        for(var key in arrResult){
            console.log(key+":语言"+arrResult[key].language+",价格:"+arrResult[key].price); //key是索引
            //结果  0:语言c++,价格:87      1:语言ES6,价格:99
        }
    </script>
</head>
<body>
</body>
</html>
splice()方法
语法格式:splice(index, len, [item])
可以用来替换/删除/添加数组内某一个值或几个值,该方法会改变初始数组。
- index:数组开始下标
- len:替换/删除的长度
- item:替换的值,为删除时item为空
//删除
let arr = ['1','2','3','4'];
arr.splice(0,2);
console.log(arr.toString());//3,4

//替换
let arr = ['1','2','3','4'];
arr.splice(0,2,['5','6','7']);
console.log(arr.toString()); //5,6,7,3,4

//新增
let arr = ['1','2','3','4'];
arr.splice(0,0,['5','6','7']);
console.log(arr.toString());//5,6,7,1,2,3,4,
every()和some()方法
every()和some()方法都是对数组元素进行指定函数的逻辑判断,入口参数都是一个指定函数,返回true或false。
every()方法:每个运算结果都是true,则返回true,一旦存在一个假,则返回false,一假即假。
some()方法:只要有一个元素的结果是true,则方法返回true,也就说一真即真。
<!DOCTYPE html>
<html lang="en">
<head>
    <meta charset="UTF-8">
    <meta http-equiv="X-UA-Compatible" content="IE=edge">
    <meta name="viewport" content="width=device-width, initial-scale=1.0">
    <title>Document</title>
    <script>
        var people =[
            {name:'lb',sex:'male'},
            {name:'wq',sex:'female'},
            {name:'lyg',sex:'femele'}
        ];
        console.log(people)
        var result = people.every(people=>people.sex ==="female")
        console.log('该对象数组都是女性:'+result); //返回值为 false

        var some = people.some(people=> people.sex === 'female')
        console.log("该对象数组包含一个女性:"+some)  // true
    </script>
</head>
<body>
</body>
</html>
reduce()方法
reduce()方法接收一个函数作为累加器,使用数组中的每个元素依次执行回调函数,不包括数组中被删除或从未被赋值的元素,回调函数接收4个参数,语法格式如下:
arr.reduce((prev,cur,index,arr)=>{
	//操作语句
},init);
arr代表数组;prev代表上一次调用回调时的返回值或初始值init;cur表示当前正在处理的数组元素;index表示当前正在处理的数组元素的索引,若提供init,则索引为0,否则索引为1;init表示初始值。
(1)数组求和
const arr = [1,2,3,4,5]
const sum = arr.reduce((pre,item)=>{
	return pre+item
},0)
console.log(sum) //15
//第1次:上一次值0,当前值1,索引0,返回1
//   2:上一次值1,当前2,索引1,返回 1+2=3
//   3:上一次值3,当前3,索引2,返回3+3=6
//   4:上一次值6,当前4,索引3,返回6+4=10
//   5:上一次值10,当前5,索引4,返回10+5=15
(2) 求数组项最大值
const arr1 = [99, 1, 2, 3, 4]
var max = arr1.reduce((pre,cur)=>{
	return Math.max(pre,cur)
}) //max = 99
由于没有传入init初始值,所以开始时pre的值为数组的第一个元素99,cur的值为数组的第二个元素1,比较两值取最大,进入下一个轮回调。
(3)数组去重
var arr2= [1,4,22,55,1,4]
var newArr = arr2.reduce((pre,cur)=>{
	pre.indexOf(cur) === -1  && pre.push(cur);//当前元素是否存在初始化数组中,不存在执行push,如果存在跳过进入下一轮
	return pre;  //最后把初始化数组pre返回
},[])  //此处[]初始值为空数组
console.log(newArr) //[1,4,22,55]
reduce()方法的应用,统计字符串中字母的个数
     const str = 'abandoned'
     const obj = str.split('').reduce((pre,cur)=>{
     console.log(pre[cur]) // 第一次pre是{},cur是a,输出undefined,则false,{}[a]的意思:从{}读取a变量的值,肯定是undefined , pre[cur]:pre是{}对象,cur是key,根据key获取value,第一次的key获取到空undefined,因为是空对象
     pre[cur] ? pre[cur]++ : pre[cur] = 1  //第一次pre[cur]是undefined,即false,执行pre[cur]=1,即per[a] =1
     console.log(pre[cur]) //这时 pre[cur] 为 {1}[a] ,所以输出  1  ,已经是key:value形式
            return pre
     },{})//初始值为对象
        console.log(obj)
模板字符串
通常在使用字符串输出时,如果其中有变量,则需要使用字符串拼接方法进行。如
misdisplay.innerHTML="姓名"+name+"<br>"
如果有多个变量,进行拼接十分麻烦,所以有了模板字符串,模板字符串通过``反引号标识字符串,用${}引入变量,如
mydisplay.innerHTML=`姓名:${name} <br>`
由于反引号是模板字符串的标识,如果要使用反引号,需要\反斜杠进行转义.
使用模板字符串表示多行字符串,空格和缩进都保存到输出里,如
console.log(`how old
are you? `)  //会输出里面的换行符
${}里面还可以放js表达式,还可以进行运算以及引用对象属性,还可以调用函数,如
var x=99; console.log(`x=${x++}`);
function string(){return 24;} console.log(`how old are you , i am ${string()}`)
查找方法includes() , startsWtih() , endsWith()
js只提供了indexof()和lastindexof()方法。返回一个字符串是否包含在另一个字符串中,es6提供了以下3个方法。
(1)includes(Sting,index): 返回布尔值。参数String表示需要查找的字符串,index表示从哪里开始找,如果没有index参数,则查找整个字符串。
(2)startsWith(Sting,index): 返回布尔值。参数String是否在源字符串头部,index表示从源字符串哪里开始找。
(3)endsWith(String,index):返回布尔值。参数String是否在源字符串尾部,index从源字符串哪里开始找。
查找方法的应用
根据用户输入的URL网址的头判断,如果网址的头是“http://” , 则显示一般网址;如果头是“https://" , 则显示加密网址;如果文件名的后缀是”.txt",则显示文本文件,如果是“.jpg",则显示图片文件。
<!DOCTYPE html>
<html lang="en">
<head>
    <meta charset="UTF-8">
    <meta http-equiv="X-UA-Compatible" content="IE=edge">
    <meta name="viewport" content="width=device-width, initial-scale=1.0">
    <title>Document</title>
    <script>
        let st1 = "teacher";
       	 	console.log(`teacher是否包含teach: ${st1.includes('teach')}`)
        let str = 'http://www.baidu.com';
        if(str.startsWith('http://')){
            console.log(str+'是普通网址');
        }else if(str.startsWith('https://')){
            console.log(str+"是加密网址");
        }
        let fileName = "1.jpg";
        if(fileName.endsWith('.jpg')){
            console.log(fileName+"是图片文件")
        }else if(fileName.endsWith('.txt')){
            console.log(fileName+"是文本文件");
        }
    </script>
</head>
<body>
    <h1>ES6新增的字符串查找方法</h1>
</body>
字符串重复方法repeat()和字符串补全方法padStart()和padEnd()
repeat()方法能将源字符串重复几次,返回一个新的字符串,如果输入小数,则向下取整,如果输入NaN,当作0;输入其他值,会报错
let str ='lb';
console.log(str.repeat(3)) ;  //显示lblblb
console.log(str.repeat(2.8)); //lblb
console.log(str.repeat(0.9)); //无显示
console.log(str.repeat(NaN));//无显示
padStart()和padEnd()是字符串补全长度的方法,如果某个字符串不够指定长度,会在头部或尾部补全。
这两个方法都有两个参数,第一个参数是补全后的字符串的最大长度;第二个参数是要补的字符串,返回的是补全后的字符串。
如果源字符串长度大于第一个参数,则返回源字符串;如果不写第二个参数,则用空格补全到指定长度。如
    	console.log('7'.padStart(2,'0')); // 显示2位,前面补0, 输出07,可用于日期时间的两位显示
        console.log('7'.padEnd(2,'0')); //显示2位,后面补0,输出70
        console.log('hello'.padStart(4,'h')); //输出hello,4位不满足源字符串,补全不了h,所以输出源字符串
        console.log('hello'.padEnd(9,'lb')); // 显示9位,后补lblb,输出 hellolblb,用lb补全4位
        console.log('hi'.padStart(5)); //显示5位,前面补3个空格
//如果补全字符串与源字符串超出补全之后的字符串长度,那么补全字符串超出的部分会被截取,如
		console.log('hello',padEnd(9,'world'));//显示 helloworl, 在补d就超出9位了
Module语法
module模块体系,将大型程序分解位相互依赖的小文件,ES6模块不是对象,而是需要export命令显式指定输出的代码,再通过import命令输入。如
import {reactive,toRefs,computed} from 'vue'
该例是从vue模块加载三个方法,其他方法不加载。
export命令
模块功能主要由export和import构成。其中,export命令用于规定模块的对外接口;import命令用于输入其他模块的功能。
一个模块就是一个独立的文件,该文件内部的所有变量从外部无法获取。如果系统外部能读取模块内部的某个变量,就必须使用export输出该变量。如
export var m = 1; //不推荐使用这种方式
var m = 1;
export {m}; //推荐,因为可以在脚本尾部看清楚输出了哪些变量。
//还可以对导出的变量起别名,解决变量过长问题
var num = 1;
export {num as i};  //变量num的别名i
规定了对外的接口m。其他脚本可以通过这个接口,获取的m的值为1.本质就是接口名与模块内部变量之间建立了一一对应的关系。
export可以出现在模块顶层的任何位置,如果处于块级作用域就会报错,处于代码块中无法做静态优化。
import命令
通过import加载这个模块,如
//main.js
import {firstName,lastName,year} from "./profile";

function setName(element){
	element.textContent=firstName + " " + lastName;
}
import加载profile.js文件并从中导入变量,import{}里面的变量必须与对外接口的名称相同。如想为输入的变量重命名,使用as关键字
import {lastName as surName} from "./profile";
import 后面的from指定模块文件的位置,可以是相对/绝对路径,.js后缀可以省略;
如果只是模块名不带路径,那么必须有配置文件,告诉js引擎该模块的位置,如
import {myMethod} from 'util';
上面的代码util是模块文件名,没有带路径,需要配置文件告诉js该模块的位置。
import相同模块,只会执行一次
import "lodash";
import "lodash"; //两条语句只执行一次

import {foo} from "my_mode";  import {bar} from "my_mode";
这两条语句等同于 import {foo,bar} from "my_mode";
export default命令
从前面的例子,可发现使用import需要知道模块的变量名和函数名,否则无法加载。
为了方便,提供export default命令,为模块指定默认输出,如
//export-default.js
export default function(){
	console.log('foo');
}
其他模块加载该模块时,import可以为该匿名函数指定任意名字。如
//import-default.js
import customName from './export-default';
customName();   //输出'foo'
上面的import可以用任意名称指向export-default.js输出的方法,这时不需要知道原模块输出的函数名。import后面不需要{}。
使用export default时,import不需要{};不使用export default时,对应的import的语句需要{}。
export default 用于指定模块的默认输出,一个模块只能有一个默认输出,因此export default命令只能使用一次。
JSON的数据定义
(1)数组方式。
[1,4,6,4,6,7,1,9]
(2) 对象方式。
{
	"name":"wang quan",
	"age":19,
	"address":{
		"country":"china",
		"zip-code":"32232"
	}
}
k:v形式必须使用双引号,不能使用单引号,对象或数组最后一个成员的后面不能加逗号。
(3)值分为简单和复合
简单值4种:字符串,数值(十进制表示)、布尔值和null(NaN, Infinity, -Infinity和undefined都会被转为null)。
复合值2种:符合json格式的对象和数组
{
	"city":null,
	"getcity": function(){
		console.log("错误用法"); //json中不能使用自定义函数或系统内置函数,如Date()
	}
}
json的使用
获取json数据的语法格式如下:
json对象.键名
json对象["键名"]
数组对象[索引]

//补充
student.name  //返回值
student.address.country
student.name="zhutou" //修改值
//另外从json字符串转为js对象可以使用JSON.parse()方法,如
var obj = JSON.parse('{"a":"hello","b":"world"}');
//要实现从js对象转json字符串使用JSON.stringify()方法
var json = JSON.stringify({a:"hello",b:"world"});  //结果:'{"a":"hello","b":"world"}'
json的数据操作
<!DOCTYPE html>
<html lang="en">
<head>
    <meta charset="UTF-8">
    <meta http-equiv="X-UA-Compatible" content="IE=edge">
    <meta name="viewport" content="width=device-width, initial-scale=1.0">
    <title>Document</title>
    <script>
        var myjson = {'name':'猪头','age':14}; //json对象
        for(var key in myjson){  //变量json对象
            console.log(`${key}: ${myjson[key]}`);
        }
        console.log("==========================")
        var wqjson = [
            {'name':'周天','age':29},
            {'name':'李四','age':23},
            {'name':'王五','age':11}
        ]
        //遍历json数组
        for(let i = 0 ; i < wqjson.length ; i++){
            for(let j in wqjson[i] ){
                console.log(j+":"+wqjson[i][j]);  //j是key  依次输出 一对对key:value形式
            }
        }
    </script>
</head>
<body>
</body>
</html>
Map数据结构
js的object本质上是键值对的集合,只能用字符串当键,有很大的限制,es6推出map数据结构,键的范围不仅限于字符串,各种类型都而可以做键,所以需要键值对形式,使用map比较好。
const myMap = new Map()  //定义map
myMap.set('age',18) // 通过set方法设置属性
console.log(myMap.get('age')) //通过get获取map属性值,返回18
map的常用属性和方法
(1)size属性。长度
const map = new Map();
map.set('foo',true);
map.set('bar',false);
map.size  //返回2
(2) set(key,value)方法,设置键值对,如果键存在,则覆盖,否则创建新的键值对。
const m = new Map();
m.set('edition',6); //键是字符串
m.set(262,'standard') //键是整型
m.set(undefinded,'nah') // 键是undefined
//链式写法
m.set(1,'a').set(2,'b').set(3,'c');
(3) get(key) 方法:根据key获取对应的value,找不到key,则返回undefined
const m = new Map();
const hello = function(){console.log('hello');};
m.set(hello,'ES6 world!')  //键是函数
m.get(hello) //输出 ES6 world!
(4) has(key) 方法:返回布尔值,表示某个键是否存在当前map对象中。
const m = new Map();
m.set('edition',6);
m.has('edition') // 返回true
m.has('e') // 返回false
(5) delete(key) 方法:用于删除某个键,删除成功,返回true,否则返回false。
const m = new Map();
m.set(undefinded,'nah');
m.has(undefinded) //true
m.delete(undefinded) //true
(6) clear()方法:用于清除数据,没有返回值。
let map = new Map();
map.set('foo',true).set('bar',false);
map.size // 2
map.clear();  map.size //0
(7)Map循环遍历:map提供三个遍历器生成函数和一个遍历方法。
-
keys():返回键名的遍历器。
-
values(): 返回键值的遍历器。
-
entries(): 返回所有成员的遍历器。
-
forEach(): 遍历map的所有成员。
<!DOCTYPE html>
<html lang="en">
<head>
    <meta charset="UTF-8">
    <meta http-equiv="X-UA-Compatible" content="IE=edge">
    <meta name="viewport" content="width=device-width, initial-scale=1.0">
    <title>Document</title>
    <script>
        let map2 = new Map([[1,'one'],[2,'two'],[3,'three']]);
        console.log([...map2.keys()]); // [1,2,3]   ...代表读取值,如果不加则返回MapInterator{1,2,3}迭代器对象
        console.log(map2.keys()) // 1,2,3
        console.log(...map2.values())// one two three
        console.log([...map2.entries()]);  //外层添加[],转为数组,返回[[1,'one'],[2,'two'],[3,'three']]
        // 注意forEach函数((value,key))value是第一个参数,就算第一个参数的名称是key,这个key也是value的值,因为forEach(Element,index)顺序决定
        map2.forEach((value,key)=> console.log(key+":"+value) ) //只有一条语句,可以省略{}和return
    </script>
</head>
<body>
</body>
</html>
(8) map与json相互转换
function mapToJson(map){
	return JSON.stringify([...map]); //将map转为json
}

function jsonToMap(jsonStr){
	return new Map(JSON.parse(jsonStr)); //把json转为map
}
Promise对象
promise是一个对象,可以获取异步操作的消息。promise对象用于一个异步操作的最终完成(或失败)及其结果值的表示。
简单来说就是用于处理异步操作的,异步处理成功,就执行成功的操作;异步处理失败,就捕获错误或停止后续操作。
promise的一般表示形式,如:
new Promise(
	/* executor */
	function(resolve,reject){
		if(条件){			//条件为真
						//执行代码
			resolve();
		}else{			//条件为假
						//执行代码
			reject();
		}
	}
)
参数executor是一个用于实现异步操作的执行器函数,有两个参数,resolve函数和reject函数。如果操作成功,调用resolve函数将实例状态设置为fulfilled,即已完成的状态;如果失败,则调用reject函数将实例状态设置为rejected,即失败的状态。
Promise对象有三种状态,如
(1)pending:初始状态,就是初始化promise时,调用executor执行器函数后的状态。
(2)fulfilled:完成状态,意味异步操作成功。
(3)rejected:失败状态,意味着异步操作失败。
Promise对象只有两种状态可以转化,如
(1)操作成功:将pending转为fulfilled状态。
(2)操作失败:将pending转为rejected状态。
这个状态转换是单向的且不可逆转,已经确定的状态(fulfilled/rejected)无法转回初始状态(pending)。
promise对象的方法
Promise.prototype.then()
Promise对象含有then()方法,调用then()方法返回一个Promise对象,实例化后的promise对象可以链式调用,then()方法接收两个函数:一个是处理成功后的函数;一个是处理错误结果的函数。如
<!DOCTYPE html>
<html lang="en">
<head>
    <meta charset="UTF-8">
    <meta http-equiv="X-UA-Compatible" content="IE=edge">
    <meta name="viewport" content="width=device-width, initial-scale=1.0">
    <title>Document</title>
    <script>
        var promise1 = new Promise((resovle,reject)=>{
            //2秒后设置为接收完成状态
            setTimeout(()=>{
                resovle('success'); //转为完成状态,fulfilled,传入success数据
                //或者设置失败状态,reject('failed')
            },2000);
        });
        //根据上面的状态,执行对应状态的函数
        promise1.then(data=>{
            console.log("成功:"+data);  //异步操作成功,调用第一个回调函数
        },err=>{
            console.log("失败:"+err);  //失败,调用第二个回调函数
        }).then(data=>{
            //上一步的then方法没有返回值,根据上一轮的返回值,继续处理
            console.log('链式调用:'+data);   //链式调用:undefined
        }).then(data=>{
            //...
        });
    </script>
</head>
<body>
</body>
</html>
Promise.prototype.catch()
catch()方法和then()一样,都会返回一个新的promise对象,用于捕获异常操作时出现的异常。因此通常省略then()方法的第二个参数,把错误处理控制权交给catch方法,如
<!DOCTYPE html>
<html lang="en">
<head>
    <meta charset="UTF-8">
    <meta http-equiv="X-UA-Compatible" content="IE=edge">
    <meta name="viewport" content="width=device-width, initial-scale=1.0">
    <title>Document</title>
    <script>
        var promise2 = new Promise((resovle,reject)=>{
            //2秒后设置为拒绝状态
            setTimeout(()=>{
                reject('reject')
            },2000);
        });
        //根据上面的状态,执行对应状态的函数
        promise2.then(data=>{
            //这里是fulfilled状态
            console.log("成功:"+data);  //异步操作成功,调用第一个回调函数
        }).catch(err=>{
            //使用最后的catch()方法可以捕获在这一条promise链上的异常
            console.log('出错:'+err);  //err中的数据是reject,输出reject
        })
    </script>
</head>
<body>
</body>
</html>
总结:通常都是then()结合catch()使用,then执行处理成功后的数据,catch处理失败后的数据。
Vue常用指令
文本插值
数据绑定就是将页面的数据和视图关联起来,当数据发生改变时,视图可以自动更新。
文本插值语法
{{插值表达式}}
文本插值会被替代对应数据对象的值。当绑定数据对象上的值发生改变时,插值处的内存都会被更新。
插值表达式还支持js表达式,但不支持js语句。
js表达式 {{ a==1? b='true': b='false'}} js语句 {{ var a = 1}}或者{{ if(ok) { return msg} }} 语句是不支持的
<template>
    <div class='hello'>
        {{ timeMsg }}
    </div>
</template>

<script>
import { reactive, toRefs, onMounted } from 'vue';
export default {
    setup() {
        const state = reactive({
            timeMsg:new Date(), // 读取当前时间
        })
        onMounted(() => {
            setInterval(()=>{  //定时器,每隔1秒更新state.timeMsg时间
                state.timeMsg=new Date();
            },1000)
        })
        return{
            ...toRefs(state)  //把响应式对象转为普通对象,读取属性时,不需要加对象前缀读取
        }
    }
};
</script>
<style scoped>

</style>
显示效果

toRefs作用: 如果不加...toRefs返回state对象,那么在template模板使用timeMsg属性,需要添加state对象前缀,也就是{{state.timeMsg}}才可以读取到值;如果添加了...toRefs(state) ,则模板可以直接使用timeMsg属性,不需要添加state前缀。
v-html指令
如果要将HTML代码以文字形式输出,可以使用v-text指令或插值符号{{}};如果希望浏览器解析HTML代码后再输出,需要使用v-html指令。
<template>
  <div class="hello">
    <p>{{rawHtml}}</p>
    <p>
      <span v-html="rawHtml"></span>
    </p>
  </div>
</template>

<script>
export default {
  name: 'HelloWorld',
  data(){   //使用data()函数里面的return{}把数据传递给template的对应变量
    return{
      rawHtml: "<a href='http://www.baidu.com'>百度一下</a>"
    }
  }
}
</script>
页面效果

可以看出插值只能显示文本HTML,v-html可以解析HTML代码后显示在页面上。
v-bind指令
- 绑定属性,如果需要在HTML的标签属性也可以发生改变,可以使用v-bind指令,如.
<template>
  <div class="hello">
    <div v-bind:id="myid"></div>
    <div :id="myid"></div>  <!-- v-bind:简写 形式可以省略前面的v_bind,只保留冒号 -->
  </div>
</template>

<script>
export default {
  name: 'HelloWorld',
  data(){   //使用data()函数里面的return{}把数据传递给template的对应变量
    return{
      myid: 1001
    }
  }
}
</script>
显示结果:

- 绑定样式类

从上图可以发现,当isActive为true时,active会添加到class中去,如果为false则不添加
- 通过数组绑定多个样式类
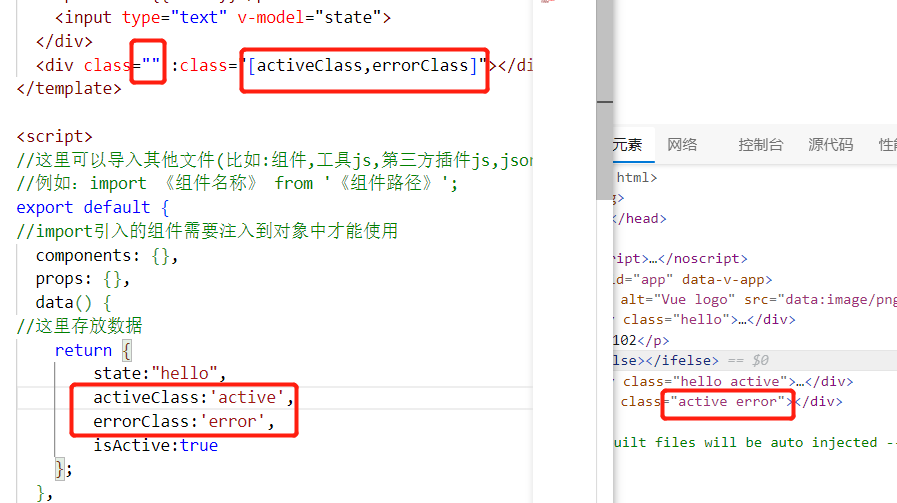
通过传递一个数组过去进行绑定样式类。
- 通过三目运算绑定样式类
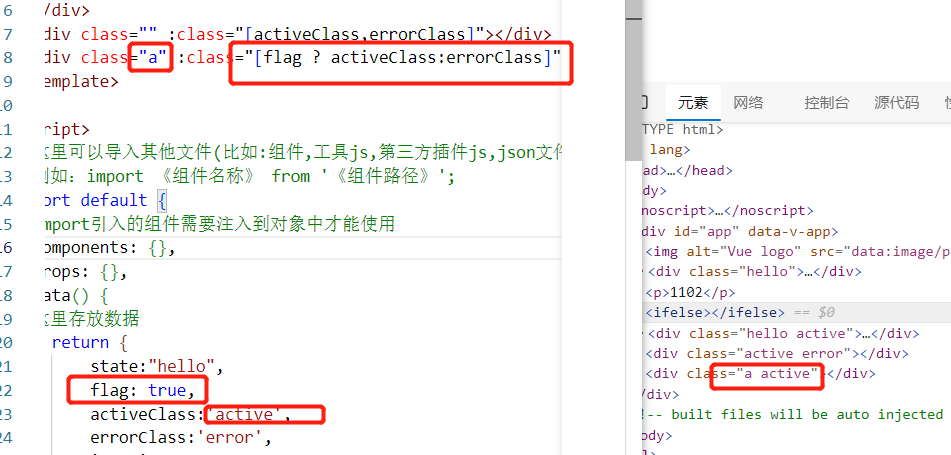
从上图发现,flag的值为true时,执行activeClass,添加active样式类,为false则添加error。
v-once指令
v-once指令用于执行一次性的插值,当数据改变时,插值处的内容不会更新。
注意:v-once是用于input输入的值不会改变,不是ref或reactive引用的值改变。
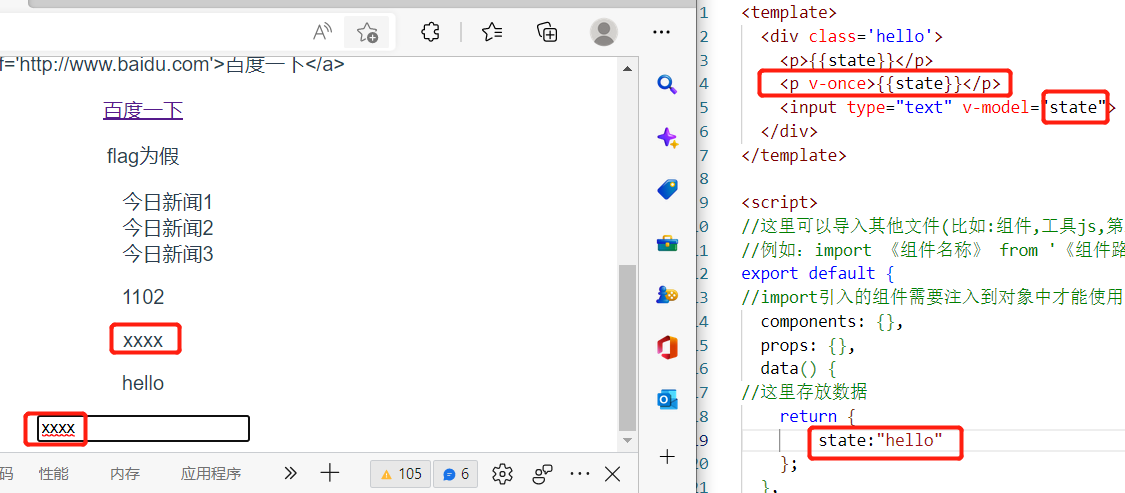
从上图发现,state默认值是hello,渲染完毕后,输入框修改state的值,只有第一个state被改变了值,而v-once修饰的变量没有被修改值。
常用指令
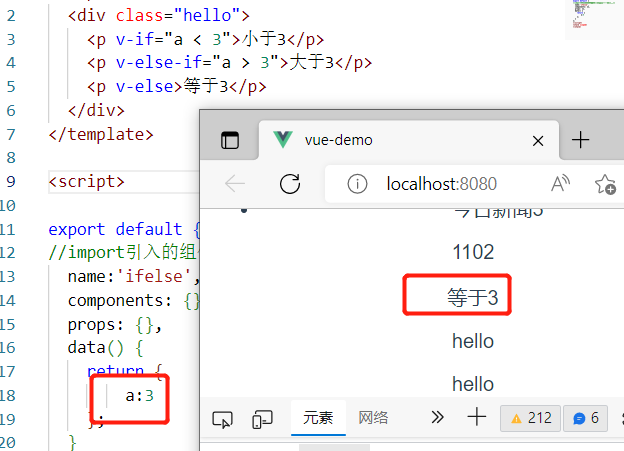
v-if、v-else-if和v-else指令
<template>
  <div class="hello">
    <p v-if="a < 3">小于3</p>
    <p v-else-if="a>3">大于3</p>
    <p v-else>等于3</p>
  </div>
</template>

<script>
export default {
  name: 'HelloWorld',
  data(){   //使用data()函数里面的return{}把数据传递给template的对应变量
    return{
     a:3
    }
  }
}
</script>
<style scoped>
</style>
页面效果
v-show指令
v-show和v-if一样的效果
v-if和v-show的区别
v-if是“真正的条件渲染” ,因为它会确保在切换过程中,条件块内的事件监听器和子组件适当地销毁和重建。
v-if也是惰性的:如果初始化条件为假,不会渲染,直到第一次为真时,才开始渲染。
v-show简单多了,不过初始条件是什么,都会渲染,只是简单的css进行切换,display:none.
总结:v-if有更高的切换开销,而v-show有更高的初始渲染开销。因此,如果频繁的切换,使用v-show较好;如果运行时很少改变,使用v-if较好。
 <p v-show="flag">v-show的flag为真则显示</p>
<script> ... flag:false...</script>
页面效果

v-for指令
v-for遍历数组,对象等,语法格式如下
v-for="(形参,index) in 数组/对象"  index是索引
{{形参.属性}}  或者{{形参}}  只有形参是直接打印一行的数据,如{ id: 1001, title: '今日新闻1' },
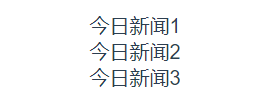
遍历对象数组
<template>
  <div class="hello">
    <ul>
      <li v-for="item in newsList">
        {{ item.title }}
      </li>
    </ul>
  </div>
</template>

<script>
export default {
  name: 'HelloWorld',
  data() {   //使用data()函数里面的return{}把数据传递给template的对应变量
    return {
      newsList: [
        { id: 1001, title: '今日新闻1' },
        { id: 1002, title: '今日新闻2' },
        { id: 1003, title: '今日新闻3' }
      ]
    }
  }
}
</script>
<style scoped>
</style>
页面效果
遍历对象
<template>
  <div class="hello">
    <span v-for="(value,key,index) in mark" :key="index">  <!--注意当v-for()括号里面3个参数时,第一个参数是value,第二个才是key,就算命名key在第一,key的值也是value-->
      属性名:{{key}},属性值:{{value}}
    </span>
  </div>
</template>

<script>

export default {
  data() {
    return {
        mark:{
          C语言: 90 ,
          离散数学: 98,
          大学英语: 88
        }
    }
  }
}
</script>
维护状态
vue-for渲染元素时,如果数组新加了一个元素,那么页面渲染要重新把数组渲染一遍,非常耗性能,能不能只渲染新添加的元素呢,vue提供了一个key属性,在标签添加了:key属性,vue就能跟踪每个节点的身份,从而重用和重新排序现有元素。
      <li v-for="item in newsList" :key="item.id">
        {{ item.title }}
      </li>
<!-- 如果数组的元素没有id,可以添加一个索引  一般不推荐使用index-->
      <li v-for="(item,index) in newsList" :key="index">
        {{ item.title }}
      </li>
事件处理
事件使用的是js里面的事件
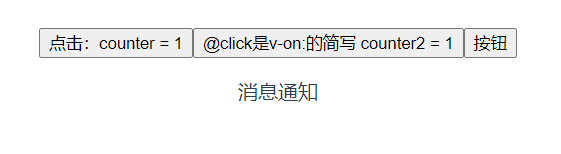
监听事件
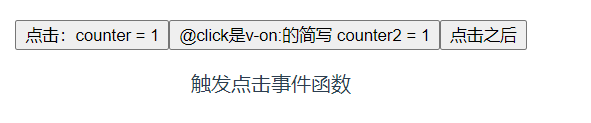
我们可以使用 v-on指令(通常缩写为@符号)来监听DOM事件,并在触发事件时执行一些js。用法为 v-on:click="方法名" 或使用简写@click="方法名"。
<template>
  <div class="hello">
    <h1>v-on:  等于  @</h1>
      <p>
          监听鼠标点击事件,每点击一下counter+=1
    </p>
    <button v-on:click="counter+=1">点击:counter = {{counter}}</button>
    <button @click="counter2+=1">@click是v-on:的简写 counter2 = {{counter2}}</button>
  </div>
</template>

<script>
export default {
  name: 'HelloWorld',
  props: {
    msg: String
  },
  data(){
    return{
      counter:1,
      counter2:1,
    }
  }
}
</script>
<style scoped></style>
显示效果

事件处理方法
然而许多事件处理逻辑会更复杂,不可能把代码都写在v-on指令中,因此v-on还可以接收一个需要调用的方法名称。
<template>
  <div class="hello">
    <button @click="clickHandle">按钮</button>
    <p>{{ message }}</p>
  </div>
</template>

<script>
export default {
  name: 'HelloWorld',
  props: {
    msg: String
  },
  data() {
    return {
      message: "消息通知"
    }
  },
  methods: {
    clickHandle(event) {
      //在事件中,读取data中的属性,是需要通过this.属性
      this.message = "触发点击事件函数,改变值"
      console.log(event) //打印js中的event对象
      event.target.innerHTML = "点击之后"// target是当前触发事件的元素,也就是按钮,修改了按钮的文本
    }
  }
}
</script>
<style scoped>
</style>
没触发事件前
点击按钮触发事件,执行函数
事件传递参数
事件触发执行函数时,可传递参数
<template>
  <div class="hello">
    <button @click="say('hi')">say hi</button>
    <button @click="say('what')">say what</button>
    <ul>
      <li @click="clickText(item)" v-for="(item,index) in names" :key="index">
        {{  item  }}
      </li>
    </ul>
  </div>
</template>

<script>
export default {
  name: 'HelloWorld',
  data() {
    return {
      names: ['iwen', 'ime', 'frank']
    }
  },
  methods: {
    say(data) {
      console.log(data); //打印传递的参数
    },
    clickText(data) {
      console.log(data);
    }
  }
}
</script>
<style scoped>
</style>
显示效果
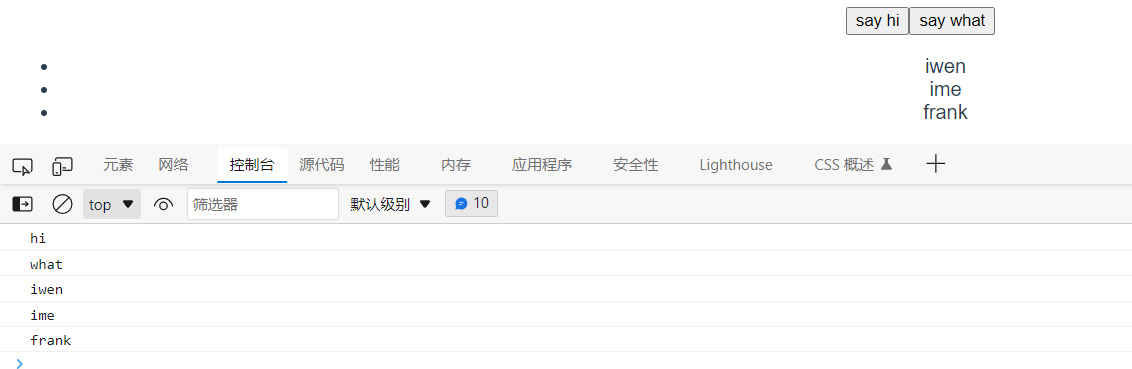
当点击say hi按钮时,触发say()函数,传递hi参数过去,然后进行输出,在li列表中定义点击事件触发clickText函数,把item变量传递过去进行打印。
事件修饰符
vue为v-on提供了4个事件修饰符,即".stop" ".prevent" ".capture" ".self" 使js代码复制处理纯粹的数据逻辑,而不用处理这些DOM事件细节。
<!--事件修饰符类型-->
<template>
  <div class='hello'>
    <!-- 阻止单击事件冒泡 -->
    <a  @click.stop="doThis"></a>
    <!-- 提交事件不再重载页面 -->
    <form @submit.prevent="onSubmit" ></form>
    <!-- 修饰符可以串联 -->
    <a @click.stop.prevent="doThat"></a>
    <!-- 只有修饰符 -->
    <form @submit.prevent></form>
    <!-- 添加事件侦听器时使用事件捕获模式 -->
    <div @click.capture="doThis">..</div>
    <!-- 只当事件在该元素本身(不是子元素)触发时触发回调 -->
    <div @click.self="doThat">...</div>

  </div>
</template>
修饰符应用
<template>
<div class="test">
        <a href="http://www.baidu.com" target="_blank">百度</a>
        <a @click="handleClick($event)"   href="http://www.baidu.com" target="_blank">百度</a>
        <a @click.prevent="handleClick1()" href="http://www.baidu.com" target="_blank">百度</a>
    </div>
</template>

<script>
export default {
//import引入的组件需要注入到对象中才能使用
  setup(){
    const handleClick = (e) =>{
        e.preventDefault();
        //event对象的preventDefault()阻止请求
    }
    const handleClick1 = ()=>{

    }
    return{
        handleClick,
        handleClick1
    }
  }
}
显示效果
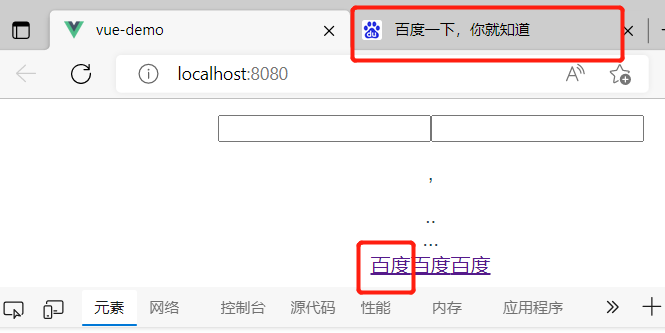
第一个百度,点击会跳转一个新页面,第二个被event对象的preventDefault()阻止跳转请求,第三个被.prevent修饰符阻止跳转(和preventDefault()一样的效果。)
按键修饰符
vue允许为v-on在监听键盘事件时添加按键修饰符。如
<input @keyup.13="submit"> //只有在keyCode是13时调用vm.submit()
记住所有的keyCode比较困难,所以为最常用的按键提供了别名,主要包括 ”.enter" ".tab" ".delete" ".esc" ".space" ".up" ".down" ".left" ".right" ".ctrl" ".alt" ".shift" ".meta" 这些按键别名的使用方法如下
<input @keyup.enter="submit">
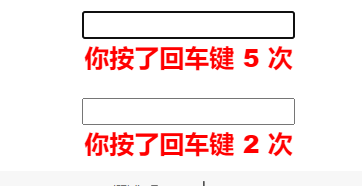
按键修饰符的使用
<template>
<div>
        <input type="text" @keyup="handleKeyup($event)"><br>
        <span v-if="state.count > 0"> 你按了回车键 {{state.count}} 次</span>
        <br><br>
        <input type="text" @keyup.enter="handleKeyup1()"><br>
        <span v-if="state.number > 0"> 你按了回车键 {{state.number}} 次</span>
    </div>
</template>

<script>
import { reactive } from 'vue';
export default {
  setup(){
    const state = reactive({
        count : 0,
        number : 0
    })
    const handleKeyup = (e) =>{
        if(e.keyCode === 13){
           state.count++
        }
    }

    const handleKeyup1 = () =>{
        state.number++
    }
    return{
        handleKeyup,
        handleKeyup1,
        state
    }
  }
}
</script>
显示效果
表单输入绑定
你可以用 v-model指令在表单 input 、textarea 及select元素上创建双向数据绑定。它会根据控件类型自动选择正确的方法来更新元素。
v-model在内部为不同的输入元素使用不同的属性并抛出不同的事件。
- text和textarea元素使用value属性和input事件。
- checkbox和radio使用checked属性和change事件
- select字段将value作为prop并将change作为事件。
- 文本框绑定
<template>
  <div class="hello">
    <input type="text" v-model="username">
    <input type="text" v-model="password">
    <p>{{username}},{{password}}</p>

  </div>
</template>

<script>
export default {
  name: 'HelloWorld',
  props: {
    msg: String
  },
  data() {
    return {
      username:"",
      password:""
    }
  }
}
</script>
<style scoped>
</style>
在输入框输入内容,p标签里的属性读取值显示。
显示效果

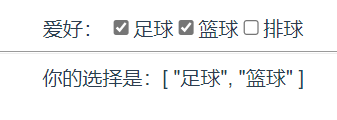
- 复选框绑定
<template>
  <div class="hello">
    爱好:
    <input type="checkbox" id="football" value="足球" v-model="state.checkedNames">
    <label for="football">足球</label>
    <input type="checkbox" id="basketball" value="篮球" v-model="state.checkedNames">
    <label for="basketball">篮球</label>
    <input type="checkbox" id="volleyball" value="排球" v-model="state.checkedNames">
    <label for="volleyball">排球</label>
    <hr>
    <span>你的选择是:{{state.checkedNames}}</span>
  </div>
</template>

<script>
import { reactive } from 'vue';
export default {
  setup(){
    const state = reactive({
      checkedNames:[]
    })
    return{
      state
    }
  },
  name: 'HelloWorld',
  props: {
    msg: String
  }
}
</script>
显示效果
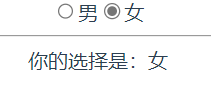
- 单选按钮绑定
使用字符串数据进行单选按钮绑定
<template>
<div>
    <input type="radio" id="one" value="男" v-model="state.picked">
    <label for="one">男</label>
    <input type="radio" id="two" value="女" v-model="state.picked">
    <label for="two">女</label>
    <hr>
    <span>你的选择是:{{state.picked}}</span>
  </div>
</template>
<script>
import { reactive } from 'vue';
export default {
  setup(){
    const state = reactive({
      picked:''
    })
    return{
      state
    }
  }
}
</script>
显示效果
- 下拉列表框绑定
使用字符串数据进行下拉列表框绑定。
<template>
<div>
<select v-model="state.selected">
      <option disabled>请选择</option>
      <option value="football" >足球</option>
      <option value="basketball">篮球</option>
      <option value="volleyball">排球</option>
      <option value="badminton">羽毛球</option>
    </select>
    <span>你的选择是:{{state.selected}}</span>
  </div>
</template>
<script>
import { reactive } from 'vue';
export default {
  setup(){
    const state = reactive({
      selected:''
    })
    return{
      state
    }
  }
}
</script>
显示效果

表单修饰符
.lazy
在默认情况下,v-model在每次input事件后,将输入框的值与数据进行同步。你可以添加lazy修饰符,从而在转为在change事件之后进行同步。
<input v-model.lazy="message"/>
<p>{{message}}</p>
data(){
	return{
		message:""
	}
}
v-model默认是修改同时显示数据,一般不需要做实时的显示,添加.lazy后,失去焦点或回车后才显示。
.trim
如果要自动过滤用户输入的首尾空白字符,可以给v-model添加trim修饰符
<input v-model.trim="message" />
data(){
	return{
		message:""
	}
}
计算属性与侦听属性
如果插值表达式中的代码过长或逻辑较为复杂,就会变得难以理解,不便于代码维护。当遇到复杂的逻辑时不推荐使用插值表达式,推荐使用计算属性把逻辑复杂的代码进行分离。
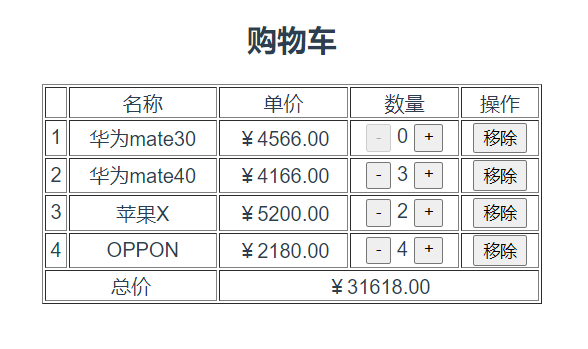
computed()计算属性
<template>
    <div class='car'>
        <table border="1" align="center" width="400px">
            <caption>
                <h2>购物车</h2>
            </caption>
            <tr align="center">
                <td>货名</td>
                <td>单价</td>
                <td>数量</td>
                <td>合计</td>
            </tr>
            <tr align="center" v-for="(item,index) in state.package1" :key="index">
                <td>{{item.name}}</td>
                <td>{{item.price}}</td>
                <td>{{item.count}}</td>
                <td>{{item.price*item.count}}</td>
            </tr>
            <tr>
                <td>总价</td>
                <td colspan="3">{{computedName}}</td>
            </tr>
        </table>
    </div>
</template>

<script>
import { reactive, computed } from 'vue';
export default {
    setup() {
        const state = reactive({
            package1: [
                {
                    name: "华为mate30",
                    price: 4566,
                    count: 2
                },
                {
                    name: "华为mate40",
                    price: 4166,
                    count: 3
                },
                {
                    name: "苹果X",
                    price: 5200,
                    count: 2
                },
                {
                    name: "OPPON",
                    price: 2180,
                    count: 4
                }
            ]
        })
        //把复杂的代码放入computed计算属性,然后返回显示
        const computedName = computed(()=>{
            let prices = 0  //总价
            for(let i= 0 ; i < state.package1.length ; i++){
                prices += state.package1[i].count * state.package1[i].price
            }
            return prices
        })
        return {
            state,
            computedName
        }
    }
}
</script>
显示效果
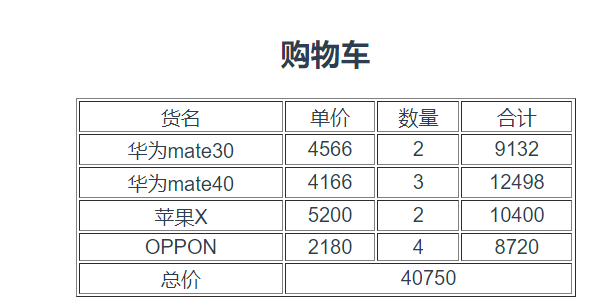
可以发现计算总结的代码放在了compute函数中计算,然后把结果返回,避免把代码都写在插值表达式中。
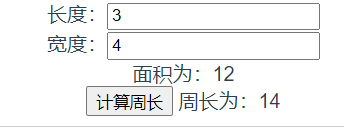
计算属性与方法的区别
用户输入长度和宽度,使用计算属性和计算长方形面积,使用方法计算长方形周长。
<template>
  <div class='test'>
    长度:<input type="text" v-model="state.length"><br>
    宽度:<input type="text" v-model="state.width"><br>
    面积为:{{computedName}} <br>
    <button @click="add">计算周长</button>
    周长为:<span>{{state.perimeter}}</span>

  </div>
</template>

<script>
import { reactive,computed } from 'vue';
export default {
    setup(){
        const state = reactive({
            length:0,
            width:0,
            perimeter:0  //周长
        })
        const computedName = computed(()=>{
            let areas = 0
            areas = state.length * state.width * 1  //*1是为了转为数字运算,否则就算字符串了
            return areas
        })
        const add = ()=>{
            state.perimeter = (state.length*1+state.width*1)*2  // 长+宽的和乘2
        }
        return{
            state,
            computedName,
            add
        }
    }
};
</script>
显示效果
computed具有缓存功能,在系统初始运行时调用一次,当计算属性依赖的响应式数据发生改变时会被再次调用。
另外,需要强调的是,computed是计算属性,调用时计算属性名computedName后面不需要加括号。
为事件(如单击、键盘按下等)所编写的方法函数,如果没有入口参数,在调用时可以加括号或者不加括号;带参数时,一定要加括号带上相应的实参。
调用方法能实现和计算属性一样的效果,区别是计算属性是基于依赖缓存的,计算属性所依赖的数据发生改变时,就会调用计算属性方法重新计算。
使用计算属性computed还是方法取决于是否需要根据响应式数据自动更新视图,但通常遍历大数组和做大量计算时,应当使用计算属性。
输入内容的综合查询
在public目录下创建test.json文件
{
    "list":[
        "Vue.js实战",
        "Vue.js企业开发实战",
        "ES6标准入门",
        "Vue.js项目实战",
        "深入浅出Vue.js",
        "Vue.js权威指南",
        "ECMAScript从零开始",
        "Web前端开发入门与实战"
    ]
}
<template>
  <div class='test'>
    请输入书籍关键字:
    <input type="text" v-model="state.mytext"><p></p>
    查询结果:
    <ul>
        <li v-for="(item,index) in computedList" :key="index">{{item}}</li>
    </ul>
  </div>
</template>

<script>
import { reactive,computed,onMounted } from 'vue';
export default {
    setup(){
        const state = reactive({
            mytext:'',
            list:[]
        })
        const computedList = computed(()=>{
            //过滤掉不包含关键字的数据
            const newList = state.list.filter(item=> item.includes(state.mytext))
            return newList
        })

        onMounted(()=>{  //生命周期函数,网页渲染完毕之前对状态数据进行赋值,
            fetch('/test.json')  //异步导入数据
            .then(res=> res.json())  //将解析正文文本的结果作为JSON解析
            .then(res=>{
                state.list = res.list  //将导入的数据转为响应式数据
            })
        })
        return{
            state,
            computedList
        }
    }
};
</script>
显示效果
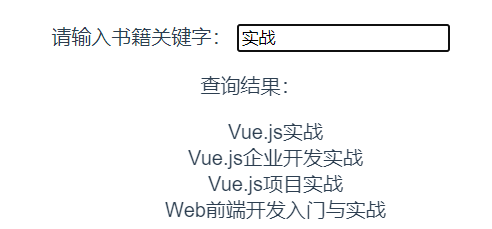
先使用生命周期函数(钩子函数)onMounted,在网页加载完之前对状态数据list数组进行赋值,使用异步方式从test.json文件中读取定义的json数据进行初始化。然后定义计算属性变量computedList,该变量在所依赖的mytext发生改变时进行自动计算,计算的结果会渲染在页面模板中。
侦听属性
vue提供一种通用的方式来观察和响应当前活动的数据变动,称为侦听属性。虽然计算属性在大多数情况更合适,但有时需要一个自定义的侦听属性。
当需要在数据变化时执行异步或开销较大的操作时,这个方式最有用。使用watch之前记得import导入watch函数
侦听属性用vue3.x的watch函数实现,在watch函数中自带两个变量,当使用reactive定义状态数据时,两个变量都是函数。第一个函数是侦听变量的返回函数,当数值发生改变时,立即会触发该侦听watch函数;第二个函数是回调函数,当触发侦听watch函数后执行什么操作的函数。侦听属性的语法格式如下
export default{
	setup(){
        const state = reactive({
        watchData:'' , //reactive定义的状态数据
        。。。
        })
    //侦听state.watchData数据的变化
        watch(()=> state.watchData,()={
            //watch触发所执行的回调函数
        })
	}
}
侦听watch函数的另一种使用方法是在使用ref定义的数据时,两个变量中的第一个变量是侦听ref定义的数据,当该数据值变化时触发侦听watch函数,第二个变量是回调函数,当触发该侦听watch函数后执行什么操作的函数。语法格式如下
export default{
	setup(){
        const watchData = ref('') //使用ref定义的数据
		...
		//侦听watch函数
        watch(watchData,()={
            //watch触发所执行的回调函数
        })
	}
}
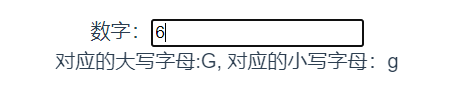
使用侦听属性显示与数字对应的字母
<template>
  <div class="hello">
    数字:<input type="text" v-model="state.num"><br>
    对应的大写字母:{{state.strA}}, 对应的小写字母:{{state.stra}}
  </div>
</template>

<script>
import { reactive,watch } from 'vue';
export default {
  setup(){
    const state  = reactive({
       num : 0, //定义数据初值
       strA: 'A',  //定义对应大写字母数据变量
       stra:'a'  //定义小写字母数据变量
    })
    watch(()=>state.num,()=>{
      //计算对应的大写字母,大写字母的ASCILL码的十进制从65开始
      //String.formCharCode(数值)函数将Unicode编码的数值转为一个字符
      state.strA = String.fromCharCode(65+parseInt(state.num % 26))
      //计算对应的小写字母,小写字母的ASCILL码的十进制从97开始
      state.stra = String.fromCharCode(97+parseInt(state.num % 26))
    })
    return{
      state
    }
  }
}
</script>
显示效果
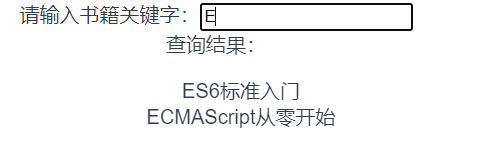
侦听用reactive定义的数据实现输入内容的综合查询
<template>
    <div class='hello'>
        请输入书籍关键字:<input type="text " v-model="state.mytest"><br>
        查询结果:
        <ul>
            <li v-for="(item, index) in state.list" :key="index">{{ item }}</li>
        </ul>
    </div>
</template>

<script>
import { onMounted, reactive, watch } from 'vue';

export default {
    setup() {
        const state = reactive({
            mytest: '',
            lists: [],
            list: []
        })
        onMounted(() => {
            fetch('test.json')
                .then(res => res.json())
                .then(res => {
                    //lists是用来过滤的数据(即全部数据),list是接收过滤后的数据
                    state.lists = res.list
                    state.list = res.list
                })
        })
        watch(() => state.mytest, () => {
            //每次侦听输入框的值,一旦发生改变,则对lists重新过滤赋值给list,输入框不输入则显示lists所有数据
            state.list = state.lists.filter(item => item.includes(state.mytest))
        })
        return {
            state
        }
    }
}
</script>
<style scoped>

</style>
显示效果
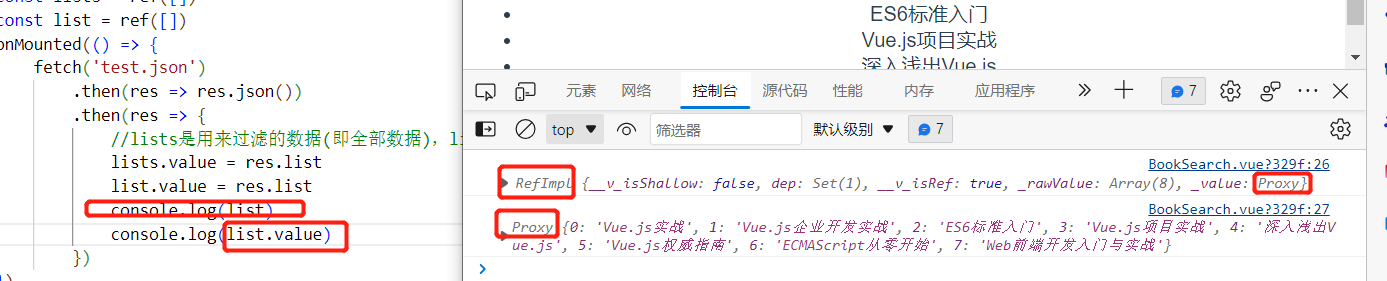
侦听用ref定义的数据实现输入内容的综合查询
基本思路和上面不变,区别在于取消了state对象,把state里面的属性分开用ref定义,并且读取/赋值都需要加上.value
<template>
    <div class='hello'>
        请输入书籍关键字:<input type="text " v-model="mytest"><br>
        查询结果:
        <ul>
            <li v-for="(item, index) in list" :key="index">{{ item }}</li>
        </ul>
    </div>
</template>

<script>
import { onMounted, ref, watch } from 'vue';

export default {
    setup() {
        const mytest = ref('')
        const lists = ref([])
        const list = ref([])
        onMounted(() => {
            fetch('test.json')
                .then(res => res.json())
                .then(res => {
                    //lists是用来过滤的数据(即全部数据),list是接收过滤后的数据
                    lists.value = res.list
                    list.value = res.list
                })
        })
        watch(mytest, () => {
            //每次侦听输入框的值,一旦发生改变,则对lists重新过滤赋值给list,输入框不输入则显示lists所有数据
            list.value =lists.value.filter(item => item.includes(mytest.value))
        })
        return {
            mytest,
            list
        }
    }
}
</script>
<style scoped>

</style>
添加.value才可以读取值,list和list.value是不同对象,如下图
综合案例:制作一个购物车
<template>
    <div class='app'>
        <div v-if="phoneList.length">
            <table border="1" align="center" width="400px">
                <caption>
                    <h2>购物车</h2>
                </caption>
                <tr align="center">
                    <td></td>
                    <td>名称</td>
                    <td>单价</td>
                    <td>数量</td>
                    <td>操作</td>
                </tr>
                <tr align="center" v-for="(item,index) in phoneList" :key="index">
                    <td>{{ item.id }}</td>
                    <td>{{ item.name }}</td>
                    <td>{{ filter(item.price) }}</td>
                    <td>
                        <!-- 当前元素的商品数量 <=0时,把按钮设置为disabled不可点击状态 -->
                        <button @click="decrement(index)" :disabled="item.count<=0">-</button>
                        {{ item.count }}
                        <button @click="increment(index)" >+</button>
                    </td>
                    <td><button @click="removeRow(index)">移除</button></td>
                </tr>
                <tr align="center">
                    <td colspan="2">总价</td>
                    <td colspan="3">{{ filter(computedName) }}</td>
                </tr>
            </table>
        </div>
        <h2 v-else>
            购物车为空
        </h2>
    </div>
</template>

<script>
import { reactive, toRefs, computed} from 'vue';
export default {
    setup() {

        const state = reactive({
            phoneList: [ //手机对象数组
                {
                    id: 1,
                    name: "华为mate30",
                    price: 4566,
                    count: 2
                },
                {
                    id: 2,
                    name: "华为mate40",
                    price: 4166,
                    count: 3
                },
                {
                    id: 3,
                    name: "苹果X",
                    price: 5200,
                    count: 2
                },
                {
                    id: 4,
                    name: "OPPON",
                    price: 2180,
                    count: 4
                }
            ]
        })
        const decrement = (index) => {
            if(state.phoneList[index].count >= 1){
                state.phoneList[index].count--  //点击-按钮时,给当前元素的数量+1
            }
        }
        const increment = (index) => {  //点击+按钮时,给当前元素的数量+1
            state.phoneList[index].count++
        }
        const removeRow = (index) =>{  //点击移除按钮,把当前元素删除
            state.phoneList.splice(index, 1)
        }
        const filter = (price) =>{ //对价格添加¥号,并且转为带2位小数点
            return '¥'+price.toFixed(2)
        }
        const computedName = computed(()=>{
            let totalPrice = 0
            for(let i = 0 ; i < state.phoneList.length ; i++){ //计算总价格
                totalPrice += (state.phoneList[i].price ) * (state.phoneList[i].count)
            }
            return totalPrice
        })
        return {
            ...toRefs(state),
            increment,
            decrement,
            computedName,
            removeRow,
            filter
        }
    }
}
</script>
<style scoped>

</style>
显示效果
综合实战案例——制作影院订票系统前端页面
需要前置知识(数据绑定、事件触发响应、计算属性computed、各种指令)
<template>
  <div class="film">
    <div class="filmLeft">
      <!-- 电影座位 -->
      <h3>屏幕</h3>
      <ul>
        <li v-for="(item, index) in seatflag" :key="index" class="seat" :class="{
          'noSeat': seatflag[index] == -1, //无座位
          'seatSpace': seatflag[index] == 0, //可选座位
          'seatActive': seatflag[index] == 1, //已选座位
          'seatNoUse': seatflag[index] == 2, //已售出座位
        }" @click="handleClick(index)">
        </li>
      </ul>
    </div>
    <div class="filmRight">
      <div class="rightTop">
        <div class="rightTopLeft">
          <!-- 电影海报 -->
          <a href="#">
            <img :src="filmInfo.filmImg" alt="..." height="200">
          </a>
        </div>
        <div class="rightTopRight">
          <!-- 电影的基本信息 -->
          <p>中文名:<strong>{{ filmInfo.name }}</strong></p>
          <p>英文名:{{ filmInfo.nameEnglish }}</p>
          <p>剧情:{{ filmInfo.storyType }}</p>
          <p>版本:{{ filmInfo.copyRight }}</p>
          <p>{{ filmInfo.place }} / {{ filmInfo.timeLength }}</p>
          <p>{{ filmInfo.timeShow }}</p>
        </div>
      </div>
      <div class="rightBootom">
        <p>影院:<strong>{{ filmInfo.cinema }}</strong></p>
        <p>影厅:<strong>{{ filmInfo.room }}</strong></p>
        <p>场次:<strong>{{ filmInfo.time }}</strong></p>
        <p id="seatSelect">
          座位:
          <span v-for="(item, index) in curSeatDisp" :key="index">
            {{ item }}
          </span>
        </p>
        <!-- 电影票的购买信息 -->
        <span>已选泽<strong style="color:red ;">{{ count }}</strong>个座位,</span>
        <strong style="color:red">再次单击座位可取消。
          <span v-if="maxFlag">你一次最多买五张票!</span>
        </strong>
        <hr>
        <p>单价:{{ numberFormat(filmInfo.unitPrice) }}</p>
        <p>总价:<strong style="color:red;">{{ numberFormat(fileTotal) }}</strong></p>
        <hr>
        <button type="button" class="btn" @click="filmSubmit(curSeat)">确认下单</button>
      </div>
    </div>
  </div>
</template>

<script>
import { reactive, toRefs, computed } from 'vue'
export default {
  setup() {

    const state = reactive({
      // -1 无座位  0 可选座位  1 选中座位  2 售出座位
      seatflag: [
        0, 0, 0, 0, 0, 0, 0, 0, 0, 0,
        0, 0, 0, 0, 0, 0, 0, 0, 0, 0,
        0, 0, 0, 0, 2, 0, 0, 0, 0, 0,
        0, 0, 2, 0, 0, 0, 0, 0, 0, 0,
        0, 0, 0, 0, 0, 0, 2, 0, 0, 0,
        0, 0, 2, 0, 0, 2, 0, 2, 0, 0,
        0, 0, 0, 0, 0, 0, 0, 0, 0, 0,
        0, 2, 0, 0, 0, 0, 0, 0, 0, 0,
        0, 0, 0, 0, 0, 0, 0, 0, 0, 0,
        -1, 0, 0, 0, 0, 0, 0, 0, 0, -1,
        -1, -1, 0, 0, 0, 0, 0, 0, -1, -1,
      ],
      filmInfo: {
        name: '囧妈',
        nameEnglish: 'Lost in Russia',
        copyRight: '中文2D',
        filmImg: require('@/assets/film1.png'),  //图片需要解析显示,所以使用require()解析
        storyType: '喜剧',
        place: '中国大陆',
        timeLength: '126分钟',
        timeShow: '2020.02',
        cinema: '万达影城',
        room: '8号影厅',
        time: '2021.05.18(周二)20:00',
        unitPrice: 38
      },
      curSeat: [],  ///当前选中座位下标
      curSeatDisp: [], //座位具体位置 几行几列
      seatCol: 10, //几列
      maxFlag: false,  //最多购买5张票就设置为true显示提示文字
      count: 0  //已选座位数量
    })
    //单击事件,选中变可选/可选变选中
    const handleClick = index => {
      if (state.seatflag[index] === 1) {
        //当前选中的座位,单击变成可选座位
        state.seatflag[index] = 0
        //splice并把选中座位下标从数组中删除,findIndex(item => item===index) item为每次循环寻找的元素,
        //每轮循环判断item===index,如果相等了就return,否则进入下一轮循环
        state.curSeat.splice(state.curSeat.findIndex(item => item === index), 1)
      } else {
        //否则就有0可选座位,-1无座位,2已售出座位
        if (state.seatflag[index] === 0 && state.curSeat.length < 5) { //可选座位时,需要判断购买的票数是否超过最多购买票数
          state.seatflag[index] = 1  //变成选中座位
          state.curSeat.push(index) //把选中的座位下标放入 当前座位数组
        }
      }
      state.curSeatDisp = [] // 每次座位状态发生改变,当前座位数组清空,重新渲染
      for (const data of state.curSeat) {
        //根据座位下标计算当前座位位置(行列) data/seatCol取(十)位数,data % state.seatCol取(个)位数,
        //如8/10向下取整0+1=1行,8%10 余8然后+1 等于9,因为下标从0开始,9就是第八个数
        state.curSeatDisp.push((Math.floor(data / state.seatCol)) + '行' + ((data % state.seatCol) + 1) + '列')
      }
      var mySeat = state.seatflag.filter(item => item === 1)  //获取已选座位
      state.count = mySeat.length  //已选座位个数
      if (mySeat.length >= 5) state.maxFlag = true  //把maxflag设置为true,代表已经到购买上限
      else mySeat.maxFlag = false  //否则设置为false
    }
    const fileTotal = computed(() => state.count * state.filmInfo.unitPrice) //总价
    const numberFormat = value => '¥' + value.toFixed(2) //价格添加符号并且加两位小数
    const filmSubmit = (data)=>{
      //把已选座位状态改为售出状态
        for(const index of data){
        state.seatflag[index] = 2
      }
      //清空当前已选座位,和具体座位列表,状态和票数
      state.curSeatDisp = []
      state.curSeat = []
      state.maxFlag = false
      state.count = 0
    }

    return {
      ...toRefs(state),
      handleClick,
      fileTotal,
      numberFormat,
      filmSubmit
    }
  }
}
</script>

<style scoped>
.seat {
  float: left;
  width: 30px;
  height: 30px;
  margin: 5px 10px;
  cursor: pointer;
}

/* 选座位样式 */
.seatSpace {
  background: url("../assets/bg.png") no-repeat 1px -29px;
}

/* 选中座位样式 */
.seatActive {
  background: url("../assets/bg.png") no-repeat 1px 0px;
}

/* 售出座位样式 */
.seatNoUse {
  background: url("../assets/bg.png") no-repeat 1px -56px;
}

/* 无座位样式 */
.noSeat {
  background: url("../assets/bg.png") no-repeat 1px -84px;
}

.film {
  margin: 0 auto;
  width: 1050px;
  border: 1px solid grey;
  height: 550px;
}

.filmLeft {
  width: 550px;
  height: 500px;
  float: left;
}

.filmLeft h3 {
  text-align: center;
}

.filmLeft ul {
  list-style: none;
}

.filmRight {
  width: 500px;
  height: 550px;
  float: left;
  background-color: bisque;
}

.rightTopLeft {
  float: left;
  margin: 20px 15px 5px 10px;
}

.rightTopRight {
  float: left;
  text-align: left;
  margin: 0px 0px 5px 5px;
}

.rightBootom {
  text-align: left;
  clear: both;
  margin: 0px 10px;
}

.rightBootom p {
  line-height: 12px;
}

#seatSelect span {
  padding: 5px;
  border: 1px solid red;
  margin: 8px;
  font-size: 14px;
  background-color: white;
  font-weight: bold;
  color: red;
}

.btn {
  margin: 15px 150px;
  width: 120px;
  height: 40px;
  background-color: rgb(68, 168, 135);
  color: white;
  cursor: pointer;
}
</style>
显示效果
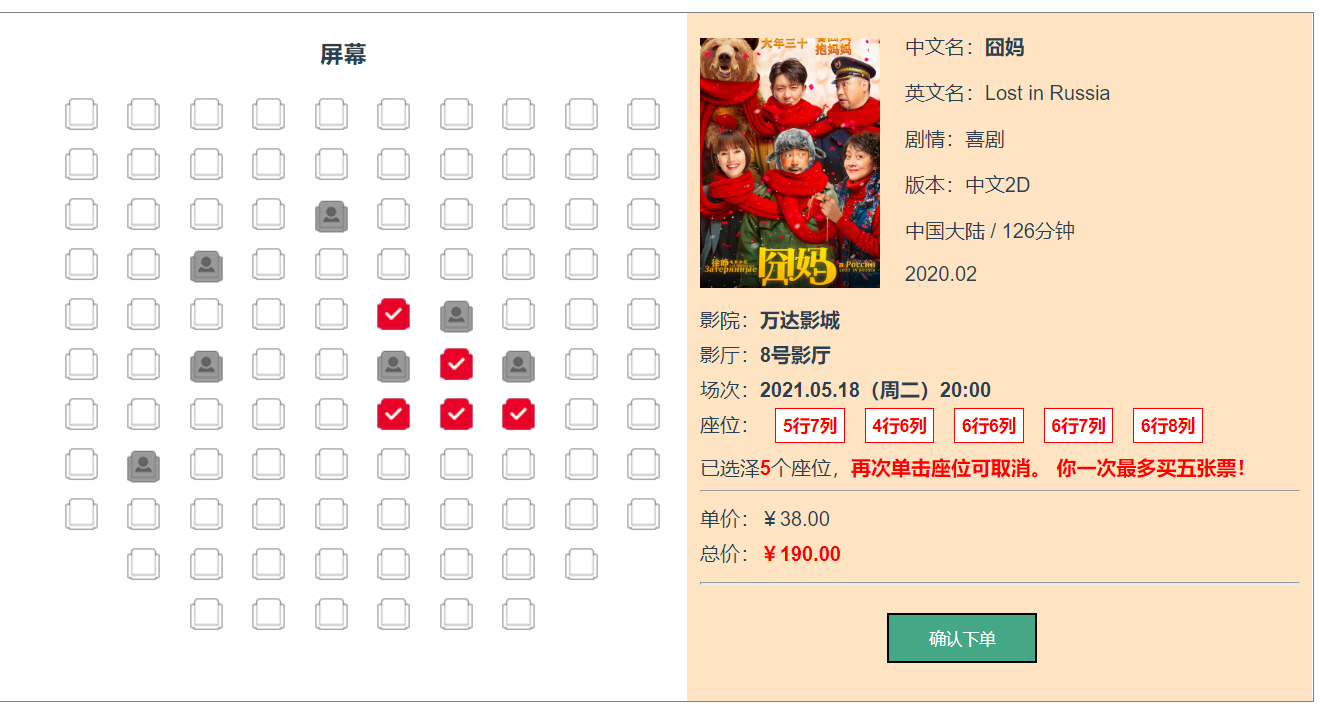
上图选中状态的座位点击确认下单后,座位更改为已售出状态。
组件与过渡
组件基础
所谓的组件化,就是把页面拆成多个组件,每个组件单独使用HTML \ CSS \ JavaScript\ 模板、图片等资源进行开发与维护。
也就说组件是为了拆分Vue实例的代码量,能够以不同的组件来划分不同的功能模块,需要什么功能,去调用对应的组件就行。
组件化和模块化是不同的两个概念。组件化是从UI界面的角度进行划分,前端的组件化方便UI的复用;模块化是从代码逻辑的角度进行划分,方便代码开发,保证每个功能模块的职能单一。
例如,每个网页中可能会有页头、侧边栏、导航等区域,把多个网页中这些统一的内容定义成一个组件,可以在使用的地方像搭积木一样快速创建网页。
组件化是Vue.js的重要思想,提供了一种抽象。利用组件可以开发出一个个独立可复用的小组件来构建应用。任何的应用都会被抽象成一棵组件树,如下图
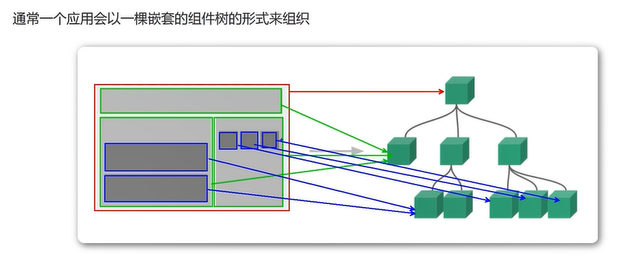
最上面的根节点相当于App.vue组件
单文件组件
<!--HelloWorld.vue子组件-->
<template>
  <div class="hello">
   子组件<br>
   <button @click="count++">你单击了{{count}}次</button>  <!--定义按钮,点击事件计数器加1-->
  </div>
</template>

<script>
import { reactive,toRefs } from 'vue';
export default {
  setup(){
    const state = reactive({
      count: 0   //定义计数器
    })

    return{
      ...toRefs(state)
    }
  }
}
</script>
加载组件
- 引入组件 import 组件名 from '组件存放路径';
- 挂载组件
- 显示组件
<!--App.vue父组件-->
<template>
  父组件<p></p>
  <HelloWorld/>   <!--第三步:使用子组件-->
  <HelloWorld/>
  <HelloWorld/>
</template>

<script>
import HelloWorld from './components/HelloWorld.vue'  //第一步:导入子组件
export default {
  name: 'App',
  components: {
    HelloWorld  //第二步:注册子组件
  }
}
</script>
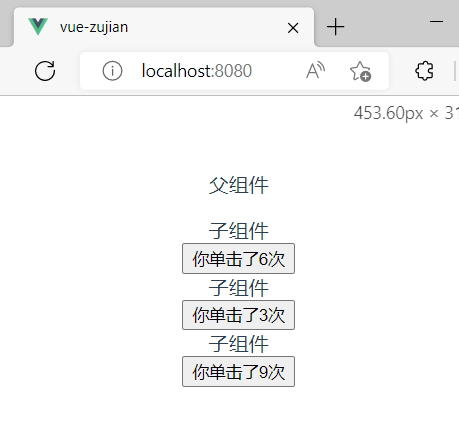
在这里的模板中,重复三次使用了子组件。注意当单击不同的按钮时,每个组件都会各自独立维护count。因为每使用一次组件,就会有一个新的实例被创建。
App.vue是最外层的组件,自定义组件都需要加入该组件进行显示,或者自定义顶层组件代替App.vue,只需要在main.js中导入使用即可
import { createApp } from 'vue'
import App from './App.vue'  //这里的App.vue换成自定义顶层组件.vue就可以了

createApp(App).mount('#app')
显示效果
Props组件交互(父组件传递数据给子组件)
父组件传递数据给子组件的流程:
(1)父组件:1. 导入子组件 2. 注册子组件 3. 显示子组件
(2)父组件定义传输的数据
(3)在显示子组件的标签上面添加 要传递的数据属性,属性前面加冒号:代表v-bind,读取该变量的值。
(4)在子组件使用 props接收父组件的传递参数,如果单纯接收参数使用props:[]方式;如果限制父组件传输的数据类型,使用props:{}方式,限制类型的同时,还可以通过default:""设置默认值。
(5)在子组件的template中使用插值表达式读取变量值。
1-3点在父组件操作,4-5是在子组件操作。
<!--App.vue父组件-->
<template>
  <!--显示子组件, :title加冒号表示读取的是title属性存的值-->
<MyComponent :title="title" :age="age" :names="names" />
</template>

<script>
//导入组件
import { reactive,toRefs } from 'vue';
import MyComponent from './components/MyComponent.vue';
export default {
  name: 'App',
  //常规写法
  // data(){
  //   return{
  //     title:"我是一个标题",
  //     age:20,
  //     names:['iag','wind','lind']
  //   }
  // },
  //组合式api写法
  setup(){
    const state = reactive({
      title:"我是一个标题",
      age: 20,
      names: ['iag','wind','lind']
    })
    return{
      ...toRefs(state)
    }
  },
  components: {
    MyComponent  //  注册/挂载组件
  }
}
</script>
Mycomponent.vue子组件
<template>
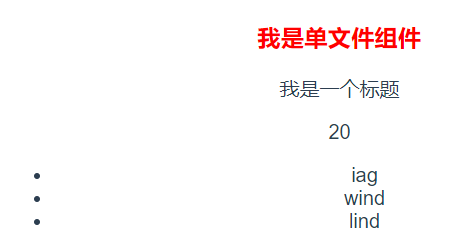
<h3>我是单文件组件</h3>
<p>{{title}}</p> <!--读取父组件传递的数据-->
<p>{{age}}</p>
<ul>
<li v-for="(item,index) in names" :key="index">
{{item}}
</li>
</ul>
</template>
<script>
import {reactive,toRefs} from 'vue'
export default {
name:"MyComponent",
//props:['title','age','names'] 如果不用限制类型,使用[]方式即可
setup(props){ //setup()里面的props参数是可以用来接收父组件传递的数据
const state = reactive({
mytitle:props.title, //把数据 转为响应式数据,mytitle和下面定义的title都可以接收父组件传递的参数
myage:props.age,
mynames:props.names
})
return{
...toRefs(state)
}
},
props:{ //{}形式可以限制父类的传输数据类型
title:{ //title是父组件定义,所以这里是title
type:String, //定义类型
default:"" //如果父组件不传值,默认值为""
},
age:{
type:Number,
default:0
},
names:{
type: Array,
//数组和对象必须使用函数进行返回
default: function(){
return []
}
}
}
}
</script>
<style scoped>
h3{
color: red;
}
</style>
接收数据三种方式:
(1)只接收:props: ['name','age','sex']
(2)接收并限制类型:props: { "name":Number }
(3)限制类型、限制必要性指定默认值:
显示效果
Prop类型
props{
	title: String,
	likes: Number,
	isPublished:Boolean,
	commentIds:Array,
	author: Object,
	callback: Function
}
注意:子组件如果返回的是数组或对象要以函数返回。
自定义事件组件交互(子组件传递数据到父组件)
子组件向父组件传递数据是通过setup()方法进行,语法格式:
setup(props,{emit}){
	//定义数据和方法
}
其中 props用于接收父组件传递给子组件的数据,{emit}是解构参数,作用是通过事件向父组件传递数据,语法格式:
emit('父组件调用子组件标签标签所绑定的事件名',子组件向父组件传输的数据)
例如,父组件调用子组件标签所绑定的事件名为onEvent,代码如下
<button @onEvent="handleClick"></button>
在子组件中使用emit方法向父组件传递数据的语句,如下
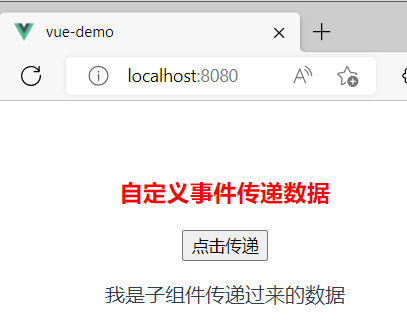
emit('onEvent',"我是子组件传递过来的数据")
<!--MyComponent.vue子组件-->
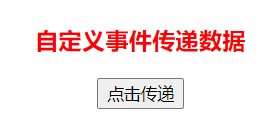
<template>
<h3>自定义事件传递数据</h3>
<button @click="sendClickHandle">点击传递</button>
</template>
<script>
import { reactive, toRefs } from 'vue';
export default {
name: "MyComponent",
//组合式api写法
setup(props, { emit }) {
const state = reactive({
message: "我是子组件传递过来的数据"
})
const sendClickHandle = () => {
emit('onEvent',state.message) //onEvent自定义事件名称,第二个参数是子组件传递给父组件的数据
}
return {
...toRefs(state),
sendClickHandle
}
},
//常规写法
// data() {
// return {
// message: "我是MyComponent数据"
// }
// },
// methods: {
// sendClickHandle() {
// //参数1:字符串:自定义事件名称
// //参数2:传递的数据
// this.$emit("onEvent", this.message)
// }
// }
}
</script>
<style scoped>
h3 {
color: red;
}
</style>
App.vue父组件
<template>
  <MyComponent @onEvent="getDataHandle"/>  <!--@onEvent是子组件自定义的事件-->
  <p>{{message}}</p>
</template>

<script>
import { reactive,toRefs } from 'vue';
import MyComponent from './components/MyComponent.vue';

export default {
  name: 'App',
  components: {
    MyComponent
  },
  //组合式api写法
  setup(){
    const state = reactive({
      message:""
    })
    const getDataHandle = data=> state.message=data  //箭头函数写法,当子组件点击事件发生,把数据传递给getDataHandle方法,data是接收的参数,把参数赋值给本组件的message
    return{
      ...toRefs(state),  //...toRefs()方法:把数据转为响应式数据,使用时,不需要添加state.前缀就可以使用message
      getDataHandle
    }
  } ,
  //常规写法
  // data(){
  //   return{
  //     message:""
  //   }
  // },
  // methods:{
  //   getDataHandle(data){
  //       this.message = data
  //   }
  // }
}
</script>
没触发事件前
触发事件后
组件进阶
动态组件
vue提供<component>组件标签元素,在该组件标签元素中使用v-bind指令搭配is属性来动态渲染对应名称的组件,即<component>组件标签元素是一个占位符,is属性指定要展示的组件的名称,切换代码格式如下
<component :is="切换组件的名称" ></component>
简单来说,就是使用<component>组件标签元素动态绑定多个组件名称到is熟悉。
选项卡
当用户点击不同的选项卡,通过切换组件实现显示不同的的组件内容。
<!--App.vue-->
<template>
<div id="dynamic-component-demo" class="demo">
<button v-for="(tab,index) in tabsName" :key="index"
:class="['tab-button',{active:currentTab === index}]"
@click="(currentTab = index)"> <!--当点击事件触发时,把选项卡的index赋值给currentTab,计算属性侦听currentTab发生改变则切换对应的子组件-->
{{tab}} <!--tab是选项卡中文标题-->
</button>
<component :is="currentTabComponent" class="tab"></component>
</div>
</template>
<script>
import { reactive,toRefs,computed } from 'vue';
import tabhome from './components/TabHome.vue' //导入子组件
import tabposts from './components/TabPosts.vue'
import tabarchive from './components/TabArchive.vue'
export default {
name: 'App',
components: {
tabhome, //注册子组件
tabarchive,
tabposts
},
setup(){
const state = reactive({
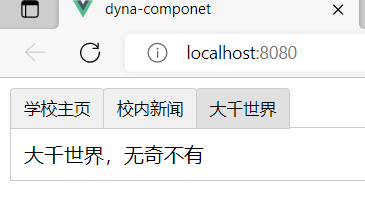
currentTab: 0 ,
tabsCompName:['tabhome','tabposts','tabarchive'],//定义切换子组件的组件名数组
tabsName:['学校主页','校内新闻','大千世界'] //定义子组件对应的中文选项卡标题
})
//计算属性监听state.currentTab数据的变化,以改变不同选项卡的内容
const currentTabComponent = computed(()=>{
return state.tabsCompName[state.currentTab]
})
return{
...toRefs(state),
currentTabComponent
}
}
}
</script>
<style scoped>
.tab-button{
padding: 6px 10px;
border-top-left-radius: 3px;
border-top-right-radius: 3px;
border: 1px solid #ccc;
cursor: pointer;
background: #f0f0f0;
margin-bottom: -1px;
margin-right: -1px;
}
.tab-button:hover{
background: #f5d1d1;
}
.tab-button.active{
background: #e0e0e0;
}
.demo-tab{
border: 1px solid #ccc;
padding: 10px;
}
</style>
选项卡标题是一个按钮,点击不同标题按钮后,触发点击事件,执行currentTab = index 语句, 让响应式变量currentTab等于现在单击的第几个选项卡。然后通过按钮中的“active : currentTab === index "使当前选项卡标题按钮处于激活状态(样式变化),再通过计算属性切换<component>标签内容中需要渲染的组件。
tabsCompName和tabsName数组的元素一定要一一对应(使用的是相同的index),不然会出现选项卡对不上子组件的内容。
还有tabsCompName数组里面的组件命名一定是和挂载的组件名一致。
显示效果
插槽的基本使用
在自定义组件时,插槽(slot)可以把需要调用该组件并且要传递内容的位置预留出来,留给使用该组件的父组件定义,同时还可以传递一些数据供使用。插槽具有扩展性。插槽语法格式如下:
<slot>默认内容</slot>
这种插槽称为不具名插槽或默认插槽,只能有一个并且内容是在插槽没有被匹配时才生效。
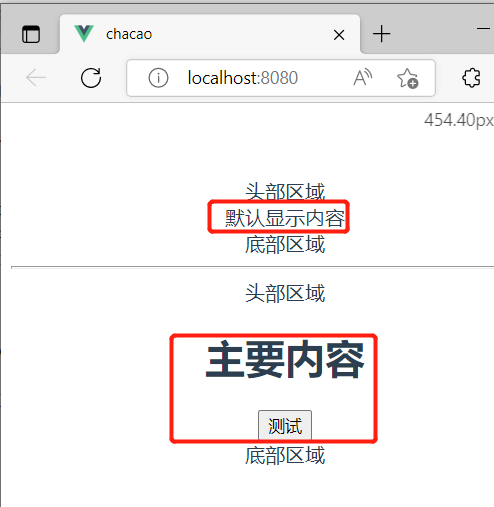
<!--Popup.vue子组件-->
<template>
    <div>头部区域</div>
    <slot>默认显示内容</slot>
    <div>底部区域</div>
</template>
<!--App.vue父组件-->
<template>
  <PopupVue></PopupVue>  <!--直接引用子组件-->
  <hr>
  <PopupVue>
    <h1>主要内容</h1>   <!--带参数引用子组件-->
    <button>测试</button>  <!--h1标签和button代替插槽中的内容-->
  </PopupVue>
</template>

<script>
import PopupVue from './components/Popup.vue';

export default {
  name: 'App',
  components: {
    PopupVue
  }
}
</script>
显示效果
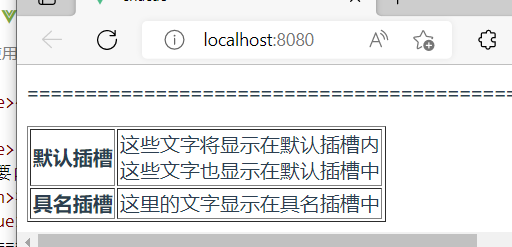
具名插槽
具名插槽就是给每一个插槽<slot> 都取个名字,取名的方法是在插槽<slot>标签中使用name属性配置如何分发内容,并且多个插槽<slot> 可以有不同的名字。例如
<!--子组件定义插槽占位-->
<slot name="footer"/>
在父组件使用这个插槽
<template v-slot:footer>  <!--注意这里的template可以不止一个-->
	这里的文字显示在组件的具名插槽footer内
</template>
例子
<!--HelloWorld.vue子组件-->
<template>
  <div>
    <table border="1">
      <tr>
        <th>默认插槽</th>
        <td><slot></slot></td>
      </tr>
      <tr>
        <th>具名插槽</th>
        <td><slot name="footer"></slot></td>
      </tr>
    </table>
  </div>
</template>
<!--App.vue父组件-->
<template>
  <HelloWorldVue>
    这些文字将显示在默认插槽内
    <template v-slot:footer>
      这里的文字显示在具名插槽中
    </template>
    <br>这些文字也显示在默认插槽中
  </HelloWorldVue>
</template>

<script>
import HelloWorldVue from './components/HelloWorld.vue';
export default {
  name: 'App',
  components: {
    HelloWorldVue
  }
}
</script>
显示效果如下图,可以发现被 <template v-slot:footer></template> 标签包裹的内容显示在具名插槽中,或者是<template slot="footer"></template> ,v-slot:的简写 #
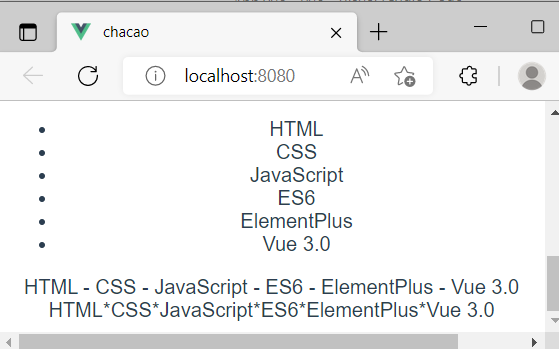
作用域插槽
如果希望在父组件下有不一样的子组件样式渲染,这个在子组件中没法做到的。只能通过子组件传递数据给父组件,让父组件按需求再渲染到页面。数据在子组件中定义但在父组件中使用,这样数据就超出其作用域。作用域插槽就是用来跨域数据作用域来实现数据在页面渲染。
<!--Popup1.vue子组件-->
<template>
   <slot name="footer" :data="webLanguages"> <!--定义作用域插槽-->
        <ul>
            <li v-for="(item,index) in webLanguages" :key="index">
                {{item}} <!--定义默认渲染方式-->
            </li>
        </ul>
   </slot>
</template>

<script>
import { reactive,toRefs } from 'vue';
export default{
    setup(){
        const state = reactive({
            webLanguages:[
                'HTML','CSS','JavaScript','ES6','ElementPlus','Vue 3.0'
            ]
        })
        return{
            ...toRefs(state)
        }
    }
}
</script>
<!--App.vue父组件-->
<template>
 <Popup1Vue></Popup1Vue>  <!--直接引用,使用默认渲染方式-->
  <Popup1Vue>  <!--作用域插槽-->
      <!--使用了具名插槽footer-->
    <template v-slot:footer="message">  <!--message是接收数据的形参-->
      {{message.data.join(' - ')}}  <!--数组元素以短横线分割-->
    </template>
  </Popup1Vue>
  <br>
  <Popup1Vue>
    <template v-slot:footer="message">
      {{message.data.join('*')}}  <!--数组元素以星号分割-->
    </template>
  </Popup1Vue>
</template>

<script>
import Popup1Vue from './components/Popup1.vue';
export default {
  name: 'App',
  components: {
    Popup1Vue
  }
}
</script>
显示效果
过渡
vue提供了在响应某些变化时可以使用过渡和动画的抽象概念,这些概念包含:
- 在CSS和JavaScript中,使用内置
<transition>组件钩住组件中进入和离开的DOM。 - 过渡模式,以便在过渡期间编排顺序
- 在处理多个元素位置更新时,使用
<transition-group>组件通过FLIP技术提高性能。 - 使用侦听属性watchers处理应用中不同状态的过渡。
CSS过渡
在需要有过渡效果的标签外面添加<transition></transition> 标签才能实现过渡。语句格式如下
<transition name="mytran">
	<!--实现过渡效果的标记元素,如<div> <li> 等-->
</transition>
vue对添加了transition标签的元素提供了三个进入过渡的样式类和三个离开过渡的样式类,如下图
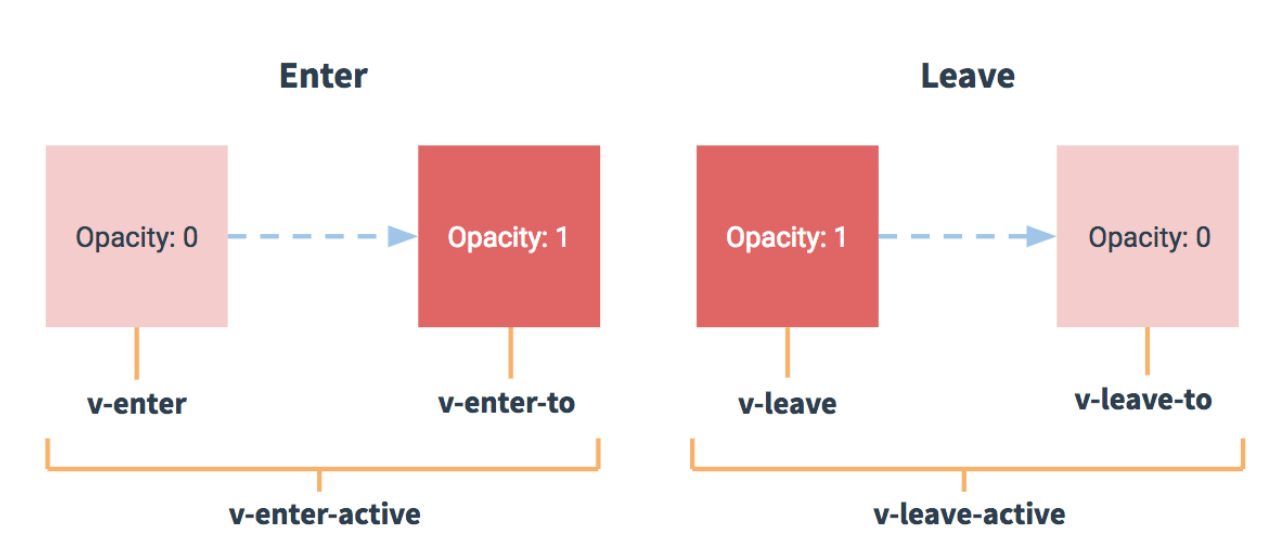
Opacity的说明:过渡动画的显示和隐藏会使用Opacity属性表示。其中 Opacity : 1 表示不透明,为0则是完全透明,元素在网页上不显示注意: 如果使用一个没有name属性的<transition>标记时,”v-"是这些样式类的默认前缀。如v-enter, v-enter-to 和v-enter-active。如果使用含name属性的<transition>标记,如<transition name="fade"> ,那么这个进行动画的三个状态名字会变成:fade-enter , fade-enter-to , fade-enter-active。
使用CSS过渡实现字符串的显示与隐藏
<template>
  <div class="hello">
      <button @click="fadeInOut">显示/隐藏</button>
      <transition name="fade">  <!--使用transition包括着,h2元素消失和显示可以设置效果-->
          <h2 v-if="isShow">{{msg}}</h2>
      </transition>
  </div>
</template>

<script>
import { reactive,toRefs } from 'vue';
export default {
  setup(){
    const state = reactive({
        isShow : true,
        msg:"hello vue 3.0 world!"
    })
    const fadeInOut = ()=>{
      state.isShow = !state.isShow
    }
    return{
      ...toRefs(state),
      fadeInOut
    }
  }
}
</script>

<style scoped>
/* 可以设置不同的进入和离开动画
设置持续时间和动画函数 */

元素进入过程状态设置
.fade-enter-active{
  /* 所有元素0.3秒完成状态过渡变化,ease-out慢速结束过渡效果 */
   transition: all 0.3s ease-out;
}

/* 元素离开过程状态设置 */
.fade-leave-active{
  /* 所有元素0.8秒完成状态过渡变化,cubic-bezier贝塞尔曲线 */
  transition: all 0.8s cubic-bezier(1,0.5,0.8,1);
}

/* 元素进入时开始状态、离开时结束状态 */
.fade-enter-from, .fade-leave-to{
  /* x轴移动20像素 */
  transform: translateX(20px);
  opacity: 0;
  /* 透明度设置为0 */
}
</style>
显示效果,默认显示,点击按钮后,慢慢消失,再次点击马上显示。
另外,除了使用<transition> 标签默认进入离开的默认样式类,用户还可以自定义过渡class类名,即通过下面的属性自定义过渡类名:
- enter-from-class
- enter-active-class
- enter-to-class
- leave-from-class
- leave-active-class
- leave-to-class
自定义样式类要比默认样式类名的优先级高,这对于vue的过渡系统和使用其他第三方CSS动画库(如:Animate.css)都非常有用。
<transition
            name="custom-classes-transition"
            enter-active-class="animate_animated animate_tada"
            leave-active-class="animate_animated animate_bounceOutRight">
    <p v-if="show">hello</p>
</transition>
在很多情况下,vue可以自动得出过渡效果的完成时机。有时候需要自己设置一系列的过渡效果时,可以使用<transition>组件中的duration属性定制一个显性的过渡持续时间(毫秒单位)。
<transition :duration="1000">...</transition>
也可以把进入和移除的持续时间分别进行定义:
<transition :duration="{enter:500,leave:800}">...</transition>
CSS动画
CSS动画和CSS过渡相同,区别是在动画中v-enter-from类名在节点插入DOM后不会立刻删除,而是在animationend事件触发时删除。
使用CSS动画实现字符串的显示和隐藏
<!--Animate.vue子组件-->
<template>
    <div>
        <button @click="fadeInOut">显示/隐藏</button>
        <transition name="bounce">
            <h2 v-if="isShow">{{msg}}</h2>
        </transition>
    </div>
</template>

<script>
import { reactive,toRefs } from 'vue';
export default{
    setup(){
        const state = reactive({
            isShow:true,
            msg:'Hello vue 3.0 world!'
        })
        const fadeInOut = ()=>{
            state.isShow = !state.isShow
        }
        return{
            ...toRefs(state),
            fadeInOut
        }
    }
}
</script>
<style scoped>
.bounce-enter-active{
    /* 关键帧名称 bounce-in , 完成时间0.5秒 */
    animation: bounce-in 0.5s;
}
.bounce-leave-active{
    /* 关键帧名称:bounce-in , 完成时间0.5秒,reverse表示动画反方向播放 */
    animation: bounce-in 0.5s reverse;
}
/* 定义关键帧,名称为bounce-in */
@keyframes bounce-in{
    0%{
        transform: scale(0);
    }
    /* 动画播放到一半,放大内容1.25倍 */
    50%{
        transform: scale(1.25);
    }
    100%{
        transform: scale(1);
    }
}
</style>
显示效果
使用钩子函数实现动画
上面的例子同时实现了入场和离场这两个半场动画,即实现了整场动画,但有时候只需要一个离场或入场动画(如将商品加入购物车的过程),可以使用钩子函数实现入场和离场这样的半场动画。
使用钩子函数实现将商品加入购物车的动画
<template>
    <button @click="fadeInOut">显示/隐藏</button>
    <transition @before-enter="beforeEnter" @enter="enter" @after-enter="afterEnter">
        <div class="ball" v-show="isShow"></div>
    </transition>
</template>

<script>
import { reactive,toRefs } from 'vue';
export default{
    setup(){
        const state = reactive({
            isShow:false
        })
        const fadeInOut = ()=>{
            state.isShow = !state.isShow
        }
        //el相当于js通过getElementById获取的js对象
        const beforeEnter = (el)=>{
            el.style.transform = 'translate(50px,50px)'
        }
        const enter = (el,done) =>{
            el.offsetWidth
            el.style.transform='translate(150px,450px)'
            el.style.transition = 'all 1s ease'
            done()
        }
        const afterEnter = ()=>{
            state.isShow = false
        }

        return{
            ...toRefs(state),
            fadeInOut,
            beforeEnter,
            enter,
            afterEnter
        }
    }
}
</script>

<style scoped>
.ball{
    width: 20px;
    height: 20px;
    border-radius: 50%;
    background-color: red;
}
</style>
显示效果

其中,el.offsetWidth语句的作用是强制动画刷新,另外,el.offsetHeight , el.offsetLeft , el.offsetRight具有同样作用;done()函数是立即调用afterEnter()函数,如果没有调用done()函数,就会造成afterEnter函数调用的延迟。
使用第三方样式类库实现动画
<template>
    <link href="https://cdn.bootcdn.net/ajax/libs/animate.css/4.1.1/animate.compat.css" rel="stylesheet" />
    <button @click="fadeInOut">显示/隐藏</button>
    <transition enter-active-class="animated bounceIn" leave-active-class="animated bounceOut"
        :duration="{ enter: 1000, leave: 1000 }">
        <h3 v-if="isShow">{{ msg }}</h3>
    </transition>
</template>

<script>
import { reactive,toRefs } from 'vue';

export default{
    setup(){
        const state = reactive({
            isShow: true,
            msg:"Hello vue World"
        })
        const fadeInOut = ()=>{
            state.isShow = !state.isShow
        }
        return{
            ...toRefs(state),
            fadeInOut
        }
    }
}
</script>
显示效果
组件生命周期
每个组件在创建时都要经过一些列的初始化过程,如需要设置数据监听、编译模板、将实例挂载到DOM并在数据变化时更新DOM等。
同时在这个过程中也会运行一些叫做生命周期钩子的函数,这给了用户在不同阶段添加自己的代码的机会
为了方便记忆,我们可以将他们分成四个阶段:
创建时: beforeCreate 、created
渲染时:beforeMount mounted
更新时: beforeUpdate updated
卸载时:beforeUnmount unmounted
App.vue
<template>
  <img alt="Vue logo" src="./assets/logo.png">
  <MyComponent/>
</template>

<script>
import MyComponent from './components/MyComponent.vue';

export default {
  name: 'App',
  components: {
    MyComponent
  }
}
</script>
MyComponent.vue
<template>
    <h3>生命周期函数</h3>
    <p>{{ message }}</p>
    <button @click="message='数据'">更改数据</button>
</template>

<script>

export default {
    data() {
        return {
            message: ""
        }
    },
    //方法集合
    methods: {},
    beforeCreate() {
        console.log("beforeCreate:组件创建之前")
    },
    created() {
        console.log("created:组件创建完成")
    },
    beforeMount() {
        console.log("beforeMount:组件渲染之前")
    },
    mounted() {
        console.log("mounted:组件渲染完成")
        //把网络请求放到这里,组件渲染完毕先显示布局小白块,然后发送网络请求,获取数据进行回显
    },
    beforeUpdate() {
        console.log("beforeUpdate:组件更新之前")
    },
    updated() {
        console.log("updated:组件更新完成")
    },
    beforeDestroy() {
        console.log("beforeDestroy: 组件销毁之前")
        //卸载之前,把消耗性能的处理都干掉
        //定时器 耗性能
    },
    destroyed() {
        console.log("destroyed:组件销毁完成")
    }
}
</script>
<style scoped>

</style>
默认初始化执行前4个函数,更改数据时,执行更新的两个函数。
销毁函数的目前演示不了。
不同的生命周期函数都有它的应用场景。
显示效果

在setup()中使用生命周期函数
在setup()中可以通过生命周期钩子函数前面加上"on" 来访问组件的生命周期钩子。
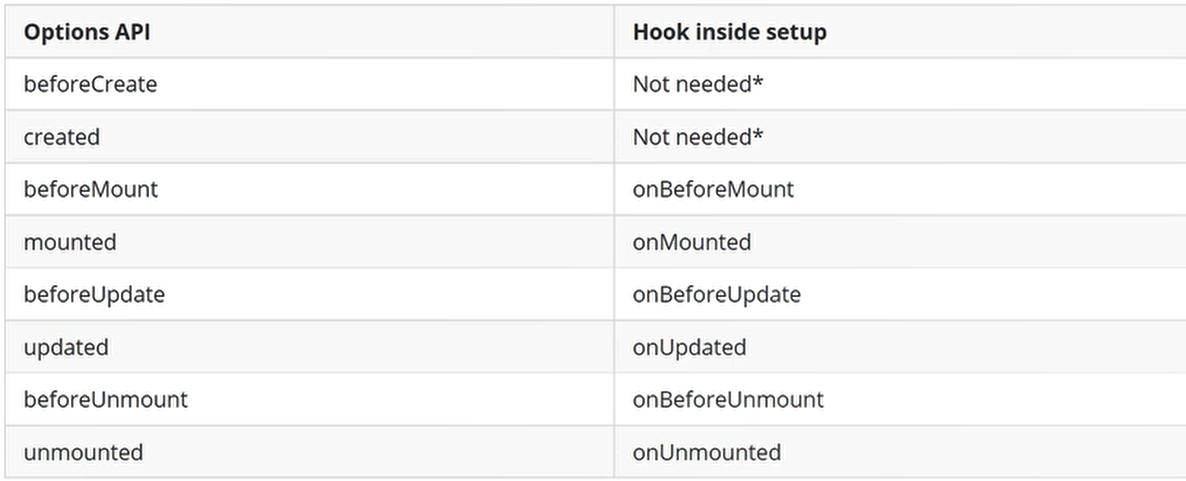
在setup()中,已经删除了创建时的两个生命周期函数beforeCreate和created。剩下的6个在前面加上on就可以使用。
<template>
<div>
  <button v-for="(item,index) in arr" :key="index" @click="selectOneFun(index)">
    {{index}}:{{item}}
  </button>
</div>
<div>你选择了【{{selectOne}}】</div>
</template>

<script>
import { reactive, toRefs, onBeforeMount, onMounted, onBeforeUpdate, onUpdated, onBeforeUnmount, onUnmounted, onDeactivated } from 'vue';
export default {
  name: 'HelloWorld',
  props: {
    msg: String
  },
  setup() {
    console.log("1...setup()开始创建组件");

    const data = reactive({
      arr: ["yes", "no"],
      selectOne: "",
    });
    const selectOneFun = index => {
      data.selectOne = data.arr[index]
    }
    onBeforeMount(() => {
      console.log("2...onBeforeMount()组件挂载到页面之前执行")
    })
    onMounted(() => {
      console.log("3...onMounted()组件挂载到页面后执行")
    })
    onBeforeUpdate(() => {
      console.log("4...onBeforeUpdate()组件更新之前执行")
    })
    onUpdated(() => {
      console.log("5...onUpdated()组件更新之后执行")
    })
    onBeforeUnmount(() => {
      console.log("6...onBeforeUnmount()组件卸载之前执行")
    })
    onUnmounted(() => {
      console.log("7...onUnmounted()组件卸载之后执行")
    })
    onDeactivated(() => {
      console.log("8...onDeactivated()在组件切换中旧组件消失时执行")
    })
    return {
      ...toRefs(data),
      selectOneFun
    }
  },
  beforeCreate() { console.log("beforeCreate")},
  created() {console.log("created") },
  beforeMount() { console.log("beforeMount")},
  mounted() { console.log("mounted")},
  beforeUpdate() {console.log("beforeUpdate") },
  updated() {console.log("updated") },
  beforeDestroy() { console.log("beforeDestroy")},
  destroyed() {console.log("destroyed") },
}
</script>
setup()中的生命周期函数和原生命周期函数输出结果
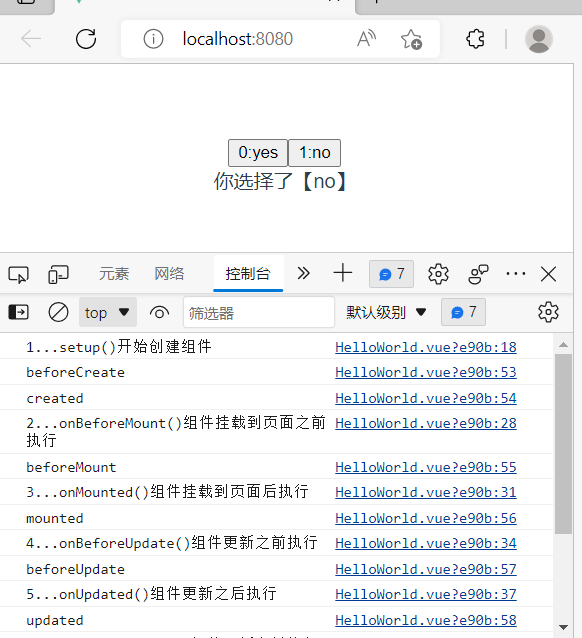
可以发现setup()执行是在beforeCreate之前。
自定义指令
vue内置了很多指令(如v-model\v-show\v-html等),但有时候一些特殊的需要,或者加一些特别的功能,这时就需要vue中自定义指令。需要明确的是自定义指令解决的问题,或者说适用场合是对普通DOM元素进行底层操作,所以不能盲目使用自定义指令。
全局自定义指令
对于全局自定义指令的创建需要使用vue.direcitve命令,语法格式如下:
createApp(App).directive('自定义指令名',{})
createApp(App).directive()中的第一个参数是自定义指令名,自定义指令名在声明的时候不需要加“-v"前缀,而在使用自定义指令时,需要加上”-v"前缀;第二个参数是是一个对象,对象中可以定义钩子函数,并且这些钩子函数可以带一些参数。其中,el是当前绑定自定义指令的DOM元素,通过el参数可以直接操作DOM元素.
全局自定义指令的定义与使用
//main.js 注册自定义指令
import { createApp } from 'vue'
import App from './App.vue'

const app = createApp(App)
//注册一个全局自定义指令
app.directive('focus',{
//当被绑定的元素插入到DOM时执行
	mounted(el){             //参数el相当于dom元素
        el.focus();              //让绑定元素获得焦点
        el.value = "获得焦点"  //修改绑定元素的表单值
    }
})
app.mount('#app')
<!--App.vue-->
<template>
  <p>{{msg}}</p>
  <input type="text"><br><br>
  <input type="text" v-focus><br><br>  <!--focus是自定义指令,使用需要加v-前缀 -->
  <input type="text">
</template>

<script>
import { reactive,toRefs } from 'vue';

export default {
  setup(){
    const state = reactive({
      msg: "页面加载后,第二个元素自动获取焦点;"
    })
    return{
      ...toRefs(state)
    }
  }
}
</script>

<style>
input:focus{
  background-color: black;
  color: white;
}
</style>
显示效果
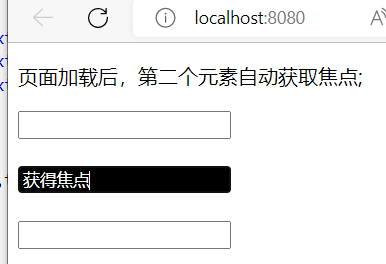
局部自定义指令
全局自定义指令在脚手架的任何一个组件中都可以使用。在vue中也可以在组件内中使用directive注册局部自定义指令,这种局部自定义指令只能在组件内进行使用。
<template>
    <p>页面加载后,第二个input元素自动获取焦点:</p>
    <input type="text"><br><br>
    <input type="text" v-focus><br><br>
    <input type="text">
</template>

<script>
export default {
    directives: {
        //局部自定义指令,调用需要加v-,即v-focus
        focus: {
            mounted(el) {
                el.focus()
                el.value = "获得焦点!"
            },
        }
    }
}
</script>
显示效果
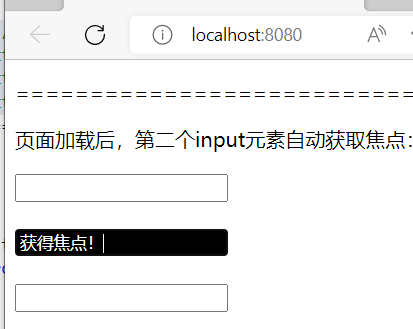
自定义指令的钩子函数
在上面的例子中v-focus使用了mounted()钩子函数,还可以使用其他钩子函数,如下
app.directive('',{
	beforeMount(el){ //指令绑定元素挂载前},
	mounted(el,binging){ //指令绑定元素挂载后},
	beforeUpdate(el){},
	updated(el){},
	beforeUnmount(el){},
	unmounted(el){}
})
重点:钩子函数可以传入以下参数。
- el:指令所绑定的元素,可以用来直接操作dom元素。
- binding:一个对象,包含以下属性。
- value:指令的绑定值。如:在v-my-directive="1+1"中,绑定值为2
- oldValue:指令绑定的前一个值。
- arg:传给指令的参数,可选,如“v-my-directive: foo"中,参数为foo
- modifiers:一个包含修饰符的对象。如:”v-my-directive.foo.bar"中,修饰符对象为{foo:true , bar: true}.
- vnode:Vue编译生成的虚拟节点。
除了对el进行操作之外,其他参数都是只读,切勿修改。
自定义指令的钩子函数的定义与使用
<!--main.js中自定义指令的钩子函数使用-->
import { createApp } from 'vue'
import App from './App.vue'

const app = createApp(App)
//注册一个全局自定义指令

app.directive('direct',{
    beforeMount(el,binding,vnode){
        console.log(binding)
        var s = JSON.stringify
        el.innerHTML = `钩子函数beforeMount中各参数的取值:<br>
        <b>value:</b>    ${s(binding.value)} <br>
        <b>argument:</b>   ${s(binding.arg)} <br>
        <b>modifiers:</b>    ${s(binding.modifiers)} <br>
        <b>vnode keys:</b>    ${Object.keys(vnode).join(', ')} <br>  `
    }
})
app.mount('#app')
这里省略App.vue引入子组件和挂载子组件和显示子组件的步骤。
<!--AllComp.vue子组件-->
<template>
    <p>{{ message }}</p>
    <div v-direct:hello.a.b="message">  <!--调用自定义指令,传递hello参数,.a.b包含修饰符的对象,message指令绑定值-->
        abc
    </div>
</template>

<script>
import { reactive, toRefs } from 'vue';
export default {
    setup() {
        const state = reactive({
            message: '自定义指令钩子函数'
        })
        return {
            ...toRefs(state)
        }
    }
}
</script>
显示效果
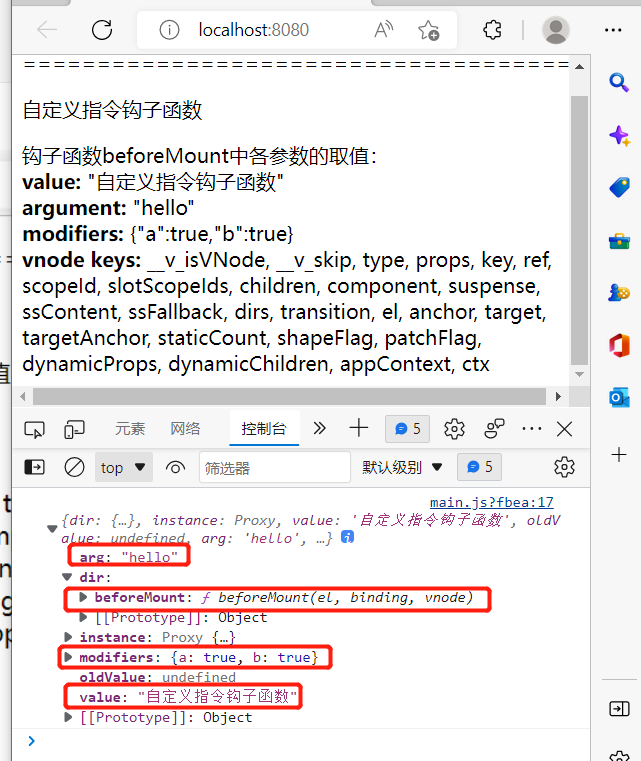
页面输出的都是子组件调用自定义传输给binding对象的值。
动态指令参数
指令的参数是可以动态的,如 ,在v-mydirective:[argument]="value" 中,argument参数可以根据组件实例数据进行更新。
例如,创建一个自定义指令实现固定布局并将某个元素固定在页面指定位置上,固定的位置由带参数的自定义指令来确定。
(1)页面中调用
<div>
	<p> 元素滚动页面 </p>
	<p v-pin="200">  页面被定位到离本页top端200像素</p>
</div>
(2) 全局自定义指令
const app = Vue.createApp({})

app.directive('pin',{
	mounted(el,binding){
		el.style.position = 'fixed'
		el.style.top = binding.value +'px'   //如果想设置其他属性,就修改el.style.属性名 具有动态性,扩展性好
	}
})
app.mount('#app')
使用动态参数修改自定义指令的绑定值来实现字符串移动
在例子中创建数据变量pinPadding,并将其绑定到<input type="range">, 这样可以通过调节杆改变pinPadding值来动态调整页面元素的位置。
// main.js
import { createApp } from 'vue'
import App from './App.vue'
import './registerServiceWorker'

const app = createApp(App)
//注册一个全局自定义指令

app.directive('direct',{
    mounted(el,binding){  //组件渲染完后进行
        el.style.position = 'fixed'
        const s = binding.arg || 'top'  //如果arg为空,则默认top
        el.style[s] = binding.value + 'px'
    },
    updated(el,binding) {  //组件更新完进行
        const s = binding.arg || 'top'
        el.style[s] = binding.value + 'px'
    },
})
app.mount('#app')
这里省略App.vue 引入/注册/显示子组件步骤
<!--AllCompo.vue子组件-->
<template>
<div>
    <h2>滚动定位页面</h2>
    <input type="range" min="0" max="1000" v-model="pinPadding">
    <p v-direct:[direction]="pinPadding">页面被定位到离本页{{direction}}端{{pinPadding}}像素</p>
    <!-- :[direction]传递的参数  pinPadding绑定的值-->
</div>

</template>

<script>
    import { reactive,toRefs } from 'vue';
    export default{
        setup(){
            const state = reactive({
                direction:'right',  //指定距离方向
                pinPadding:200   //指定距离
            })
            return{
                ...toRefs(state)
            }
        }
    }
</script>
通过自定义指令,子组件传递过去的参数arg为:[direction] , 绑定的值value为pinPadding,分别传递给对应自定义指令的binding里面的 arg 和value。
显示效果
模态框
在使用模态框组件时,需要将组件放在模板template中使用,但是由于模态框一般位于页面的最上方,最好将模态框组件挂载到body上面,能够通过z-index进行模态框位置的控制。但是嵌套在模板<template> 标签内,处理嵌套组件的定位position、层级关系z-index和样式不容易实现,而使用Teleport标签可以方便地解决这些问题。Teleport能够直接将组件渲染到页面中的任意地方,只要通过to属性指定了渲染的目标对象即可。
//main.js把App.vue默认组件换成Teleport.vue
import { createApp } from 'vue'
import App from './components/Teleport.vue'
import './registerServiceWorker'

createApp(App).mount('#app')
<!--Modal.vue子组件-->
<template>
<button @click="openModalHandle">
使用Teleport全屏打开模态框
</button>
<teleport to="body"> <!--这里是模态框-->
<div v-if="modalOpen" class="modal">
<div>
这是Teleport模态框<br>(展示位置是 <body>元素)
<button @click="closeModalHandle">关闭</button>
</div>
</div>
</teleport>
</template>
<script>
import { reactive, toRefs } from 'vue';
export default {
setup() {
const state = reactive({
modalOpen: false
})
const openModalHandle = () => {
state.modalOpen = true
}
const closeModalHandle = () => {
state.modalOpen = false
}
return {
...toRefs(state),
openModalHandle,
closeModalHandle
}
}
}
</script>
<style>
.modal {
position: absolute;
top: 0;
right: 0;
bottom: 0;
left: 0;
background-color: rgba(0, 0, 0, .5);
display: flex;
flex-direction: column;
align-items: center;
justify-content: center;
}
.modal div {
display: flex;
flex-direction: column;
align-items: center;
justify-content: center;
background-color: white;
width: 300px;
height: 300px;
padding: 5px;
}
</style>
<!--Teleport.vue父组件-->
<template>
<div style="position: relative;">
    <h3>使用vue 3.0 的Teleport标签</h3>
    <div>
        <ModalVue/>  <!--显示模态框子组件-->
    </div>
</div>
</template>
<script>
    import ModalVue from './Modal.vue';
    export default{
        components:{
            ModalVue
        }
    }
</script>
重点在于Modal.vue子组件,父组件只是引入/注册/显示子组件而已。当点击子组件的按钮时,调用子组件定义好的teleport标签内容,v-if控制模态框是否显示。
显示效果

实验八
使用自定义指令实现全选和取消全选
<template>
    <div>
        <form action="#" v-for="(item, index) in hobby" :key="index">
            <input type="checkbox" v-checkbox="item.checked" v-model="item.checked">
            <span>{{ item.name }}</span>
        </form><br>
    </div>
    <div>
        数组定义格式:{{ hobby }}
    </div>
    <div>
        <button @click="allSelect">全选</button> | <button @click="allNoSelect">取消全选</button>
    </div>
</template>

<script>
import { reactive, toRefs } from 'vue';
export default {
    setup() {
        const state = reactive({
            hobby: [
                { "name": "足球", "checked": "false" },
                { "name": "篮球", "checked": "false" },
                { "name": "乒乓球", "checked": "false" },
            ]
        })
        //全选
        const allSelect = () => {
            for (let item in state.hobby) {
                state.hobby[item].checked = true;
            }
        }
        //取消全选
        const allNoSelect = () => {
            for (let item in state.hobby) {
                state.hobby[item].checked = false;
            }
        }
        return {
            ...toRefs(state),
            allSelect,
            allNoSelect
        }
    },
    directives: {
        checkbox: {
            mounted(el, binding) {  //dom树渲染完成后,设置属性
                if (binding.value === true) {
                    el.setAttribute('checked','checked')
                } else {
                    el.removeAttribute('checked')
                }
            },
            updated(el, binding) { //元素发生改变后,更新属性
                if (binding.value === true) {
                    el.setAttribute('checked','checked')
                } else {
                    el.removeAttribute('checked')
                }
            },
        }
    }
}

</script>
显示效果
vue引入第三方
swipr是js打造的滑动特效插件,面向手机、平板等移动端,能实现触屏Tab切换、触屏轮播图切换等常用效果。
官方文档:https://www.swiper.com.cn/
安装指定版本:npm install --save swiper@8.1.6
<template>
  <div class="hello">
      <!--clickable:false就关闭点击小点切换图片 -->
    <Swiper :modules="modules" :pagination="{clickable:true}">
      <SwiperSlide >
        <img src="../assets/1.jpg">
      </SwiperSlide>
      <SwiperSlide>
        <img src="../assets/2.jpg">
      </SwiperSlide>
      <SwiperSlide>
        <img src="../assets/3.jpg">
      </SwiperSlide>
    </Swiper>
  </div>
</template>

<script>
import {Pagination} from 'swiper';//指示器,轮播图下面的小点
import {Swiper,SwiperSlide} from 'swiper/vue';
import 'swiper/css'; //引入swiper的css样式
import 'swiper/css/pagination';
export default {
  name: 'HelloWorld',
  components:{
    Swiper,
    SwiperSlide
  },
  data(){
    return{
      modules:[Pagination]  //返回一个模块
    }
  }
}
</script>

<style scoped>
  img{
    width: 100%;
  }
</style>
显示效果

Axios网络请求
axios是基于promise的网络请求库,主要作用向服务器后台发起Ajax请求,并在请求的过程中可以进行很多控制。主要特性如下:
- 可以在浏览器发送XMLHttpRequests
- 可以在node.js发送http请求
- 支持Promise API
- 拦截请求和响应
- 转换请求数据和响应数据
- 能够取消请求
- 自动转换json数据
- 客户端可以防止XSRF攻击
安装 npm install --save axios // --save 安装的同时添加到项目中
注意:如果创建项目时,勾选了axios,这时候不需要再次安装,否则发生冲突异常
局部组件中引入:import axios from 'axios' ; 每个组件使用都需要添加
全局引用:
//main.js
import axios from "axios";
//注意这里axios不需要use
const app = createApp(App);
app.config.globalProperties.$axios= axios;
app.mount('#app')
this.$aixos //在组件中调用的形式
网络请求基本实例
Axios的请求方法主要有以下几种:
- axios.request(config)
- axios.get(url[,config])
- axios.delete(url[,config])
- axios.head(url[,config])
- axios.options(url[,config])
- axios.post(url[,data[,config]])
- axios.put(url[,data[,config]])
- axios.patch(url[,data[,config]])
[]里面的参数代表可省略。
get请求
get请求格式如下
Axios.get(url,cofig);//url地址,config可省略
Axios的get函数源码,如下图
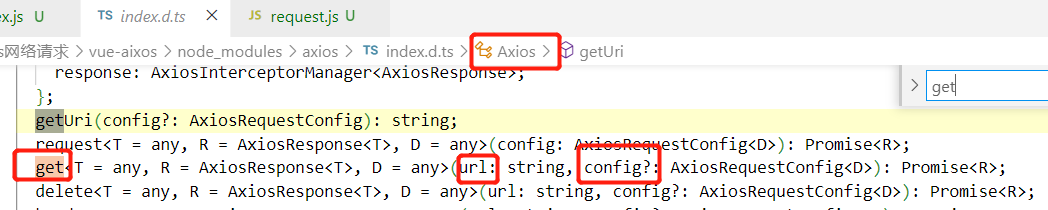
例子:
<template>
  <div class="hello">
   <p>{{chengpin.title}}</p>
  </div>
</template>

<script>
import axios from "axios"
export default {
  name: 'HelloWorld',
  data(){
   return{
      chengpin:{}
   }
  },
  mounted(){
    axios({
      method:"get", url:"http://iwenwiki.com/api/blueberrypai/getChengpinDetails.php"
    }).then(res=>{
      console.log(res.data);
      this.chengpin = res.data.chengpinDetails[0]
    }).catch(error=>{
        console.log(error)
    })
  }
}
</script>
请求成功时,返回的数据在res参数变量中,如果请求错误,错误的原因在error参数变量中。
显示效果
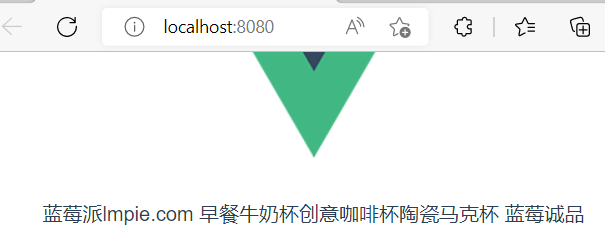
post请求
Axios的post函数请求格式如下
axios.post(url,data,config); //url地址,data{}对象数据,config可省略
观看aixos源码如下图
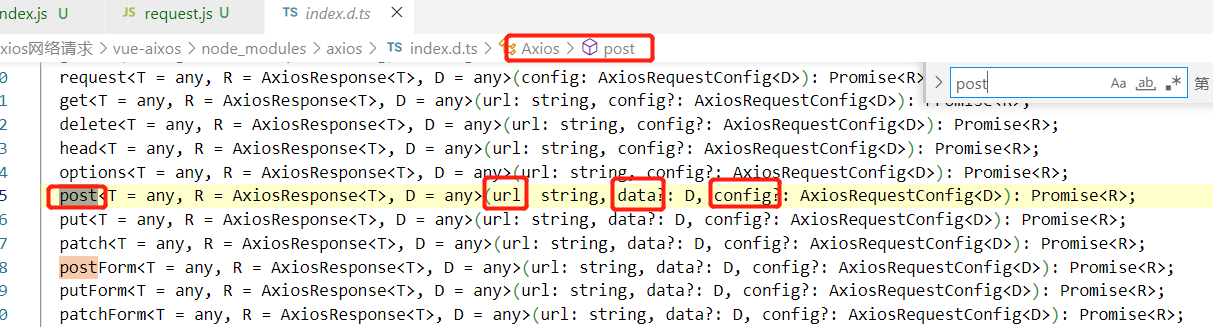
提示:post请求参数需要额外处理的
- 安装依赖 npm install --save querystring
- 转换参数格式:库名.stringify({})
axios({
      method:"post",
      url:"http://iwenwiki.com/api/blueberrypai/login.php",
      data:{
        user_id:"iwen@qq.com",
        password:"iwen123",
        verification_code:"crfvw"
      }
    }).then(res=>{
      console.log(res.data);
    })
网络请求接收类型不是对象类型,是字符串类型,所以需要把对象转换为字符串,否则显示如下图

需要安装querystring库,npm install --save querystring
<template>
  <div class="hello">
  </div>
</template>

<script>
import axios from "axios"
import querystring from "querystring"
export default {
  name: 'HelloWorld',
  mounted(){
    //post请求
    axios({
      method:"post",
  	  url:"http://iwenwiki.com/api/blueberrypai/login.php",
      //querystring.stringify({})对象转字符串
      data:querystring.stringify({
        user_id:"iwen@qq.com",
        password:"iwen123",
        verification_code:"crfvw"
      })
    }).then(res=>{
      console.log(res.data);
    })

  }
}
</script>
显示结果
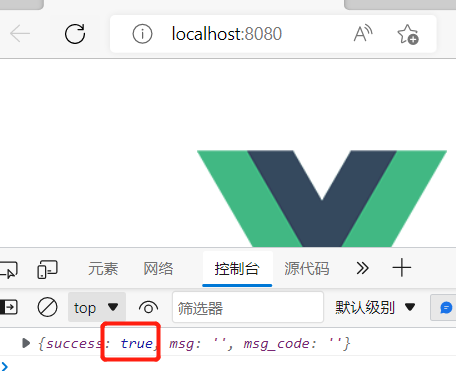
请求配置config
在请求参数除了url是必须项,还有一个config,config可以存放多个配置项,使用{}括起来,如 axios.get(url,{parms:{ID:12332},...})注意params是config里面声明好的参数,更多的参数请自行百度config内置参数。
request请求
一般request请求包括所有的请求方法,下面以axios.request(config)最基础的请求方法为例来说明axios中config的配置方法。
axios.request({
	method:'post',
	url:'/user',
	data:{
		firstName: 'fred',
		lastName: 'Flintsonte'
	}
}).then(response=>{
	console.log(response)
}).catch(error=>{
	console.log(error)
})
全局引入axios(不推荐)
在main.js中引入
import { createApp } from 'vue'
import App from './App.vue'
import './registerServiceWorker'
import axios from 'axios'  //导入axios库
//全局挂载axios组件
const app =  createApp(App)
app.config.globalProperties.$axios = axios
app.mount('#app')
HelloWorld.vue
<template>
  <div class="hello">
  </div>
</template>

<script>
import querystring from "querystring"
export default {
  name: 'HelloWorld',
  mounted(){
    this.$axios.post("http://iwenwiki.com/api/blueberrypai/login.php",querystring.stringify({
      user_id:"iwen@qq.com",
        password:"iwen123",
        verification_code:"crfvw"
    })).then(res=>{
      console.log(res.data);
    })
  }
}
</script>
注意:全局挂载的axios重命名为 $axios,所以使用方式是 this.$axios.post("url",querystring({ key:value})).then(res=>{})
显示效果
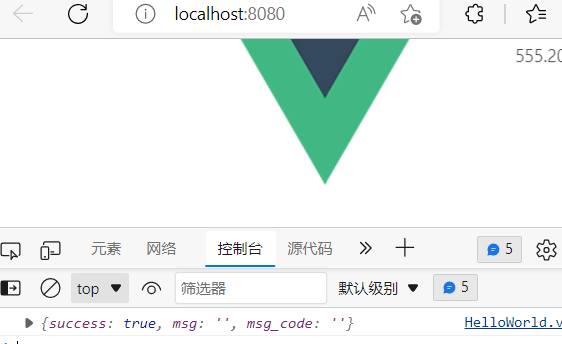
axios网络请求的封装
在日常应用过程中,一个项目中的网络请求会很多,此时一般采取的方案是将网络请求封装起来。
注意:如果是新创建的项目,需要重新安装axios和querystring依赖,上面的都是局部安装依赖(只安装到本项目)。
摘要: axios网络请求的封装,把请求拆分为3个文件,request.js(已经引入axios组件)文件负责请求的处理逻辑(拦截器)对axios二次封装(加入自己的业务逻辑);path.js文件负责存放请求路径,index.js文件负责将请求封装为一个函数(代码复用),依赖于path.js和request.js文件。
- 在src目录下创建utils文件夹,并创建request.js , 用例存储网络请求对象axios
import axios from "axios"
import querystring from "querystring"

//参考文档:https://www.kancloud.cn/yunye/axios/234845/
const errorHandle = (status,info)=>{
    switch(status){
        case 400:
            console.log("语义有误");
            break;
        case 401:
            console.log("服务器认证失败");
            break;
        case 403:
            console.log("服务器拒绝访问");
            break;
        case 404:
            console.log("地址错误");
            break;
        case 500:
            console.log("服务器遇到意外");
            break;
        case 502:
            console.log("服务器无响应");
            break;
        default:
            console.log(info);
            break;
    }
}

const instance = axios.create({
    //网络请求的公共配置
    timeout:5000
})
//拦截器最常用

//发送数据之前
instance.interceptors.request.use(
    config=>{
        if(config.method === "post"){
            //对象转为字符串类型
            config.data = querystring.stringify(config.data);
        }
        //config:包含着网络请求的所有信息
        return config;
    },
    error=>{
        return Promise.reject(error);
    }
)

//获取数据之前
instance.interceptors.response.use(
    response=>{
        return response.status === 200 ? Promise.resolve(response): Promise.reject(response);
    },
    error=>{
        const {response } = error;
        //错误的处理才是最需要关注的
        errorHandle(response.states,response.info)
    }
)

export default instance;
- 在src目录创建api目录,并创建index.js和(base)path.js
path.js
const base ={
    baseUrl: "http://iwenwiki.com",
    chengpin:"/api/blueberrypai/getChengpinDetails.php",
    login:"/api/blueberrypai/login.php"
}

export default base;
index.js
import axios from "../utils/request"
import path from "./path"

const api = {
    //成品详情地址,这里的axios是二次封装对象,所以包含了axios的get请求方法,相当于继承父类的意思
    getChengpin(){
        return axios.get(path.baseUrl+path.chengpin)
    },
    login(){
        return axios.post(path.baseUrl+path.login,{
            user_id:"iwen@qq.com",
            password:"iwen123",
            verification_code:"crfvw"
        })
    }
}

export default api;
- 组件中调用封装的请求
<template>
  <div class="hello">
  </div>
</template>

<script>
import api from "../api/index"
export default {
  name: 'HelloWorld',
  mounted(){
    //渲染完毕调用getChengpin()函数返回数据,使用then处理
    api.getChengpin().then(res=>{
      console.log(res.data)
    }).catch(err=>{
      console.log(err.data);
    })

    api.login().then(res=>{
      console.log(res.data)
    }).catch(err=>{
      console.log(err)
    })
  }
}
</script>

<style scoped>
</style>
网络请求跨域解决方案
JS采取的是同源策略
同源策略是浏览器的一项安全策略,浏览器只允许js代码请求和当前所在服务器域名,端口,协议相同的数据接口上的数据,这就是同源策略。
也就是说,当协议、域名、端口任意一个不同时,都会产生跨域问题。
跨域错误提示信息(CORS)
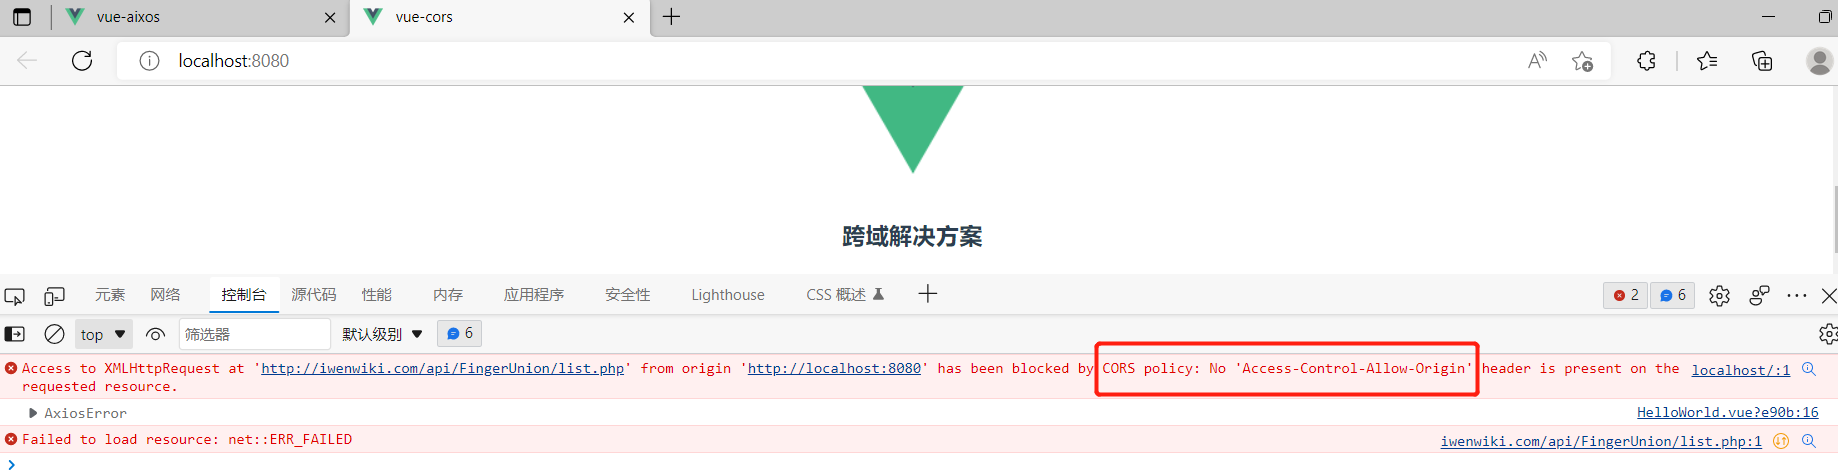
目前主流的跨域解决方案有两种:
1 后台解决: cors
2 前台解决:proxy
这里采用第二种方案,首先在vue.config.js文件中,配置以下代码
const { defineConfig } = require('@vue/cli-service')
module.exports = defineConfig({
  transpileDependencies: true, //下面是新配置上去的
  devServer:{
    proxy:{
      '/api':{
        target:'http://iwenwiki.com', //targt是需要跨域的地址,不用放跨域地址的全url,放 根域名就行
        changeOrigin:true
      }
    }
  }
})
上面的 /api代理了http://iwenwiki.com,访问/api就是访问该地址。
然后在组件中修改url,修改为配置好的url,
<template>
  <div class="hello">
   <h3>跨域解决方案</h3>
  </div>
</template>

<script>
import axios from "axios"
export default {
  name: 'HelloWorld',
  mounted(){
      // axios.get("http://iwenwiki.com/api/FingerUnion/list.php")//这里会产生跨域,下面已经配置好跨域
      axios.get("/api/FingerUnion/list.php")
      .then(res=>{
        console.log(res.data)
      }).catch(err=>{
        console.log(err)
      })
  }
}
</script>
跨域解决显示
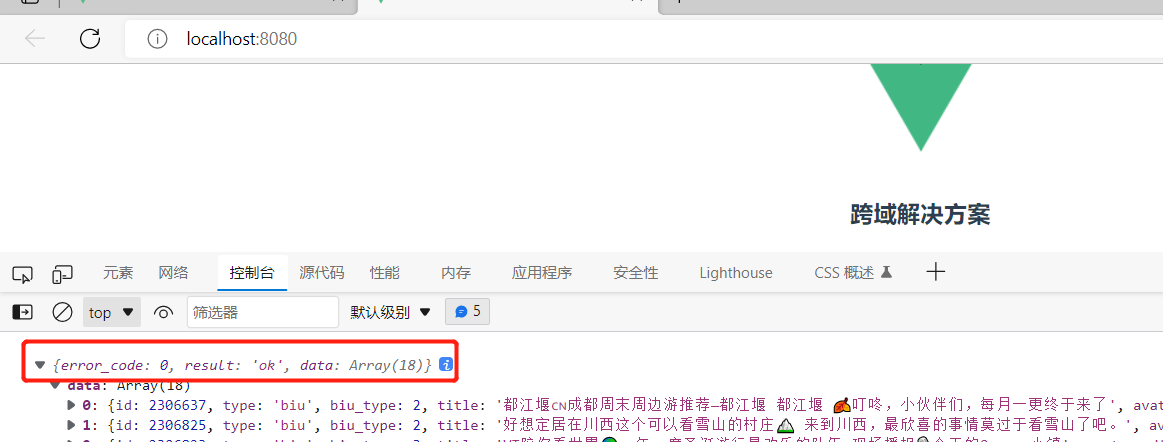
vue引入路由管理
在vue中,我们可以通过vue-router路由管理页面之间的关系
vue Router是vue.js的官方路由。它于vue.js核心深度集成,让vue.js构建单页面应用变得轻而易举。
单页面通过vue-router进行跳转。(只有一个页面也可以跳转)这里需要理解三个词语的区别。
(1)route:是单数,译为路由。即可以理解为单个路由或某一条路由。
(2)routes:是个复数,表示多个路由的集合,js中表示多种不同状态的集合形式只有数组和对象两种,官方定义routes是表示多个数组的集合。
(3)router:路由器,一个包含route和routes的容器,或者说router是一个管理者,负责管理route和routes。如用户在页面点击按钮时,router火灾routes中查找route,即路由器会在路由集合中查找对应的路由。具体功能如下:
- 嵌套的路由/视图表
- 模块化的、基于组件的路由配置
- 路由参数、查询、通配符
- 基于vue过渡系统的视图过渡效果
- 细粒度的导航控制
- 自定义的滚动条行为
在vue中引入路由
- 安装路由
npm install --save vue-router - 配置独立的路由文件
在src目录下创建router和views目录,然后在router下创建index.js , 在views创建两个组件页面
<!--HomeView.vue-->
<template>
    <h3>首页</h3>
</template>
<!-- AboutView.vue-->
<template>
    <h3>关于页面</h3>
</template>
//index.js
import{createRouter,createWebHashHistory } from  "vue-router"
//import{createWebHistory} from "vue-router"
import HomeView from "../views/HomeView"
import AboutView from "../views/AboutView"

//配置信息中需要页面的相关配置
const routes =[
    {
        name:"Home",  //链接名称,可省略
        path:"/",  //当前路由规则匹配的hash地址
        //redirect: '/Login'  //路由重定向到 /Login,即访问/会跳转到/Login去
        component:HomeView //当前路由规则对应要展示的组件
    },
    {	name:"About"
        path:"/about",
        component:AboutView
    }
]

/**
 * createWebHashHistory(原理:a标签的锚点连接)
 * 地址  home: http://localhost:8080/#/
 		about: http://localhost:8080/#/about
 *
 * createWebHistory(原理:H5 pushState()) ,地址照常显示,
 不过,问题来了。由于我们的应用是一个单页的客户端应用,如果没有适当的服务器配置,用户在浏览器中直接访问 https://example.com/user/id,就会得到一个 404 错误。这就尴尬了。需要后台配合做重定向,否则404
 		home: http://localhost:8080
 		about: http://localhost:8080/about
 */
const router = createRouter({
    history:createWebHashHistory(),
    routes
})
export default router;//导出对外接口,用于外部使用
在路由器router中指定两个内容,一个是用什么方法使用路由(有两种方法:history模式和hash模式);另一个是路由数组。
其中,history模式使用下面的命令进行指定:
history:createWebHistory(process.env.BASE_URL),
hash模式使用下面的命令指定:
history:createWebHashHistory()
- 在main.js中使用路由
//其他import
import router from "./router"  //导入路由

createApp(App).use(router).mount('#app')  //use(路由)
- 在App.vue中添加路由链接和指定路由显示入口
<template>
<!-- 路由的显示入口 -->
<router-link to="/">首页</router-link>|
<router-link to="/about">关于</router-link>
<router-view></router-view>
</template>

<script>

export default {
  name: 'App'
}
</script>
路由链接<router-link>默认会被渲染为a标签,to属性可以指定目标地址,to属性渲染为a标签的href属性,并且有多种写法,如下:
1. <router-link to="/">首页</router-link>    推荐使用
2. 缩写形式<router-link :to="'/'">首页</router-link>  '/'的默认参数为path
3. 详写形式 <router-link :to="{path:'/'}">首页</router-link>
不使用path也可以跳转,通过name属性指定跳转
4. <router-link :to="{name:'Home'}">首页</router-link>  Home在router目录的index.js定义
1、2、3都是路径路由,4是命名路由。
<router-view></router-view> 显示路由跳转的页面位置
显示效果

router目录下的index.js使用了createWebHashHistory,所以地址栏会添加多一个#,原理是a标签的锚点,锚点就是利用#跳转,
如果使用createWebHistory,如下图
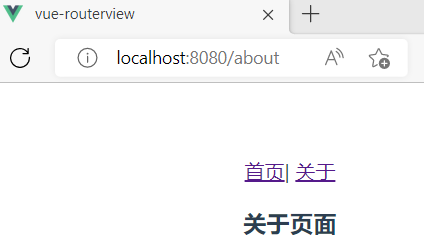
路由传递参数
路由传递参数方式有两种:1. 通过<router-link>标签 2. 事件方法传递
router-link标签传递路由参数
路由传递参数总共有三步:1.传参组件页面 2.router转发路由 3. 路由接收参数方
其中传参有路径参数(类似restful)、params和query三种方式,分别对应的router转发路由格式也不同,路由接收参数方只需要修改接收对象是params或query。路径参数和params都是使用params对象解析。
动态路由
某些情况下,一个页面的path路径可能是不确定的。例如,进入用户页面时,不仅希望有路径信息,还需要有一些其他信息。例如:
/user/lb
/user/wq
这种路径与组件之间的匹配关系,称为动态路由(也是路由传递数据的一种方式)。因为路径后面的参数是变化的,所以不可能一个路径设置一个映射关系,所以使用路径参数实现动态跳转,下面的例子包含了动态路由。
创建项目时,把router也勾选上,不用像上面手动搭建路由。
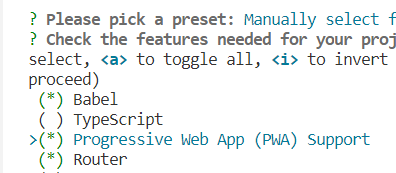
- 在views创建一个NewsView.vue页面组件(传参组件页面)
<template>
	<!-- 转发方采用了query对象形式,所以下面的 路径传参 和params对象传参将接收不到数据,需要把router里面的path路径后面声明path:'/newsDetails/:name/:year 传参变量-->
   <ul>
    <li>
        <router-link to="/newsDetails/百度/2088">百度新闻</router-link><br> <!--动态路由也就是路径传参-->
        <router-link :to="{path:'/newsDetails',query:{name:'百度',year:'2099'}}"> :to 路径路由 百度新闻 带query参数</router-link>
    </li>
       	<br>        <hr>
    <li>
        <router-link to="/newsDetails/网易/2088">网易新闻</router-link><br>
        <router-link :to="{name:'newsDetails',query:{name:'网易',year:'2088'}}"> :to 命名路由 网易新闻  带query参数</router-link>
    </li>
       	<br>        <hr>
    <li>
        <router-link to="/newsDetails/头条/2099">头条新闻</router-link><br><hr>
        <router-link :to="{name:'newsDetails',params:{name:'头条',year:'2099'}}">带params的头条新闻,router参数写法:/:参数名</router-link>
    </li>
   </ul>
</template>
注意每个li都有to和 :to的形式,to是路径参数,:to是传对象,传对象分为query和params,路径参数和params在路由转发需要在path后面声明传参变量。而query只需要声明路径和组件的映射关系。
- router目录下创建index.js (router转发方)
import { createRouter, createWebHistory } from 'vue-router'
import HomeView from '../views/HomeView.vue'

const routes = [
  {
    path: '/',
    name: 'home',
    component: HomeView
  },
  {
    path: '/about',
    name: 'about',
    component: () => import(/* webpackChunkName: "about" */ '../views/AboutView.vue')
  }, //新添加内容
  {
    path:'/news',
    name:'news',
    //异步加载方式
    component: ()=> import('../views/NewsView')
  },
  {
    //如果是  路径参数或者params对象需要声明传递变量 如  path:'/newsDetails/:name/:year',  :name是声明参数变量
    //如果是query对象,则无需在路径后面添加变量,如下
    path:'/newsDetails',
    name:"newsDetails",
    component:()=>import('../views/NewsDetailView')
  }
]

const router = createRouter({
  history: createWebHistory(process.env.BASE_URL),
  routes
})

export default router
- 在views目录下创建NewsDetailView.vue组件(接收方组件)
<template>
    <p>{{$route.query.year}}年
    {{$route.query.name}}新闻</p>
   <!-- <p>{{$route.params.year}}年
    {{$route.params.name}}新闻</p>  如果是路径传参或者parmas对象传参,需要更改params对象 -->
</template>
显示效果
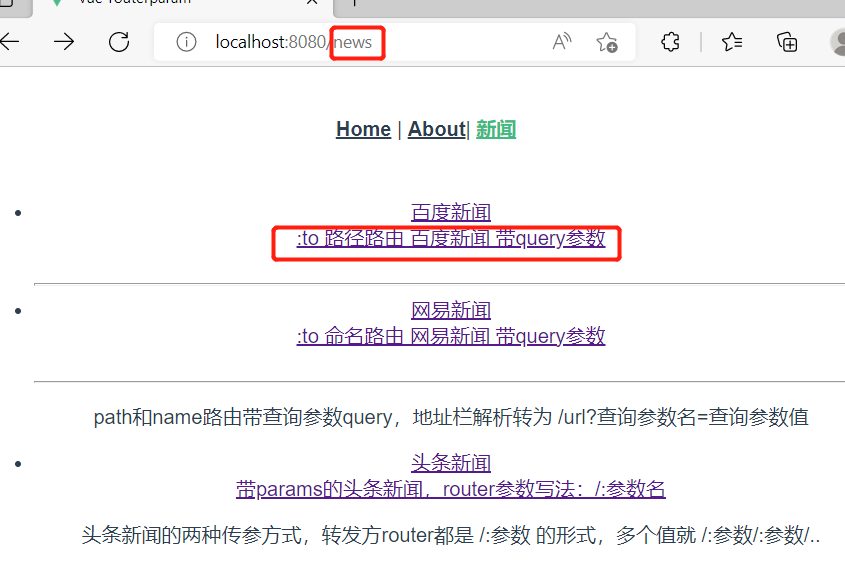
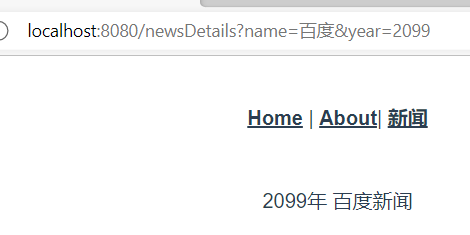
事件方法传递路由参数
事件响应函数内通过route路由的push()方法携带参数,当用户点击页面的按钮时,在触发的按钮事件中把相关参数展示在页面中。
(1)在App.vue中编写传递路由参数的事件方法
<template>
  <nav>
    <router-link to="/">Home</router-link> |
    <router-link to="/about">About</router-link>|
    <button @click="profileClick">事件方法传递路由参数</button>
  </nav>
  <router-view/>
</template>
<script>
  import { reactive,toRefs } from 'vue';
  import { useRouter } from 'vue-router';
  export default{
    setup(){
      const router = useRouter()
      const profileClick = ()=>{
          //router对象由上面的useRouter()创建
        router.push({
          path: "/event",
          query:{
            name:"张三",
            age: 33,
            height: 194
          }
        })
      }

      return{
        profileClick
      }
    }
  }
</script>
(2)router目录的index.js添加组件和路径的映射关系
import { createRouter, createWebHistory } from 'vue-router'
import HomeView from '../views/HomeView.vue'

const routes = [
  {
    path: '/',
    name: 'home',
    component: HomeView
  },
  {
    path: '/about',
    name: 'about',
    component: () => import(/* webpackChunkName: "about" */ '../views/AboutView.vue')
  },
  { //关系映射
    name:"EventMethod",
    path:"/event",
    component: () => import('../views/EventMethod.vue')
  }
]

const router = createRouter({
  history: createWebHistory(process.env.BASE_URL),
  routes
})

export default router
(3) 在views目录下创建EventMethod.vue路由参数接收方
<template>
    <div class="eventMethod">
    <p>姓名:{{$route.query.name}}</p>
    <p>年龄:{{$route.query.age}}</p>
    <p>身高:{{$route.query.height}}</p>
</div>
</template>
显示效果,当点击按钮触发事件方法,传递路由参数query对象,该push()作用在下一个小节有介绍,作用类似router-link的to属性。
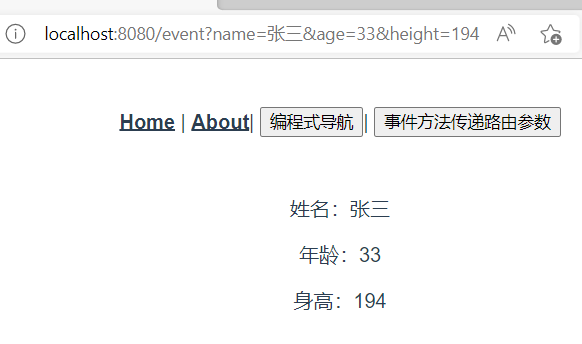
编程式导航
页面导航有两种主要方式:1. 单击定义的链接实现导航(a标签/router-link)称为声明式导航;
- 调用js形式的API实现导航称为编程式导航。
编程式导航的使用
使用方法前,导入useRouter和创建router对象使用useRouter() 函数。
(1)router.push()方法。导航到不同的URL,使用该方法。这个方法向history栈添加一个新的记录,当用户单击浏览器“后退”按钮时,则退回到上一次访问的浏览器网页。单击<router-link :to="...">等同 调用router.push()方法。
(2)router.replace()方法。和push基本相同,唯一区别是不向浏览器的history添加新纪录,而是替换当前的history记录。
(3)router.go()方法。router.go()的参数是一个整数,意思是在浏览器的history记录中向前或后退多少步,类似原生js的window.history.go(n)方法。例 router.go(1)等同history.forward() router.go(-1)等同history.back()
<!-- App.vue-->
<template>
  <nav>
    <router-link to="/">Home</router-link> |
    <router-link to="/about">About</router-link>|
    <button @click="homeClick">编程式导航</button>
  </nav>
  <router-view/>
</template>
<script>
  import { reactive,toRefs } from 'vue';
  import { useRouter } from 'vue-router';
  export default{
    setup(){
      const state = reactive({
        count : 0
      })

      const router = useRouter()
      const homeClick = ()=>{
        router.push('/about') //push函数和 router-link的to属性是一样的效果,当然路径参数、query和params对象也可以使用
						      //如  router.push({path:'/about',query:{plan:'private'}})
      }
      return{
        ...toRefs(state),
        homeClick
      }
    }
  }
</script>
显示效果,点击编程式导航和about链接是一样的效果。
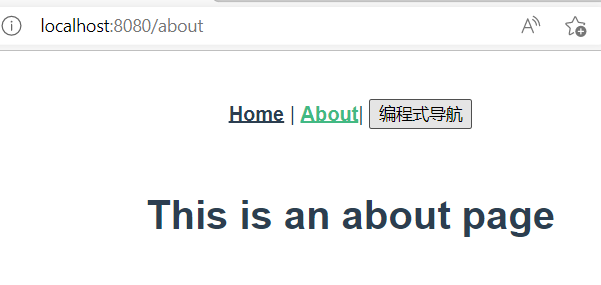
嵌套路由配置
嵌套路由,就是一级菜单下面还有二级菜单,不是直接显示页面,而是根据二级菜单显示页面,如下图
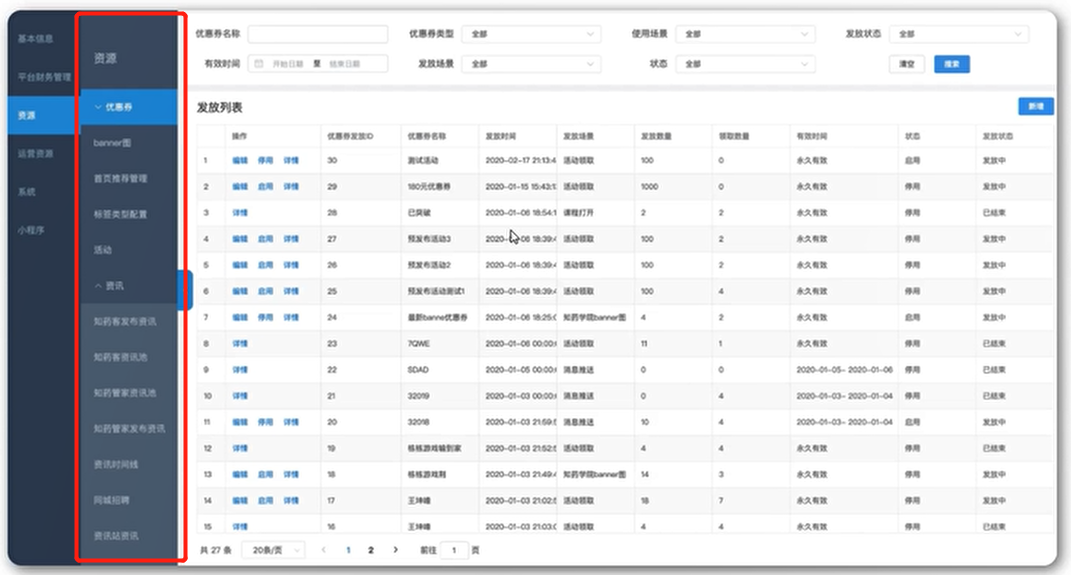
(1) 在views创建AboutUs.vue和AboutInfo.vue子路由页面
 <!-- AboutUs.vue -->
<template>
    <h3>关于我们</h3>
</template>
 <!-- AboutInfo.vue -->
<template>
    <h3>关于信息</h3>
</template>
(2)在router目录下的index.js添加子路由
import { createRouter, createWebHashHistory } from 'vue-router'
import HomeView from '../views/HomeView.vue'

const routes = [
  {
    path: '/',
    name: 'home',
    component: HomeView
  },
  {
    path: '/about',
    name: 'about',
    component: () => import('../views/AboutView.vue'),
    redirect:"/about/us",  //该属性指定默认访问的二级菜单
    //子路由(嵌套路由)
    children:[
      {  //子路由不需要添加/,父路由已经在后面自动添加/了
        path: 'us',
        name:'关于我们',
        component: ()=> import('../views/AboutUs.vue')
      },
      {
        path: 'info',
        name:'关于信息',
        component: ()=> import('../views/AboutInfo.vue')
      }
    ]

  }
]

const router = createRouter({
  history: createWebHashHistory(),
  routes
})

export default router
(3)在AboutView.vue添加子路由链接
<template>
  <div class="about">
    <router-link to="/about/us">关于我们</router-link>|
    <router-link to="/about/info">关于信息</router-link>
    <router-view></router-view>
  </div>
</template>
显示效果
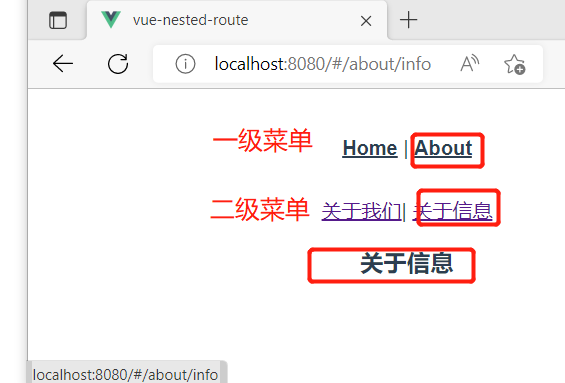
补充:如果想添加三级菜单,在二级菜单里面,添加children属性就行。
全局导航守卫
在vue脚手架页面中,网页标题仅有一个,是通过<title> 标签展示,当切换到不同页面时,标题不会改变,需要使用js语句修改标题。
window.document.title="新标题"
普通的修改方式:修改标题的位置是在每一个路由对应的组件中,通过onMounted生命周期函数,组件渲染之前执行js代码修改。但缺点是当页面比较多,不容易维护(因为需要在多个页面执行类似的代码)。
此时可以使用全局导航守卫进行修改。vue-router提供的全局路由守卫主要用于监听路由的进入和离开,通过vue-router的beforeEach和afterEach的生命周期函数,分别在路由即将改变前和改变后触发。在router目录下的index.js路由文件中设置。
- 全局前置守卫
使用router.beforeEach注册一个全局前置守卫,使用方法如下:
const router = new VueRouter({...})
router.beforeEach((to,from,next)=>{ //..})
当一个导航触发时,全局前置守卫按照创建顺序调用。守卫是异步解析执行,此时导航在所有守卫解析完之前一直处于等待中。每个守卫方法接收三个参数。
(1)to : 即将要进入的目录路由对象
(2)from:当前导航正要离开的路由。
(3)next:一定要调用该方法来解析这个生命周期函数。执行效果依赖next()方法的调用参数如下。
1)next(): 执行下下一个生命周期函数。如果全部生命周期函数执行完毕,则导航的状态就是confirmed(确认的)。
2)next(false): 中断当前的导航。如果浏览器的URL发生改变(可能用户手动修改或者浏览器的后退按钮),那么URL地址会重置到from路由对应的地址。
3)next('/')或next(path: '/') : 跳转到一个不同的地址。当前的导航被中断,然后进入一个新的导航。可以向next传递任意位置对象。
Router.afterEach的生命周期函数的使用方法和beforeEach相同,只是触发时间点不同。
- 路由元信息
const router = new VueRouter({
	routes:[
		path : '/foo',
		component: Foo,
		children: [
			path: 'bar',
			component: Bar,
			meta:{		//meta域
				requiresAuth: true  //属性:值
			}
		]
	]
})
一个路由匹配到所有路由记录会暴露为route对象的route.matched数组。因此,需要遍历route.matched数组来检查路由记录中的meta字段。访问路由元信息的语句:to.meta.属性
- 案例实现(这里使用修改的嵌套路由的例子,只需修改router下的index.js)
import { createRouter, createWebHashHistory } from 'vue-router'
import HomeView from '../views/HomeView.vue'

const routes = [
  {
    path: '/',
    name: 'Home',
    component: HomeView,
    meta: {
      title: '首页'
    }
  },
  {
    path: '/about',
    name: 'About',
    component: () => import('../views/AboutView.vue'),
    meta: {
      title: '关于'
    },
    children: [
      {
        path: 'us',
        name: 'AboutUs',
        component: () => import('../views/AboutUs.vue'),
        meta: {
          title: "关于我们"
        }
      },
      {
        path: 'info',
        name: 'AboutInfo',
        component: () => import('../views/AboutInfo.vue'),
        meta: {
          title: "关于信息"
        }
      }
    ]
  }
]

const router = createRouter({
  history: createWebHashHistory(),
  routes
})

//全局前置守卫
router.beforeEach((to, form, next) => {
  //matched之所以是数组,有可能传过来的路径是/user/20 这个路径会匹配到两个路由 /user 和/user/20,所以matched是数组区分路由
  if (to.matched.length > 1) {  //数组长度大于1,代表请求路径有子路径
    if (to.matched[1].name === 'AboutInfo') {  //判断子路径的name
      console.log("拦截")
    } else {
      //其他子路径放行
      document.title = to.meta.title  //读取路由元信息,并修改网页标题
      next()                          //跳转到指定页面
    }
  } else {
    //其他根路径放行
    document.title = to.meta.title  //读取路由元信息,并修改网页标题
    next()                          //跳转到指定页面
  }
})

export default router
显示效果
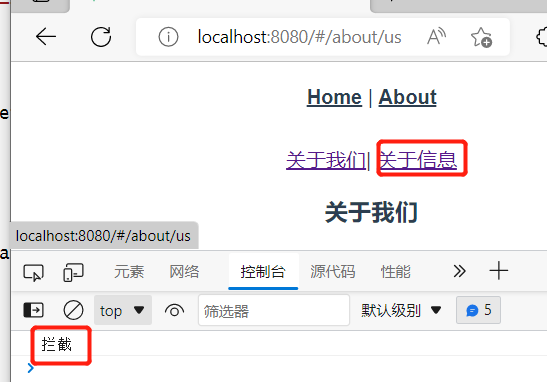
当点击关于信息时,会被全局前置守卫拦截,并提示信息。
新增路由
在最新的vue-router中增加了router.addRoute()方法,该方法有两种使用方法:
router.addRoute({})  //增加单条路由
router.addRoute('父路由',{})  //增加指定父路由的子路由
如,增加一条msg路由信息,然后在这条msg路由下创建一条info的子路由。然后创建对应的组件。在router目录下的index.js修改
import { createRouter, createWebHashHistory } from 'vue-router'
//此处省略与新增无关的代码

const router = createRouter({
  history: createWebHashHistory(),
  routes
})

router.addRoute({
  path: '/msg',
  name: "Msg",
  component: () => import("../components/Msg.vue")
})
router.addRoute('Msg', // 指定父路由,添加子路由
{
  path: "/msg/info",
  component: () => import("../components/Info.vue")
})
//此处省略与新增路由无关的代码
export default router
addRoute()方法其实就是和在routes里面编写的{}内容一样,然后指定子路由就相当于routes里面组件的children属性。
综合案例
本案例是基于vue-router的综合案例,根据导航栏跳转到不同路由。
- main.js
import { createApp } from 'vue'
import App from './App.vue'
import './registerServiceWorker'
import router from './router'

createApp(App).use(router).mount('#app')
- router/index.js
import { createRouter, createWebHistory } from 'vue-router'
import User from "../components/User"
import UserInfo from "../components/UserInfo"

const routes = [
  {
    path: '/',
    redirect:"/users"  //重定向到users
  },
  {
    name:"Users",
    path:"/users",
    component: User,
    meta:{
      title:"用户信息"
    }
  },
  {
    name:"UserInfo",
    path:"/userInfo",
    component: UserInfo,
    meta:{
      title:"用户详情"
    }
  },
  {
    name:"Authority",
    path:"/authority",
    component: ()=> import('../components/Authority.vue'),
    meta:{
      title:"权限管理"
    }
  },
  {
    name:"Goods",
    path:"/goods",
    component: ()=>import('../components/Goods.vue'),
    meta:{
      title:"商品管理"
    }
  },
  {
    name:"Orders",
    path:"/orders",
    component: ()=>import('../components/Orders.vue'),
    meta:{
      title:"订单管理"
    }
  },
  {
    name:"Settings",
    path:"/settings",
    component: ()=>import('../components/Settings.vue'),
    meta:{
      title:"系统设置"
    }
  }
]

const router = createRouter({
  history: createWebHistory(process.env.BASE_URL),  //history模式,地址栏不会像hash模式一样添加#
  routes
})

router.beforeEach((to,form,next)=>{
  document.title = to.meta.title   //读取路由元信息,并修改网页标题
  next()  //跳转指定页面,跳转到下一个路由
})

export default router
- App.vue
<template>
  <div class="header">
    XX管理系统
  </div>
  <div class="content left">
    <ul>
      <li><router-link to="/users">用户管理</router-link></li>
      <li><router-link to="/authority">权限管理</router-link></li>
      <li><router-link to="/goods">商品管理</router-link></li>
      <li><router-link to="/orders">订单管理</router-link></li>
      <li><router-link to="/settings">系统设置</router-link></li>
    </ul>
  </div>
  <div class="content right">
    <router-view></router-view>
  </div>
  <div class="footer">
    版权页
  </div>

</template>

<style  scoped>
* {
  margin: 0px;
  padding: 0px;
}

.header,
.footer {
  height: 50px;
  background-color: grey;
  color: white;
  font-size: 20px;
  text-align: center;
  line-height: 50px;
}

.content {
  height: 400px;
  float: left;
  width: 500px;
}

.left {
  background-color: wheat;
  width: 200px;
}

.left li {
  list-style: none;
  text-align: center;
  height: 30px;
  line-height: 30px;
  border-bottom: thistle;
  cursor: pointer;
}

.left li a {
  text-decoration-line: none;
}

.left li:hover {
  background-color: yellowgreen;
}

.footer {
  clear: both;
}
</style>
- components/User.vue
<template>
    <div>
        <table class="table" width="60%">
            <caption>
                <h3>用户管理</h3>
            </caption>
            <thead>
                <tr>
                    <th>编号</th>
                    <th>姓名</th>
                    <th>年龄</th>
                    <th>操作</th>
                </tr>
            </thead>
            <tbody align="center">
                <tr v-for="item in userlist" :key="item.id">
                    <td> {{ item.id }}</td>
                    <td> {{ item.name }}</td>
                    <td> {{ item.age }}</td>
                    <td>
                        <button @click="goDetail(item.id - 1)">详情</button>
                        <!-- item.id -1 是因为用户详情页的userList数组索引位置是从0开始,而id是从1开始 -->
                    </td>
                </tr>
            </tbody>
        </table>
    </div>
</template>
<script>
import { reactive, toRefs } from 'vue'
import { useRouter } from 'vue-router'
export default {
    setup() {
        const state = reactive({
            userlist: [
                {
                    id: 1,
                    name: '张三',
                    age: 25
                },
                {
                    id: 2,
                    name: '李四',
                    age: 18
                },
                {
                    id: 3,
                    name: '王二',
                    age: 17
                }
            ]
        })
        const router = useRouter() //创建router对象
        const goDetail = (index) => {
            router.push({   //编程式导航,push相当于router-link的 :to属性 ,这里不使用声明式导航,如果传递参数过多,都放在:to属性 不好维护
                path: '/userInfo',  //跳转到/userInfo,携带query对象包含id属性,index是跳转到指定用户id的信息索引
                query: {
                    id: index
                }
            })
        }
        // router.push('/userInfo/' + id) 路径传参方式
        return {
            ...toRefs(state),
            goDetail
        }
    }
}
</script>

<style  scoped>
tr {
    height: 40px;
}
</style>
- components/UserInfo.vue
<template>
    <p />
    <table width="300" height="300" align="center" border="1">
        <caption>
            <h3>用户详细信息</h3>
        </caption>
        <tr align="center">
            <td>编号</td>
            <td>{{ userlist[index].id }}</td>
        </tr>
        <tr align="center">
            <td>姓名</td>
            <td>{{ userlist[index].name }}</td>
        </tr>
        <tr align="center">
            <td>年龄</td>
            <td>{{ userlist[index].age }}</td>
        </tr>

        <tr align="center">
            <td>性别</td>
            <td>{{ userlist[index].sex }}</td>
        </tr>
        <tr align="center">
            <td>生日</td>
            <td>{{ userlist[index].birthday }}</td>
        </tr>
        <tr align="center">
            <td>电话</td>
            <td>{{ userlist[index].telphone }}</td>
        </tr>
        <tr>
            <td align="center" colspan="2"><button @click="goback()"> 返 回 </button></td>
        </tr>
    </table>

</template>

<script>
import { reactive, toRefs } from 'vue'
import { useRoute, useRouter } from 'vue-router'
export default {
    setup() {
        const state = reactive({
            userlist: [
                {
                    id: 1,
                    name: '张三',
                    age: 25,
                    sex: '男',
                    birthday: '1995.04.01',
                    telphone: '13712345678'
                },
                {
                    id: 2,
                    name: '李四',
                    age: 18,
                    sex: '女',
                    birthday: '2002.08.13',
                    telphone: '13787654321'
                },
                {
                    id: 3,
                    name: '王二',
                    age: 17,
                    sex: '女',
                    birthday: '2003.09.20',
                    telphone: '13712345678'
                }
            ],
            index: 0
        })
        const route = useRoute()   //useRoute()方法是创建路由接收参数对象,useRouter()是编程式导航对象
        // 读取用户页路由传送过来的id参数
        state.index = route.query.id
        const router = useRouter()
        const goback = () => router.go(-1)  //返回上一页,类似浏览器回退按钮
        return {
            ...toRefs(state),
            goback
        }
    }
}
</script>

<style scoped>

</style>
- 其他组件
setting.vue \ orders.vue\ goods.vue 和 authority.vue仅有一个显示名称的组件模板,如<tempalte><h1>系统设置</h1></tempalte>
显示效果
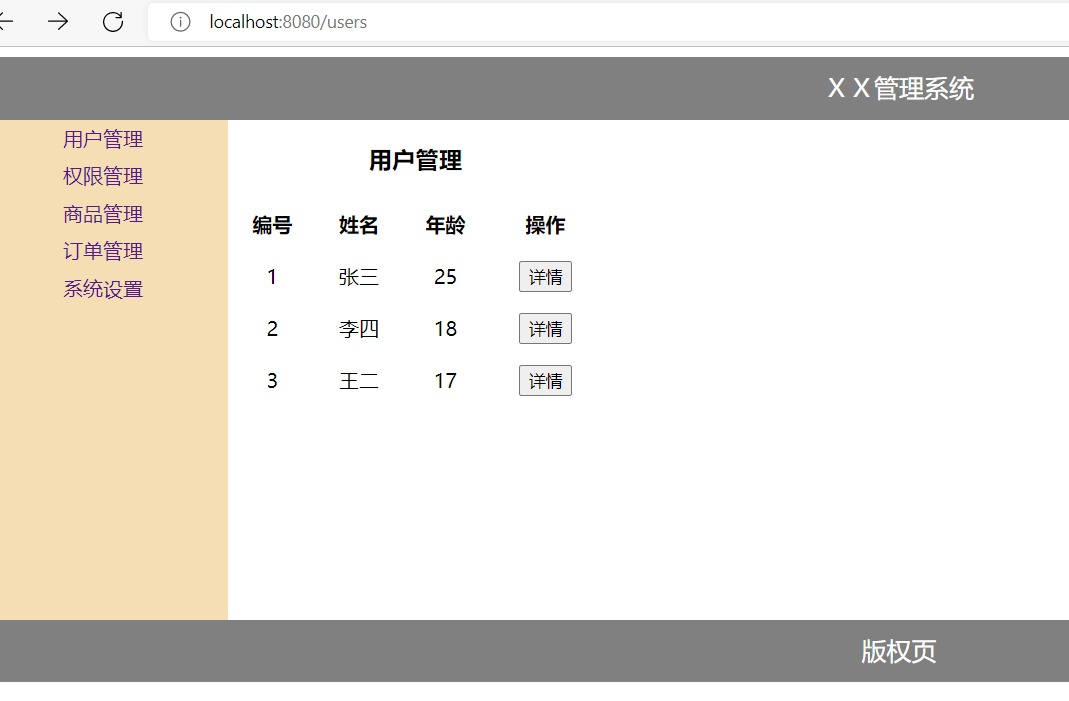
点击详情就跳到对应的用户信息页面
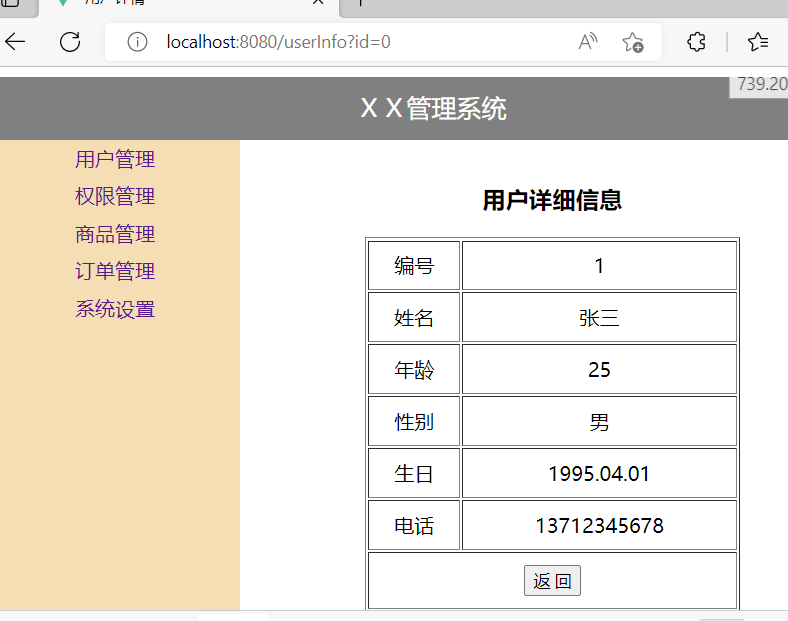
左边的导航,点击就可以切换到对应的路由。
Vue状态管理(Vuex)
状态管理是为了更方便管理组件之间的数据交互,提供一个集中式的管理方案,任何组件都可以按照指定的方式进行读取和改变数据。
之前组件之间传递数据是Props组件交互的,但是仅限于组件之间是父子关系,如果是兄弟关系就麻烦了,所以需要Vuex状态管理,不使用vuex组件传递数据就像下图左边一样非常乱,如果是vuex状态管理,下图右边的紫色节点把数据发送给store仓库(vuex),然后由store分发给其他组件,如果其他组件有一个出现问题,不会影响到其他组件。
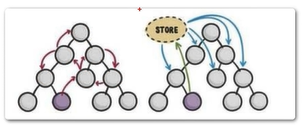
引入Vuex的步骤
-
安装vuex
npm install --save vuex -
配置vuex文件
在src目录下创建store目录并创建index.js
import {createStore} from "vuex"

//vuex的核心作用就是帮我们管理组件之间的状态
export default createStore({
    //所有状态都放在这里(数据)
    state:{
        counter:0
    }
})
- 在main.js中使用vuex
import store from './store'


createApp(App).use(store).mount('#app')
- 组件中使用vuex状态数据
<!-- App.vue -->
<template>
  <p>counter: {{$store.state.counter}}</p>
  <HelloWorld msg="Welcome to Your Vue.js App"/>
</template>
<!--HelloWorld.vue-->
<template>
  <div class="hello">
   <p>{{$store.state.counter}}</p>
  </div>
</template>
读取vuex的数据有两种方式:
-
{{$store.state.形参}}这种方式,如果要引入多次,有点麻烦,可以使用第二种方式
-
导入mapState,compute调用mapState , 插值表达式可以直接读取变量
<!--HelloWorld.vue-->
<template>
  <div class="hello">
   <p>helloworld.vue:{{$store.state.counter}}</p>
   <p>helloworld.vue:{{counter}}</p>
  </div>
</template>

<script>
import {mapState} from "vuex"
export default {
  name: 'HelloWorld',
  props: {
    msg: String
  },
  //专门来读取vuex的数据
  computed:{
      ...mapState(["counter"])
  }
}
</script>
显示效果
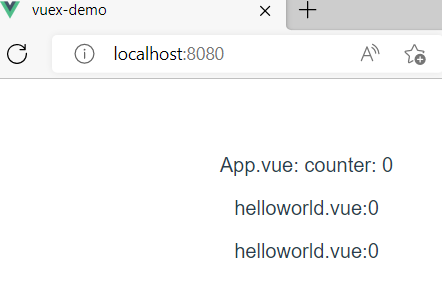
vuex状态管理核心
最常用的核心概念包含:State Getter Mutation Action
现在的阶段创建项目需要选择vuex不用手动搭建vuex,选择router的时候,会有一个选项 Use history mode for router?路由分history和hash两种模式,第一种前端请求路径需要和后端完全一致,而hash不需要,但地址栏多了#号,非常难看。
Getter
- 在store目录下的index.js添加getter
import { createStore } from 'vuex'

export default createStore({
  state: {
    counter:10
  },
  getters: {
    //getCount()函数是自定义的,getter是用来数据逻辑处理进行读取
    getCount(state){
      return state.counter > 0 ? state.counter: "counter小于0,不符合要求"
    }
  }
})
- 在任意组件中读取getter定义的获取状态函数
<!--HomeView.vue -->
<template>
  <div class="home">
    <img alt="Vue logo" src="../assets/logo.png">
    <p>{{getCount}}</p>
     <p>
         getCount函数根据count的值,处理返回结果
    </p>
  </div>
</template>

<script>
import { mapState ,mapGetters} from 'vuex';

export default {
  name: 'HomeView',
   //利用mapGetters(["自定义函数"])读取处理好的值
  computed:{
    ...mapGetters(["getCount"])
  }
}
</script>
显示效果
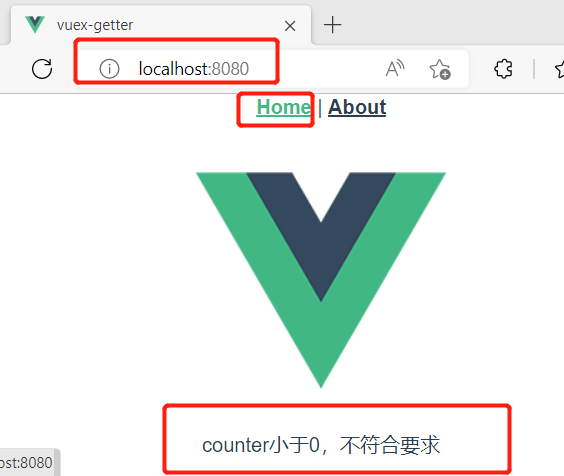
当把store目录下的index.js里面的counter值修改为大于0,就会显示实际的值。
Mutation
mutation可以修改store里面的数据,一旦改变store里面的值改变,所有组件引用store的数据都会发生改变。
- 在store目录下修改index.js,添加mutations
import { createStore } from 'vuex'

export default createStore({
  state: {
    counter: 0
  },
  getters: {
    //getCount()函数是自定义的,getter是用来数据逻辑处理进行读取
    getCount(state) {
      return state.counter > 0 ? state.counter : "counter小于0,不符合要求"
    }
  },
  mutations: {
    addCount(state, num) {
      state.counter += num  // 每次调用addCount累加num
    }
  }
})
- 在组件中调用addCount函数
<template>
  <div class="home">
    <img alt="Vue logo" src="../assets/logo.png">
    <p>{{getCount}}</p>
    <button @click="addClickHandle">增加</button>
  </div>
</template>

<script>
import { mapState ,mapGetters,mapMutations} from 'vuex';

export default {
  name: 'HomeView',
  computed:{
    ...mapGetters(["getCount"])
  },
  methods:{
    ...mapMutations(["addCount"]),//引用addCount()
    addClickHandle(){
      this.addCount(20)  //调用函数并传参
    }
  }
}
</script>
显示效果
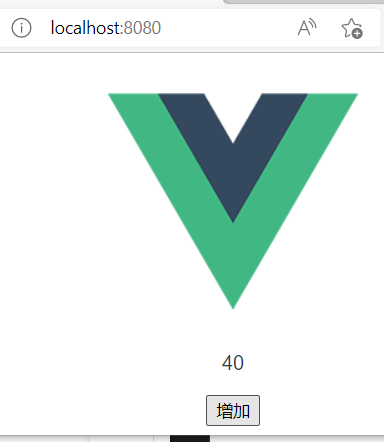
每次点击按钮,触发addCount函数传递20过去修改counter的值,当然其他组件如果引用了counter,数据也会被改变。
Action
action和Mutation类似,不同在于:
- Action提交的是mutation,而不是直接变更状态
- Action可以包含任意异步操作
mutation的是同步操作,不支持异步。
- 安装axios插件,在store目录下的index.js添加action,action是在mutation后面加逗号隔开
  //commit参数需要{}转对象,进行解构赋值
  actions:{
    asyncAddCount({commit}){
      axios.get("http://iwenwiki.com/api/generator/list.php")
      .then(res=>{
        commit("addCount",res.data[0]);//通过异步获取数据,addCount是调用mutation里面定义的函数
      })
    }
  }
- 在HomeView.vue组件中调用异步函数测试
<template>
 <!--其余部分省略,在上面有getter,mutation和action都是用的同一个项目-->
  <p>{{getCount}}</p>
 <button @click="addAsyncHandle">异步增加</button>
</template>

<script>
import { mapState ,mapGetters,mapMutations,mapActions} from 'vuex';

export default {
  name: 'HomeView',
  computed:{ //getCount需要计算,所以放到computed中,下面的不用计算,所以放到methods中
    ...mapGetters(["getCount"]),
  },
  methods:{
    ...mapActions(["asyncAddCount"]), //引用自定义函数
    addAsyncHandle(){
      this.asyncAddCount(); //调用自定义函数
    }
  }
}
</script>
显示效果
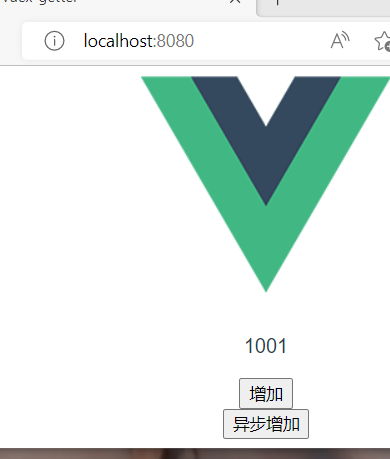
1001是异步请求返回的数据,每点击异步增加就获取一次1001进行累加。
组合式API
组合式API基础
实现响应式
响应式是一种允许以声明式的方法去适应变化的编程范例。如js实现响应式地说明定义一个数据count如下:
let count
//然后根据这个数据count的情况定义另一个数据如下:
let doubleCount = count * 2
响应式就是当count发生改变时,doubleCount也随之发生变化。这里就需要通过监听count数据的事件处理函数来执行doubleCount数据的变化。
还有一种响应式是数据在网页上渲染之后,当数据发生变化后会自动在网页上重新渲染新的数据。这在原生js实现非常困难。
下面使用vue3.0实现上面说明的数据在页面上自动渲染和数据自动变化的响应式实例。
<template>
  <div class="hello">
   <button @click="increment">
    count值是:{{state.count}}, doubleCount值是:{{state.doubleCount}}
  </button>
  </div>
</template>

<script>
import { reactive,toRefs } from 'vue';
export default {
  setup(){
    const state = reactive({
      count:0,
      doubleCount: compute(()=>{return state.count*2})
    })
    //用户单击按钮后,修改count的值,使其加1
    const increment = () => state.count++

    return{
      state,
      increment
    }
  }
}
</script>
显示效果

下面简要说明其实现过程及原理
- 响应式状态
创建一个响应式的状态,使用以下语句
import {reactive} from 'vue'  //从vue引入reactive方法

//state是一个响应式的状态
const state = reactive({
	count : 0,
})
reactive方法是接收一个普通对象然后返回该普通对象的响应式代理。vue中响应式状态可以在渲染期间使用。响应式状态数据会根据数据的变化自动刷新页面渲染内容。
- 计算属性
计算属性:监听computed方法中所使用的数据,当其中的数据发生变化,就会自动重新计算值,自动刷新页面渲染内容。
doubleCount : computed(()=> state.count * 2) //省略了{}代表包含return也被省略了
该计算属性依赖于响应式数据state.count,当state.count发生变化时,将自动计算doubleCount属性,并更新模板中渲染的内容。
- vue3.0的响应式
vue3.0中使用ES6的proxy语法实现响应式数据,其优点是可以检测到代理对象属性的动态添加和删除,可以监测到数组下标和length属性的变更。
setup函数
setup函数是一个新的组件选项,组合API的代码都在setup函数中去实现。使用setup函数时将接受两个参数:props和context。
- props参数
该参数是响应式的,当新的props参数传入时将被更新。
export default{
	props:{
		title:String
	},
	setup(props){
		console.log(props.title)
	}
}
由于props是响应式的,不能使用ES6进行解构,因为会消除props的响应式。如果需要解构props,可以使用setup函数的toRefs方法。如
import {toRefs} from 'vue'
export default{
	props:{
		title:String
	},
	setup(props){
		const {title}  = toRefs(props) //props是对象形式,所以{title}要加{}解构赋值
		console.log(title.value) //通过.value方法读取值
	}
}
- context参数
context是一个普通的js对象,该对象有三个属性,分别是attrs,slots和emit。
export default{
	setup(props,context){
		//Attribute(非响应式对象)
		console.log(context.attrs)

		//插槽(非响应式对象)
		console.log(context.slots)

		//触发事件(方法)
		console.log(context.emit)
	}
}
attrs和slots是有状态的对象,总是会随组件本身的更新而更新。这意味着应该避免对它们进行解构,并始终以attrs.x或slots.x的方式引用属性,emit是主要用于子组件向父组件传递数据和调用父组件的方法。
- 结合模板使用
setup函数必须要有返回值,该函数的返回值才能在模板中使用。也就是说在setup中定义的方法或变量要在return{}里面返回才可以使用。
<template>
	<div> {{readersNumber}} {{book.title }}</div>
</template>
<script>
	import {reactive,ref} from 'vue'
    export default{
        setup(){
            const readersNumber = ref(0)
            const book = reactive({title:'vue 3 Guide'})
            //将setup的返回值暴露给模板
            return{
                readersNumber,
                book
            }
		}
    }
</script>
- 使用渲染函数
setup函数还可以返回一个渲染函数,该函数可以直接使用在同一作用域中声明的响应式状态:
<script>
	import {reactive,ref,h} from 'vue'
    export default{
        setup(){
            const readersNumber = ref(0)
            const book = reactive({title:'vue 3 Guide'})
            return ()=> h('div',[readersNumber.value,book.title])
		}
    }
</script>
setup函数和 script setup标签的区别
Vue3 中的setup 一种是setup函数,一种是script setup。
<script setup>
    import { reactive, toRefs,watchEffect,ref } from 'vue'
    //script setup声明后,代表当前script里面的代码都是在setup函数里面,并且不用return{}返回即可在模板中使用

   //在script setup中使用toRefs函数
    const state = (reactive({
  dialogImageUrl :'',
  dialogVisible:false,
  fileList:[]
}))
//把响应式对象解构赋值
const { imageUrl,dialogImageUrl ,dialogVisible,fileList} = toRefs(state)
//或者通过ref()声明的变量就是响应式

//在script setup中导入子组件,不需要在components注册,已经默认注册,只需引入和显示
import ChildComp from './ChildComp.vue'
</script>
<template>
	<ChildComp/>
</template>
更多区别:https://www.cnblogs.com/Joannamo/p/15396039.html
响应式API
- ref函数
ref函数接受一个参数并返回一个响应式且可改变的ref对象,该对象拥有一个指向内部值的单一value属性。
- reactive函数
reactive函数的用法和ref相似,也是将数据变成响应式数据,当数据发生变化时UI也会自动更新。不同的是ref函数用于基本数据类型,而reactive函数用于复杂数据类型,其主要有对象和数组两种数据类型。
- computed方法
computed方法接收一个getter函数,返回一个默认不可手动修改的ref对象。
const count = ref(1)
const plusOne = computed(()=>{count.value+1})
console.log(plusOne.value) //输出数据2
plusOne.value++  //错误,plusOne.value是常量
computed也可以接收一个拥有get函数和set函数的对象,创建一个可手动修改的计算状态。
const count = ref(1)
const plusOne = computed({
	get:() => count.value +1,
	set:(val)=>{ count.value = val -1}
})
plusOne.value = 1  //调用set函数 ,val-1,count等0
console.log(count.value) //输出0
- watchEffect方法
watchEffect方法的参数是一个函数,该方法可以响应式追踪其依赖,并在其依赖变更时重新运行该函数。
import {watchEffect,ref} from 'vue'
export default{
	const count = ref(0)
	watchEffect(()=> console.log(count.value)) //count发生改变立即输出
	setTimeout(()=>{
		count.value++   //每隔1秒加1
	},1000)
	retturn{
		count
	}
}
watchEffect方法不需要指定监听哪个属性,会自动收集回调函数中引用到的响应式属性,当这些属性发生变化时这个回调函数都会自动执行,并且watchEffect在组件初始化时就会执行一次用于收集依赖。
停止侦听的两种方式分别是隐式停止和显示停止。隐式停止当watchEffect在setup或生命周期钩子被调用时,侦听器会被链接到该组件的生命周期,并在组件卸载时自动停止;显示停止使用语句如下:
const stopWE = watchEffect(..)
stopWE.stop();
在vue2.x中通过组件data方法来定义一些当前组件的数据
<template>
  <div class="hello">
   <p>{{message}}</p>
  </div>
</template>

<script>
export default {
  name: 'HelloWorld',
  data(){
    return{
      message:"猪头"
    }
  }
}
</script>
在3.x中通过ref或者reactive创建响应对象
<template>
  <div class="hello">
   <p>{{message}}</p>
   <ul>
    <li v-for="(item,index) in names.list" :key="index">
      {{item}}
    </li>
   </ul>
  </div>
</template>

<script>
import { ref,reactive } from 'vue';
export default {
  name: 'HelloWorld',
  //setup()组合式Api,把data,methods等这些合并在一起
  setup(){
    //基本类型使用ref声明
    const message = ref("我是消息")
    console.log(message.value)
    //复杂类型使用reactive声明
    const names = reactive({
      list:["iwen","wiki","koo"]
    })

    //把数据返回
    return{
      message,
      names
    }
  }
}
</script>
当ref作为渲染上下文的属性返回,即在return对象中到模板时会自动解套,不需要加上value属性,如果是在script里使用则需要加上value读取值。
显示效果
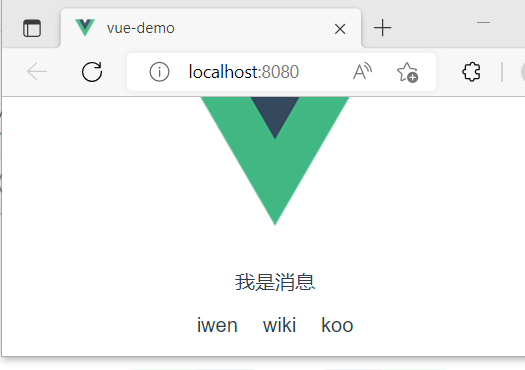
使用响应式数据实现电子钟
实现一个电子钟,读取客户系统内的时间,并拼接成“年月日星期时分秒”的形式在模板中显示。读取系统时间调用js的内置setInterval函数:
setInterval(函数名,间隔时间)
间隔时间单位是毫秒,该函数表示在定时的间隔时间内执行一次自定义函数。
<template>
    {{msg}}
</template>

<script>
    import {onMounted,ref } from 'vue';
    export default{
        setup(){
            let msg = ref('')
            const week = ['星期天','星期一','星期二','星期三','星期四','星期五','星期六']
            onMounted(()=>{   //钩子函数,表示网页加载后立即运行函数
                timeShow()
            })
            //拼接年月日星期时分秒函数
            const timeShow = ()=>{
                let myTime = new Date()
                msg.value = myTime.getFullYear() + '年'
                msg.value += toTwo(myTime.getMonth()+1) + '月'  //getMounth从0开始,所以+1
                msg.value += toTwo(myTime.getDate()) + '日'
                msg.value += week[myTime.getDay()]
                msg.value += toTwo(myTime.getHours()) + ':'
                msg.value += toTwo(myTime.getMinutes())+':'
                msg.value += toTwo(myTime.getSeconds())
            }
            const toTwo = x => x>9? x: '0'+x  //把少于两位数前面添加0
            setInterval(timeShow,1000);
            return{
                msg
            }
        }
    }
</script>
显示效果

这里gif只录制了3秒
methods中定义的方法写在setup()
在vue2.x中定义方法时
<template>
   <button @click="clickHandle">点击</button>
</template>

<script>
import { ref,reactive } from 'vue';
export default {
  name: 'HelloWorld',
  methods:{ //在methods中定义函数
    clickHandle(){
      console.log("xxxxxx")
    }
  }
}
在vue3.x定义方法可以直接写在setup()
<template>
   <button @click="clickHandle">点击</button>
</template>

<script>
import { ref,reactive } from 'vue';
export default {
  name: 'HelloWorld',
  //setup()组合式Api,把data,methods等这些合并在一起
  setup(){
    //基本类型使用ref声明
    const message = ref("我是消息")
    //复杂类型使用reactive声明
    const names = reactive({
      list:["iwen","wiki","koo"]
    })
    //定义方法
    function clickHandle(){
      this.message="我是新的消息"
    }
    //把数据返回
    return{
      message,
      names,
      clickHandle  //把方法返回
    }
  }
}
</script>
可以看出setup把方法也集成在里面了,只需要return出去就可以使用。
setup()使用props和context
前言:在2.x中,组件的方法中可以通过this获取到当前组件的实例,并执行data变量的修改,方法的调用,组件的通信等等,但是在3.x中,setup()在beforeCreate和created前就已调用,无法使用和2.x一样的this,但是可以通过接收setup(props,ctx)的方法,获取当前组件的实例和props,ctx和context的简写。
- 以前使用props父组件向子组件传递数据,子组件定义变量,父组件导入子组件并传递数据
<!-- 子组件HelloWorld.vue定义变量-->
<template>
<p>{{msg}}</p>
</template>
<script>
export default{
props:{
msg: String
}
}
</script>
父组件导入子组件,并传递数据
<!--HomeView.vue父组件 -->
<template>
<div class="home">
<img alt="Vue logo" src="../assets/logo.png">
<HelloWorld msg="数据"/>
<!-- msg传递数据给子组件 -->
</div>
</template>
<script>
import HelloWorld from '@/components/HelloWorld.vue'
export default {
name: 'HomeView',
components: {
HelloWorld //挂载子组件
}
}
</script>
在setup()中,多了props属性,父组件还是不变,子组件多了props属性
<!-- 子组件HelloWorld.vue定义变量-->
<template>
<p>{{msg}}</p>
<p>{{mess}}</p>
</template>
<script>
export default{
props:{
msg: String
},
setup(props){
console.log(props) //proxy代理对象
const mess = ref(props.msg) //也可以通过props读取变量
return{
mess //返回mess ,页面就可以读取到了
}
}
}
</script>
- 在setup()中,this对象为undefined,但是可以通过context获取当前实例对象。
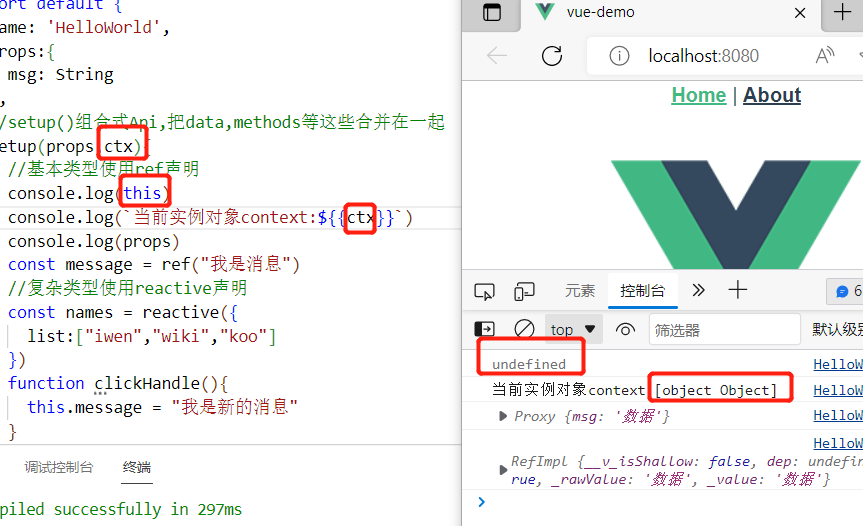
响应式系统工具集
- toRef
toRef可以为一个reactive对象的属性创建一个ref。这个ref可以被传递并且能够保持响应式。
- toRefs
把一个响应式对象转为普通对象,该普通对象的每个属性都是一个ref,和响应式对象属性一一对应。
当想要从一个组合逻辑函数中返回响应式对象时,用toRefs是很有效的,该API让组件可以解构/扩展(使用...操作符)返回的对象,并不会丢失响应式。
Provide / Inject
-
provide()和inject()可以实现嵌套组件之间的数据传递。
-
这两个函数只能在setup()函数中使用。
-
父组件中使用provide()函数向下传递数据。
-
子组件使用inject()函数获取上层传递过来的数据。
-
不限层级(跨层级,前提是父子,也就是自上向下,父传孙也可以)
<!--HomeView.vue父组件-->
<template></template>
<script>
import HelloWorld from '@/components/HelloWorld.vue'
import { provide } from 'vue' //导入函数
export default {
name: 'HomeView',
components: {
HelloWorld
},
setup(){
//provide("变量","值")
provide("mes","我是父组件向子组件传递的值")
provide("grode",{vue:95,jquery:97})
}
}
</script>
<!--HelloWorld.vue子组件-->
<template>
<p>{{mes}}</p>
<p>
{{grode.vue}}|{{grode.jquery}}
</p>
</template>
<script>
import { ref,reactive,inject } from 'vue';
export default {
name: 'HelloWorld',
//setup()组合式Api,把data,methods等这些合并在一起
setup(props,ctx){
const mes = inject("mes") //inject("父组件定义的变量","默认值") //默认值可以省略
const grode = inject("grode")
return{
mes,
grode
}
}
}
</script>
可以看出provide和inject省略了 props:{ msg: String }的定义,父子组件传递数据过程变得更简洁。
响应式修改Provide与Inject
增加provide和inject值之间的响应性,可以在provide值使用ref或reactive。当使用响应式修改provide/inject的值时,尽可能在provide内进行响应式属性的更改,如果需要在inject的子组件更新inject数据时,通过调用provide提供的方法修改。
如果需要保证provide传递的数据不会被inject修改,可以对provide属性使用readonly方法保护数据。
<!--父组件-->
<template>
<input type="text" v-model="studentName">
<br>
<Child/>
</template>
<script>
import { reactive,readonly,ref,provide } from 'vue';
import Child from '../components/Child.vue'
export default{
components:{
Child
},
setup(){
const studentName = ref('猪头并')
const grode = reactive({
vue:90,jquery:80
})
//提供给inject修改数据的方法
const updateLocation = ()=>{
studentName.value = '左子树'
grode.vue = 99
}
//传递数据给子组件
provide("studentName",readonly(studentName))
provide("grode",readonly(grode))
provide("updateLocation",updateLocation)
return{
studentName
}
}
}
</script>
<!--子组件-->
<template>
学生姓名:{{studentName}}
vue成绩:{{grode.vue}}
jquery成绩:{{grode.jquery}}
<button @click="updateLocation">调用父组件的方法</button>
</template>
<script>
import { inject } from 'vue';
export default{
setup(){
const studentName = inject("studentName")
const grode = inject("grode")
const updateLocation = inject("updateLocation")
return{
studentName,
grode,
updateLocation
}
}
}
</script>
显示效果

点击按钮时,调用父组件传递的方法对数据修改。
实验九
判断计数器数据count是否为响应式数据
<template>
<p>字符串反转:{{message}}</p>
<p>{{content}}</p>
<button @click="isRef">测试</button>
</template>
<script>
import { reactive,ref,toRefs,watchEffect } from 'vue';
export default {
setup(){
const state = reactive({
message:'Hello Vue3 world!',
content:''
})
const count = ref(0)
const flag = false
const isRef = ()=>{
//字符串反转
state.message = state.message.split("").reverse().join("")
count.value++
}
watchEffect(()=>{
state.content= `计数器:${count.value} , 该数据是否为响应式数据:${!flag}`
console.log("默认先执行一次,count发生改变运行一次watchEffect方法")
})
return{
...toRefs(state),
isRef
}
}
}
</script>
显示效果

Vue3加载Element-plus
官方文档:https://element-plus.gitee.io/zh-CN/ 这是vue3的文档
Element,一套为开发者、设计师和产品经理准备的基于vue2.0的桌面端组件库
Element Plus基于 Vue3 ,面向设计师和开发者的组件库。
安装Element-Plus
npm install --save element-plus
完整引用
在main.js引用插件
import { createApp } from 'vue'
import App from './App.vue'
import ElementPlus from "element-plus" //引入插件
import 'element-plus/dist/index.css' //引入插件的样式
createApp(App).use(ElementPlus).mount('#app') //use插件
使用ui组件,在官方文档中找到组件,然后复制代码,如下图
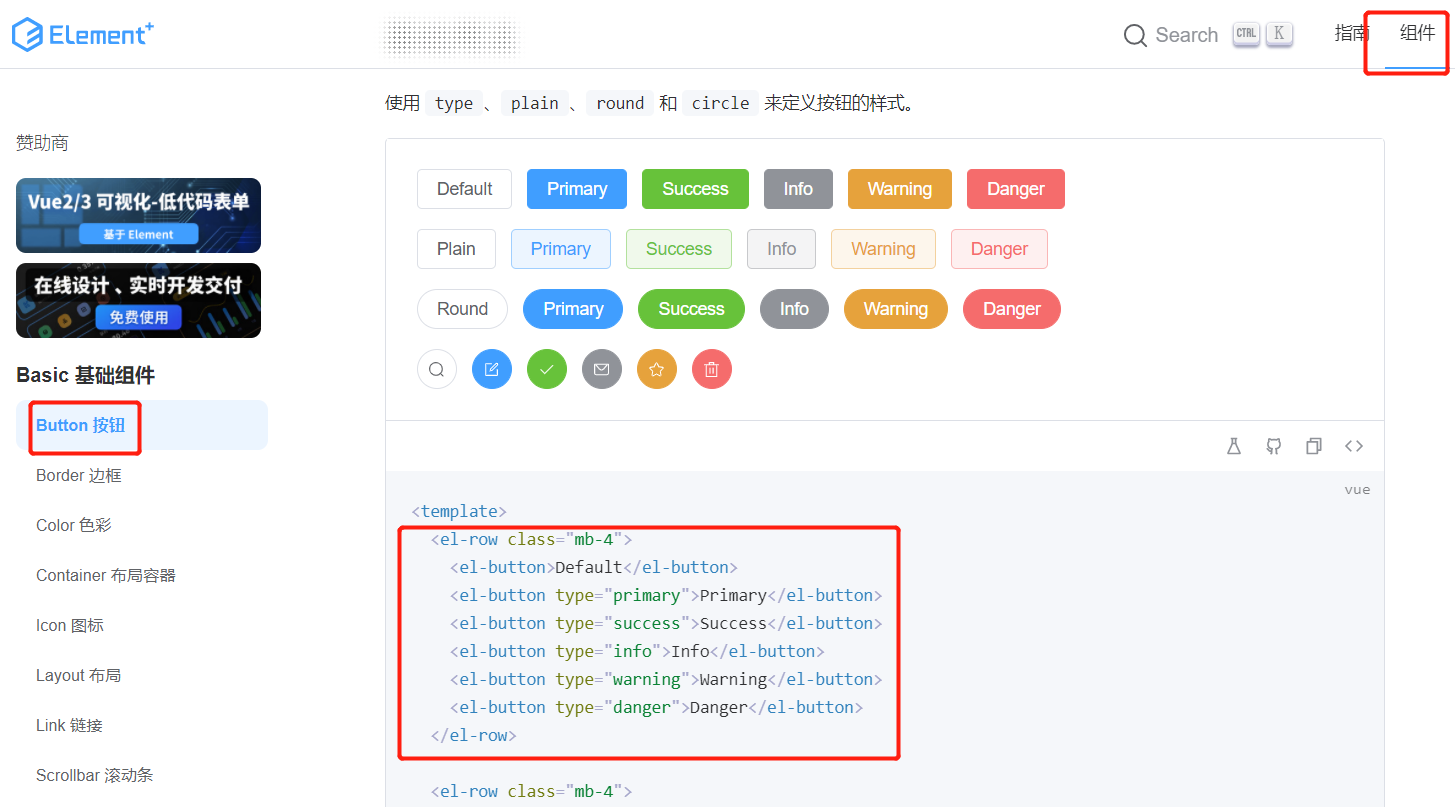
<!--在HelloWorld.vue-->
<template>
<div class="hello">
<p>{{msg}}</p>
<p>{{mess}}</p>
<el-row class="mb-4">
<el-button>Default</el-button>
<el-button type="primary">Primary</el-button>
<el-button type="success">Success</el-button>
<el-button type="info">Info</el-button>
<el-button type="warning">Warning</el-button>
<el-button type="danger">Danger</el-button>
</el-row>
<el-row>
<el-button :icon="Search" circle />
<el-button type="primary" :icon="Edit" circle />
<el-button type="success" :icon="Check" circle />
<el-button type="info" :icon="Message" circle />
<el-button type="warning" :icon="Star" circle />
<el-button type="danger" :icon="Delete" circle />
</el-row>
</div>
</template>
<script setup> //注意这里引入了图标,需要在script标签里面添加setup属性
import { Check, Delete,Edit,Message,Search,Star,} from '@element-plus/icons-vue' //引入组件
import {ref} from 'vue'
const mess = ref("在script标签带上setup属性,代表该script写的代码都是在setup()函数体里面,而且无需把属性return出去就可以使用")
</script>
<script>
export default {
name: 'HelloWorld',
props: {
msg: String
}
}
</script>
重点: 在script标签加上setup属性后,在script标签内的代码都是在setup函数体中,而且不需要return出去就可以使用,加了setup属性的script不能在里面写export default,要新添加一个script标签写export default.
显示效果

按需导入
完整引用有点浪费空间,因为有些组件可能用不上也被导入了,这里可以使用按需导入。(要把main.js里面的全局引用删除掉)
- 首先安装unplugin-vue-components和unplugin-auto-import这两款插件
npm install -D unplugin-vue-components unplugin-auto-import
- 修改vue.config.js配置文件
const { defineConfig } = require('@vue/cli-service')
const AutoImport = require('unplugin-auto-import/webpack')
const Components = require('unplugin-vue-components/webpack')
const { ElementPlusResolver } = require('unplugin-vue-components/resolvers')
module.exports = defineConfig({
transpileDependencies:true,
configureWebpack: {
//配置webpack自动按需引入element-plus,
plugins: [
AutoImport({
resolvers: [ElementPlusResolver()]
}),
Components({
resolvers: [ElementPlusResolver()]
})
]
}
})
然后运行项目引入的组件效果和全局引入的一样,注意如果安装完按需引入的两个插件运行项目报异常显示Error: Cannot find module 'unplugin-auto-import/webpack' 找不到插件,则把node.js的版本换成16.x版本就行。
组件
- Container布局容器
用于布局的容器组件,方便快速搭建页面的基本结构:
<el-container>:外层容器。 当子元素中包含 <el-header> 或 <el-footer> 时,全部子元素会垂直上下排列, 否则会水平左右排列。
<el-header>:顶栏容器。
<el-aside>:侧边栏容器。
<el-main>:主要区域容器。
<el-footer>:底栏容器。
<template>
<div class="common-layout">
<el-container>
<el-header>Header</el-header>
<el-container>
<el-aside width="200px">Aside</el-aside>
<el-main>Main</el-main>
</el-container>
</el-container>
</div>
</template>
<style scoped>
.el-header {
background-color: red;
}
.el-main {
background-color: blue;
}
.el-aside {
background-color: green;
}
</style>
显示效果

- layout布局
Element Plus随着屏幕或视口(viewport)尺寸的增加,系统会自动把浏览器窗口分为最多24栏,结合媒体查询,制作出强大的响应式栅格系统。
用container容器布局设置整体结构,使用layout对布局细分。
可以通过row和col组件,并通过col组件的span属性就可以自由组合布局。当分栏之间需要添加一定的间隔时,row组件提供gutter属性来指定每栏之间的间隔,默认间隔为0,如把整行分为2个分栏,每个分栏20间隔元素,语句如下
<el-row :gutter="20">
<el-col :span="12">
<div class="grid-content bg-purple-dark">
</div>
</el-col>
<el-col :span="12">
<div class="grid-content bg-purple-dark">
</div>
</el-col>
</el-row>
Element Plus参照Bootstrap的响应式设计,预设了5个响应尺寸:xs(<768px) , sm( >= 768px) , md(>= 992px) , lg(>= 1200px) 和 xl(>= 1920px) , 这里的单位是指 长,不是宽(高)。
基于Element Plus的布局验证
通过一个响应式布局针对不同的分辨率进行动态调整显示分栏。
<template>
<el-row :gutter="10">
<el-col :xs="8" :sm="6" :md="4" :lg="3" :xl="1">
<div class="grid-content bg-purple">1</div>
</el-col>
<el-col :xs="4" :sm="6" :md="8" :lg="9" :xl="12">
<div class="grid-content bg-purple-light">2</div>
</el-col>
<el-col :xs="4" :sm="6" :md="8" :lg="9" :xl="12">
<div class="grid-content bg-purple">3</div>
</el-col>
<el-col :xs="8" :sm="6" :md="4" :lg="3" :xl="1">
<div class="grid-content bg-purple-light">4</div>
</el-col>
</el-row>
</template>
<script>
</script>
<style scoped>
.el-col{
border-radius: 4px;
}
.bg-purple-dark{
background: #99a9bf;
}
.bg-purple{
background: #d3dce6;
}
.bg-purple-light{
background: #e5e9f2;
}
.grid-content{
border-radius: 4px;
min-height: 36px;
}
</style>
:xs="4" :sm="6" :md="8" :lg="9" 这些在col里面的属性分别对应响应式尺寸,当页面分辨率符合哪个尺寸时,哪个尺寸的属性就会生效,如下图所示当尺寸在768的时候,符合sm尺寸,则所有col的sm属性生效,sm属性分别是6,6,6,6,所以下面分栏大小一致。

如下图小于768分辨率时,符合xs(<768px),则激活col里面的xs属性(8,4,4,8)

- 图标与按钮
Element Plus提供了一套常用的图标集合。设置类名el-icon-iconName即可使用。如,编写具有编辑、共享、删除和带有搜索图标的按钮语句如下:
<i class="edit"></i>
<i class="share"></i>
<i class="delete"></i>
<el-button type="primary" icon="search">搜索</el-button>
基于Element Plus的图标与按钮验证
实现各种图标或按钮的显示和隐藏。
<template>
<el-button type="primary" @click="handleClick">主要按钮</el-button><br><br>
<el-row v-if="show">
<el-button type="primary" plain disabled>主要按钮,禁用</el-button>
<el-button type="success">成功按钮</el-button>
<el-button type="info" plain>信息按钮</el-button>
<el-button type="warning" round>警告按钮</el-button>
<el-button type="danger" round>危险按钮</el-button>
<el-button type="primary" :loading="true">加载中</el-button>
</el-row><br><br>
<el-row v-if="show">
<el-button-group>
<el-button type="primary" icon="arrow-left">上一页</el-button>
<el-button type="primary" icon="arrow-right">下一页<i class="arrow-right"></i></el-button>
</el-button-group>
<!--新版本引入图标,不需要加el-icon前缀了-->
<el-button-group>
<el-button type="primary" icon="Edit"></el-button>
<el-button type="primary" icon="share"></el-button>
<el-button type="primary" icon="-delete"></el-button>
</el-button-group>
<el-button type="primary" icon="search">搜索</el-button>
<el-button type="primary" icon="upload">上传<i class="upload el-icon--right"></i></el-button>
</el-row><br><br>
</template>
<script>
import { reactive, toRefs } from 'vue';
export default {
setup() {
const state = reactive({
show: true
})
const handleClick = () => {
state.show = !state.show
}
return {
...toRefs(state),
handleClick
}
}
}
</script>
显示效果

表单
Element Plus 提供了许多表单元素样式,主要包括Radio(单选按钮),Checkbox(复选框),Input(输入框),InputNumber(计数器),Select(选择器),Cascader级联选择器,Switch(开关),Slider(滑块),TimePicker(时间选择器),DatePickre(日期选择器),DateTimePicker(日期时间选择器),Upload(上传),Rate(评分),ClolorPicker(颜色选择器),同时还可以对表单元素进行验证。
基于Element Plus的表单制作
<template>
<el-form :model="form" label-width="120px">
<el-form-item label="用户">
<el-input v-model="form.name" />
</el-form-item>
<el-form-item label="活动区域">
<el-select v-model="form.region" placeholder="请选择活动区域">
<el-option label="常青校区" value="changqing" />
<el-option label="金银湖校区" value="jinyinhu" />
</el-select>
</el-form-item>
<el-form-item label="活动时间">
<el-col :span="4">
<el-date-picker v-model="form.date1" type="date" placeholder="选择日期" style="width: 100%" />
</el-col>
<el-col :span="0.9" class="text-center">
<span class="text-gray-500">-</span>
</el-col>
<el-col :span="4">
<el-time-picker v-model="form.date2" placeholder="选择时间" style="width: 100%" />
</el-col>
</el-form-item>
<el-form-item label="即时配送">
<el-switch v-model="form.delivery" />
</el-form-item>
<el-form-item label="活动性质">
<el-checkbox-group v-model="form.type">
<el-checkbox label="美食/餐厅线上活动" name="type" />
<el-checkbox label="地推活动" name="type" />
<el-checkbox label="线下主题活动" name="type" />
<el-checkbox label="单纯品牌曝光" name="type" />
</el-checkbox-group>
</el-form-item>
<el-form-item label="特殊资源">
<el-radio-group v-model="form.resource">
<el-radio label="线上品牌商赞助" />
<el-radio label="线下场地免费" />
</el-radio-group>
</el-form-item>
<el-form-item label="活动形式">
<el-input v-model="form.desc" type="textarea" />
</el-form-item>
<el-form-item>
<el-button type="primary" @click="onSubmit">立即创建</el-button>
<el-button>取消</el-button>
</el-form-item>
</el-form>
</template>
<script setup>
import { reactive } from 'vue'
// do not use same name with ref
const form = reactive({
name: '',
region: '',
date1: '',
date2: '',
delivery: false,
type: [],
resource: '',
desc: '',
})
const onSubmit = () => {
alert('提交表单!')
}
</script>
显示效果

表格
当需要展示多条结构类似的数据时,可以使用表格进行展示。Element Plus提供了丰富的表格样式及其相关处理,表格样式包括数据进行排序,筛选,对比和其他自定义操作。
基础表格使用语句如下:
<el-table :data="对象数组" stripe="true" style="width:100%">
<el-table-column prop="数组元素" label="表头展示文字" width="180">
</el-table-column>
</el-table>
当在el-table元素中注入data对象数组后,在el-table-column中使用prop属性对应对象中的键名即可填入数据,使用label属性定义表格的列名。另外使用stripe属性可以创建带斑马纹的表格,其值是布尔值,默认false,当设置为true时,启用斑马纹表格。
默认情况,table组件是不具有竖直方向的边框,如果需要添加border属性,其值是布尔值,默认false,当设置为true时,启动带竖直方向的边框的表格。
基于Element Plus的表格验证
<template>
<el-table :data="tableData" style="width: 100%" :stripe="true"> <!--stripe前面加冒号代表把true从字符串读取为布尔值-->
<el-table-column type="selection" width="55" />
<el-table-column prop="date" label="日期" width="180" />
<el-table-column prop="name" label="姓名" width="180" />
<el-table-column prop="address" label="地址" />
</el-table>
</template>
<script setup>
const tableData = [
{
date: '2016-05-03',
name: 'Tom',
address: 'No. 189, Grove St, Los Angeles',
},
{
date: '2016-05-02',
name: 'Tom',
address: 'No. 189, Grove St, Los Angeles',
},
{
date: '2016-05-04',
name: 'Tom',
address: 'No. 189, Grove St, Los Angeles',
},
{
date: '2016-05-01',
name: 'Tom',
address: 'No. 189, Grove St, Los Angeles',
},
]
</script>
script setup中的数据、方法不需要return即可使用。
显示效果

通知
Notification组件提供通知功能,即悬浮出现在页面角落,显示全局的通知提醒消息。
Element Plus 使用 $notify 方法并且它接受一个 Object 作为其参数。 在最简单的情况下,你可以通过设置 title 和 message 属性来设置通知的标题和正文内容。 默认情况下,通知在4500毫秒后自动关闭,但你可以通过设置 duration 属性来自定义通知的展示时间。 如果你将它设置为 0,那么通知将不会自动关闭。 需要注意的是 duration 接收一个 Number,单位为毫秒。
Notification 组件有四种通知类型:success, warning, info, error。 他们可以设置 type 字段来修改,除上述的四个值之外的值会被忽略。
使用 position 属性设置 Notification 的弹出位置, 支持四个选项:top-right、top-left、bottom-right 和 bottom-left, 默认为 top-right。
Notification 提供设置偏移量的功能,通过设置 offset 字段,可以使弹出的消息距屏幕边缘偏移一段距离。 注意在同一时刻,每一个的 Notification 实例应当具有一个相同的偏移量。
将 dangerouslyUseHTMLString 属性设置为 true,message 属性就会被当作 HTML 片段处理。
通知制作
<template>
<el-button :plain="true" @click="openMsg">打开消息提示</el-button>
<el-button :plain="true" @click="openVn">VNode虚拟节点</el-button>
<el-button plain @click="open1">可自动关闭</el-button>
</template>
<script>
import {h} from 'vue'
export default{
setup(){
const openMsg = ()=>{
ElNotification.success({
dangerouslyUseHTMLString : true, //message被作为html处理
message:'<strong>恭喜你,这是一条<i>成功</i> 消息</strong>',
showClose:true, //设置可关闭的警告框
center:true //文字居中
})
}
const openVn = ()=>{
ElNotification.info({
message:h('p',null,[
h('span',null,'内容可以是'),
h('i',{style:'color:teal'},'VNode')
])
})
}
const open1 = ()=>{
ElNotification.warning({
title:'确认删除',
message:h('i',{style:'color:teal'},'请确认!!!'),
position:'bottom-right' //定义弹出位置
})
}
return{
openMsg,
openVn,
open1
}
}
}
</script>
显示效果

导航菜单
- 水平导航菜单
导航菜单默认为垂直模式,通过mode属性改变为水平模式。在菜单中通过 sub-menu 组件可以生成二级菜单。 Menu 还提供了background-color、text-color和active-text-color,分别用于设置菜单的背景色、菜单的文字颜色和当前激活菜单的文字颜色。
水平导航菜单制作
<template>
<el-menu :default-active="activeIndex" class="el-menu-demo" mode="horizontal" @select="handleSelect">
<el-menu-item index="1">处理中心</el-menu-item>
<el-sub-menu index="2">
<template #title>我的工作台</template>
<el-menu-item index="2-1">选项1</el-menu-item>
<el-menu-item index="2-2">选项2</el-menu-item>
<el-menu-item index="2-3">选项3</el-menu-item>
<el-sub-menu index="2-4">
<template #title>选项4</template>
<el-menu-item index="2-4-1">选项2-4-1</el-menu-item>
<el-menu-item index="2-4-2">选项2-4-2</el-menu-item>
<el-menu-item index="2-4-3">选项2-4-3</el-menu-item>
</el-sub-menu>
</el-sub-menu>
<el-menu-item index="3" disabled>消息中心</el-menu-item>
<el-menu-item index="4">订单管理</el-menu-item>
</el-menu>
<div class="h-6" />
<el-menu :default-active="activeIndex2" class="el-menu-demo" mode="horizontal" background-color="#545c64"
text-color="#fff" active-text-color="#ffd04b" @select="handleSelect">
<el-menu-item index="1">处理中心</el-menu-item>
<el-sub-menu index="2">
<template #title>我的工作台</template>
<el-menu-item index="2-1">选项1</el-menu-item>
<el-menu-item index="2-2">选项2</el-menu-item>
<el-menu-item index="2-3">选项3</el-menu-item>
<el-sub-menu index="2-4">
<template #title>选项4</template>
<el-menu-item index="2-4-1">选项2-4-1</el-menu-item>
<el-menu-item index="2-4-2">选项2-4-2</el-menu-item>
<el-menu-item index="2-4-3">选项2-4-3</el-menu-item>
</el-sub-menu>
</el-sub-menu>
<el-menu-item index="3" disabled>消息中心</el-menu-item>
<el-menu-item index="4">订单管理</el-menu-item>
</el-menu>
</template>
<script>
import { ref } from 'vue'
export default {
setup() {
const activeIndex = ref('1')
const activeIndex2 = ref('1')
const handleSelect = (key, keyPath) => {
console.log(key, keyPath)
}
return {
activeIndex,
activeIndex2,
handleSelect
}
}
}
</script>
显示效果

- 侧边导航菜单
通过el-menu-item-group组件可以实现菜单分组
侧边导航菜单制作
<template>
<el-row class="tac">
<el-col :span="12">
<h5 class="mb-2" align="left">默认颜色</h5>
<el-menu default-active="2" class="el-menu-vertical-demo" @open="handleOpen" @close="handleClose">
<el-sub-menu index="1">
<template #title>
<el-icon>
<location/>
</el-icon>
<span>导航一</span>
</template>
<el-menu-item-group title="分组1">
<el-menu-item index="1-1">选项1-1</el-menu-item>
<el-menu-item index="1-2">选项1-2</el-menu-item>
</el-menu-item-group>
<el-menu-item-group title="分组2">
<el-menu-item index="1-3">选项1-3</el-menu-item>
</el-menu-item-group>
<el-sub-menu index="1-4">
<template #title>选项4</template>
<el-menu-item index="1-4-1">选项1-4-1</el-menu-item>
</el-sub-menu>
</el-sub-menu>
<el-menu-item index="2">
<el-icon><Menu /></el-icon>
<span>导航二</span>
</el-menu-item>
<el-menu-item index="3" disabled>
<el-icon>
<document />
</el-icon>
<span>导航三</span>
</el-menu-item>
<el-menu-item index="4">
<el-icon>
<setting />
</el-icon>
<span>导航四</span>
</el-menu-item>
</el-menu>
</el-col>
<el-col :span="12">
<h5 class="mb-2" align="left">自定义颜色</h5>
<el-menu active-text-color="#ffd04b" background-color="#545c64" class="el-menu-vertical-demo"
default-active="2" text-color="#fff" @open="handleOpen" @close="handleClose">
<el-sub-menu index="1">
<template #title>
<el-icon>
<location/>
</el-icon>
<span>导航一</span>
</template>
<el-menu-item-group title="分组1">
<el-menu-item index="1-1">选项1-1</el-menu-item>
<el-menu-item index="1-2">选项1-2</el-menu-item>
</el-menu-item-group>
<el-menu-item-group title="分组2">
<el-menu-item index="1-3">选项1-3</el-menu-item>
</el-menu-item-group>
<el-sub-menu index="1-4">
<template #title>选项4</template>
<el-menu-item index="1-4-1">选项1-4-1</el-menu-item>
</el-sub-menu>
</el-sub-menu>
<el-menu-item index="2">
<el-icon><Menu /></el-icon>
<span>导航二</span>
</el-menu-item>
<el-menu-item index="3" disabled>
<el-icon>
<document />
</el-icon>
<span>导航三</span>
</el-menu-item>
<el-menu-item index="4">
<el-icon>
<setting />
</el-icon>
<span>导航四</span>
</el-menu-item>
</el-menu>
</el-col>
</el-row>
</template>
<script>
import { reactive, toRefs } from 'vue'
export default {
setup() {
const state = reactive({
acitveIndex: '1',
acitveIndex2: '1'
})
const handleOpen = (key, keyPath) => {
console.log(key, keyPath)
}
const handleClose = (key, keyPath) => {
console.log(key, keyPath)
}
return {
handleOpen,
handleClose,
...toRefs(state)
}
}
}
</script>
显示效果

Badge标记
Badge标记是出现在按钮、图标旁的数字或状态标记。
- 可以用来展示新消息的数量,数量值可接受 Number 或 String,语句如下
<el-badge :value="12"> //或者
<el-badge value="new">
- 自定义最大值
由 max 属性定义,接受 Number 值。 请注意,仅在值也是 Number 时起作用,语句如下
<el-badge :value="200" :max="99">
- 小红点
通过一个小红点标记来告知用户有新内容。使用 is-dot 属性。 是个布尔值。
<el-badge is-dot class="item">数据查询</el-badge>
状态标记使用
<template>
<el-badge :value="12" class="item">
<el-button size="small">评论</el-button>
</el-badge>
<el-badge :value="3" class="item">
<el-button>回复</el-button>
</el-badge>
<el-badge :value="1" class="item" type="primary">
<el-button>评论</el-button>
</el-badge>
<el-badge :value="2" class="item" type="warning">
<el-button>回复</el-button>
</el-badge>
<el-badge :value="200" :max="99" class="item">
<el-button>评论</el-button>
</el-badge>
<el-badge :value="100" :max="10" class="item">
<el-button>回复</el-button>
</el-badge>
<el-badge value="new" class="item">
<el-button>评论</el-button>
</el-badge>
<el-badge value="hot" class="item">
<el-button>回复</el-button>
</el-badge>
<el-badge is-dot class="item">query</el-badge>
<el-badge is-dot class="item">
<el-button class="share-button" icon="Share" type="primary" />
</el-badge>
</template>
<style scoped>
.item {
margin-top: 10px;
margin-right: 40px;
}
</style>
显示效果

轮播图
在有限空间内,循环播放同一类型的图片、文字等内容。
结合使用 el-carousel 和 el-carousel-item 标签就得到了一个轮播图。 每一个页面的内容是完全可定制的,把你想要展示的内容放在 el-carousel-item 标签内。 默认情况下,在鼠标 hover 底部的指示器时就会触发切换。 通过设置 trigger 属性为 click,可以达到点击触发的效果。
可以将指示器(轮播图下面的小点)的显示位置设置在容器外部,indicator-position 属性定义了指示器的位置。 默认情况下,它会显示在走马灯内部,设置为 outside 则会显示在外部;设置为 none 则不会显示指示器。
可以设置切换箭头的显示时机,arrow 属性定义了切换箭头的显示时机。 默认情况下,切换箭头只有在鼠标 hover 到轮播图上时才会显示。 若将 arrow 设置为 always,则会一直显示;设置为 never,则会一直隐藏。
interval属性可以设置轮播图的图片自动切换的时间间隔,默认3000(毫秒)。
轮播图例子
<template>
<div class="block" width="1000px" height="1000px">
<el-carousel :interval="3000" arrow="always" >
<el-carousel-item v-for="item in 5" :key="item">
<img :src="imgArray[item-1]" alt="">
</el-carousel-item>
</el-carousel>
</div>
</template>
<script>
import { reactive, toRefs } from 'vue';
export default{
setup(){
const state =reactive({
imgArray:[
require('../assets/1.jpg'),
require('../assets/2.jpg'),
require('../assets/3.jpg'),
require('../assets/4.jpg'),
require('../assets/5.jpg')
]
})
return{
...toRefs(state)
}
}
}
</script>
<style scoped>
.el-carousel__item h3 {
color: #475669;
opacity: 0.75;
line-height: 300px;
margin: 0;
text-align: center;
}
.el-carousel__item:nth-child(2n) {
background-color: #99a9bf;
}
.el-carousel__item:nth-child(2n + 1) {
background-color: #d3dce6;
}
img{
width: 100%;
}
</style>
显示效果

对话框
在保留当前页面状态的情况下,告知用户并承载相关操作。
- 基础用法
Dialog 弹出一个对话框,适合需要定制性更大的场景,需要设置 model-value / v-model 属性,它接收 Boolean,当为 true 时显示 Dialog。 Dialog 分为两个部分:body 和 footer,footer 需要具名为 footer 的 slot。 title 属性用于定义标题,它是可选的,默认值为空。 最后,本例还展示了 before-close 的用法。
- 自定义对话框内容
对话框的内容可以是任何东西,甚至是一个表格或表单。
- 自定义标题
header 可用于自定义显示标题的区域。 为了保持可用性,除了使用此插槽外,使用 title 属性,或使用 titleId 插槽属性来指定哪些元素应该读取为对话框标题。
- 嵌套的对话框
如果需要在一个 Dialog 内部嵌套另一个 Dialog,需要使用 append-to-body 属性。通常我们不建议使用嵌套对话框。 如果你需要在页面上呈现多个对话框,你可以简单地打平它们,以便它们彼此之间是平级关系。 将内层 Dialog 的该属性设置为 true,它就会插入至 body 元素上,从而保证内外层 Dialog 和遮罩层级关系的正确。
- 内容居中
标题和底部可水平居中,将center设置为true即可使标题和底部居中。 center仅影响标题和底部区域。 Dialog 的内容是任意的,在一些情况下,内容并不适合居中布局。 如果需要内容也水平居中,请自行为其添加 CSS 样式。
- 居中对话框
从屏幕中心打开对话框。设置 align-center 为 true 使对话框水平垂直居中。 由于对话框垂直居中在弹性盒子中,所以top属性将不起作用。
- 关闭时销毁
启用此功能时,默认栏位下的内容将使用 v-if 指令销毁。 当出现性能问题时,可以启用此功能。需要注意的是,当这个属性被启用时,在 transition.beforeEnter 事件卸载前,除了 overlay、header (可选)与footer(可选) ,Dialog 内不会有其它任何其它的 DOM 节点存在。
- 可拖拽的对话框
试着拖动一下header部分,设置draggable属性为true以做到拖拽。
对话框
<template>
<el-button text @click="dialogVisible = true">
Click to open Dialog
</el-button>
<el-dialog v-model="dialogVisible" title="Tips" width="30%" draggable>
<span>It's a draggable Dialog</span>
<template #footer>
<span class="dialog-footer">
<el-button @click="dialogVisible = false">Cancel</el-button>
<el-button type="primary" @click="dialogVisible = false">
Confirm
</el-button>
</span>
</template>
</el-dialog>
</template>
<script setup>
import { ref } from 'vue'
const dialogVisible = ref(false)
</script>
显示效果

抽屉
有些时候, Dialog 组件并不满足我们的需求, 比如你的表单很长, 亦或是你需要临时展示一些文档, Drawer 拥有和 Dialog 几乎相同的 API, 在 UI 上带来不一样的体验.
呼出一个临时的侧边栏,支持上下左右四个方向。
你必须像 Dialog一样为 Drawer 设置 model-value 属性来控制 Drawer 的显示与隐藏状态,该属性接受一个 boolean 类型。 Drawer 包含三部分: title & body & footer, 其中 title 是一个具名 slot, 你还可以通过 title 属性来设置标题, 默认情况下它是一个空字符串, 其中 body 部分是 Drawer 组件的主区域, 它包含了用户定义的主要内容. footer和title用法一致, 用来显示页脚信息. 当 Drawer 打开时,默认设置是从右至左打开 30% 浏览器宽度。 你可以通过传入对应的 direction 和 size 属性来修改这一默认行为。
Drawer抽屉
实现从4个方向打开侧边栏,分别是从左到右开,从右往左开,从上到下开和从下往上开。
<template>
<el-radio-group v-model="direction">
<el-radio label="ltr">从左往右开</el-radio> <!--选择按钮后,label传值给direction-->
<el-radio label="rtl">从右往左开</el-radio>
<el-radio label="ttb">从上往下开</el-radio>
<el-radio label="btt">从下往上开</el-radio>
</el-radio-group>
<el-button type="primary" style="margin-left: 16px" @click="handleClick">
点我打开
</el-button>
<el-drawer v-model="drawer" title="我是标题" :direction="direction">
<span>Hi, there!</span>
</el-drawer>
</template>
<script>
import { reactive, toRefs ,watchEffect} from 'vue'
export default {
setup() {
const state = reactive({
drawer:false,
direction:'rtl'
})
const handleClick = ()=>{
state.drawer = true
setTimeout(()=>state.drawer=false,2000) //过2秒就关闭
}
watchEffect(()=> console.log(state.direction)) //direction发生改变立即输出
return{
...toRefs(state),
handleClick
}
}
}
</script>
显示效果

引入字体图标
引入图标还需要安装插件,上面的图标是和按钮绑定的所以不需要另外安装,但是如果单独引入字体图标,则需要安装插件。
注意引入字体图标之前也是需要引入Element-plus。
- 安装icons字体图标
npm install @element-plus/icons-vue
- 全局注册
在src根目录下,创建plugins文件夹,在文件夹下创建icons.js配置文件,直接复制进去就行。
import * as components from "@element-plus/icons-vue"
export default{
install:(app)=>{
for(const key in components){
const componentConfig = components[key];
app.component(componentConfig.name,componentConfig);
}
}
}
- 在main.js引入icons.js文件
import { createApp } from 'vue'
import App from './App.vue'
import './registerServiceWorker'
import router from './router'
import store from './store'
import icons from './plugins/icons' //引入
createApp(App).use(store).use(icons).use(router).mount('#app') //use(icons)
- 然后在官方文档中找字体图标组件,随便挑选一个复制代码就可以使用了,如下图
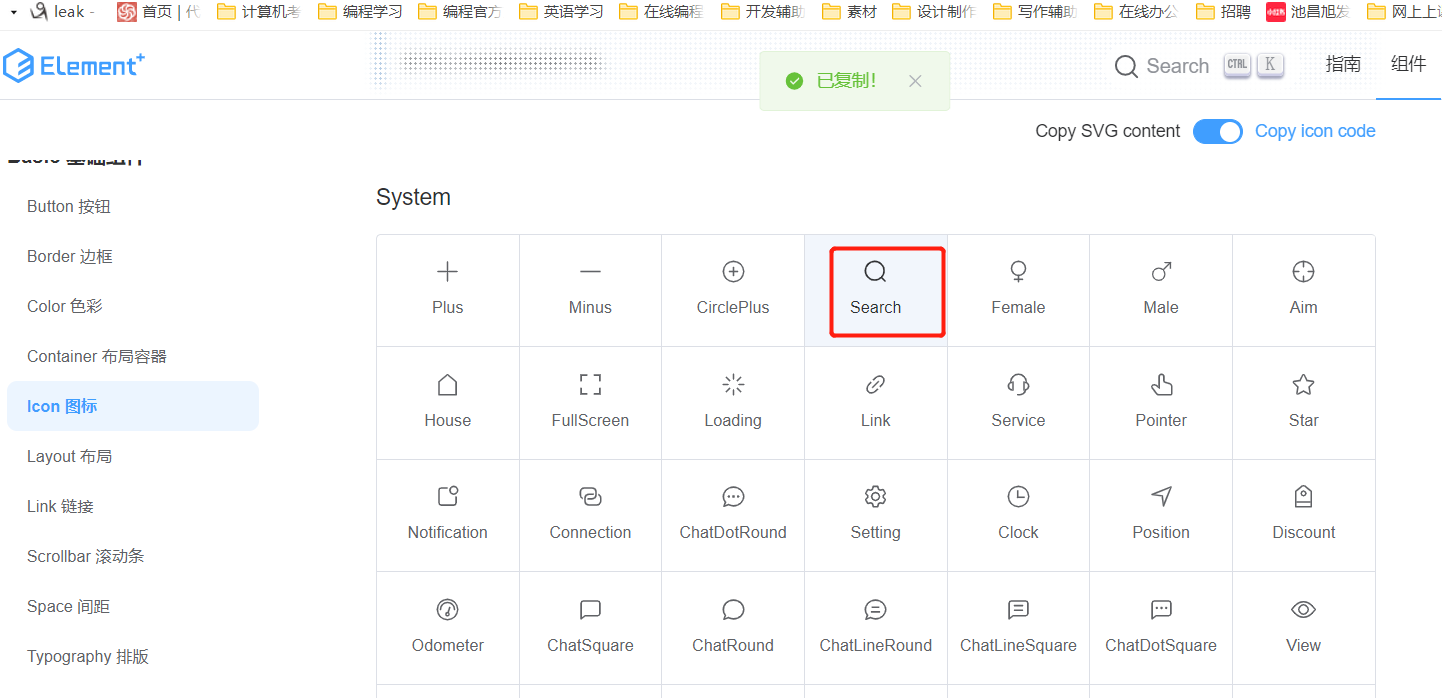
鼠标点击一下图标就复制代码了,然后把代码粘贴到组件中
<!--HelloWorld.vue-->
<template>
<div class="hello">
<el-icon><Plus/></el-icon>
<el-icon><Search /></el-icon>
</div>
</template>
显示效果
图标可以调整颜色和大小,在标签中,写上css样式就行,如size="32" color="red"等。
登录验证表单
<template>
<div class="container" >
<!-- form表单容器 -->
<div class="forms-container" style="width:300px">
<el-form :model="form" ref="lbLogin" label-width="80px" :rules="rules" class="loginForm">
<el-form-item label="用户名" prop="name">
<el-input v-model="form.name" placeholder="请输入用户名:"></el-input>
</el-form-item>
<el-form-item label="密 码" prop="password">
<el-input v-model="form.password" type="password" placeholder="请输入密码:"></el-input>
</el-form-item>
<el-form-item>
<el-button type="success" class="submit-btn" @click="onSubmit('lbLogin')">登录</el-button>
</el-form-item>
</el-form>
<div class="tiparea">
<p>忘记密码?<a href="#">立即找回</a>|
<a href="/register">注册</a>
</p>
</div>
</div>
</div>
</template>
<script>
import { getCurrentInstance, reactive, toRefs } from 'vue';
export default {
setup() {
const state = reactive({
form: {
name:'',
password:''
},
rules:{
name:[{required:true, message:'请输入用户名', trigger:'blur'}],
password:[{required:true,message:'请输入密码',trigger:'blur'}]
}
})
const {ctx} = getCurrentInstance()
const onSubmit = (forName)=>{
console.log(ctx)
ctx.$refs[forName].validate((valid) =>{
if(valid){
if(state.form.name === state.form.password){
console.log("登录成功")
}else{
console.log("用户名或密码错误!")
}
}else{
console.log("错误提交")
return false
}
})
}
return{
...toRefs(state),
onSubmit
}
}
}
</script>
<style scoped>
.logo{
width: 70%;
margin-top: 75px;
}
.container{
position: relative;
width: 100%;
background-color: #fff;
min-height: 300px;
overflow: hidden;
}
.forms-container{
width: 100%;
margin: 50px auto;
padding:20px;
}
.login-title{
text-align: center;
font-weight: bolder;
margin-bottom: 30px;
}
.submit-btn{
width: 100%;
}
.tiparea{
text-align: right;
font-size: 12px;
color: #333;
}
.tiparea p a{
color: #409eff;
text-decoration: none;
}
</style>
显示效果

当用户名和密码相同时,登录成功,否则登录失败,做了表单的一些检查约束。
参考:《轻松学Vue.js 3.0从入门到实战》;
视频链接:https://www.bilibili.com/video/BV1TT411V7dW?share_source=copy_web

 浙公网安备 33010602011771号