Spring注解详解(使用注解的方式完成IOC)
补充:xml配置
最开始(Spring 1.x),Spring都是通过xml配置控制层(controller)--业务逻辑层(service)--dao层--数据源的关系,但是比较复杂
Spring 2.x的时候,随着JDK1.5支持注解的方式,实现了 "xml + 注解" 的开发模式,
<?xml version="1.0" encoding="UTF-8"?>
<beans xmlns="http://www.springframework.org/schema/beans"
       xmlns:xsi="http://www.w3.org/2001/XMLSchema-instance" xmlns:p="http://www.springframework.org/schema/p"
       xsi:schemaLocation="http://www.springframework.org/schema/beans http://www.springframework.org/schema/beans/spring-beans.xsd">

    <!--可以配置多个数据源,用哪个就引用哪个-->
    <!--mysql-->
    <bean id="ds" class="com.qzcsbj.dao.impl.DataSource">
        <property name="username" value="root"/>
        <property name="password" value="123456"/>
        <property name="url" value="jdbc:mysql://192.168.168.168:3360/gifts?useUnicode=true&characterEncoding=utf-8&useSSL=true"/>
        <property name="driverClass" value="com.mysql.jdbc.Driver"/>
    </bean>

    <!--dao引用ds-->
    <bean id="dao" class="com.qzcsbj.dao.impl.UserDaoImpl">
        <property name="ds" ref="ds"/>
    </bean>

    <!--service引用dao-->
    <bean id="service" class="com.qzcsbj.service.impl.UserServiceImpl">
        <property name="userDao" ref="dao"/>
    </bean>

    <!--controller引用service-->
    <bean id="controller" class="com.qzcsbj.controller.UserController">
        <property name="userService" ref="service"/>
    </bean>
</beans>
注解使用
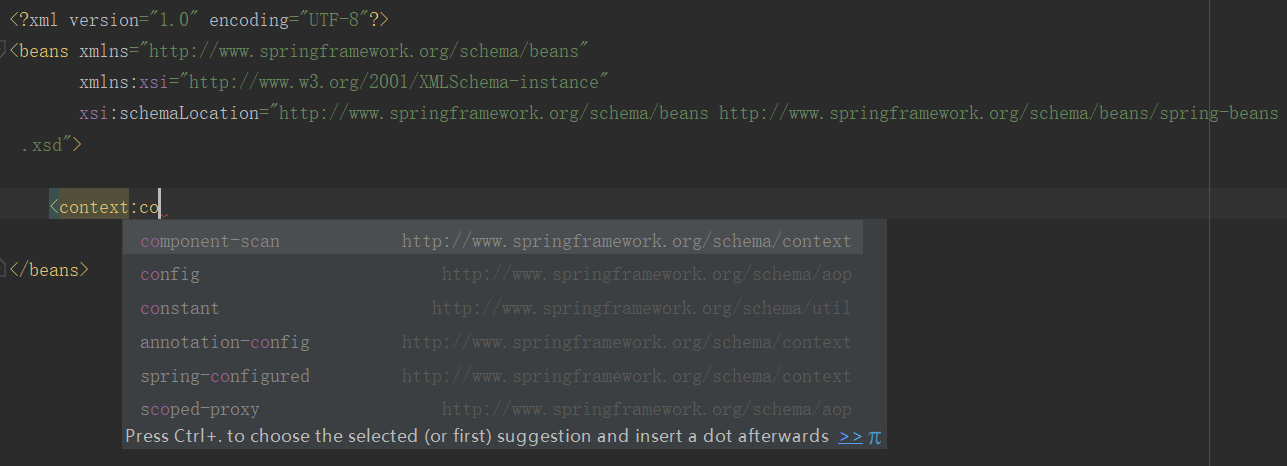
引入Context的约束
输入下面后

会自动添加context的约束
<?xml version="1.0" encoding="UTF-8"?>
<beans xmlns="http://www.springframework.org/schema/beans"
       xmlns:xsi="http://www.w3.org/2001/XMLSchema-instance"
       xmlns:context="http://www.springframework.org/schema/context"
       xsi:schemaLocation="http://www.springframework.org/schema/beans http://www.springframework.org/schema/beans/spring-beans.xsd http://www.springframework.org/schema/context http://www.springframework.org/schema/context/spring-context.xsd">
配置注解
指定扫描包下所有类中的注解
<?xml version="1.0" encoding="UTF-8"?>
<beans xmlns="http://www.springframework.org/schema/beans"
       xmlns:xsi="http://www.w3.org/2001/XMLSchema-instance"
       xmlns:context="http://www.springframework.org/schema/context"
       xsi:schemaLocation="http://www.springframework.org/schema/beans http://www.springframework.org/schema/beans/spring-beans.xsd http://www.springframework.org/schema/context http://www.springframework.org/schema/context/spring-context.xsd">

    <!--扫描注解类-->
    <context:component-scan base-package="com.qzcsbj.*"/>

</beans>
Component

测试:对象名是student
package com.qzcsbj.test;

import com.qzcsbj.bean.Student;
import org.junit.Test;
import org.springframework.context.support.ClassPathXmlApplicationContext;

/**
 * @公众号 : 全栈测试笔记
 * @博客 : www.cnblogs.com/uncleyong
 * @微信 : ren168632201
 * @描述 : <>
 */
public class Test2 {
    @Test
    public void test(){
        ClassPathXmlApplicationContext context = new ClassPathXmlApplicationContext("applicationContext.xml");
        Student stu = context.getBean("student", Student.class);
        System.out.println(stu);
    }
}
结果:没有值(下图展示的是类型默认值),是因为没有注入值
![]()
也可以给对象取别的名字,后续就只能用这个自定义的对象名
@Component("stu")
public class Student {
    private String name;
    private int age;

    @Override
    public String toString() {
        return "Student{" +
                "name='" + name + '\'' +
                ", age=" + age +
                '}';
    }
}
测试:对象名是stu
Student stu = context.getBean("stu", Student.class);
Value
给属性赋值:@Value("属性值") 等同于 @Value(value="属性值")
@Component("stu")
public class Student {
    @Value("jack")
    private String name;

    @Value("18")
    private int age;

    @Override
    public String toString() {
        return "Student{" +
                "name='" + name + '\'' +
                ", age=" + age +
                '}';
    }
}
测试

Autowired
接口
package com.qzcsbj;

/**
 * @公众号 : 全栈测试笔记
 * @博客 : www.cnblogs.com/uncleyong
 * @微信 : ren168632201
 * @描述 : <>
 */
public interface Alimal {
    void eat();
}
Cat实现类
package com.qzcsbj;

import org.springframework.stereotype.Component;

/**
 * @公众号 : 全栈测试笔记
 * @博客 : www.cnblogs.com/uncleyong
 * @微信 : ren168632201
 * @描述 : <>
 */
@Component
public class Cat implements Alimal {
    public void eat() {
        System.out.println("==============cat eat fish");
    }
}
Dog实现类
package com.qzcsbj;

import org.springframework.stereotype.Component;

/**
 * @公众号 : 全栈测试笔记
 * @博客 : www.cnblogs.com/uncleyong
 * @微信 : ren168632201
 * @描述 : <>
 */
@Component
public class Dog implements Alimal {
    public void eat() {
        System.out.println("==========dog eat bone");
    }
}
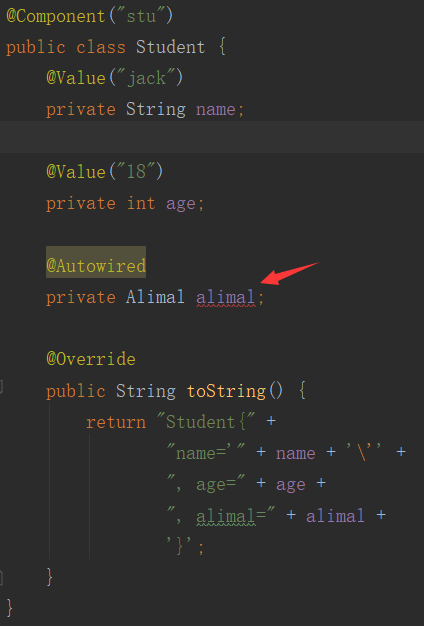
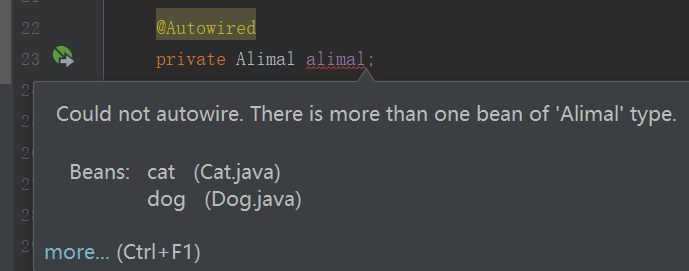
给对象属性注入值,报错


注释一个就不会报上面的错了

给Student的对象属性加上get方法
    public Alimal getAlimal() {
        return alimal;
    }
测试
package com.qzcsbj.test;

import com.qzcsbj.bean.Student;
import org.junit.Test;
import org.springframework.context.support.ClassPathXmlApplicationContext;

/**
 * @公众号 : 全栈测试笔记
 * @博客 : www.cnblogs.com/uncleyong
 * @微信 : ren168632201
 * @描述 : <>
 */
public class Test2 {
    @Test
    public void test(){
        ClassPathXmlApplicationContext context = new ClassPathXmlApplicationContext("applicationContext.xml");
        Student stu = context.getBean("stu", Student.class);
        stu.getAlimal().eat();
    }
}
结果
![]()
Qualifier
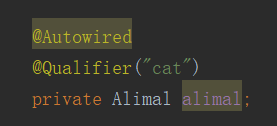
@Qualifier:如果匹配到多个对象,可以用Qualifier来指定要匹配哪一个对象,需要配合@Autowired使用
给Cat类加上注解:@Component

下面这种方式写,就不报错了

测试结果
![]()
Resource
@Resource:默认是根据类型自动装配一个,如果匹配多个会异常,也可以指定名字匹配,@Resource(name="obj") == @Autowired + @Qualifier("obj")
    // @Autowired
    // @Qualifier("cat")
    @Resource(name = "cat")
    private Alimal alimal;
Scope
@Scope:用于指定对象作用域,在类上添加此注解
单例:singleton
多例:prototype
@Scope(scopeName = "singleton"),或者:@Scope("singleton")
@Scope(scopeName = "prototype"),或者:@Scope("prototype")
实体类
package com.qzcsbj.bean;

import com.qzcsbj.test.Alimal;
import org.springframework.beans.factory.annotation.Autowired;
import org.springframework.beans.factory.annotation.Qualifier;
import org.springframework.beans.factory.annotation.Value;
import org.springframework.stereotype.Component;

import javax.annotation.Resource;

/**
 * @公众号 : 全栈测试笔记
 * @博客 : www.cnblogs.com/uncleyong
 * @微信 : ren168632201
 * @描述 : <>
 */
@Component("stu")
public class Student {
    @Value("jack")
    private String name;

    @Value("18")
    private int age;

    // @Autowired
    // @Qualifier("cat")
    @Resource(name = "cat")
    private Alimal alimal;

    public Alimal getAlimal() {
        return alimal;
    }

    @Override
    public String toString() {
        return "Student{" +
                "name='" + name + '\'' +
                ", age=" + age +
                ", alimal=" + alimal +
                '}';
    }
}
测试
package com.qzcsbj.test;

import com.qzcsbj.bean.Student;
import org.junit.Test;
import org.springframework.context.support.ClassPathXmlApplicationContext;

/**
 * @公众号 : 全栈测试笔记
 * @博客 : www.cnblogs.com/uncleyong
 * @微信 : ren168632201
 * @描述 : <>
 */
public class Test2 {
    @Test
    public void test(){
        ClassPathXmlApplicationContext context = new ClassPathXmlApplicationContext("applicationContext.xml");
        Student stu = context.getBean("stu", Student.class);
        Student stu2 = context.getBean("stu", Student.class);
        System.out.println(stu==stu2);
    }
}
测试结果是true,因为默认是单例
![]()
默认单例:@Scope("singleton")


测试结果
![]()
其它注解
@Service:用于标注业务层,给业务逻辑层生成对象
@Controller:用于标注控制层,给控制层生成对象
@Repository:用于标注数据访问层,给dao层生成对象,说明:Mybatis的dao层是自动生成对象的,所以不需要这个注解
说明:不是上面任何一层,就加@Component注解;其它,上面三层也可以用@Component注解,但是用对应层的注解能见名知意。
原文会持续更新,原文地址:https://www.cnblogs.com/uncleyong/p/17020010.html
__EOF__

关于博主:擅长性能、全链路、自动化、企业级自动化持续集成(DevTestOps)、测开等
面试必备:项目实战(性能、自动化)、简历笔试,https://www.cnblogs.com/uncleyong/p/15777706.html
测试提升:从测试小白到高级测试修炼之路,https://www.cnblogs.com/uncleyong/p/10530261.html
欢迎分享:如果您觉得文章对您有帮助,欢迎转载、分享,也可以点击文章右下角【推荐】一下!


