二十、日志格式化处理(二)
一、预处理节点
如果nginx服务器过多,每台都要改配置文件,改为json格式就很繁琐。
而filebeat-pipeline预处理节点就能把正常格式的nginx日志改为json格式
注意这个是在es上实现的,是es的一个功能。
1、还原nginx配置文件
如果是从日志格式处理(一)过来的,需要将Ngxin配置文件改回来,清空原格式日志文件,删除索引;如果不是请忽略这一步。
vim /etc/nginx/nginx.conf
nginx -t
systemctl reload nginx
> /var/log/nginx/access.log
ab -c 2 -n 9999 http://192.168.0.112/
2、配置Kibana
在kibana控制台输入
PUT _ingest/pipeline/pipeline-nginx-access
{
    "description": "解析nginx日志",
    "processors": [
        {
            "grok": {
                "field": "message",
                "patterns": ["%{IP:clientip} - - \\[%{HTTPDATE:nginx.access.time}\\] \"%{DATA:nginx.access.info}\" %{NUMBER:http.response.status_code:long} %{NUMBER:http.response.body.bytes:long} \"(-|%{DATA:http.request.referrer})\" \"(-|%{DATA:user_agent.original})\""]
            }
        },
        {
            "remove": {
                "field": [
                    "message"
                ]
            }
        }

    ]
}

#查看pipeline
GET /_ingest/pipeline/pipeline-nginx-access
遇事不决,官方配置文档
3、配置Filebeat
修改Filebeat配置文件
vim /usr/local/filebeat-7.9.3/filebeat.yml
filebeat.inputs:
- type: log
  enabled: true
  paths:
    - /var/log/nginx/access*.log
  tags: ["access"]

- type: log
  enabled: true
  paths:
    - /var/log/nginx/error*.log
  tags: ["error"]

processors:
  - drop_fields: #过滤掉key/value
      fields: ["offset","prospector", "source", "input","beat","ecs","log"]

setup.kibana:
  host: "192.168.0.110:5601"

output.elasticsearch:
  hosts: ["192.168.0.110:9200","192.168.0.111:9200","192.168.0.112:9200"]

  pipelines:
  	- pipeline: "pipeline-nginx-access" #指定pipeline名称
	  when.contains:
	  	tags: "access"
  indices:
    - index: "Nginx-access-%{+yyyy.MM.dd}"
      when.contains:
        tags: "access"
    - index: "Nginx-error-%{+yyyy.MM.dd}"
      when.contains:
        tags: "error"

setup.ilm.enabled: false
setup.template.enabled: false

#检查配置文件
./filebeat test config
./filebeat test output

#重启filebeat
kill -9 `ps -aux|grep filebeat|awk '{print$2}'|awk 'NR==1'`
cd /usr/local/filebeat-7.9.3/ && nohup ./filebeat -e -c filebeat.yml &
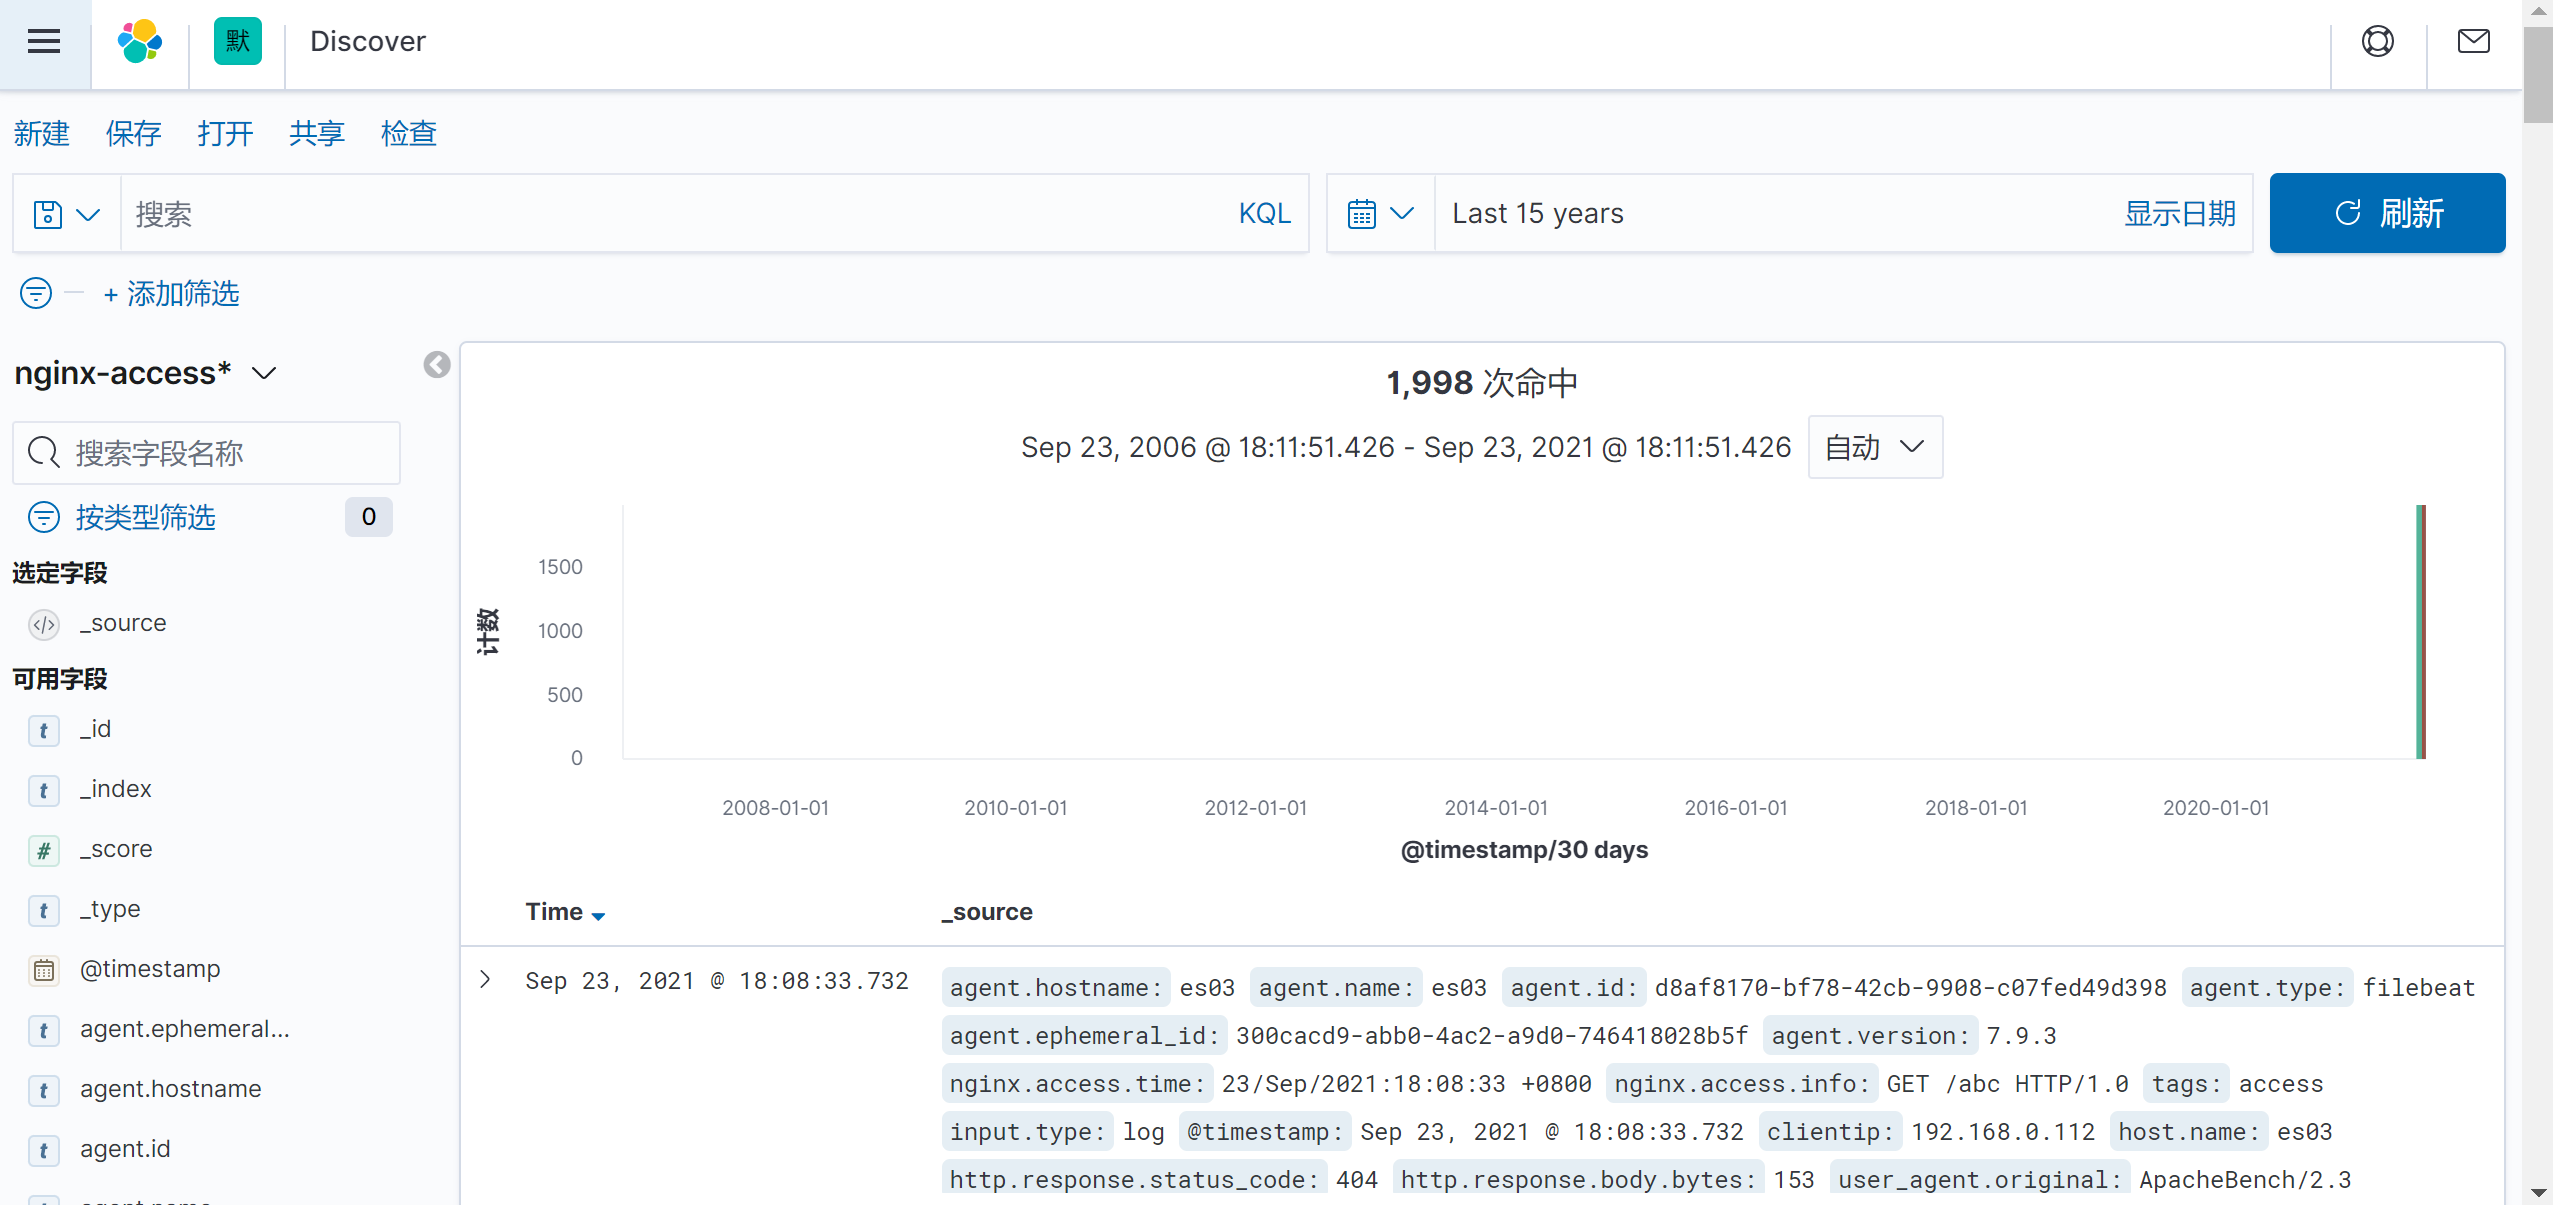
4、查看效果
二、Filebeat模板
Filebeat内置了很多模板方便我们对日志格式化处理。
1、配置Filebeat
修改Filebeat配置文件
vim /usr/local/filebeat-7.9.3/filebeat.yml
filebeat.config.modules:
  path: ${path.config}/modules.d/*.yml
  reload.enabled: enable
filebeat.modules:
- module: nginx

output.elasticsearch:
  hosts: ["192.168.0.110:9200","192.168.0.111:9200","192.168.0.112:9200"]

  indices:
    - index: "Nginx-access-%{+yyyy.MM.dd}"
      when.contains:
        log.file.path: "/var/log/nginx/access.log"
    - index: "Nginx-error-%{+yyyy.MM.dd}"
      when.contains:
        log.file.path: "/var/log/nginx/error.log"

setup.ilm.enabled: false
setup.template.enabled: false

#检查配置文件
./filebeat test config
./filebeat test output

#重启filebeat
kill -9 `ps -aux|grep filebeat|awk '{print$2}'|awk 'NR==1'`
cd /usr/local/filebeat-7.9.3/ && nohup ./filebeat -e -c filebeat.yml &
2、配置模板
添加日志路径,激活模块
#添加日志路径如下
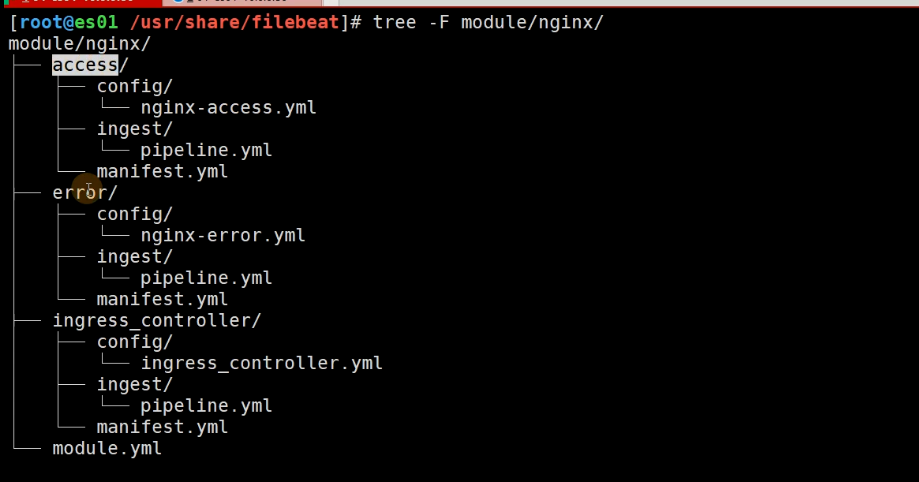
egrep -v '#|^$' /usr/local/filebeat-7.9.3/modules.d/nginx.yml.disabled
- module: nginx
access:
enabled: true
var.paths: ["/var/log/nginx/access.log"]
error:
enabled: true
var.paths: ["/var/log/nginx/error.log"]
ingress_controller:
enabled: false
#激活模块
cd /usr/local/filebeat-7.9.3/
./filebeat modules enable nginx
./filebeat modules list | head
#关闭模块
./filebeat modules disable nginx
3、生成访问日志
ab -c 2 -n 9999 http://192.168.0.112/
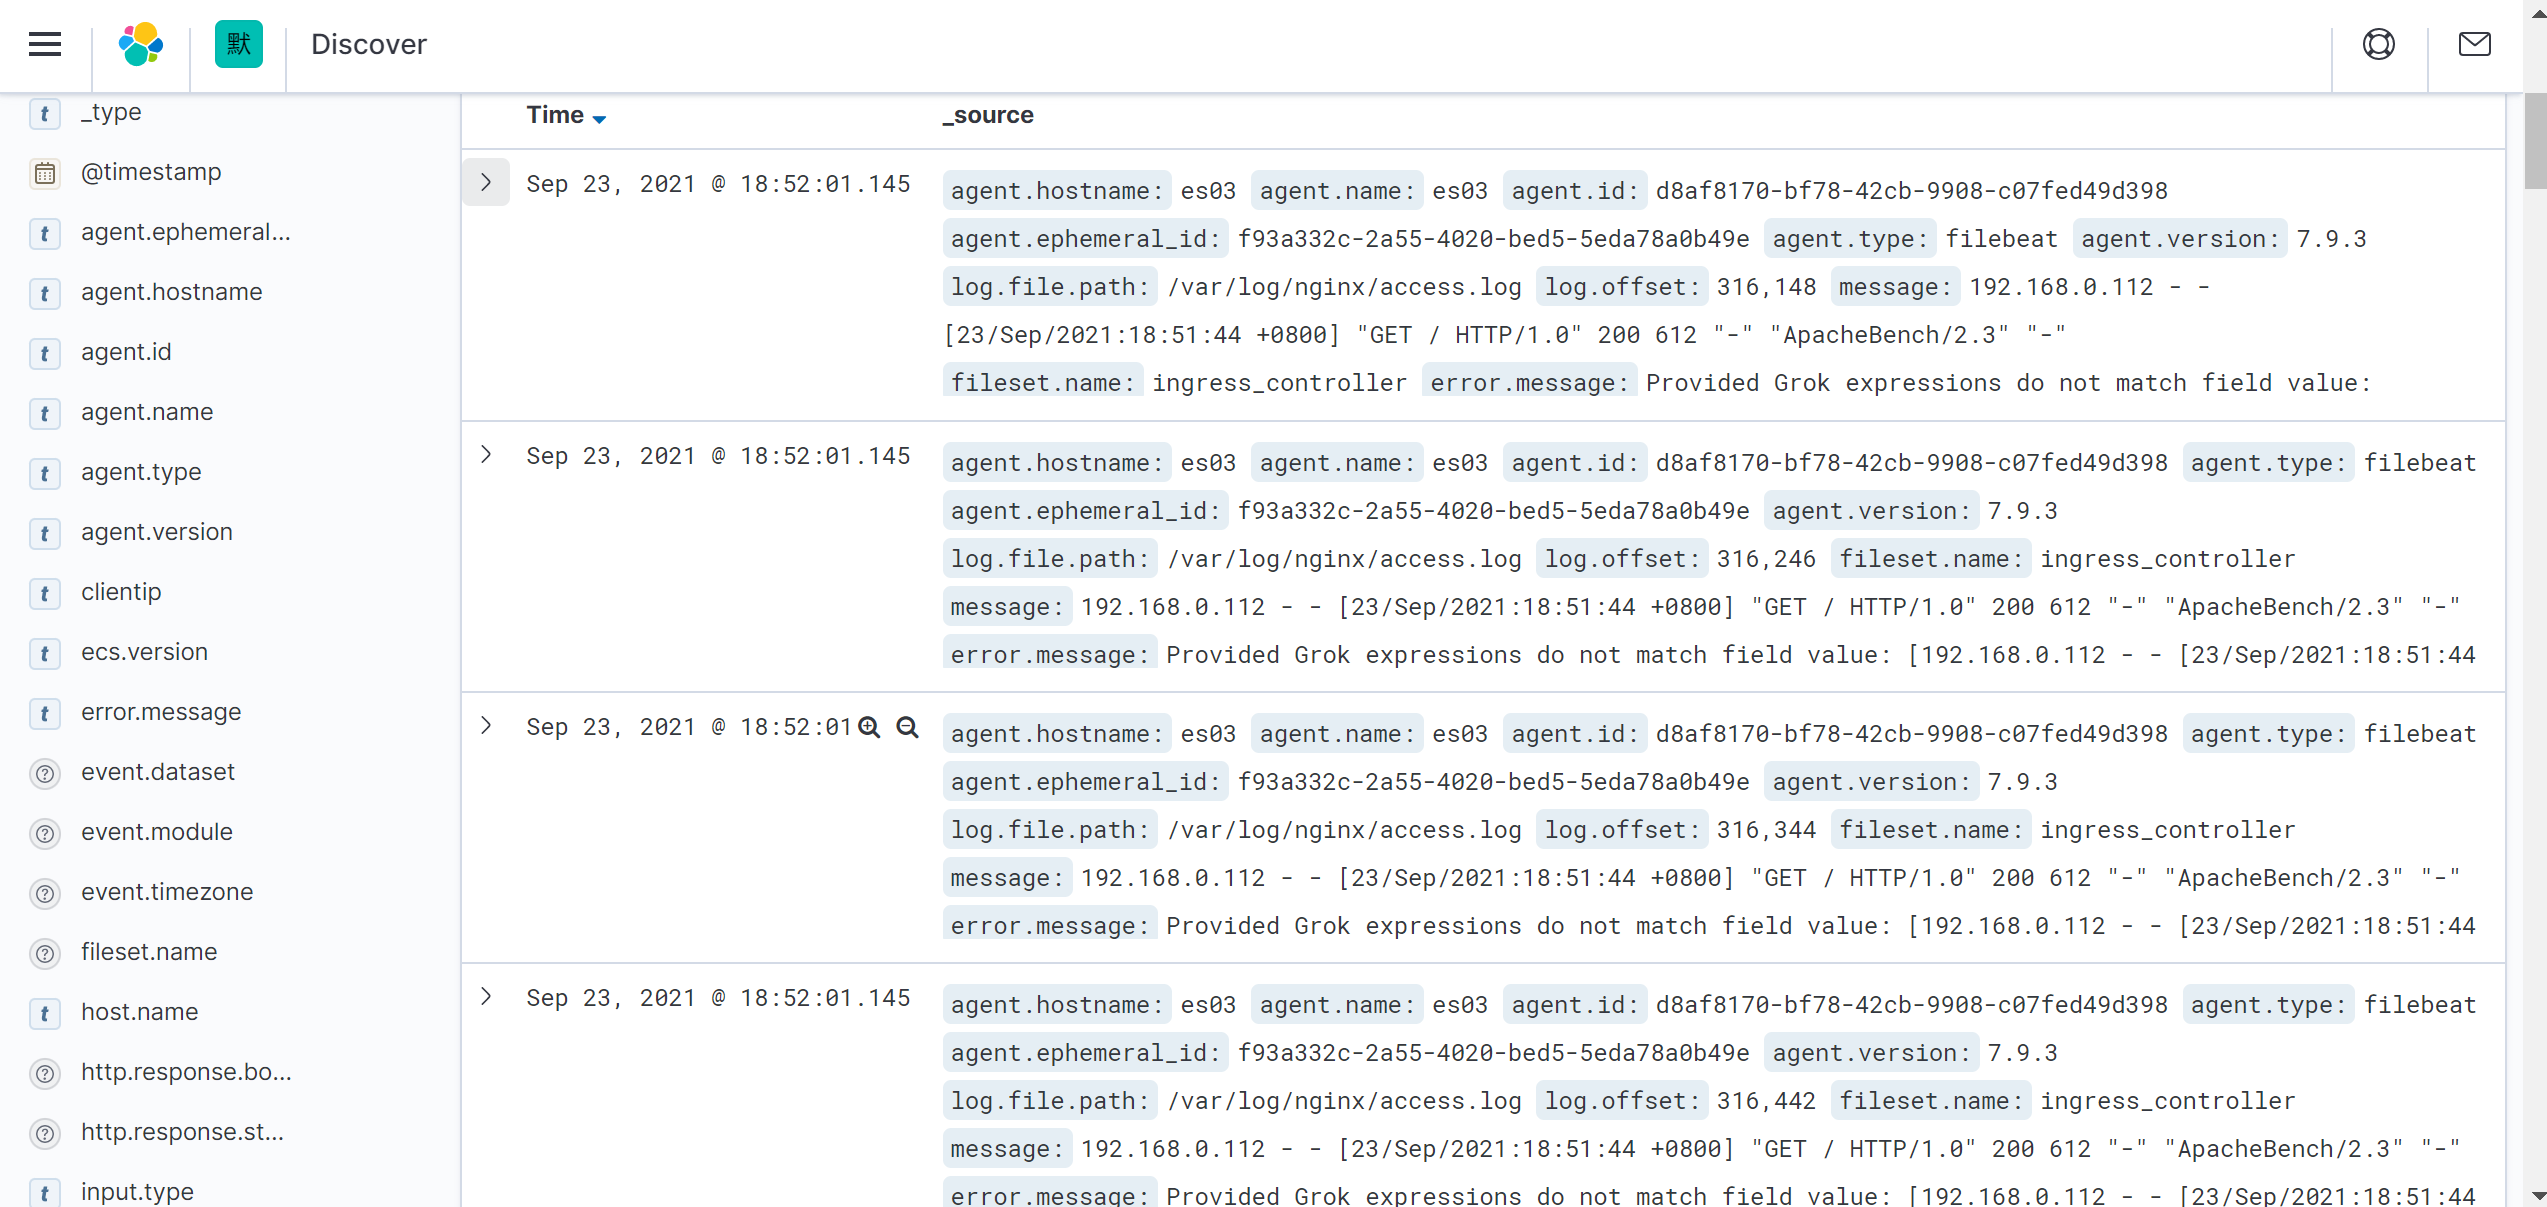
4、查看效果
今天的学习是为了以后的工作更加的轻松!

 浙公网安备 33010602011771号