十九、日志格式化处理(一)
一、日志格式处理
前面已经学了EFK的搭建,查看es-head插件可以发现收集上来的日志对我们来说只有message这个键值才有用,接下来格式化nginx日志将message里的值提取出来方便我们查看。
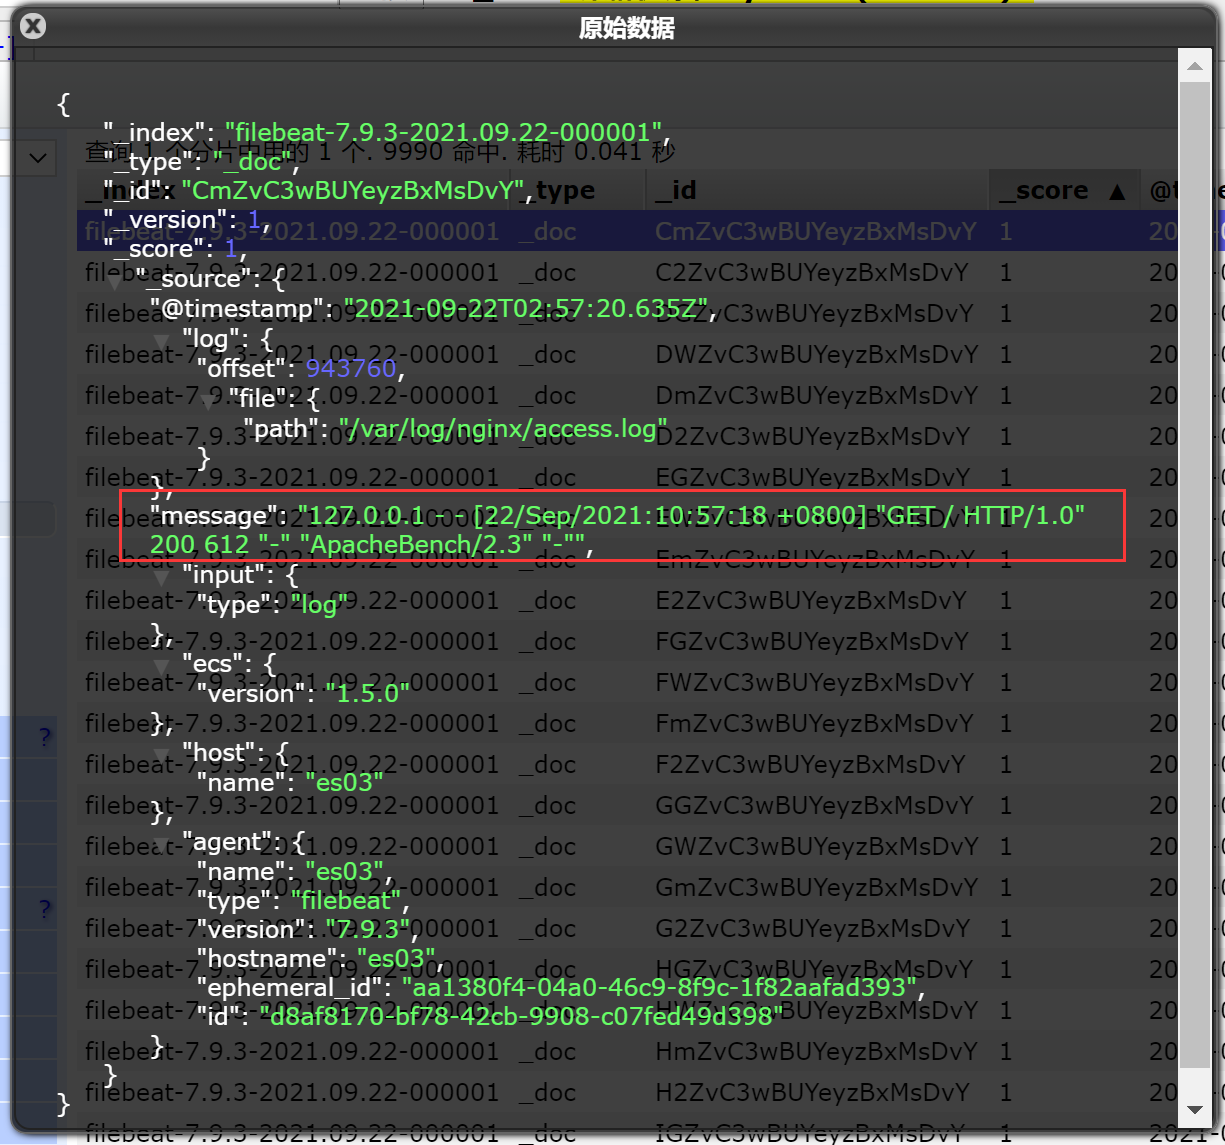
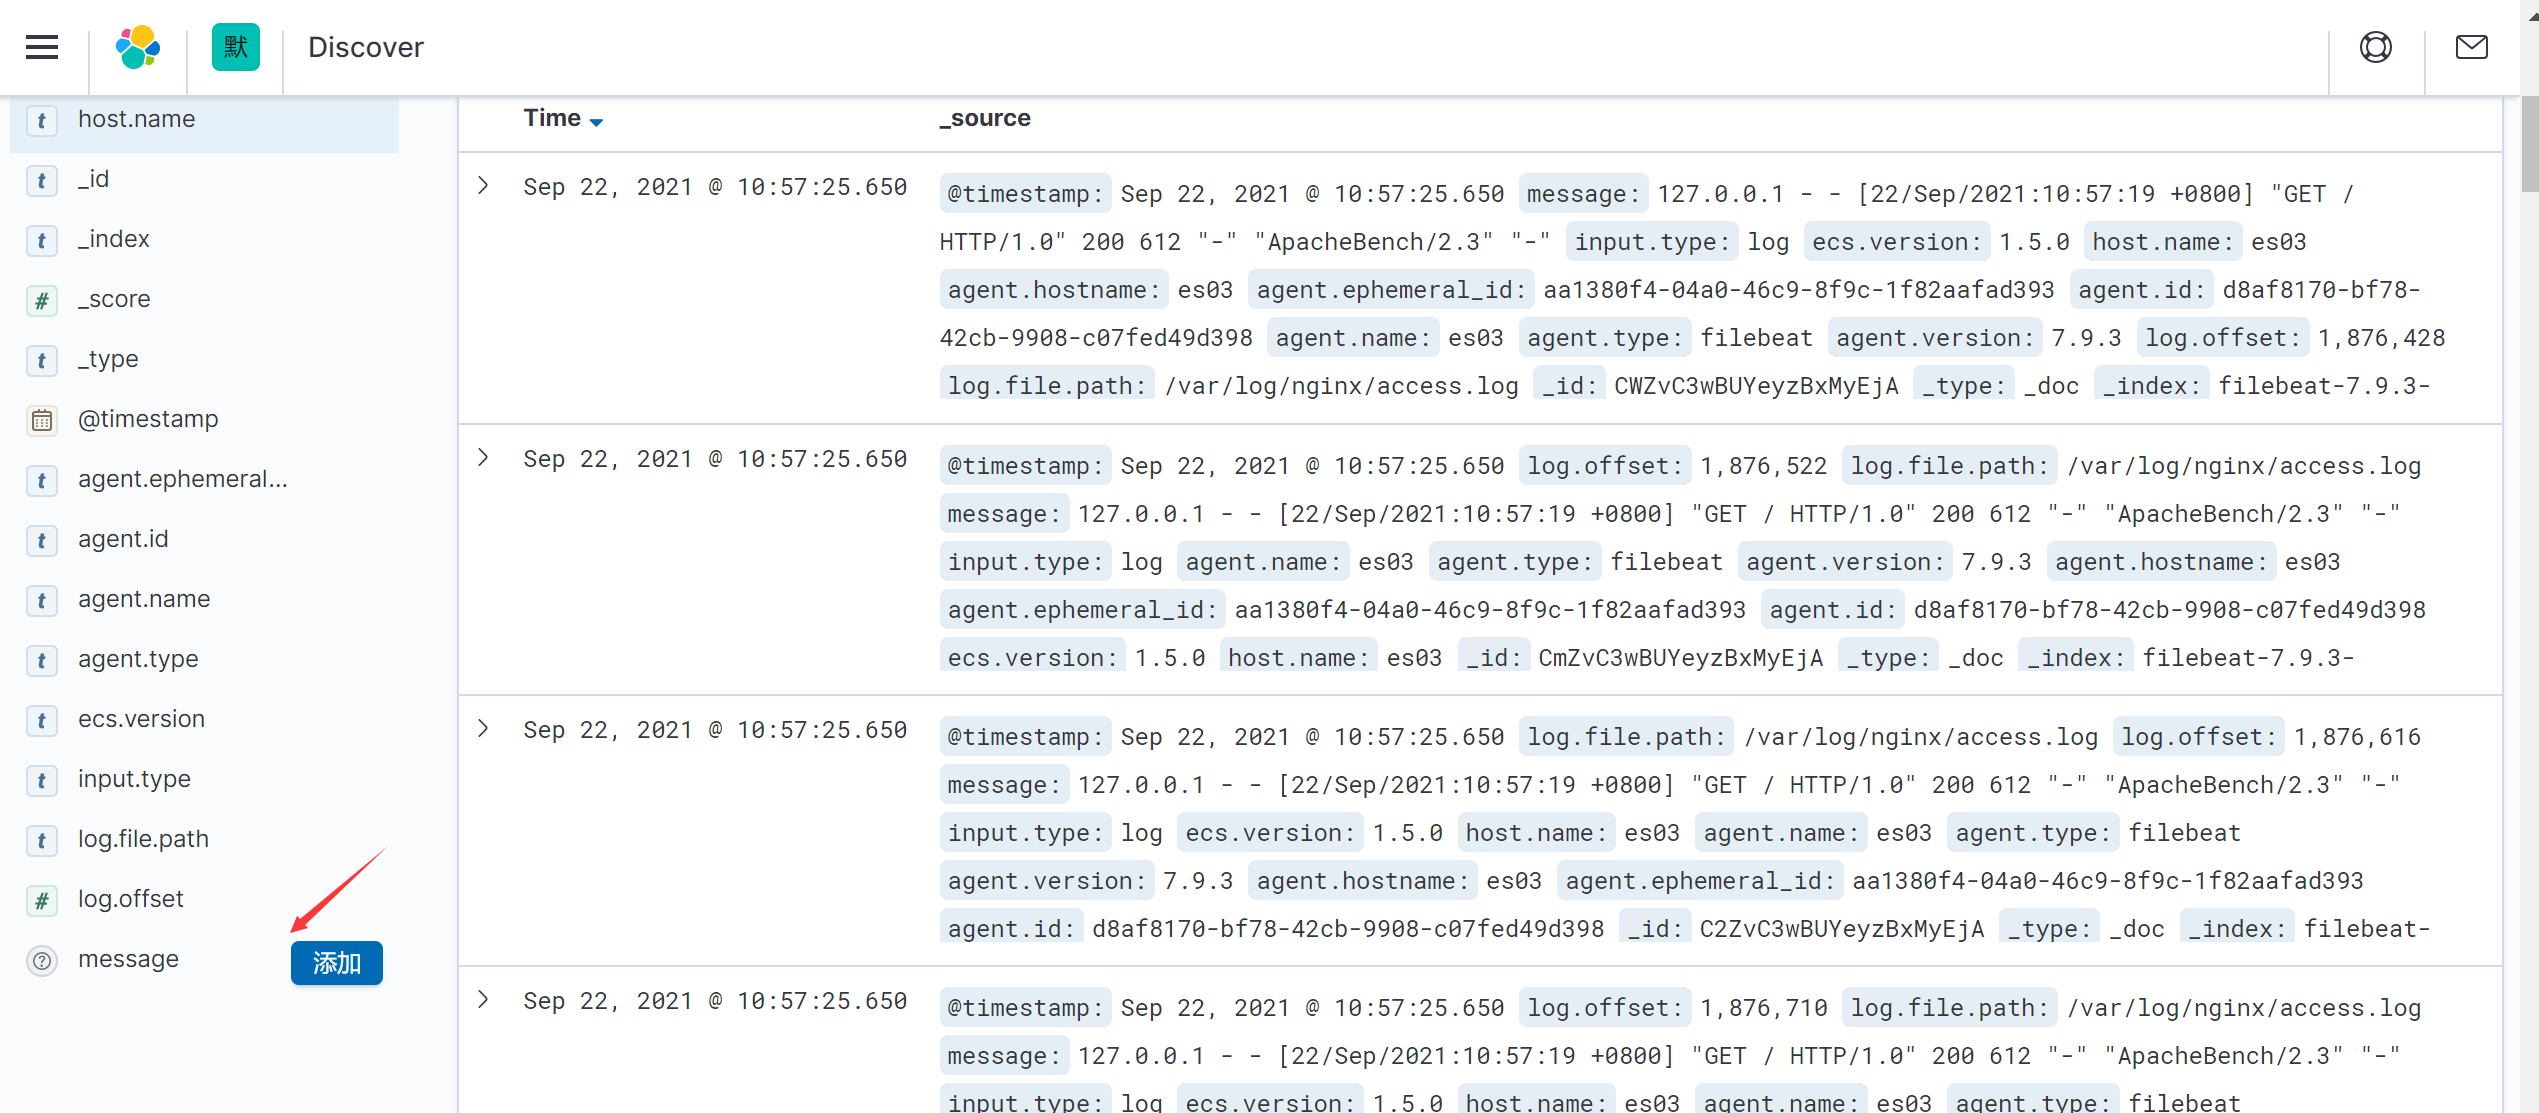
需要将message字段里的值提取出来方便我们筛选查看

二、环境介绍
Filebeat-->es-->kibana
| 主机名 | IP | 安装软件 |
|---|---|---|
| es01 | 192.168.0.110 | es/kibana |
| es02 | 192.168.0.111 | es |
| es03 | 192.168.0.112 | es/filebeat/nginx |
一套完整的EFK系统太耗内存了,机器配置不够的可以使用该简化版本。
三、Nginx日志格式配置
以监控Nginx日志为例。
该方案是通过修改Nginx配置文件中的日志格式,然后将格式化后的日志发给Filebeat。
1、修改ES配置文件
es01配置文件如下,es02跟es03只修改node.name跟discovery.zen.ping.unicast.hosts即可
cd /usr/local/elasticsearch-7.9.3/config && cp elasticsearch.yml elasticsearch.yml.bak

echo '
cluster.name: tz_elk
node.name: es01
node.master: true
node.data: true
path.data: /data/elasticsearch/data
path.logs: /data/elasticsearch/logs
bootstrap.memory_lock: false
bootstrap.system_call_filter: false
network.host: 0.0.0.0
http.port: 9200
discovery.zen.ping.unicast.hosts: ["192.168.0.111","192.168.0.112"] #允许发现111跟112节点
cluster.initial_master_nodes: ["192.168.0.110"]  #指定master节点
discovery.zen.minimum_master_nodes: 2
discovery.zen.ping_timeout: 150s
discovery.zen.fd.ping_retries: 10
client.transport.ping_timeout: 60s
http.cors.enabled: true
http.cors.allow-origin: "*"
' >/usr/local/elasticsearch-7.9.3/config/elasticsearch.yml

#启动
su - ela -c "cd /usr/local/elasticsearch-7.9.3/ && nohup bin/elasticsearch &"
#关闭
fuser -k -n tcp 9200
2、修改kibana配置文件
cp /usr/local/kibana-7.9.3/config/kibana.yml /usr/local/kibana-7.9.3/config/kibana.yml.bak

echo '
server.port: 5601
server.host: "192.168.0.110"
elasticsearch.hosts: ["http://192.168.0.110:9200"]
kibana.index: ".kibana"
i18n.locale: "zh-CN"
'>/usr/local/kibana-7.9.3/config/kibana.yml

#启动
su - ela -c "cd /usr/local/kibana-7.9.3/ && nohup ./bin/kibana &"
#关闭
fuser -k -n tcp 5601
3、修改Filebeat配置文件
cd /usr/local/filebeat-7.9.3/ && cp filebeat.yml filebeat.yml.bak

vim /usr/local/filebeat-7.9.3/filebeat.yml
filebeat.inputs:
- type: log
  paths:
    - /var/log/nginx/access.log
  json.keys_under_root: true #加入这三行配置,表示接收json格式的日志
  json.add_error_key: true
  json.message_key: log
output.elasticsearch:  #输出到es
  hosts: ["192.168.0.110:9200","192.168.0.111:9200","192.168.0.112:9200"]  #输出到ES节点,注意端口是9200
  index: "Nginx-access-%{+yyyy.MM.dd}" #生成的es索引名
setup.ilm.enabled: false
setup.template.enabled: false

#启动
cd /usr/local/filebeat-7.9.3/ && nohup ./filebeat -e -c filebeat.yml &
#关闭
kill -9 `ps -aux|grep filebeat|awk '{print$2}'|awk 'NR==1'`
参考资料:
json.keys_under_root介绍
setup.ilm.enabled介绍
4、修改Nginx配置文件
需要加入如下配置
#新增一个名为access_json的日志格式
log_format access_json '{"time_local":"$time_local",'
                           '"host":"$server_addr",'  #host是key,是自定义的,后面的值是nginx内置变量
                           '"clientip":"$remote_addr",'
                           '"size":$body_bytes_sent,'
                           '"responsetime":$request_time,'
                           '"upstreamtime":"$upstream_response_time",'
                           '"upstreamhost":"$upstream_addr",'
                           '"http_host":"$host",'
                           '"url":"$uri",'
                           '"domain":"$host",'
                           '"xff":"$http_x_forwarded_for",'
                           '"referer":"$http_referer",'
                           '"status":"$status"}';
    access_log  /var/log/nginx/access.log  access_json;
    #注释掉原来的日志格式
    #access_log  /var/log/nginx/access.log  main;
参考资料:Nginx变量
5、重启服务
#检查配置文件是否正确
cd /usr/local/filebeat-7.9.3/
./filebeat test config
nginx -t

#重启filebeat
kill -9 `ps -aux|grep filebeat|awk '{print$2}'|awk 'NR==1'`
cd /usr/local/filebeat-7.9.3/ && nohup ./filebeat -e -c filebeat.yml &

#重新加载Nginx配置文件
nginx -t
systemctl reload nginx
6、验证
1)清空日志文件,增加访问日志
> /var/log/nginx/access.log
yum -y install httpd-tools

#批量访问nginx,产生access.log
ab -c 2 -n 9999 http://192.168.0.112/

#批量访问nginx,产生error.log,xxx为不存在的资源,访问不存在的资源会报404
ab -c 2 -n 9999 http://192.168.0.112/xxx
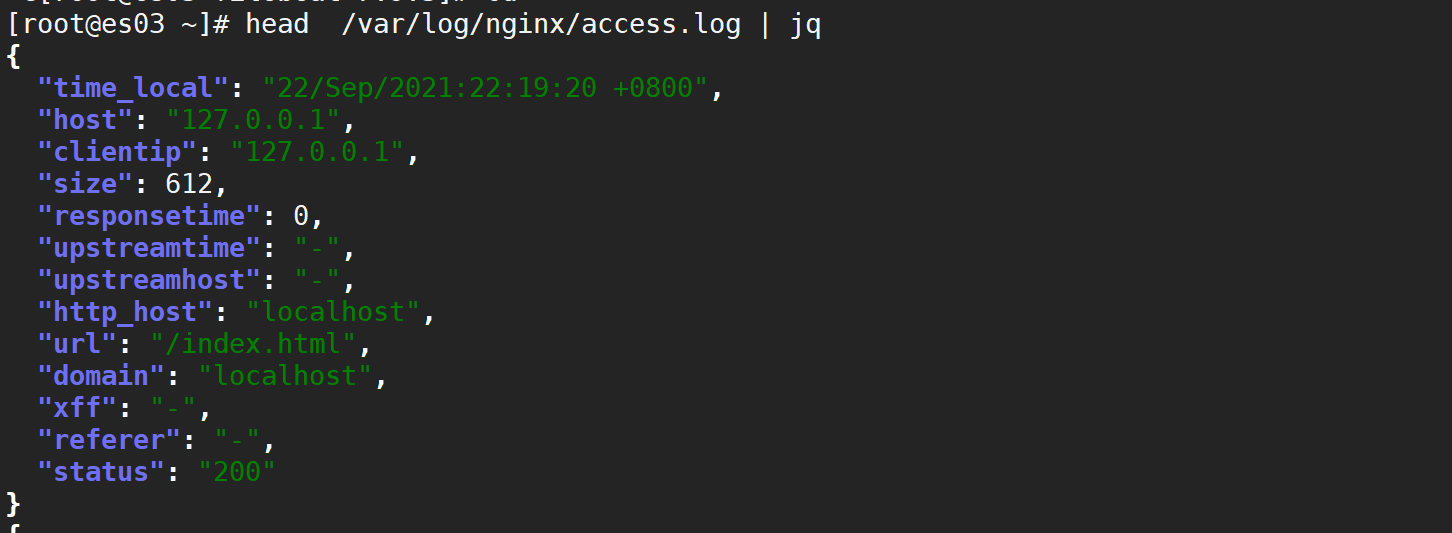
这时Nginx的访问日志格式如下
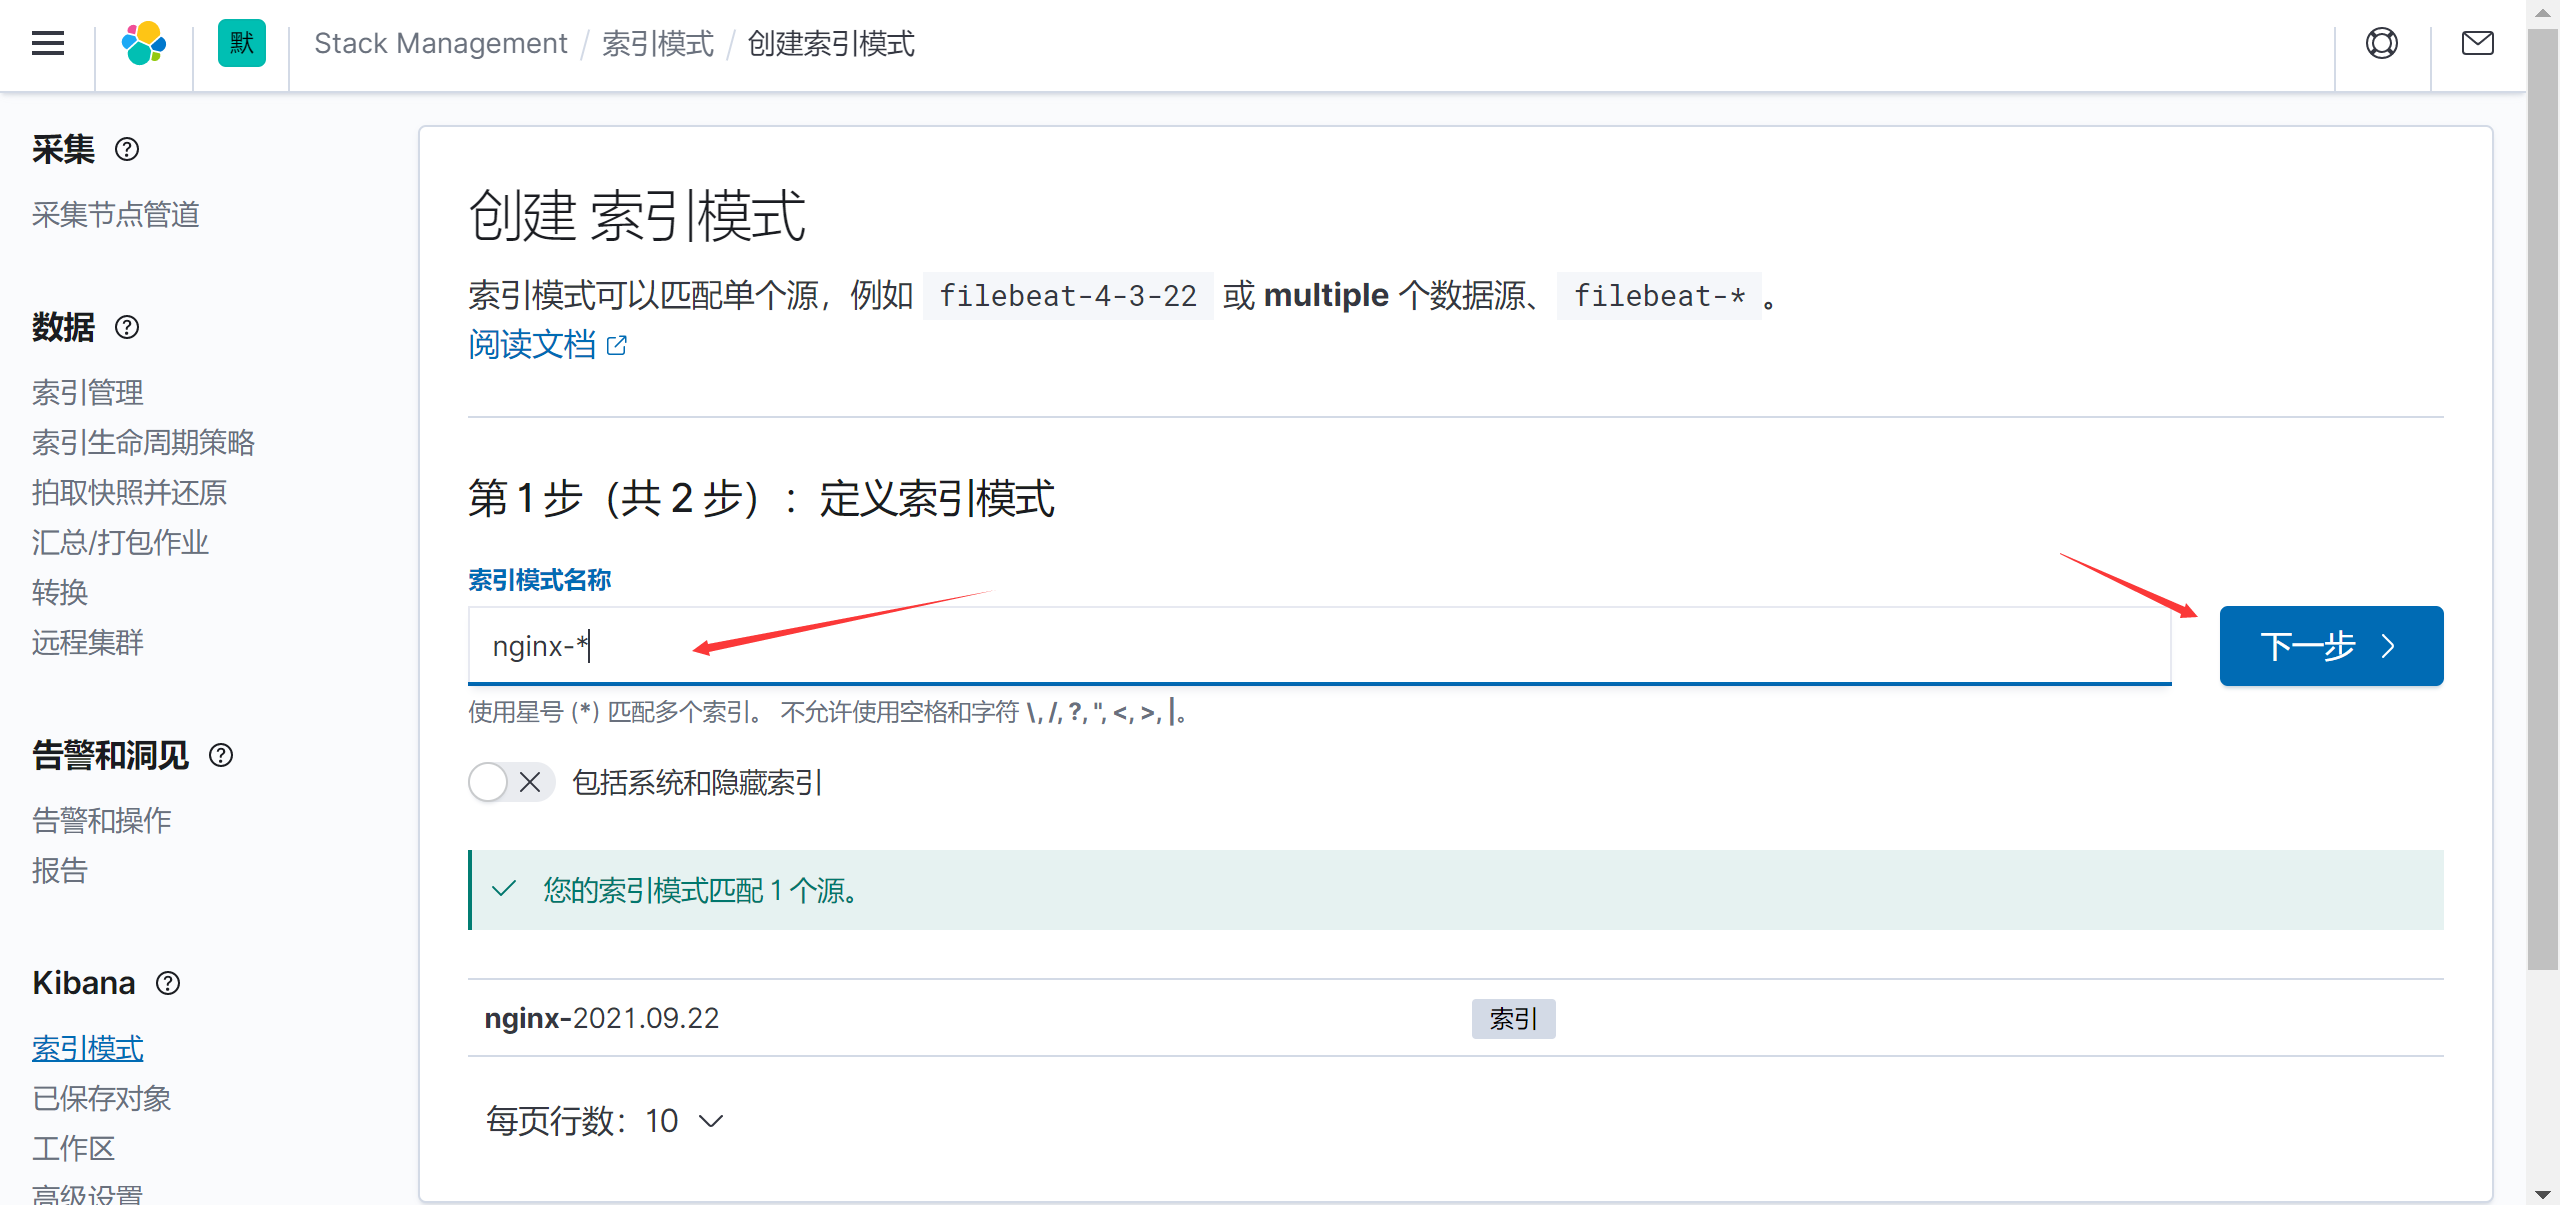
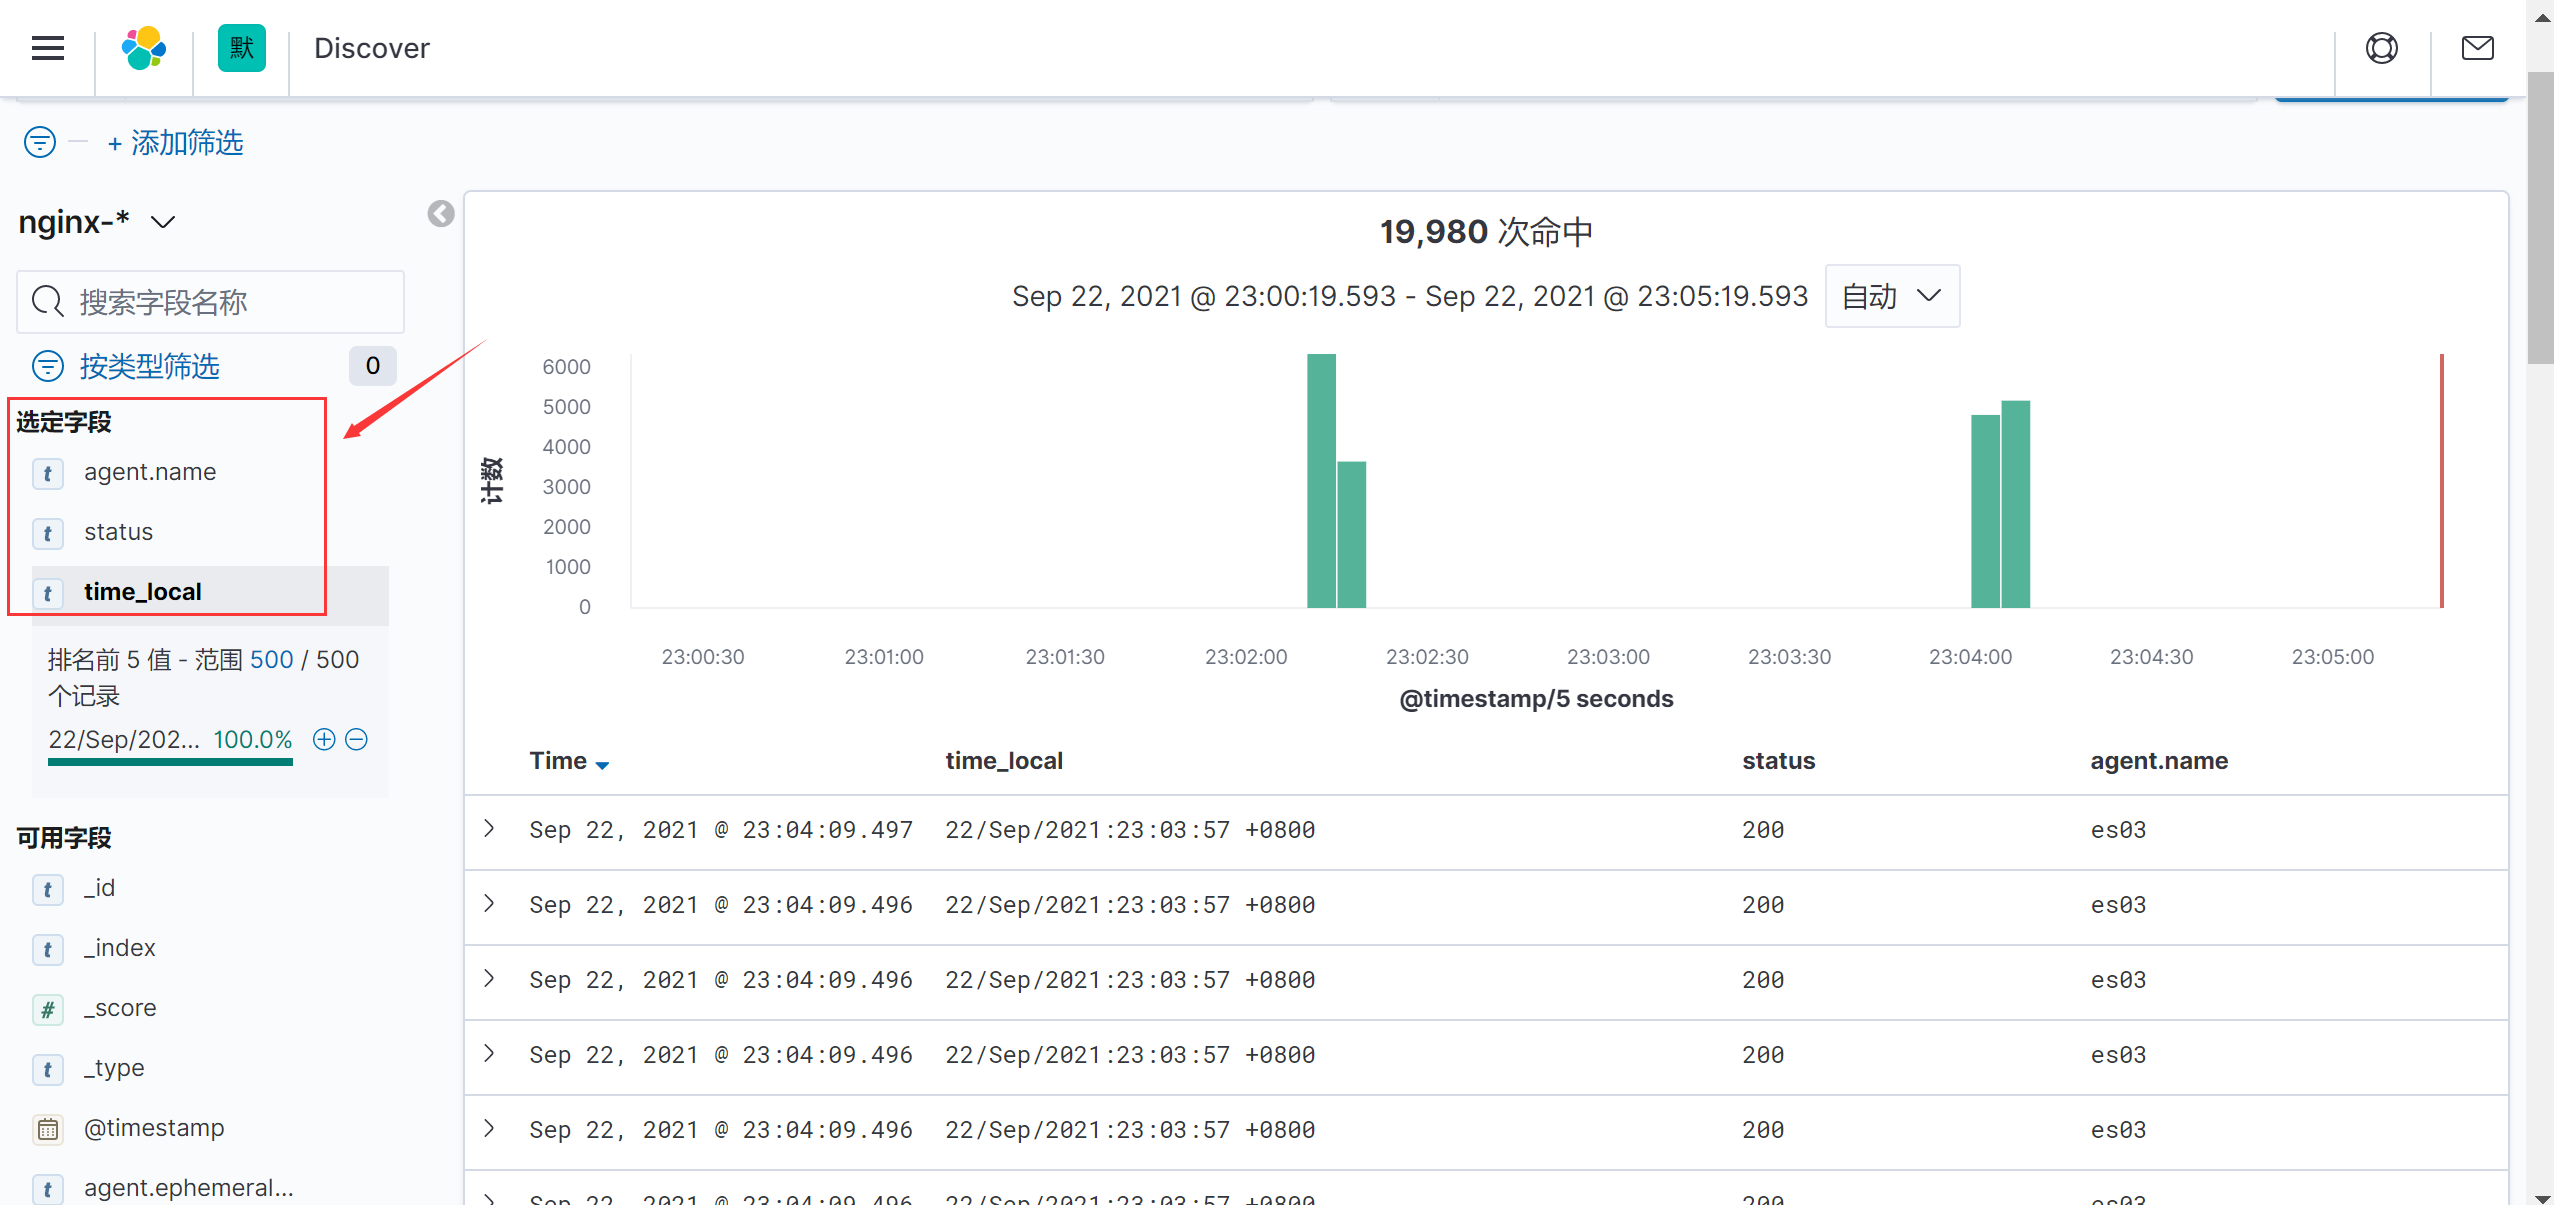
2)访问Kibana,创建索引模式,选定字段,查看效果

四、按类型分类日志
前面介绍了Nginx日志格式处理,但只接收了access.log日志,如果要看error.log以及其他日志怎么办呢?
非常好办,直接修改Filebeat配置文件即可。
1、修改Filebeat配置文件
vim /usr/local/filebeat-7.9.3/filebeat.yml
filebeat.inputs:
- type: log
  enabled: true
  paths:
    - /var/log/nginx/access.log
  json.keys_under_root: true
  json.add_error_key: true
  json.message_key: log
  tags: ["access"]

- type: log
  enabled: true
  paths:
    - /var/log/nginx/error.log
  tags: ["error"]

output.elasticsearch:
  hosts: ["192.168.0.110:9200","192.168.0.111:9200","192.168.0.112:9200"]
  indices:
    - index: "Nginx-access-%{+yyyy.MM.dd}"
      when.contains:
        tags: "access"
    - index: "Nginx-error-%{+yyyy.MM.dd}"
      when.contains:
        tags: "error"
setup.ilm.enabled: false
setup.template.enabled: false

#重启filebeat
kill -9 `ps -aux|grep filebeat|awk '{print$2}'|awk 'NR==1'`
cd /usr/local/filebeat-7.9.3/ && nohup ./filebeat -e -c filebeat.yml &
2、修改nginx配置文件
增加error.log日志格式处理
vim /etc/nginx/ningx.conf
 log_format error_json ' {
        "time_local":"$time_local",'
        '"clientip":"$remote_addr",'
        '"size":$body_bytes_sent,'
        '"responsetime":$request_time,'
        '"http_host":"$host",'
        '"url":"$uri",'
        '"domain":"$host",'
        '"status":"$status"
        }';

   access_log /var/log/nginx/error.log error_json;

#重启nginx
nginx -t
systemctl restart nginx

#清空日志文件
>/var/log/nginx/error.log

#批量访问nginx,产生error.log,xxx为不存在的资源,访问不存在的资源会报404
ab -c 2 -n 9999 http://192.168.0.112/xxx
这里要注意的是使用
nginx -t检查语法,语法没错不代表配置文件配置正确了,最好重启Nginx。
3、验证
创建索引模式,查看效果
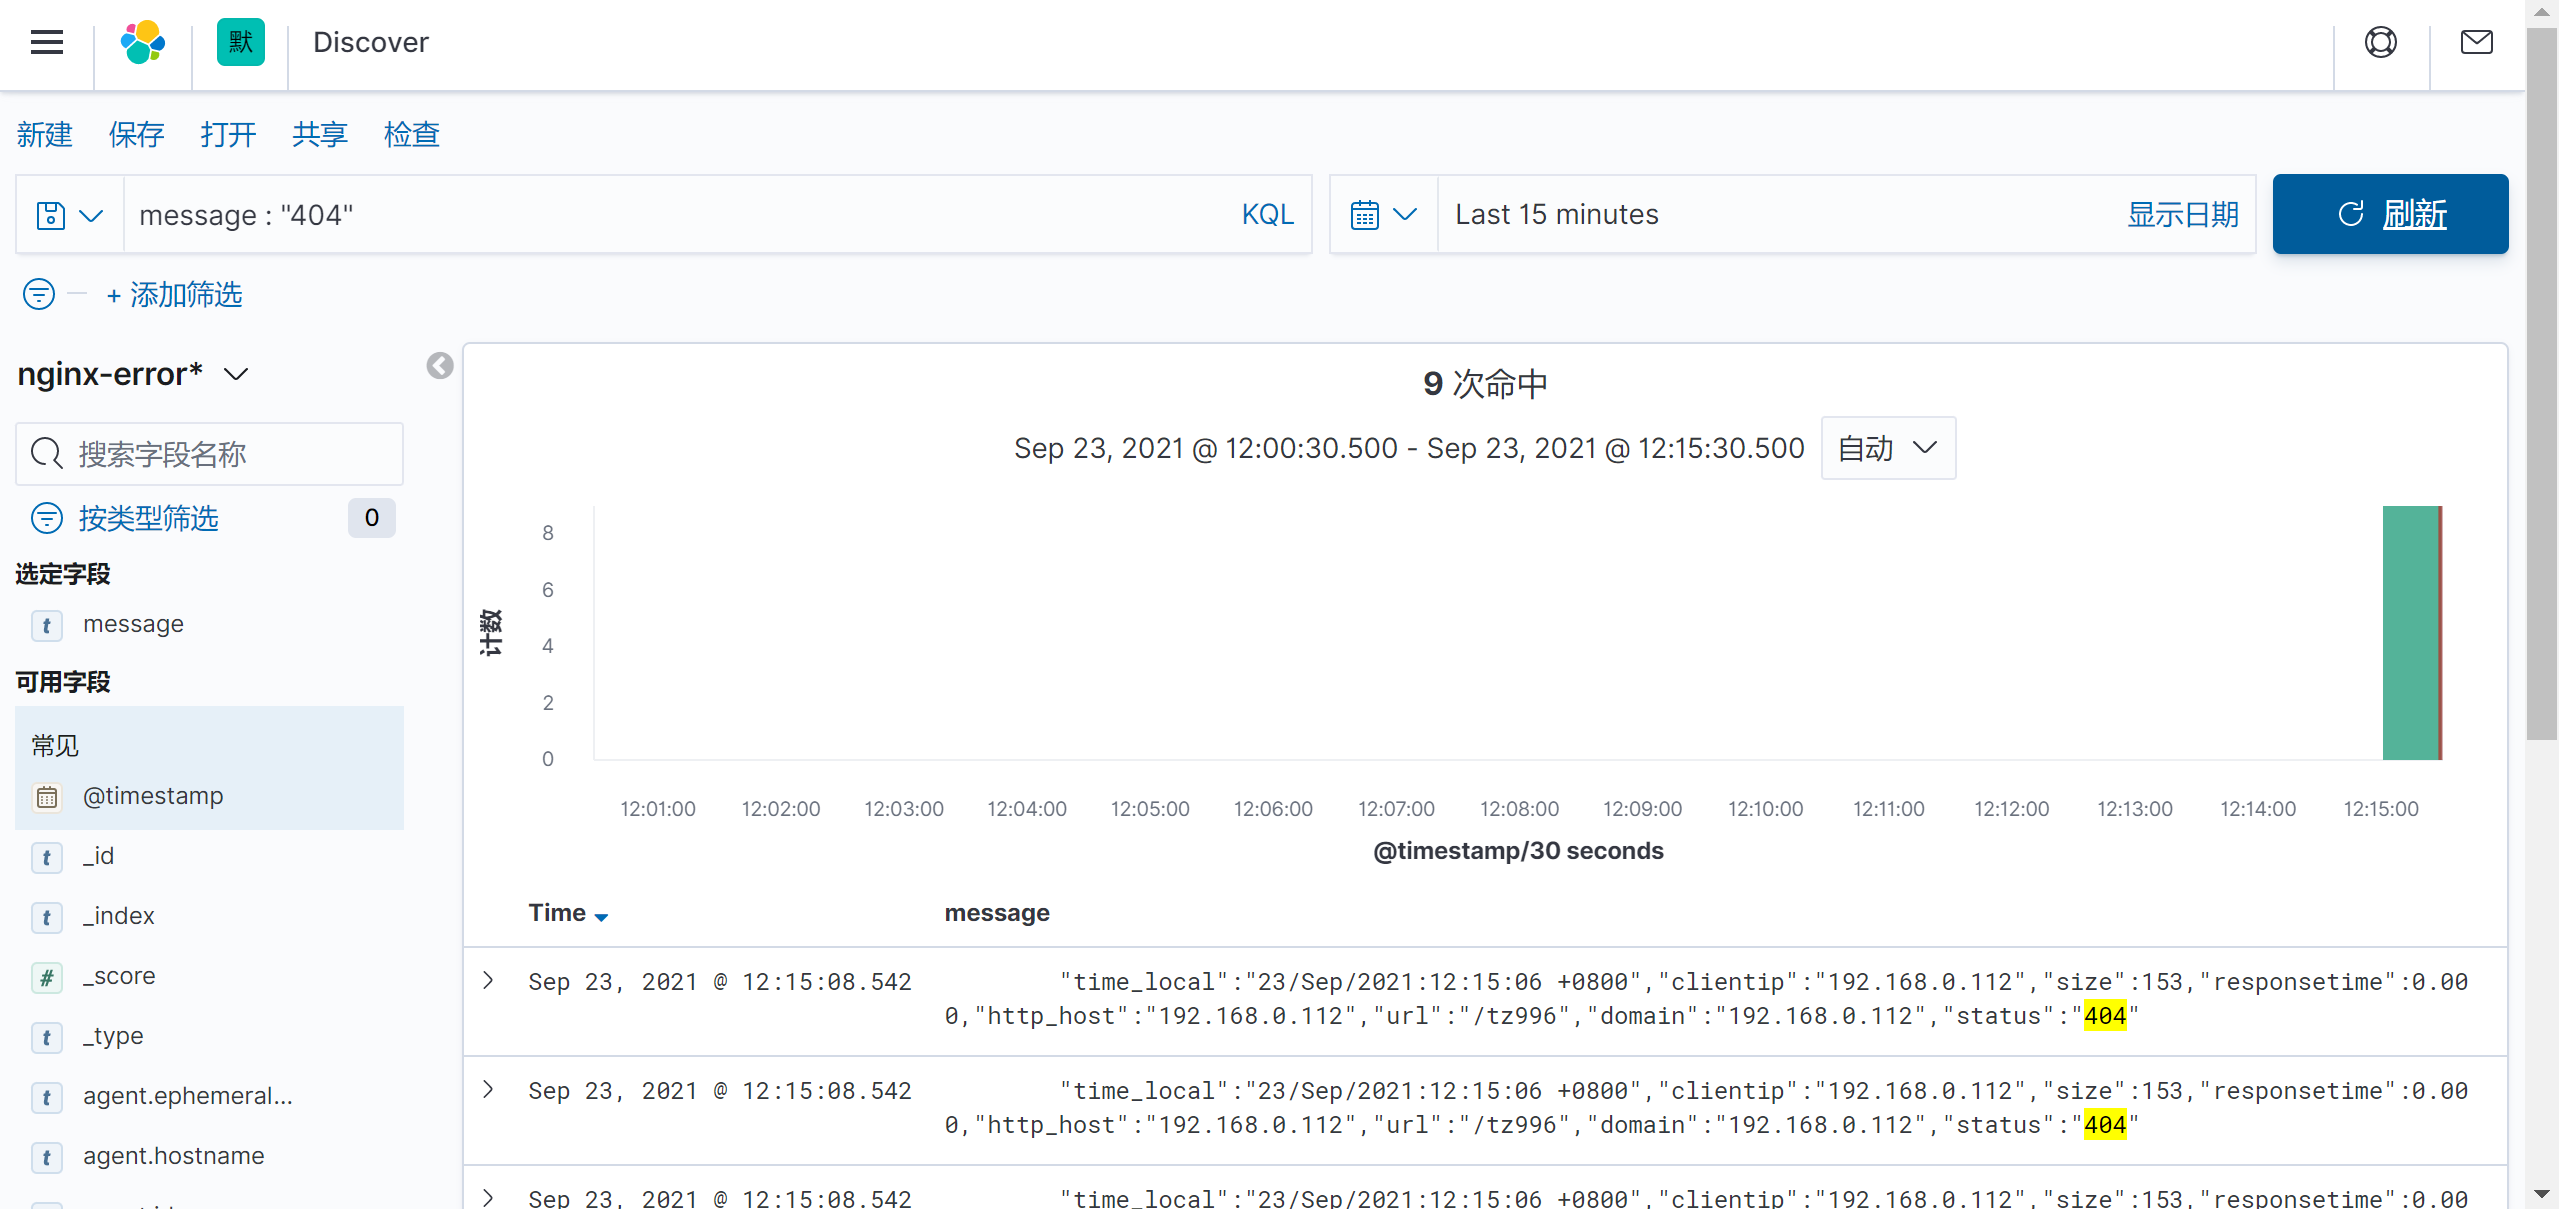
这里的error.log日志格式生效了,但因为无法形成标准的json格式,因为有些错误日志信息如下,故所有信息还是在message字段中。

五、Kibana查询语言
1、批量产生404日志
访问不存在的资源就会产生404报错,tz996是不存在的资源,也可以写成其他的。
ab -c 2 -n 9990 http://192.168.0.112/tz996
2、使用Kibana查询语言
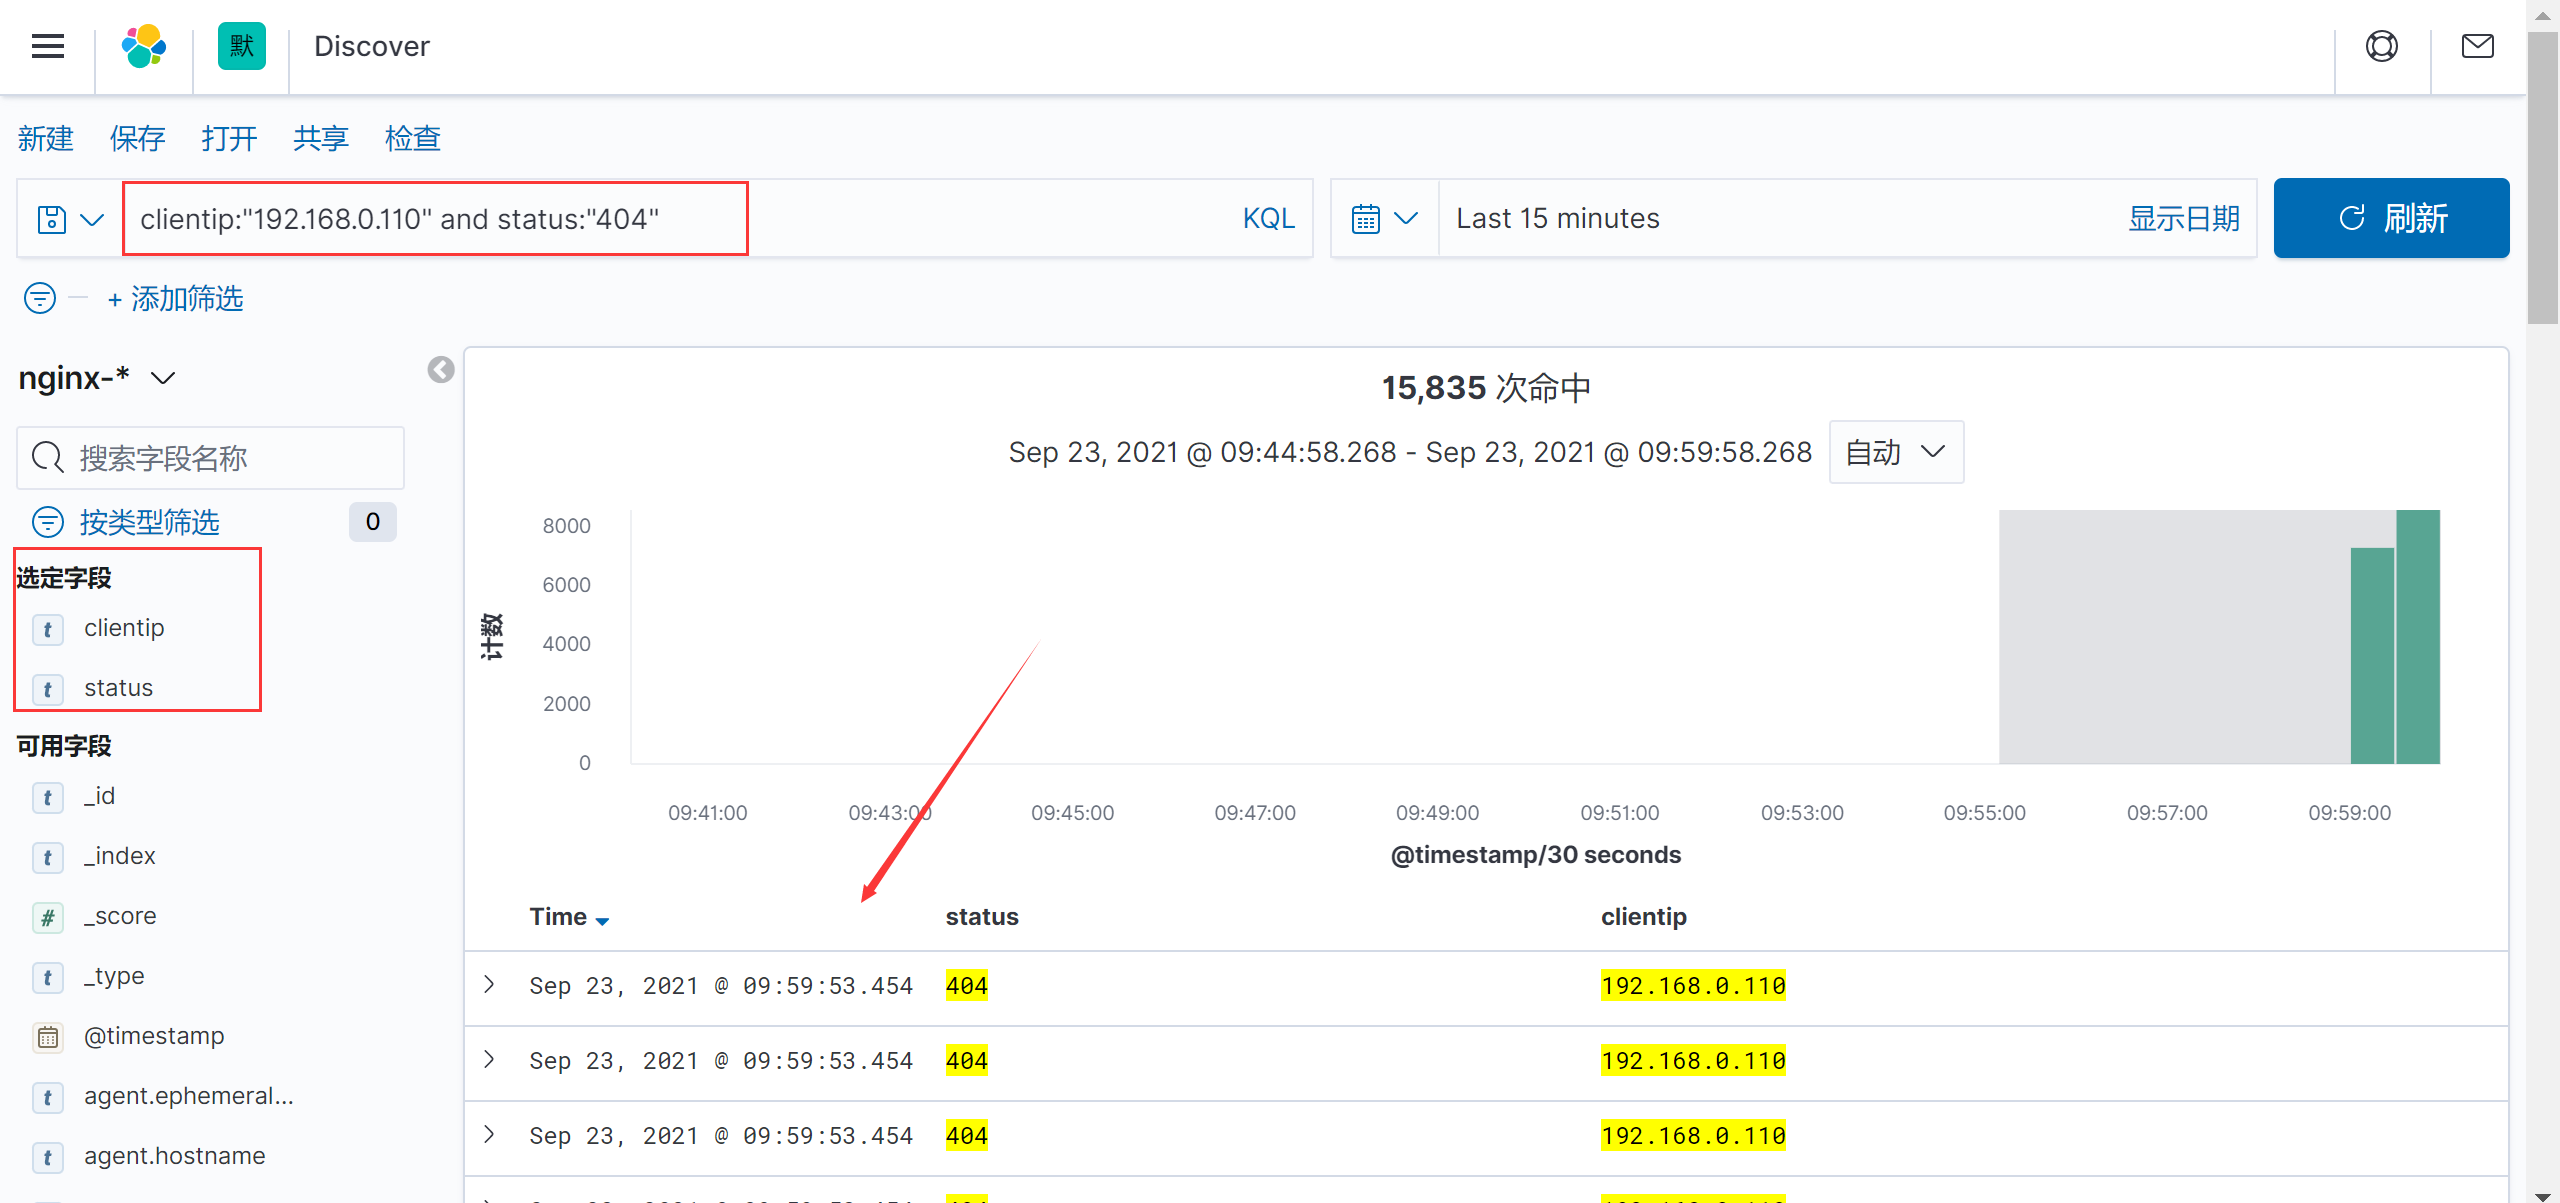
搜索客户端IP为192.168.0.110,状态码为404的日志
详情见官方文档


