
nginx简述
编译安装nginx
@1
@2.验证版本
@3.创建nginx自启动文件
@4验证自启动文件
[root@centos8-2 nginx]# systemctl status nginx
● nginx.service - The nginx HTTP and reverse proxy server
Loaded: loaded (/usr/lib/systemd/system/nginx.service; disabled; vendor preset: disabled)
Active: active (running) since Wed 2021-12-22 10:41:17 CST; 4h 1min ago
Process: 4900 ExecStart=/apps/nginx/sbin/nginx -c /apps/nginx/conf/nginx.conf (code=exited, status=0/SUCCESS)
Process: 4898 ExecStartPre=/apps/nginx/sbin/nginx -t (code=exited, status=0/SUCCESS)
Process: 4897 ExecStartPre=/usr/bin/rm -f /apps/nginx/logs/nginx.pid (code=exited, status=0/SUCCESS)
Main PID: 4902 (nginx)
Tasks: 2 (limit: 23503)
Memory: 6.8M
CGroup: /system.slice/nginx.service
├─4902 nginx: master process /apps/nginx/sbin/nginx -c /apps/nginx/conf/nginx.conf
└─4903 nginx: worker process
nginx的平滑升级和回滚(14版本到20版本)
1查看目前的版本(此版本是yum安装)
[root@centos8-2 ~]# nginx -v
nginx version: nginx/1.14.1
2下载更新版本
3 按照14版本的编译参数重新编译
[root@centos8-3 nginx-1.20.1]# make (只要make)
[root@centos8-3 nginx-1.20.1]# objs/nginx -v (新版版本)
nginx version: nginx/1.20.1
4查看下两个版本
[root@centos8-3 nginx-1.20.1]# ll objs/nginx /usr/sbin/nginx
-rwxr-xr-x 1 root root 9044728 Dec 22 16:02 objs/nginx
-rwxr-xr-x 1 root root 1264168 Oct 8 2019 /usr/sbin/nginx
5将旧版nginx备份
[root@centos8-3 nginx-1.20.1]# mv /usr/sbin/nginx /usr/sbin/nginx.old
6将新版nginx复制过去
[root@centos8-3 sbin]# cp -a objs/nginx /usr/sbin
7检测下有没有问题
[root@centos8-3 sbin]# nginx -v
nginx version: nginx/1.20.1
8
[root@centos8-3]#kill -USR2 `cat /run/nginx.pid`(将原有主进程的id重命名为nginx.pid.oldbin,两个master都在运行,只是旧的master不在监听,由新的master接手)[root@centos8-3 ]#kill -WINCH `cat /run/nginx.pid.oldbin` (向原Nginx主进程发送WINCH信号,它会逐步关闭旗下的工作进程(主进程不退出),这时所有请求都会由新版Nginx处理)
9回滚
配置简述
yum安装配置(橙色均为优化项)
[root@centos7-2 nginx]# grep -Ev "^$|#" nginx.conf
user nginx;
worker_processes auto; 启动nginx worker进程的数量,auto会自动和cpu核数相同
worker_cpu_affinity auto; worker进程绑定cpu核心,减少CPU对进程的资源分配与回收以及内存管理等,因此可以有效的提升nginx服务器的性能。
########################## watch -n1 'ps -axo pid,cmd,nice,psr | grep nginx' (可以查看到cpu的切换)
error_log /var/log/nginx/error.log;
pid /run/nginx.pid;
worker_rlimit_nofile 65536;
worker进程能打开的文件数量上限,包括nginx的所有连接(代理服务器等),而不仅仅是客户端。值可以百万
worker_priority 0;
include /usr/share/nginx/modules/*.conf;
events {
worker_connections 65535; 设置单个工作进程的最大并发连接数
accept_mutex on; on为同一时刻一个请求轮流由work进程处理,而防止被同时唤醒所有worker,避免多个睡眠进程被唤醒的设置
multi_accept on; ON时Nginx服务器的每个工作进程可以同时接受多个新的网络连接
}
http {
log_format main '$remote_addr - $remote_user [$time_local] "$request" '
'$status $body_bytes_sent "$http_referer" '
'"$http_user_agent" "$http_x_forwarded_for"';
access_log /var/log/nginx/access.log main;
sendfile on;
tcp_nopush on; 在开启sendfile时,tcp请求可以被合并同一发送给客户端
tcp_nodelay on; 在开启keepalived模式下的连接,on表示不延迟发送,立即发送用户响应报文
keepalive_timeout 65; 会话超时时间
gzip on; 开启文件压缩
gzip_comp_level 5; 压缩从低到高1-9
gzip_min_length 1k; 压缩的最小文件,小于1k不压
gzip_types text/plain application/javascript application/x-javascript text/css application/xml text/javascript application/x-httpd-php image/gif image/png; 对那些资源类型压缩
gzip_vary on; 启动压缩,在响应报文首部插入"vary:accept-encoding",一般开启
types_hash_max_size 4096;
include /etc/nginx/mime.types;
default_type application/octet-stream;
include /etc/nginx/conf.d/*.conf;
server {
listen 80;
listen [::]:80;
server_name _;
root /usr/share/nginx/html;
include /etc/nginx/default.d/*.conf;
error_page 404 /404.html;
location = /404.html {
}
error_page 500 502 503 504 /50x.html;
location = /50x.html {
}
}
}
新建web站点
[root@centos7-2 conf.d]# cat /etc/nginx/conf.d/test.conf
server {
 listen 80;
server_name www.lxg.com;
location / {
 root  /data/nginx/pc;

}
}
[root@centos7-2 ~]# ll /data/nginx/pc/*
-rw-r--r-- 1 root root 61072 12月 23 14:06 /data/nginx/pc/2.PNG
-rw-r--r-- 1 root root 7 12月 23 13:51 /data/nginx/pc/index.html
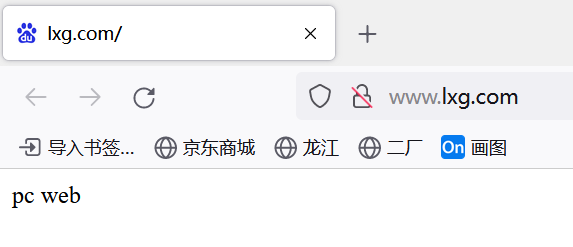
[root@centos7-2 ~]# cat /data/nginx/pc/index.html
pc web
在本地电脑或者其他虚机做个解析,我的web虚机是192.168.10.32,所以192.168.10.32 www.lxg.com。访问静态资源的时候会首先去web虚机的/data/nginx/pc目录去寻找,因为location匹配的是/,优先级最低。然后默认会去寻找index.html


[root@centos7-2 ~]# cat /etc/nginx/conf.d/test.conf
server {
 listen 80;
server_name www.lxg.com;
location / {
 root  /data/nginx/pc;
}
location /about {      一旦location新增一个路径,就必须在root的原始路径下新增一个目录。寻找资源的路径变成了/data/nginx/pc/about
 root /data/nginx/pc;
}
}
[root@centos7-2 ~]# cat /data/nginx/pc/about/index.html
about

[root@centos7-2 pc]# cat /etc/nginx/conf.d/test.conf
server {
listen 80;
server_name www.lxg.com;
location / {
root /data/nginx/pc;
}
#location /about {
# root /data/nginx/pc;
#}
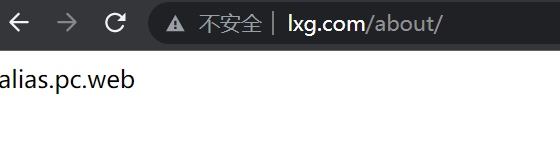
location /about {
alias /opt/nginx/pc; 当访问www.lxg.com/about时,就去/opt/nginx/pc寻找资源。
}
}
[root@centos7-2 pc]# cat /opt/nginx/pc/index.html
alias.pc.web
总结
location的匹配规则
nginx账号认证功能(由 ngx_http_auth_basic_module 模块提供此功能)
location /login {
root /data/nginx/html;
index index.html;
auth_basic   "login password";
auth_basic_user_file  /etc/nginx/.htpasswd;
}
[root@centos7-2 ~]# ll /data/nginx/html/login/
总用量 4
-rw-r--r-- 1 root root 6 12月 23 17:12 index.html
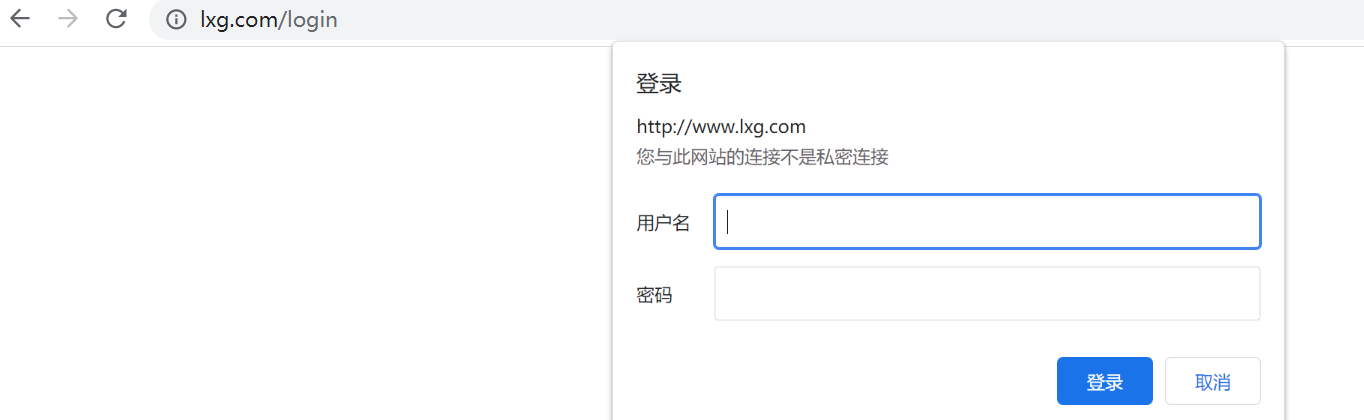
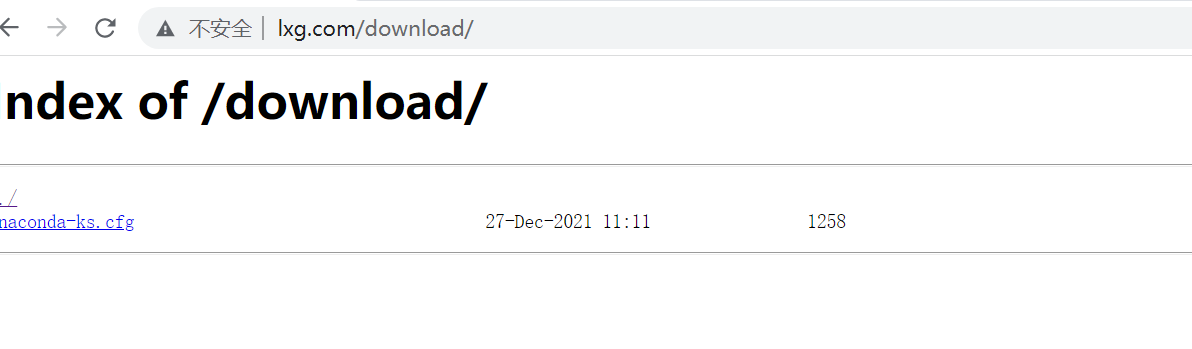
nginx作为下载服务器配置
nginx日志格式
1选择默认主配置文件已有的main日志格式进行各个域名的不同日志存放
server {
 listen 80;
server_name www.lxg.com;
error_log  /var/log/nginx/www.lxg.com-error.log info;
access_log  /var/log/nginx/www.lxg.com-access.log main;    调用主配置文件的main格式
location / {
 root  /data/nginx/pc;
}
2自定义日志格式
log_format access_json '{"@timestamp":"$time_iso8601",'
        '"host":"$server_addr",'    域名服务器
        '"clientip":"$remote_addr",'  客户端公网地址
        '"size":$body_bytes_sent,'
        '"responsetime":$request_time,'
        '"upstreamtime":"$upstream_response_time",'
        '"upstreamhost":"$upstream_addr",'
        '"http_host":"$host",'
        '"uri":"$uri",'
        '"xff":"$http_x_forwarded_for",'
        '"referer":"$http_referer",'
        '"tcp_xff":"$proxy_protocol_addr",'
        '"http_user_agent":"$http_user_agent",'
        '"status":"$status"}';
        access_log   /var/log/nginx/access_json.log access_json;
此日志格式放在了主配置里面,配置完后重启nginx
[root@centos7-2 nginx]# cat access_json.log
{"@timestamp":"2021-12-28T00:19:14+08:00","host":"192.168.10.32","clientip":"192.168.10.1","size":548,"responsetime":0.000,"upstreamtime":"-","upstreamhost":"-", "http_host":"www.lxg.com","uri":"/2.PNG","xff":"-","referer":"-","tcp_xff":"-","http_user_agent":"Mozilla/5.0 (Windows NT 10.0; Win64; x64) AppleWebKit/537.36 (KHTML, like Gecko) Chrome/96.0.4664.93 Safari/537.36","status":"404"}
nginx的https加密
[root@centos7-2 nginx]# mkdir /etc/nginx/certs
[root@centos7-2 nginx]# cd /etc/nginx/certs
[root@centos7-2 nginx]# openssl req -newkey rsa:4096 -nodes -sha256 -keyout ca.key -x509 -days 3650 -out ca.crt 生成ca自签名证书
[root@centos7-2 nginx]# openssl req -newkey rsa:4096 -nodes -sha256 -keyout www.lxg.com.key -out www.lxg.com.csr 客户端申请证书
[root@centos7-2 nginx]# openssl x509 -req -days 3650 -in www.lxg.com.csr -CA ca.crt -CAkey ca.key -CAcreateserial -out www.lxg.com.crt 服务器签发证书
[root@centos7-2 nginx]# cat www.lxg.com.crt ca.crt >www.lxg.com.pem 将服务器证书和ca证书合并,服务器证书在前
server {
 listen 80;
listen 443 ssl;
        ssl_certificate /etc/nginx/certs/www.lxg.com.pem;
        ssl_certificate_key /etc/nginx/certs/www.lxg.com.key;
        ssl_session_cache shared:sslcache:20m;  在各个worker之间使用一个共享的缓存,需要定义缓存名字和缓存空间大小,多个虚拟主机可以使用同一个
        ssl_session_timeout 10m;     客户端连接可以复用session cache缓存的有效时长,默认5分钟

server_name www.lxg.com;

nginx的favicon.ico问题(用了下百度的logo)
server{
listen 80;
server www.lxg.com;
location = /favicon.ico {
root /data/nginx/static3;
}
}
nginx的rewrite相关功能
if指令
if (条件匹配) { action}
set指令
指定key并给其定义一个变量,变量可以调用Nginx内置变量赋值给key,另外set定义格式为set $key
value,value可以是text, variables和两者的组合。
break指令
用于中断当前相同作用域(location)中的其他Nginx配置,与该指令处于同一作用域的Nginx配置中,位于它前面的配置生效,位于后面的 ngx_http_rewrite_module 模块中指令就不再执行,Nginx服务器
在根据配置处理请求的过程中遇到该指令的时候,回到上一层作用域继续向下读取配置,该指令可以在server块和locationif块中使用
return指令
return用于完成对请求的处理,并直接向客户端返回响应状态码,比如:可以指定重定向URL(对于特殊重定向状态码,301/302等) 或者是指定提示文本内容(对于特殊状态码403/500等),处于此指令后的所有配置都将不被执行,return可以在server、if 和 location块进行配置
return code; #返回给客户端指定的HTTP状态码
return code [text]; #返回给客户端的状态码及响应报文的实体内容,可以调用变量,其中text如果有空格,需要用单或双引号
return code URL; #返回给客户端的URL地址
server {
listen 80;
server_name www.lxg.com;
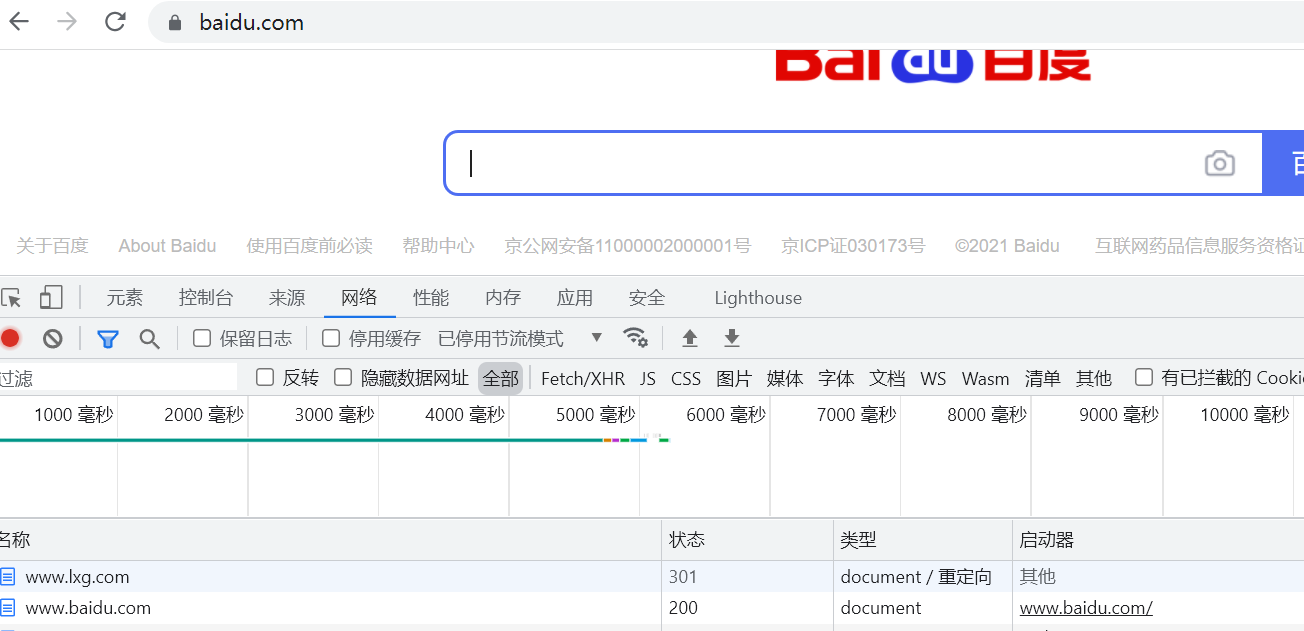
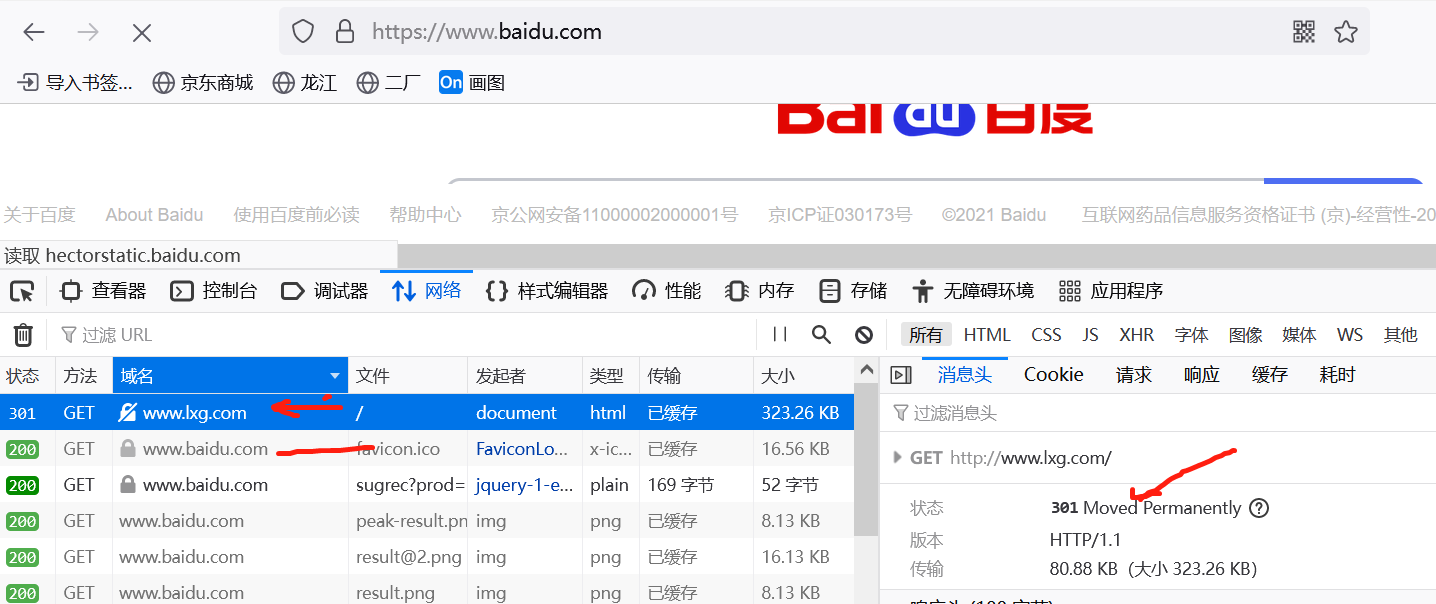
return 301 https://www.baidu.com;
}
rewrite指令
server {
listen 80;
server_name www.lxg.com;
return 301 https://www.baidu.com;
rewrite / http://www.baidu.com permanent; 永久跳转,会有缓存
# rewrite / http://www.baidu.com redirect; 临时跳转
}
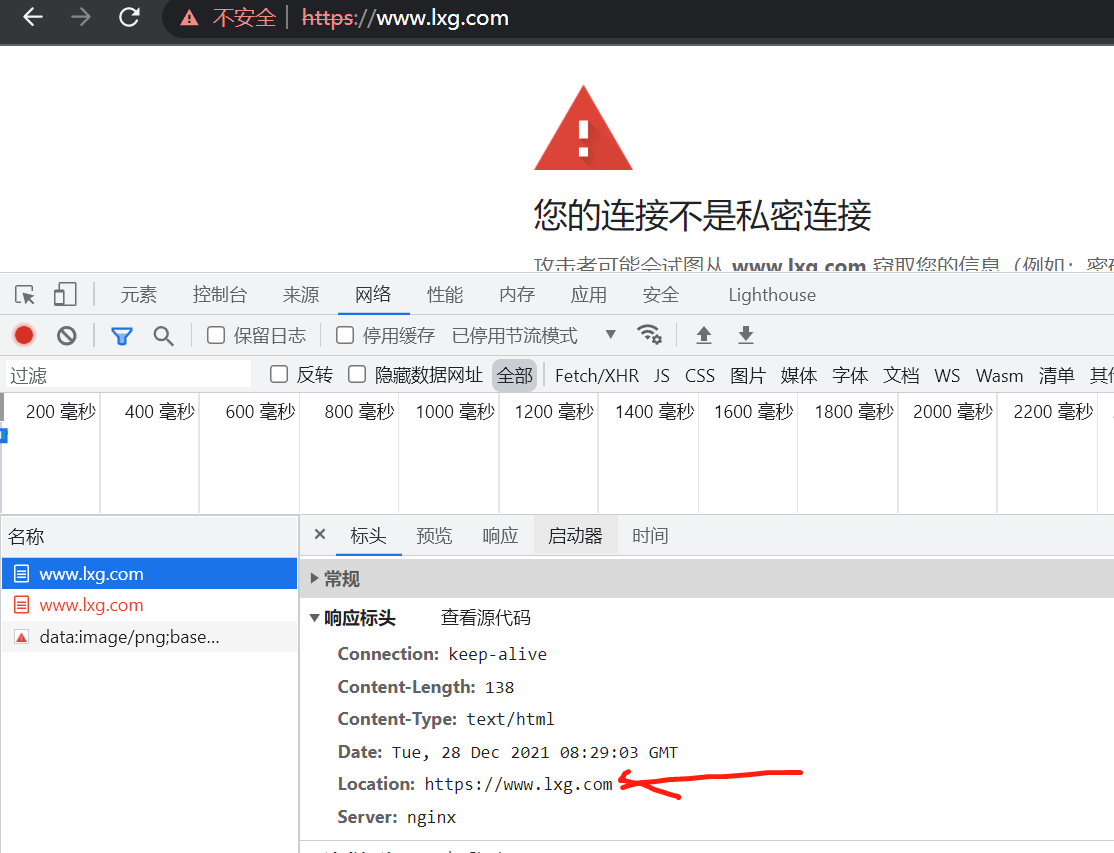
http自动跳转https
server {
 listen 80;
 server_name www.lxg.com;
if ($scheme = http) {     必须加判断条件,不然会死循环,默认好像是10次
rewrite / https://$host redirect;
}
}
当用户访问到网站的时输入了一个错误的URL,可以将用户重定向至官网首页
location / {
   root /data/nginx/html/pc;
   index index.html;
    if (!-e $request_filename) {
       rewrite .* http://www.lxg.com/index.html; #实现客户端浏览器的302跳转
        #rewrite .* /index.html; #web服务器内部跳转
nginx的反向代理
基础
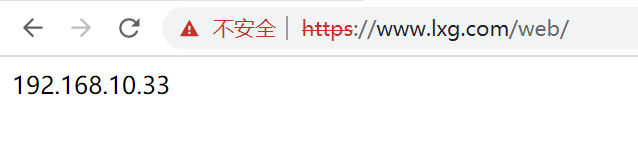
location /web {
proxy_pass  http://192.168.10.33:80;    一般80后面不加/,这样寻找的资源路径时后端应用服务器的web目录,完整路径为192.168.10.33/web/index.html。如果加了/,那么等同于alias,访问的资源路径为192.168.10.33/index.html
#proxy——hide_header Etag;     影藏后端服务器etag首部字段
#proxy_pass_header Server;   透传后端服务器的server。这里就是透传的apache版本,默认是不透传
#proxy_pass_header Server;   透传后端服务器的date。
#proxy_pass_request_body on;     是否向后端服务器发送http实体部分,默认开启
#proxy_pass_request_headers on;  是否将客户端的请求发送给后端服务器,默认开启
#proxy_set_header  X-Forwarded-For  $proxy_add_x_forwarded_for;  后端服务器想要获取客户端的真实ip,更改每一个报文的头部,透传过去。总结客户端地址和代理服务器地址都收到
#proxy_set_header X-Real-IP $remote_addr;添加HOST到报文头部,如果客户端为NAT上网那么其值为客户端的共用的公网IP地址,常用于在日之中记录客户端的真实IP地址。
#proxy_connect_timeout 600s;   nginx与后端服务器尝试建立连接的超时时间,默认为60s
#proxy_read_timeout 600s;   nginx向后端服务器发起read的超时时间,默认为60s
#proxy_send_timeout 600s;   nginx向后端服务器发起write的超时时间,默认为60s
#proxy_http_version 1.1;     nginx提供代理服务器的http协议版本
#proxy_ignore_client_abort off;当客户端网络中断请求时,nginx服务器中断其对后端服务器的请求。
#proxy_headers_hash_bucket_size 128;#当配置了 proxy_hide_header和proxy_set_header的时候,用于设置nginx保存HTTP报文头的hash表的上限
#proxy_headers_hash_max_size 512;  #设置proxy_headers_hash_bucket_size的最大可用空间
#server_namse_hash_bucket_size 512;  #server_name hash表申请空间大小
#server_names_hash_max_size  512;    #设置服务器名称hash表的上限大小
}
[root@centos7-3 web]# cat /var/www/html/web/index.html 后端用apache写个index.html
192.168.10.33
访问下
当找不到后端应用服务器资源时,会报404。此时的404是由apache发出的,因为nginx已经转发过去了
nginx反向代理缓存(默认关闭,需要配置才能启用)
[root@centos7-2 ~]# vim /etc/nginx/nginx.conf (缓存配置我是放在http模块)
proxy_cache_path /data/nginx/proxy_cache #定义缓存保存路径,proxy_cache会自动创建。前面的路径必须存在,这里就是/data/nginx levels=1:2:2 #定义缓存目录结构层次,1:2:2可以生成2^4x2^8x2^8=2^20=1048576个目录 keys_zone=proxycache:20m #指内存中缓存的大小,主要用于存放key和metadata(如:使用次数) inactive=120s #缓存有效时间 max_size=1g; #最大磁盘占用空间,磁盘存入文件内容的缓存空间最大值
proxy_cache_path /data/nginx/proxy_cache levels=1:1:1 keys_zone=proxycache:20m inactive=120s max_size=1g; 配置时连起来写
[root@centos7-2 ~]# vim /etc/nginx/conf.d/test.conf (可以放在server模块对整个站点生效,也可以放在location单个中对某个资源生效)
proxy_cache proxycache; 调用上面的缓存名字,必须一致
proxy_cache_key $request_uri; 对指定的数据进行md5的运算作为缓存的key
proxy_cache_valid 200 302 301 10m; 对指定的状态码返回的数据缓存时长
proxy_cache_valid any 1m; 除指定外的状态码返回的数据缓存时长,必须设置,不然不缓存
proxy_cache_use_stale error timeout invalid_header updating http_500 http_502 http_503 http_504 http_403 http_404; 后端服务器出现这些情况使用过期的缓存
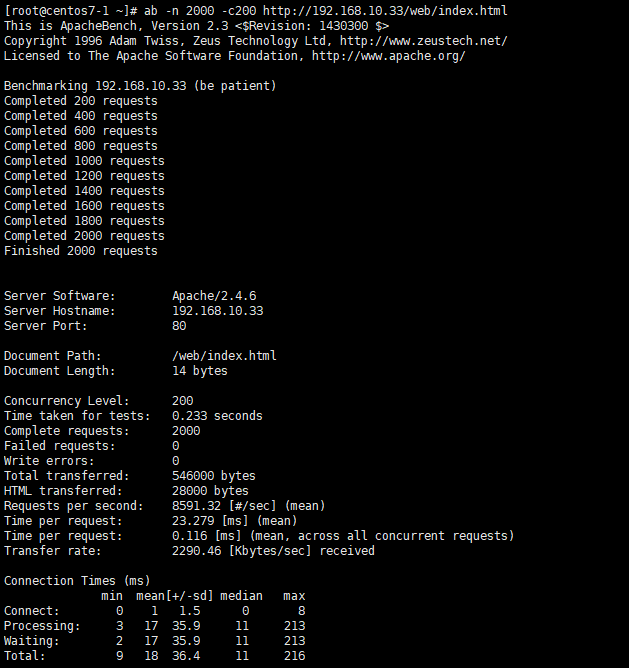
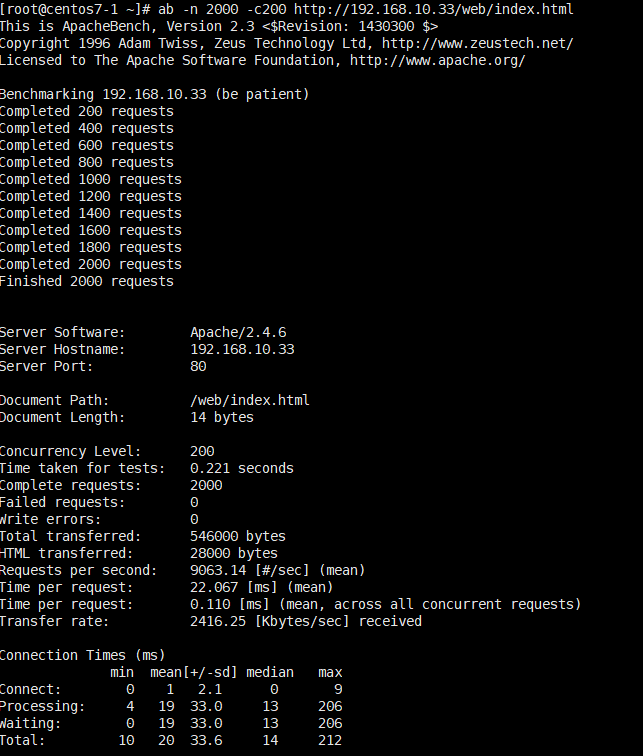
对比下性能,有点提升
nginx反向代理高级功能 (http upstream)
架构: client(192.168.10.31)---- nginx(192.168.10.32) -----httpd(192.168.10.33,192.168.10.34)

[root@centos7-2 nginx]# vim /etc/nginx/conf.d/test.conf

 upstream webserver {  自定义一组服务器名字
 #hash $request_uri consistent;  基于用户请求的uri做hash。比如你去访问location的web资源,那么会记录下来。不管你用任何客户端都是调度到同一个后端节点
 #hash  $cookie_sessionid  基于cookie的session id这个key做hash,实现会话绑定
 #ip_hash;   源地址hash,基于客户端的remote_addr实现会话绑定
 #least_conn; 最小链接调度算法
 server 192.168.10.33:80 weight=1 fail_timeout=5s max_fails=3;  后端服务器状态检测,权重为1,连续超时5s,最大失败次数3次
 server 192.168.10.34:80  weight=1 fail_timeout=5s max_fails=3;

}
server {
 listen 80;
server_name www.lxg.com;
location /web {
index index.html;
proxy_pass  http://webserver;    代理上面定义的服务器名字。注意webserver后不要加/,原理和alias一样
#proxy_pass_header Server;
#proxy_pass_header Date;
#proxy_set_header  X-Forwarded-For  $proxy_add_x_forwarded_for;   前面已经讲过,我们看看效果。注意要将nginx的代理缓存配置注释掉,不然轮询不生效,会一直访问一个节点
#proxy_set_header  X-Real-Ip  $remote_addr;
}
}

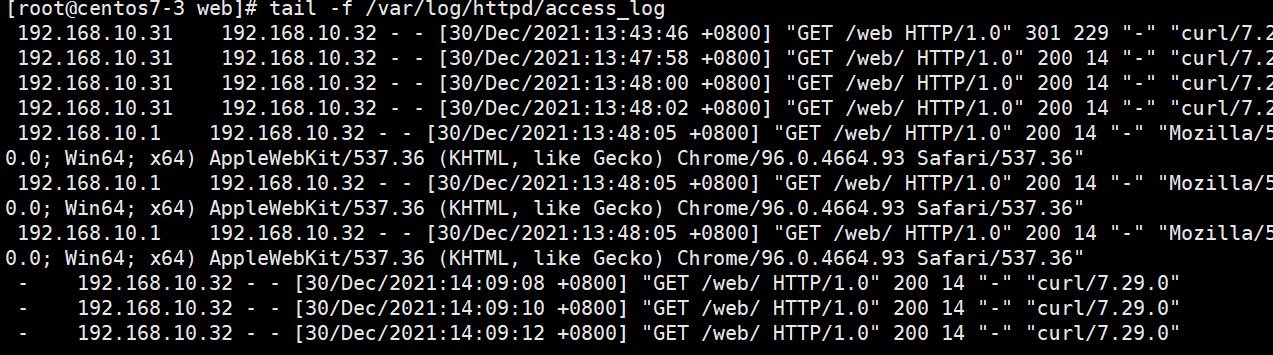
1当用proxy_set_header X-Forwarded-For $proxy_add_x_forwarded_for时,可以看到访问日志有192.168.10.31的客户端地址和192.168.10.32 nginx代理地址
2当用proxy_set_header X-Real-Ip $remote_addr;只能看到192.168.10.32的nginx的代理地址
3如果有多级代理,只需每个nginx代理都配置proxy_set_header X-Forwarded-For $proxy_add_x_forwarded_for即可
4nginx支持状态监测,后端apache停掉一个,那么只会转发到好的节点上,如果apache又起来了,访问时nginx就会按照算法调度
nginx的fastcgi实现
fastcgi_pass address:port;
#转发请求到后端服务器,address为后端的fastcgi server的地址,可用位置:location, if in location
fastcgi_index name;
#fastcgi默认的主页资源,示例:fastcgi_index index.php;
fastcgi_param parameter value [if_not_empty];
#设置传递给FastCGI服务器的参数值,可以是文本,变量或组合,可用于将Nginx的内置变量赋值给自定义key
fastcgi_param REMOTE_ADDR        $remote_addr; #客户端源IP
fastcgi_param REMOTE_PORT        $remote_port; #客户端源端口
fastcgi_param SERVER_ADDR        $server_addr; #请求的服务器IP地址
fastcgi_param SERVER_PORT        $server_port; #请求的服务器端口
fastcgi_param SERVER_NAME        $server_name; #请求的server name
Nginx默认配置示例:
   location ~ \.php$ {
     root           /scripts;
     fastcgi_pass   127.0.0.1:9000;
     fastcgi_index index.php;
     fastcgi_param SCRIPT_FILENAME /scripts$fastcgi_script_name; #默认脚本路径
      #fastcgi_param SCRIPT_FILENAME $document_root$fastcgi_script_name;
     include       fastcgi_params;    #此文件默认系统已提供,存放的相对路径为prefix/conf
   }
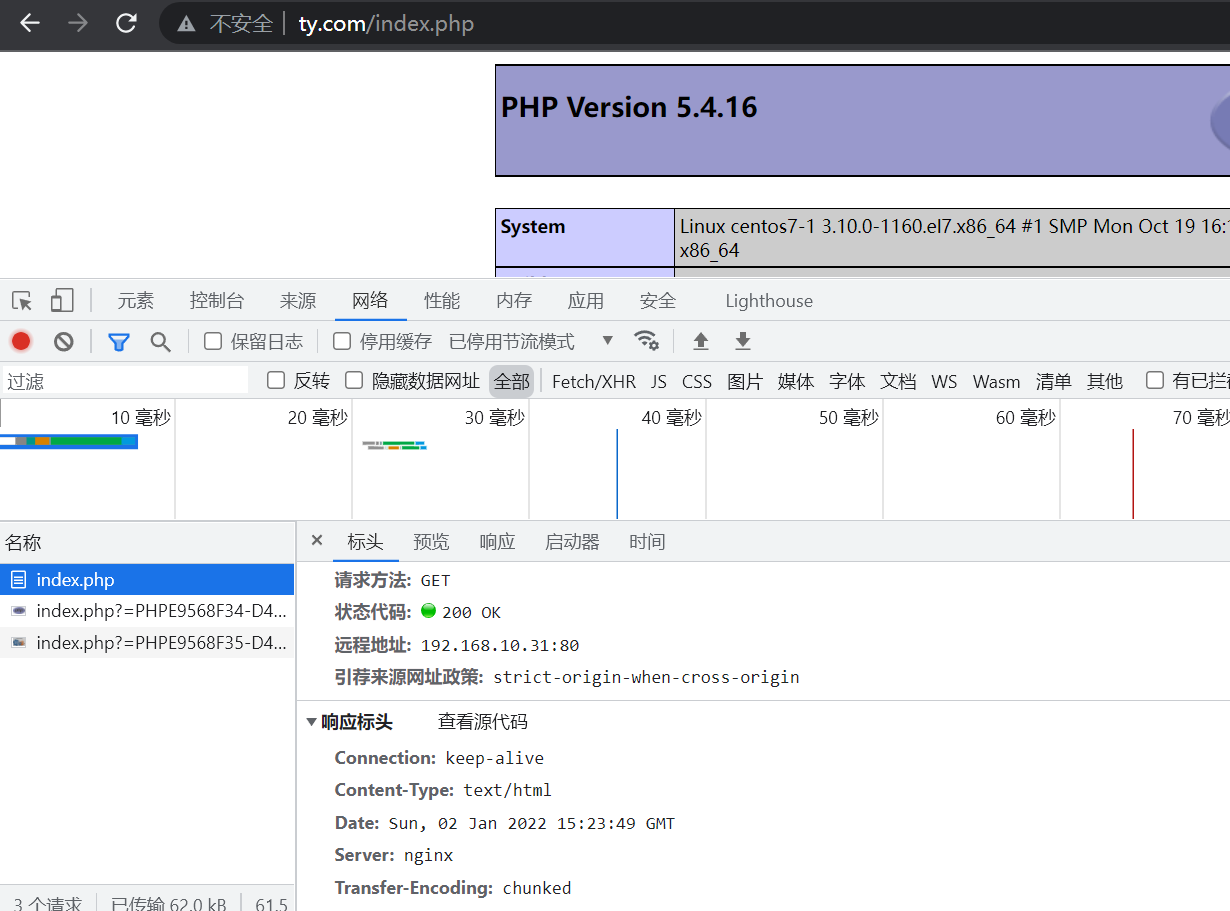
[root@centos7-1 ~]# cat /data/nginx/php/index.php
<?php
phpinfo();
?>
location ~ \.php$|status|ping {
root /data/nginx/php; 这里的路径和2同步,不然找不到资源
# fastcgi_pass unix:/run/php-fpm/www.sock;
fastcgi_pass 127.0.0.1:9000; 这里因为nginx和php在一台机器上,所以可以用127。如果不在同一台机器上,写php服务器地址
fastcgi_index index.php;
#fastcgi_param SCRIPT_FILENAME /data/nginx/php$fastcgi_script_name;
fastcgi_param SCRIPT_FILENAME $document_root$fastcgi_script_name;
include fastcgi_params;
fastcgi_keep_conn on; 收到后端服务器响应后,fastcgi是否关闭连接,建议启用长链接
fastcgi_hide_header X-Powered-By; 影藏php版本,一定要
}


 浙公网安备 33010602011771号