Vue3详解
一、组合式api
1.setup选项
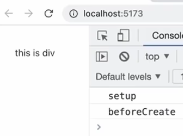
使用时机
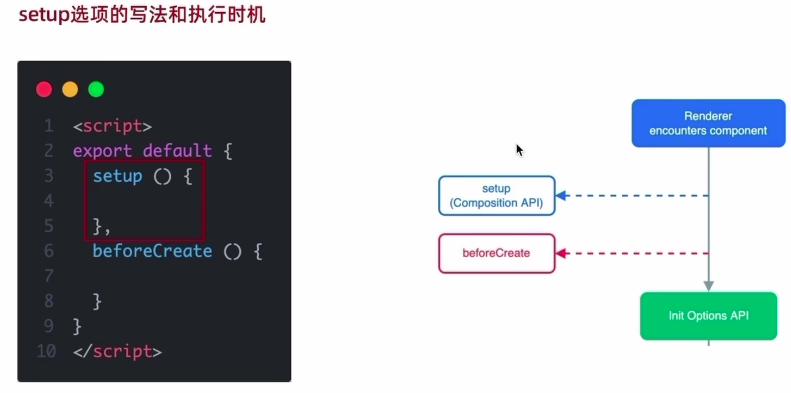
<script>
export default {
  setup (){
    console.log(' setup')
  }
  beforeCreate(){
    console. log('beforeCreate")
  }
</script>

<template>
  <div>
  </div>
</template>
写代码的特点
<script>
export default {
  setup (){
    console.log(' setup')
    const message = 'this is message'
    const logMessage = () => {
      console.log(message)
    }
    return {
      message,
      logMessage
    }
  }
  beforeCreate(){
    console. log('beforeCreate")
  }
</script>

<template>
  <div>
    {{message}}
    <button @click="logMessage">log</button>
  </div>
</template>

setup中没有this
2. reactive和ref
reactive
作用:接受对象类型数据的参数传入并返回一个响应式的对象 响应式对象:如下方事例,但点击按钮时state中的count的值会发生变化,如果只是一个普通的对象,则按钮点击时不会发生变化<script setup>
//1.导入函数
import {reactive} from 'vue'
//2.执行函数 传入一个对象类型的参数 变量接收
const state = reactive({
count: 0
})
const setCount = () =>{
state.count ++
}
</script>
<template>
<button @click="setCount">{{ state.count}}</button>
</template>
ref
作用:接收简单类型或者对象类型的数据传入并返回一个响应式的对象<script setup>
//1.导入函数
import {ref} from 'vue'
//2.执行函数 传入一个对象类型的参数 变量接收
const count = ref(0)//count就是一个响应式
const setCount = () =>{
//脚本区域修改ref产生的响应式对象数据,必须通过.value属性
count.value ++
}
</script>
<template>
<button @click="setCount">{{ count}}</button>
</template>
3. computed计算属性函数
计算属性基本思想和Vue2的完全一致,组合式API下的计算属性只是修改了写法核心步骤:1.导入computed函数
2.执行函数 在回调参数中return基于响应式数据做计算的值,用变量接收
<script setup>
//1.导入函数
import {ref,computed} from 'vue'
const list =ref([1,2,3,4,5,6,7,8])
//2.执行函数return计算之后的值变量接收
const computedList = computed(()=>{
  return list.value.filter(item => item > 2)
})
</script>
<template>
  <div>原始的响应式数组--{{ list }}</div>
  <div>计算属性数组--{{ computedList }}</div>
</template>

设置3秒后自动修改list数组的值,计算属性的数组的值也会随之发生改变,说明ref生成返回的list数组是一个响应式数组
<script setup>
//1.导入函数
import {ref,computed} from 'vue'
const list =ref([1,2,3,4,5,6,7,8])
//2.执行函数return计算之后的值变量接收
const computedList = computed(()=>{
  return list.value.filter(item => item > 2)
})
setTimeout(()=>{
  list.value.push(9,10)
},3000)
</script>
<template>
  <div>原始的响应式数组--{{ list }}</div>
  <div>计算属性数组--{{ computedList }}</div>
</template>

4. watch函数
作用: 侦听一个或者多个数据的变化,数据变化时执行回调函数
俩个额外参数:1.immediate (立即执行) 2.deep (深度侦听
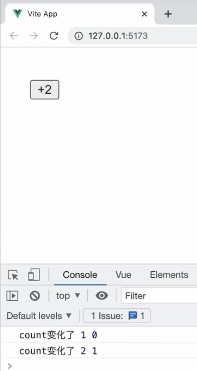
侦听单个数据的变化
<script setup>
//1.导入函数
import {ref} from 'vue'
//2.执行函数 传入一个对象类型的参数 变量接收
const count = ref(0)//count就是一个响应式
const setCount = () =>{
//脚本区域修改ref产生的响应式对象数据,必须通过.value属性
  count.value ++
}
//watch侦听单个数据源
//watch里面ref对象不需要加.value
watch(count,(newVal,oldVla)=>{
  console.log('count变化了',newVal,oldVla);
})
</script>
<template>
  <button @click="setCount">{{ count}}</button>
</template>
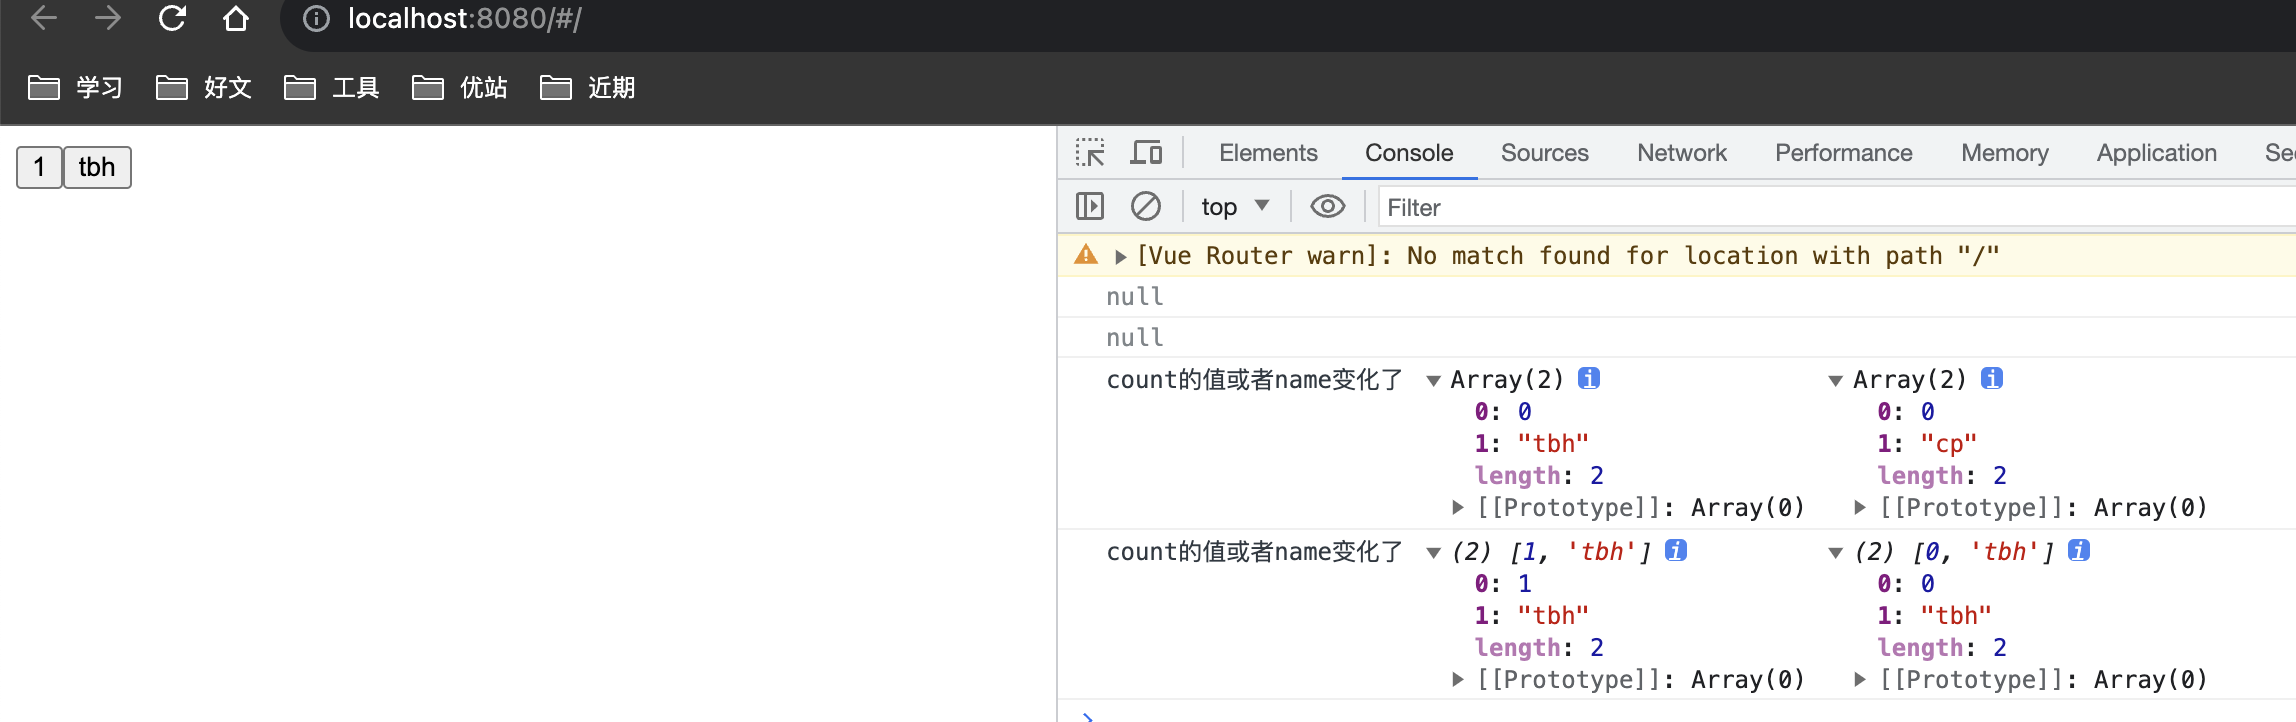
侦听多个数据的变化
<script setup>
//1.导入函数
import {ref} from 'vue'
//watch侦听多个个数据源
const count = ref(0)
//脚本区域修改ref产生的响应式对象数据,必须通过.value属性
const setCount = () => count.value ++
const name = ref('cp')
const changeName = ()=>{
name.value = 'tbh'
}
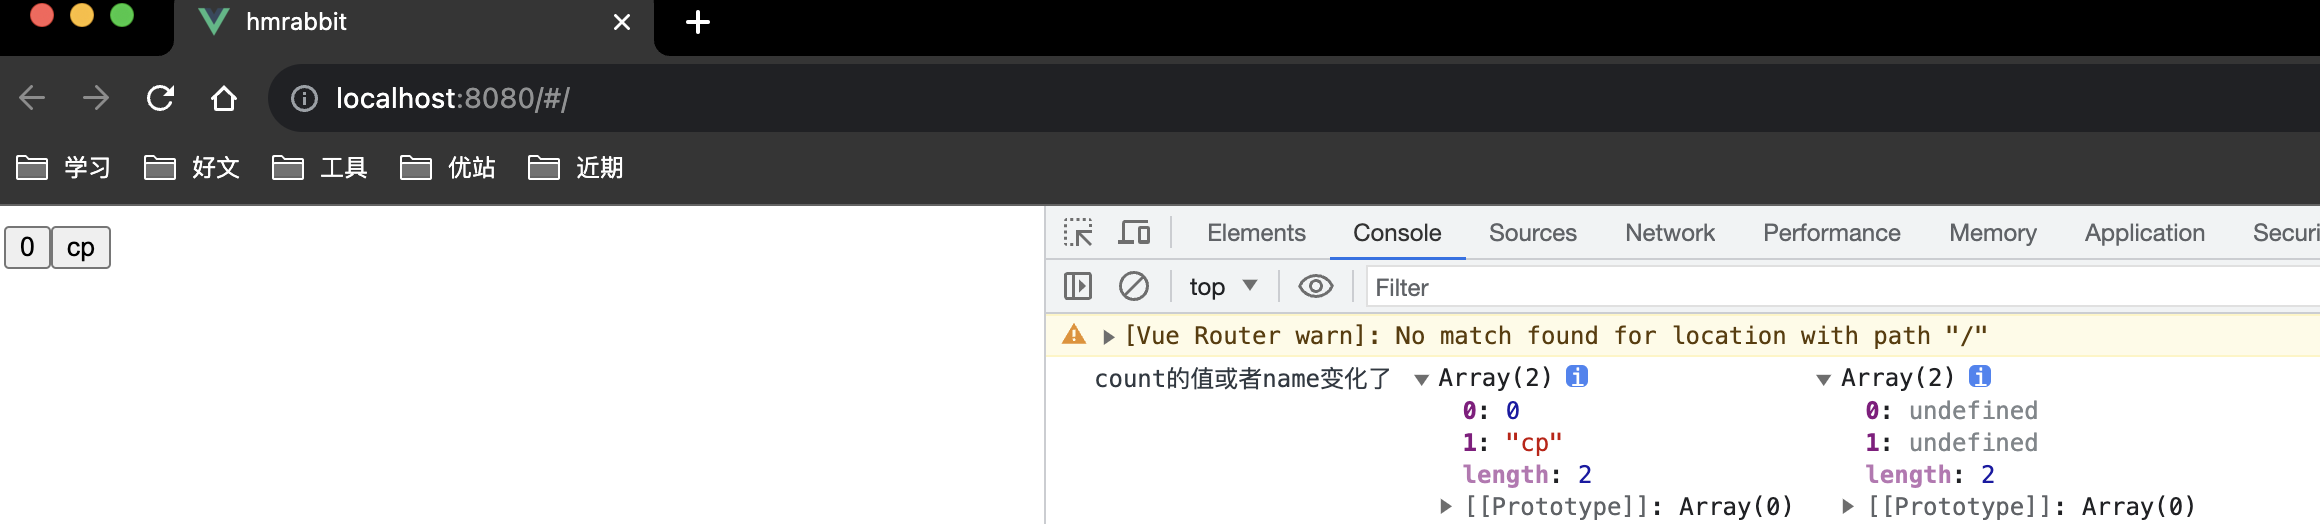
watch([count,name],([newCount,newName],[oldCount,oldName])=>{
console.log('count的值或者name变化了',[newCount,newName],[oldCount,oldName]);
})
</script>
<template>
<button @click="setCount">{{ count}}</button>
<button @click="changeName">{{name}}</button>
</template>
immediate
说明:在侦听器创建时立即触发回调,响应式数据变化之后继续执行回调watch([count,name],([newCount,newName],[oldCount,oldName])=>{
console.log('count的值或者name变化了',[newCount,newName],[oldCount,oldName]);
},{
//watch立即执行
immediate:true
})
deep
默认机制:通过watch监听的ref对象默认是浅层侦听的,直接修改嵌套的对象属性不会触发回调执行,需要开启deep选项<script setup>
//1.导入函数
import {ref} from 'vue'
const tbhname = ref({count:0})
watch(tbhname,()=>{
console.log('count变化了');
})
</script>
<template>
{{tbhname.count}}
<button @click="changeStateCount">state中的count变化了</button>
</template>
修改state内部的count的值并没有触发watch的回掉,此时需要添加deep
<script setup>
//1.导入函数
import {ref} from 'vue'
const tbhname = ref({count:0})
watch(tbhname,()=>{
  console.log('count变化了');
},{
  deep:true
})
</script>
<template>
  {{tbhname.count}}
  <button @click="changeStateCount">state中的count变化了</button>
</template>
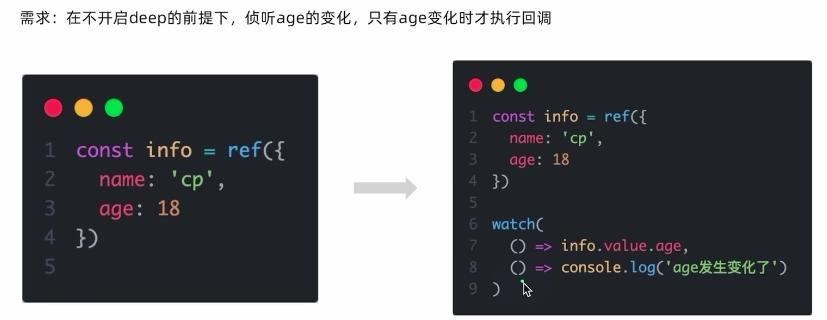
上述又回引出一个问题,如果tbhname中不止count一个属性的话,而我又只想监听但count的值变化才会触发tbhname的watch的回掉,其他值的改变并不会触发tbhname的watch的回掉
精确侦听对象的某个属性的方法如下:
<script setup>

import {ref, watch} from 'vue'

const tbhname = ref({
  count:0,
  age:20
})

const changeStateCount = ()=>{
  tbhname.value.count ++
}
const changeAge = ()=>{
  tbhname.value.age ++
}
//可以把第一个参数写成函数的写法,返回要监听的具体属性
watch(
  ()=>tbhname.value.count,
  ()=>{console.log('count变化了')}
)
</script>
<template>

  当前的count的值{{tbhname.count}}
  <button @click="changeStateCount">state中的count变化了</button><br>
  当前的age的值{{tbhname.age}}
  <button @click="changeAge">age改变</button>
</template>
以上精准侦听一个对象里的一个具体的属性的变化
5. 生命周期函数
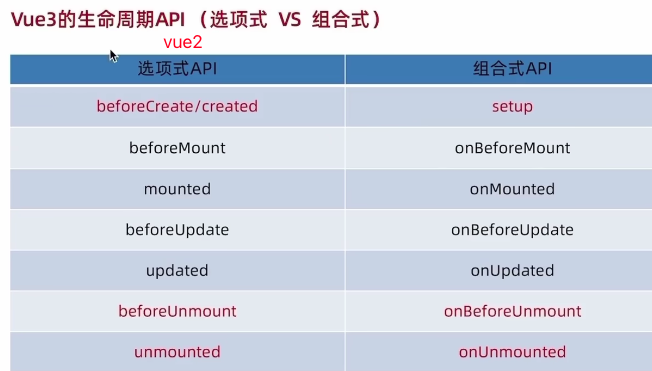
基本使用
<script setup>
//生命周期函数的使用
import {onMounted} from 'vue'
onMounted(()=>{
  //自定义逻辑
  console.log('onMounted');
})

</script>
<template>

</template>

<style lang="less">

</style>
多次使用同一个生命周期函数
<script setup>
//生命周期函数的使用
import {onMounted} from 'vue'
onMounted(()=>{
  //自定义逻辑
  console.log('onMounted1');
})

onMounted(()=>{
  //自定义逻辑
  console.log('onMounted3');
})

onMounted(()=>{
  //自定义逻辑
  console.log('onMounted2');
})
</script>

6. 父子通信
父传子
父组件<script setup>
//setup语法糖下局部组件无需注册直接可以使用
import textTa from './views/test/texTa'
</script>
<template>
<div>
<div>123</div>
<textTa message="message"></textTa>
</div>
</template>
子组件
<template>
  <div>父组件传入的值--{{message}}</div>
</template>

<script setup>

const Tbhprops = defineProps({
  message:String
})

//vue3里属性的值不能通过this来获取,只能通过如下方式获取
onMounted(()=>{
  console.log(Tbhprops.message);
})
</script>
子传父
子组件<template>
<div>父组件传入的值--{{message}}</div>
<button @click="sendMsg">log</button>
</template>
<script setup>
import {onMounted} from 'vue'
const Tbhprops = defineProps({
message:String
})
//传入数组的原因是,以后可能会定义多个事件,这里只有一个事件,因此数组里也只有一项
const emit = defineEmits(['get-message'])
const sendMsg = () =>{
//触发自定义事件,并传递参数
emit('get-message','this is son msg')
}
</script>
父组件
<script setup>
//setup语法糖下局部组件无需注册直接可以使用
import textTa from './views/test/texTa'

const getMessage = (msg)=>{
  console.log(msg);
}
</script>
<template>
  <div>
    <div>123</div>
    <textTa message="message" @get-message="getMessage"></textTa>
  </div>
</template>

7. 模版引用(ref)
基本使用
<script setup>
//setup语法糖下局部组件无需注册直接可以使用
import textTa from './views/test/texTa'
import {ref,onMounted} from 'vue'

//1.调用ref函数 -> ref对象
const comRef = ref(null)

//组件挂载完毕之后才能获取
onMounted(()=>{
  console.log(comRef.value);
})
</script>
<template>
  <div>
    <div>123</div>
    <textTa ref="comRef" message="message" @get-message="getMessage"></textTa>
  </div>

</template>
vue3的一个明显变化,通过ref拿到的元素并不包含元素内部的属性和方法,vue2中是包含的
默认情况下在script setup语法糖下组件内部的属性和方法是不开放给父组件访问的,可以通过defineExpose编译宏指定哪些属性和
方法允许访问
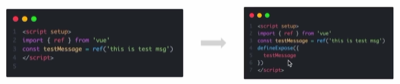
在子组件textTa中
<script setup>
import {onMounted} from 'vue'
const Tbhprops = defineProps({
  message:String
})
//传入数组的原因是,以后可能会定义多个事件,这里只有一个事件,因此数组里也只有一项
const emit = defineEmits(['get-message'])

const sendMsg = () =>{
  //触发自定义事件,并传递参数
  emit('get-message','this is son msg')
}

defineExpose({
  sendMsg
})
</script>
父组件通过ref拿到textTa组件后就可以访问textTa中的属性或者方法
8. provide和inject
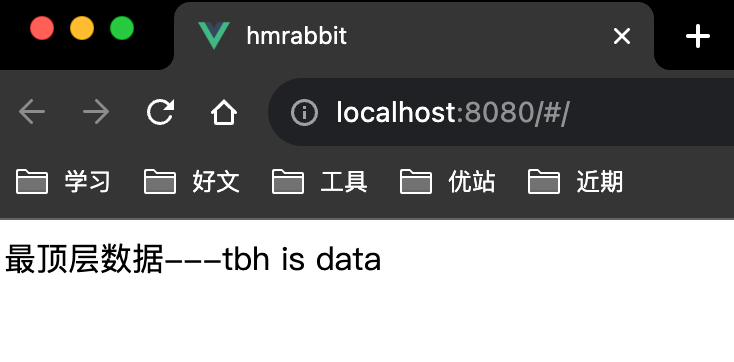
作用和场景顶层组件向任意的底层组件传递数据和方法,实现跨层组件通信
顶层组件app.vue
<script setup>
//setup语法糖下局部组件无需注册直接可以使用
// import textTa from './views/test/texTa'
import {ref, provide} from 'vue'
import Middle from './views/middleTest/middle'
const tbh = ref('tbh is data')
provide('data-key',tbh)

</script>
<template>
  <Middle></Middle>
</template>

<style lang="less">

</style>
中间组件middle
<template>
  <testTa></testTa>
</template>

<script setup>
import testTa from '../test/texTa'
</script>

<style scoped>

</style>
底层组件texTa
<template>
  <div>最顶层数据---{{data}}</div>
</template>

<script setup>
import {onMounted, inject} from 'vue'

const data = inject('data-key')

</script>

<style scoped>

</style>
9. Pinia即vuex
基本介绍
Pinia 是 Vue 的专属的最新状态管理库 ,是 Vuex 状态管理工具的替代品相对于vuex的优点:
1.提供更加简单的API(去掉了 mutation )
2.提供符合组合式风格的API (和 Vue3 新语法统一)
3.去掉了 modules 的概念,每一个 store 都是一个独立的模块
4.搭配 TypeScript 一起使用提供可靠的类型推断
官网:https://pinia.vuejs.org/zh/introduction.html#basic-example
基本使用
目标:拿到store中的count数据和方法,实现按钮的数值点一下加1安装pinia
npm i pinia
导入并创建实例
main.js文件中import { createApp } from 'vue'
import App from './App.vue'
import router from './router'
//1.导入createPinia
import {createPinia} from 'pinia'
//2.执行方法得到的实例
const pinia = createPinia()
//3.把pinia实例加入到app应用中
createApp(App).use(pinia).use(router).mount('#app')
创建store目录
创建counter.js文件//导入一个方法 defineStore
import {defineStore} from "pinia";
import {ref} from 'vue'
//defineStore的返回值还是一个方法
export const useCounterStore = defineStore('counter',()=>{
//定义数据(state)
const count = ref(0)
//定义修改数据的方法(action同步+异步)
const increment = () =>{
count.value ++
}
//以对象的方式return供组件使用
return {
count,
increment
}
})
在组件中使用
<script setup>
//1.导入use打头的方法
import {useCounterStore} from "@/store/counter";

//2.执行方法得到store实例对象
const counterStore = useCounterStore()

</script>

<template>
  <button @click="counterStore.increment">{{counterStore.count}}</button>
</template>
效果
getters和异步actions
counter.js文件中//导入一个方法 defineStore
import {defineStore} from "pinia";
import {ref,computed} from 'vue'
//defineStore的返回值还是一个方法
export const useCounterStore = defineStore('counter',()=>{
//定义数据(state)
const count = ref(0)
//定义修改数据的方法(action同步+异步)
const increment = () =>{
count.value ++
}
//getter定义
const doubleCount = computed(()=>count.value * 2)
//已对象的方式return供组件使用
return {
count,
doubleCount,
increment
}
})
组件中使用
<script setup>
//setup语法糖下局部组件无需注册直接可以使用
// import textTa from './views/test/texTa'
import {ref, provide} from 'vue'
import Middle from './views/middleTest/middle'
const tbh = ref('tbh is data')
provide('data-key',tbh)

//1.导入use打头的方法
import {useCounterStore} from "@/store/counter";

//2.执行方法得到store实例对象
const counterStore = useCounterStore()

</script>

<template>
  <button @click="counterStore.increment">{{counterStore.count}}</button>
  {{counterStore.doubleCount}}
</template>
异步actions
action中实现异步和组件中定义数据和方法的风格完全一致
counter.js中代码
//导入一个方法 defineStore
import {defineStore} from "pinia";
import {ref, computed, provide} from 'vue'
import axios from "axios";
//defineStore的返回值还是一个方法
const API_URL = 'http://geek.itheima.net/v1_0/channels'

export const useCounterStore = defineStore('counter',()=>{
  //定义数据(state)
  const count = ref(0)

  //定义修改数据的方法(action同步)
  const increment = () =>{
    count.value ++
  }

  //getter定义
  const doubleCount = computed(()=>count.value * 2)

  //定义异步action
  const list = ref([])
  const getList = async ()=> {
    const res = await axios.get(API_URL)
    list.value = res.data.data.channels
  }
  //已对象的方式return供组件使用
  return {
    count,
    doubleCount,
    increment,
    list,
    getList
  }
})
组件中
<script setup>
//setup语法糖下局部组件无需注册直接可以使用
import {ref, provide,onMounted} from 'vue'

//1.导入use打头的方法
import {useCounterStore} from "@/store/counter";

//2.执行方法得到store实例对象
const counterStore = useCounterStore()

onMounted(()=>{
  counterStore.getList()
})
</script>

<template>
  <button @click="counterStore.increment">{{counterStore.count}}</button>
  {{counterStore.doubleCount}}
  <br>
  <ul>
    <li v-for="(item,i) in counterStore.list" :key="i">{{item.name}}  </li>
  </ul>
</template>

<style lang="less">

</style>
storeToRefs
直接结构store中属性值,sotre中的方法则不需要使用storeToRefs<script setup>
import {ref, provide,onMounted} from 'vue'
import {storeToRefs} from 'pinia'
provide('data-key',tbh)
//1.导入use打头的方法
import {useCounterStore} from "@/store/counter";
//2.执行方法得到store实例对象
const counterStore = useCounterStore()
//属性直接解构赋值(响应式丢失)
// const {count,doubleCount} = counterStore
//方法包裹(保持响应式更新)
const {count,doubleCount,list} = storeToRefs(counterStore)
onMounted(()=>{
counterStore.getList()
})
//方法直接从原来的counterStore中解构赋值
const {increment} = counterStore
</script>
<template>
<button @click="increment">{{count}}</button>
{{doubleCount}}
<br>
<ul>
<li v-for="(item,i) in list" :key="i">{{item.name}} </li>
</ul>
</template>
Pinia调试

 浙公网安备 33010602011771号