elasticsearch简单实现
初次接触分布式是全文搜索引擎,之前都是spinx+coreseek,先简单实现初步了解先
官方文档:https://www.elastic.co/guide/cn/elasticsearch/guide/current/logging.html
一.基础概念:
集群和节点:一个集群是由多个节点组成。每一个集群都有一个唯一的名字。
索引:还有相同·含有相同属性的文档集合。
类型:索引可以定义一个或多个类型,文档必须属于一个类型。
文档:文档是可以被索引的基本数据单位。
三者关系:索引(图书索引、汽车索引、家具索引,注意英文字母小写且不含中划线)--->类型(图书索引--->科普类、小说类的等)--->文档。
分片:每个索引都有分片,每个分片是一个lucene索引。
备份:老·拷贝一份分片就完成了分片的备份。
分片好处:
假如一个索引数据量很大,就会压力很大,同时搜索速度也会出现瓶颈。这时就可以将索引分成多个分片,从而分摊部分压力。分片同时还允许用户进行水平的拆分和分布式操作,可以提高搜索以及分布式效率。
备份好处:
万一某个主分片出现失败或者问题时,备份的分片就可以代替工作,从而提高的es的可用性,同时备份的分片还可以执行搜索操,以分摊搜索的压力。
es创建索引时,会创建5个分片一个备份,数量是可以修改的。分片只能在创建索引时指定,而不能在后期进行修改,而备份是可以动态修改的。
二.安装
es依赖java8,java8的具体安装就不做记录了,网上很多 看这里
我是在windows下安装使用,linux下可以看这篇博文 看这里 es的linux运行问题
软件下载 看这里
下完解压后,打开cmd在根目录/bin下执行elasticsearch
报错,因为写好前没有保存,电脑莫名关机了,所以错误具体内容忘记了,唉...做好记录并保存真的很重要
[2019-04-02T10:33:01,491][INFO ][o.e.c.r.a.DiskThresholdMonitor] [5wkvRes] low disk watermark [85%] exceeded on [5wkvResTRia0NvQqno0Rjw][5wkvRes][D:\App_self\elasticsearch\elasticsearch-6.7.0\data\nodes\0] free: 9.4gb[13.7%], replicas will not be assigned to this node
在config下的elasticsearch.yml文件中添加了以下代码,ok了
cluster.routing.allocation.disk.threshold_enabled: false
#cluster.routing.allocation.disk.watermark.low: 30gb
#cluster.routing.allocation.disk.watermark.high: 20gb
排出后在执行之前命令,started安装完成,记住不要关闭窗口哦。
可以另起窗口使用curl 127.0.0.1:9200命令测试下,输出
{
  "name" : "5wkvRes",
  "cluster_name" : "elasticsearch",
  "cluster_uuid" : "DEQGhogJQ3mKRQpKv-OedQ",
  "version" : {
    "number" : "6.7.0",
    "build_flavor" : "default",
    "build_type" : "zip",
    "build_hash" : "8453f77",
    "build_date" : "2019-03-21T15:32:29.844721Z",
    "build_snapshot" : false,
    "lucene_version" : "7.7.0",
    "minimum_wire_compatibility_version" : "5.6.0",
    "minimum_index_compatibility_version" : "5.0.0"
  },
  "tagline" : "You Know, for Search"
}
因为es默认占用的是9200节点,所以也可以使用tcping 127.0.0.1 9200命令测试下,port is open,ok已经被打开。
linux下安装:跳转
windows下head插件安装:
elasticsearch返回的是json结构,不是很友好的。使用head插件提供了友好的web界面,帮助我们解决了界面的问题。
在github中,搜索elasticsearch-head,选择mobz/elasticsearch-head进行下载。我将插件放在了elasticsearch同级目录下并解压。
进入解压目录后的目录下,检查node版本
node -v
注意,版本需要>=6.0
我的是4.2.6版本,不支持,升级吧。node升级是要在原有的路径下覆盖升级的哦。
另附上:linux下node安装
查看版本、查看安装路径:

傻瓜式安装,注意下安装路径就可以了

okey。开始正式安装::
D:\App_self\elasticsearch\elasticsearch-head-master>下执行npm install报错
D:\App_self\elasticsearch\elasticsearch-head-master>npm install
npm WARN package.json elasticsearch-head@0.0.0 license should be a valid SPDX license expression
WARN engine karma@1.3.0: wanted: {"node":"0.10 || 0.12 || 4 || 5 || 6"} (current: {"node":"10.15.3","npm":"2.14.12"})
npm ERR! Windows_NT 10.0.17134
npm ERR! argv "C:\\Program Files\\nodejs\\node.exe" "C:\\Users\\dell\\AppData\\Roaming\\npm\\node_modules\\npm\\bin\\npm-cli.js" "install"
npm ERR! node v10.15.3
npm ERR! npm  v2.14.12
npm ERR! code MODULE_NOT_FOUND

npm ERR! Cannot find module 'internal/util/types'
npm ERR!
npm ERR! If you need help, you may report this error at:
npm ERR!     <https://github.com/npm/npm/issues>
npm ERR! Windows_NT 10.0.17134
npm ERR! argv "C:\\Program Files\\nodejs\\node.exe" "C:\\Users\\dell\\AppData\\Roaming\\npm\\node_modules\\npm\\bin\\npm-cli.js" "install"
npm ERR! node v10.15.3
npm ERR! npm  v2.14.12
npm ERR! code MODULE_NOT_FOUND
解决方法,执行>npm install phantomjs-prebuilt@2.1.16 --ignore-scripts
报错:
npm ERR! Windows_NT 10.0.17134
npm ERR! argv "C:\\Program Files\\nodejs\\node.exe" "C:\\Users\\dell\\AppData\\Roaming\\npm\\node_modules\\npm\\bin\\npm-cli.js" "install" "phantomjs-prebuilt@2.1.16" "--ignore-scripts"
npm ERR! node v10.15.3
npm ERR! npm  v2.14.12
npm ERR! code MODULE_NOT_FOUND

npm ERR! Cannot find module 'internal/util/types'
npm ERR!
npm ERR! If you need help, you may report this error at:
npm ERR!     <https://github.com/npm/npm/issues>

npm ERR! Please include the following file with any support request:
npm ERR!     D:\App_self\elasticsearch\elasticsearch-head-master\npm-debug.log
由于npm官网的模块仓库网速太慢,需要切换到其他的源
//腾讯的
npm install cnpm -g --registry=https://gems.ruby-china.org/
//淘宝的
npm install cnpm -g --registry=https://registry.npm.taobao.org
使用head插件:
索引创建:
APL基本格式 http://<ip>:<port>/<索引>/<类型>/<文档id>
常用HTTP动词 GET/PUT/POST/DELETE
索引创建基本用法:
利用head插件创建索引:
非结构化创建:点击索引信息,其中有mappings后面的内容是空的就是非结构化
结构化创建:如图

 创建成功,首页上也会显示具体索引
三.简单使用
es依赖composer,所以需要使用composer进行安装
新建目录下创建文件composer.json,并写入
{
    "require":{
        "elasticsearch/elasticsearch":"~6.0"
    }
}
根目录下执行composer install
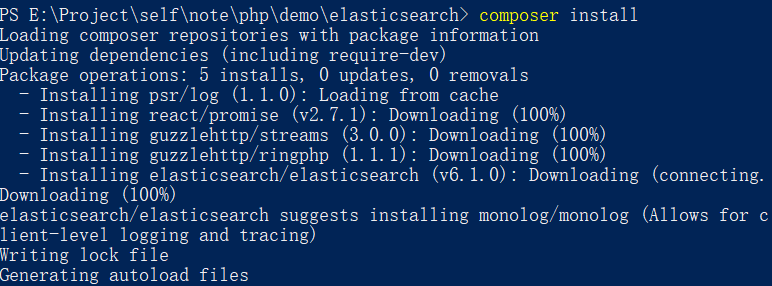
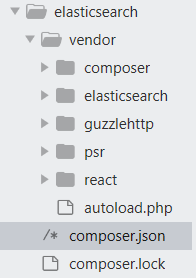
好了,多出了vendor和composer.lock
新建Elasticsearch.php:
<?php
require_once('vendor/autoload.php');
use Elasticsearch\ClientBuilder;
use Monolog\Logger;

class Elasticsearch{

    private $config = array(
        'hosts' => ['http://127.0.0.1:9200']
    );
    private $api;
    public function __construct(){
        $logger = ClientBuilder::defaultLogger('path/to/log.log',Logger::DEBUG);
        $this->api = ClientBuilder::create()->setHosts($this->config['hosts'])->setLogger($logger)->build();
    }

    /**
     * 新增one
     * @return [type] [description]
     */
    public function addOne(){
        $params = [];
        $params['index'] = 'demo';
        $params['type']  = 'cat';
        $params['id']  = '20190329001';  # 不指定就是es自动分配
        $params['body']  = array('name' => 'es编程');
        return $this->api->index($params);
    }

    /**
     * 批量新增
     * 注意,索引没有被创建时会自动创建索引
     */
    public function addAll(){
        $params = [];//echo 1;
        for($i = 1;$i < 1001;$i++){
            $params['body'][] = [
                'index' => [
                    '_index' => 'test_index'.$i,
                    '_type' => 'cat_test',
                    '_id' => $i,
                    //'client'=> ['client' => [
                    //    'timeout'=> 10,//十秒超时
                    //    'connect_timeout'=> 10
                    //]]
                ]
            ];
            $params['body'][] = [
                'name' => 'elasticsearch'.$i,
                'content' => '内容'.$i
            ];
        }//var_dump($params);die;
        return $this->api->bulk($params);
    }

    /**
     * 获取一个文档
     */
    public function getOne(){
        $params = [];
        $params['index'] = 'demo';
        $params['type']  = 'cat';
        $params['id']    = '20190329001';
        return $this->api->get($params);
    }

    /**
     * 搜索文档
     */
    public function search(){
        $params = [];
        $params['index'] = 'test_index4';
        return $this->api->search($params);
    }

    /**
     * 删除文档
     * 注意,删除文档后并不会删除对应索引
     */
    public function delete(){
        $params = [];
        $params['index'] = 'demo';
        $params['type'] = 'cat';
        $params['id'] = '20190329001';
        return $this->api->delete($params);
    }

    /**
     * 创建索引
     */
    public function createIndex(){
        $params = [];
        $params['index'] = 'demo';
        return $this->api->indices()->create($params);
    }

    /**
     * 删除索引:匹配单个 | 匹配多个
     * 说明: 索引删除后,索引下的所有文档也会被删除
     */
      public function deleteIndex()
      {
          $params = [];
          $params['index'] = 'test_index';  # 删除test_index单个索引
          #$params['index'] = 'test_index*'; # 删除以test_index开始的所有索引
        return $this->api->indices()->delete($params);
      }

      /**
     * 设置索引配置
     */
      public function setIndexConfig()
      {
          $params = [];
          $params['index'] = 'demo';
        $params['body']['index']['number_of_replicas'] = 0;
        $params['body']['index']['refresh_interval'] = -1;
        return $this->api->indices()->putSettings($params);
      }

     /**
     * 获取索引配置
     */
      public function getIndexConfig()
      {
        # 单个获取条件写法
        $params['index'] = 'demo';
        # 多个获取条件写法
        //$params['index'] = ['demo', 'test_index'];
        return $this->api->indices()->getSettings($params);
      }

    /**
     * 设置索引映射
     */
      public function setIndexMapping()
      {
          #  设置索引和类型
        $params['index'] = 'demo';
        $params['type']  = 'cat';

        #  向现有索引添加新类型
        $myTypeMapping = array(
            '_source' => array(
                'enabled' => true
            ),
            'properties' => array(
                'first_name' => array(
                    'type' => 'string',
                    'analyzer' => 'standard'
                ),
                'age' => array(
                    'type' => 'integer'
                )
            )
        );
        $params['body']['cat'] = $myTypeMapping;

        #  更新索引映射
        $this->api->indices()->putMapping($params);
      }

      /**
     * 获取索引映射
     */
      public function getIndexMapping()
      {
          #  获取所有索引和类型的映射
        $ret = $this->api->indices()->getMapping();

        /*
        #  获取索引为:demo的映射
        $params['index'] = 'demo';
        $ret = $this->api->indices()->getMapping($params);

        #  获取类型为:cat的映射
        $params['type'] = 'cat';
        $ret = $this->api->indices()->getMapping($params);

        #  获取(索引为:demo和 类型为:cat)的映射
        $params['index'] = 'demo';
        $params['type']  = 'cat'
        $ret = $this->api->indices()->getMapping($params);

        #  获取索引为:demo和test_index的映射
        $params['index'] = ['demo', 'test_index'];
        $ret = $this->api->indices()->getMapping($params);
        */

        return $ret;
      }
}

?>
新建index.php文件
<?php

require_once('Elasticsearch.php');

$es = new Elasticsearch();

//$addOne = $es -> addOne();
//$getOne = $es -> getOne();
//$delete = $es -> delete();
//$addAll = $es -> addAll();
$getIndexMapping = $es -> getIndexMapping();
//$search = $es -> search();
var_dump($getIndexMapping);

?>
https://www.cnblogs.com/zhi-leaf/p/8484337.html

 浙公网安备 33010602011771号